


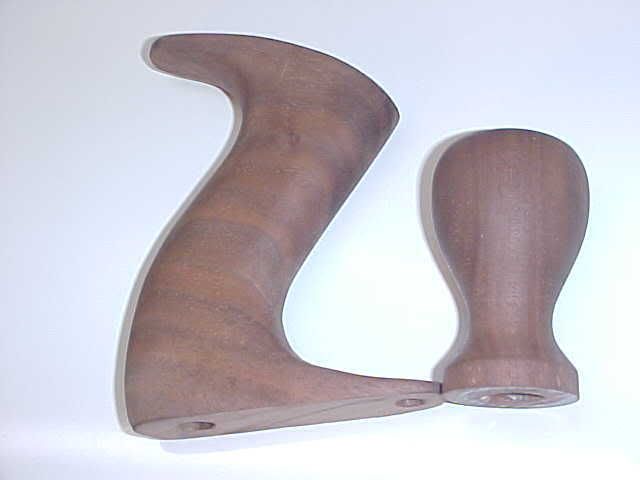
It seems like just about every plane you find has a busted tote. Alot of people have been asking to buy them lately but you will soon realize the cost of a tote can often times be more than you paid for the plane in the first place. The easy way out is to make your own. I know this has been covered before and there is a better tutorial but for those who cant search I was making this anyways why not take a few pictures and explain how I did it.
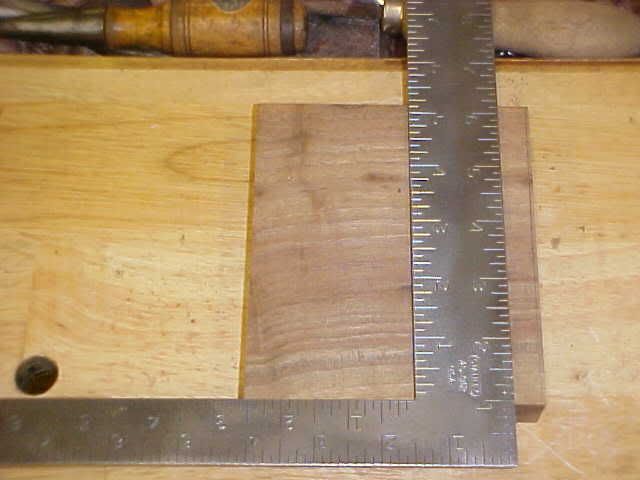
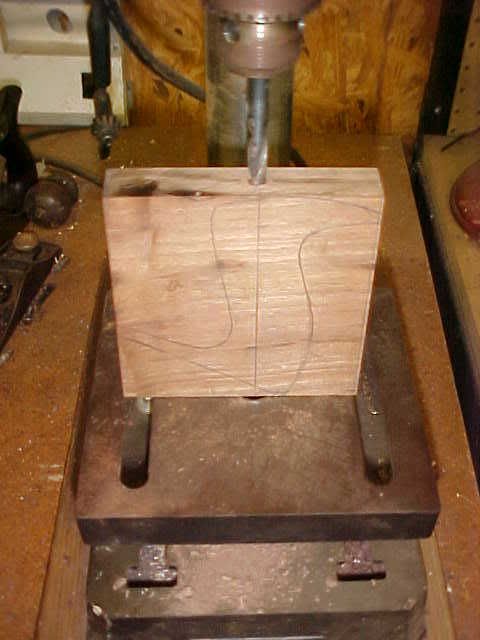
Start out with a piece that is a bit thicker than you want the tote. I just used a piece of a walnut cut off for this one. Cut it down to a square. Use a square to make a straight line from top to bottom.
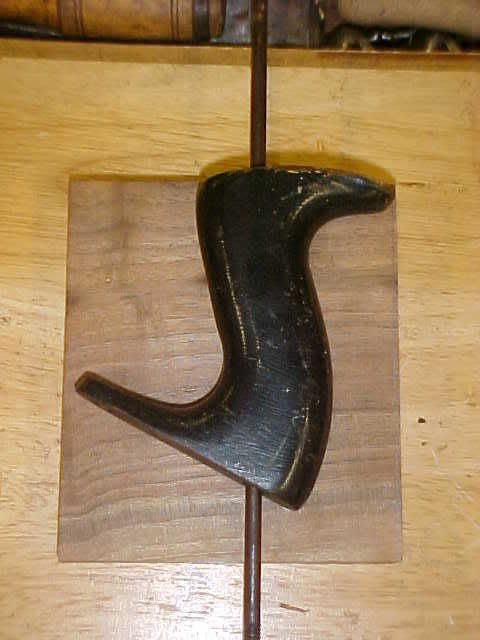
Find a tote that hasnt been broken and pass something straight through the hole the bolt goes through on the tote. Line it up with the first line you layed out.
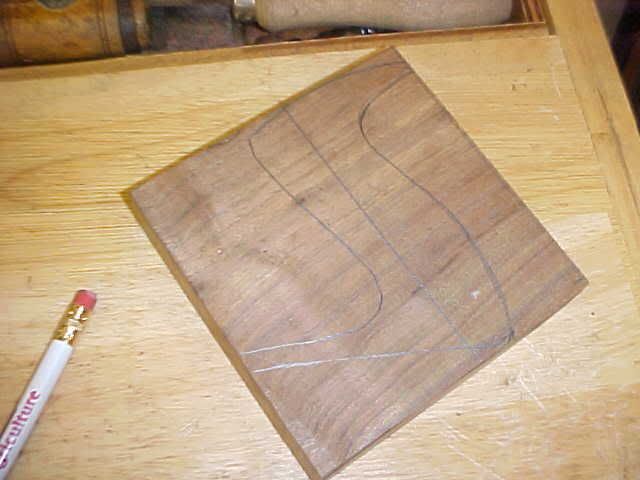
Trace the outline of the tote on to the wood. You can be sloppy because you will be shaping later.
Next use a square to transfer the original line to the top and bottom of the piece, find the center of the tranfered line and mark it.
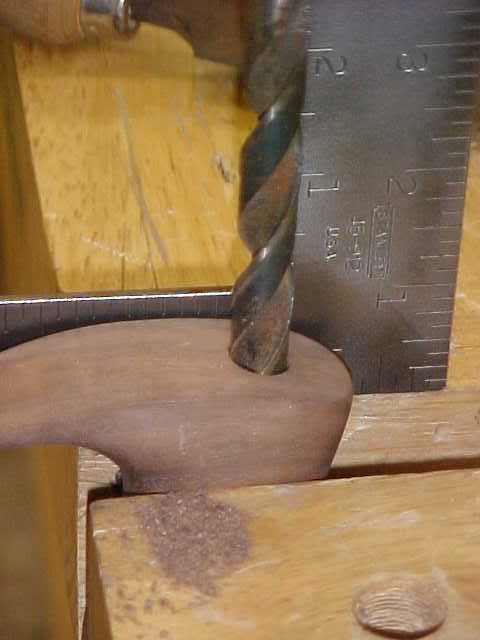
once you have the piece marked find a drill bit the correct size and long enough to pass through the piece. Line it up on the mark and drill the hole with the drill press. (You will drill the countersink for the brass nut after shaping to get the correct depth.
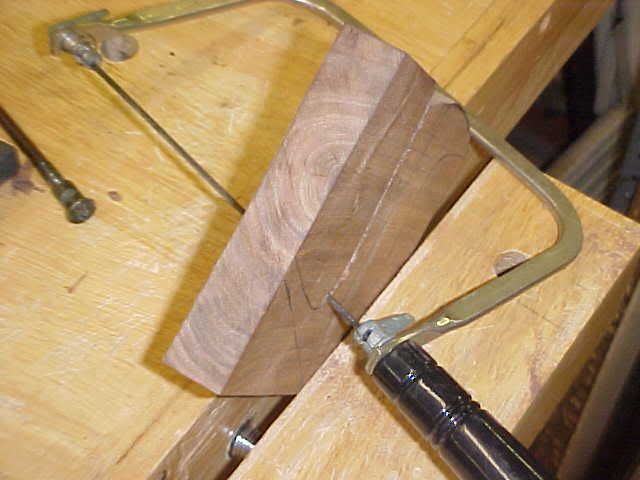
After the hole is drilled cut the outline of the tote. You can use a bandsaw or scroll saw but in the galoot spirit you can also use a coping saw
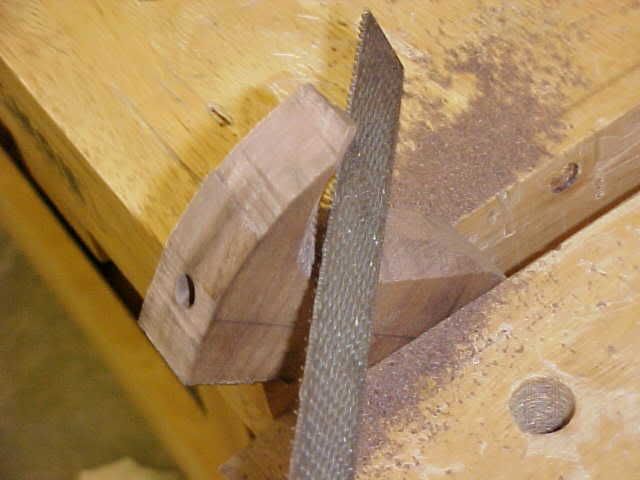
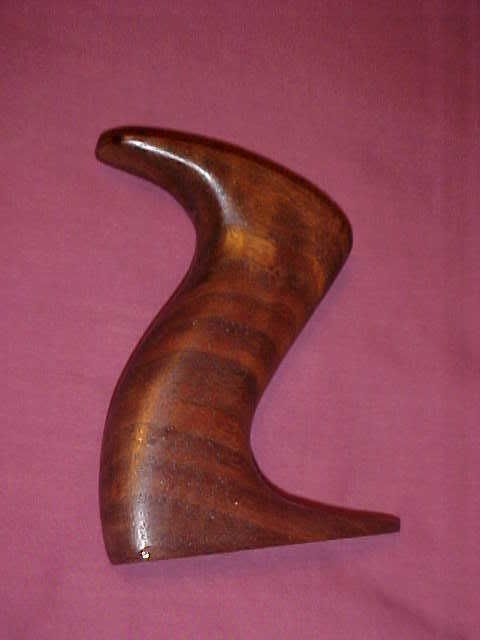
Once you have it cut out you will start to have your tote. Secure the piece and use rasps then sand paper to shape your tote. Have fun and make it custom fit. I like to make thinner longer horns.
To do the countersink a forstner bit will work. I just use the original hole as a guide and it has came out ok with the totes I have made so far.


 Reply With Quote
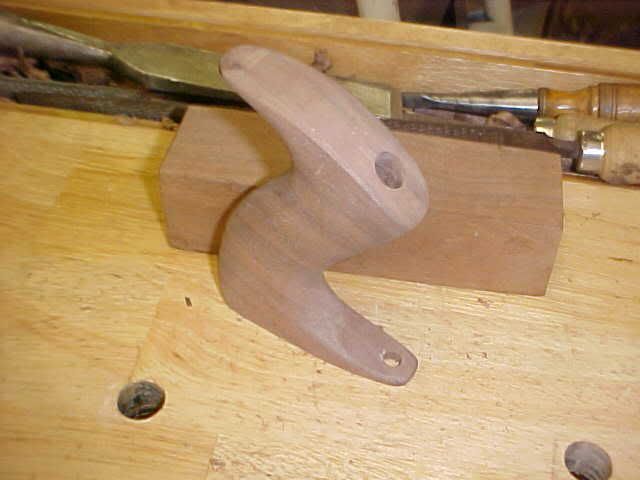


")
