Page 1 of 2 12 LastLast
Results 1 to 15 of 22

Thread: Dovetailing on an angle

  1. #1
    Join Date
    Feb 2004
    Location
    Perth, Australia
    Posts
    9,491

    Dovetailing on an angle

    I was in two minds whether to post this, but since the method is a practice, it would be great to get feedback, since the strategy I have come up with is complex. Can you do this another way?


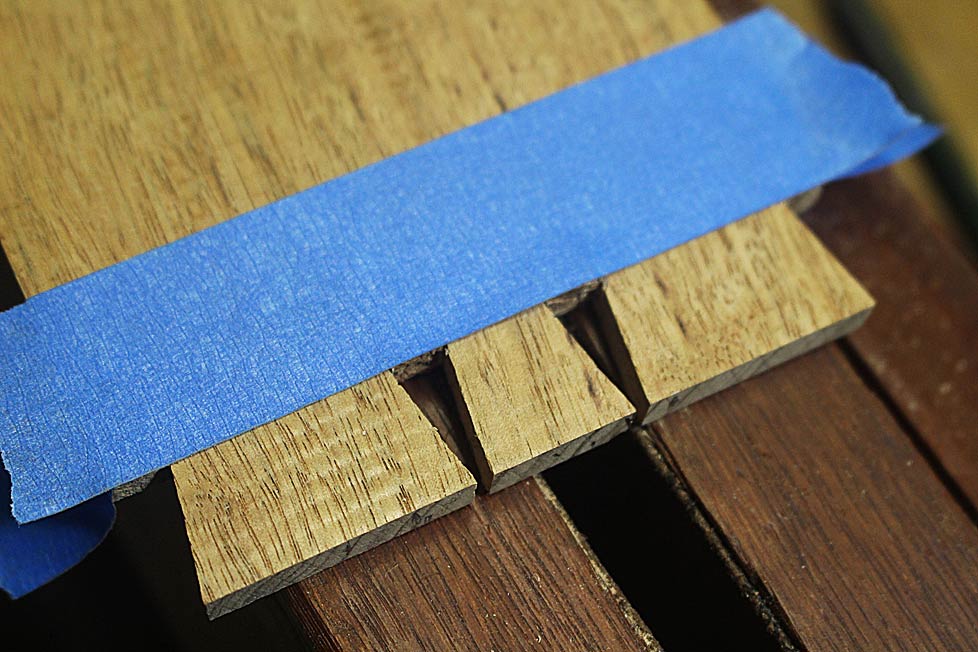
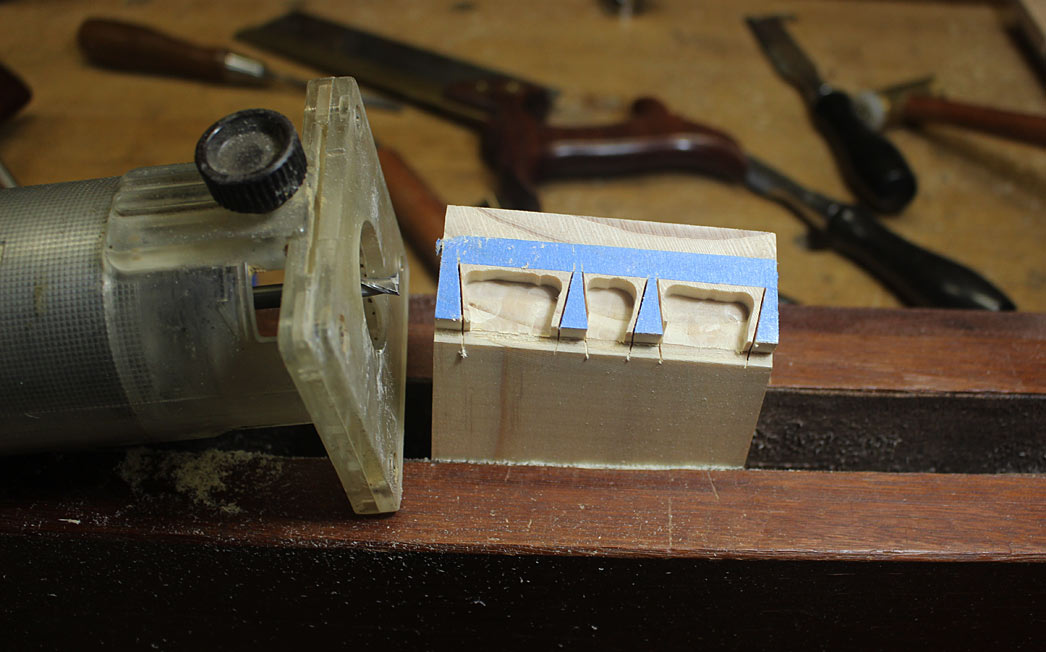
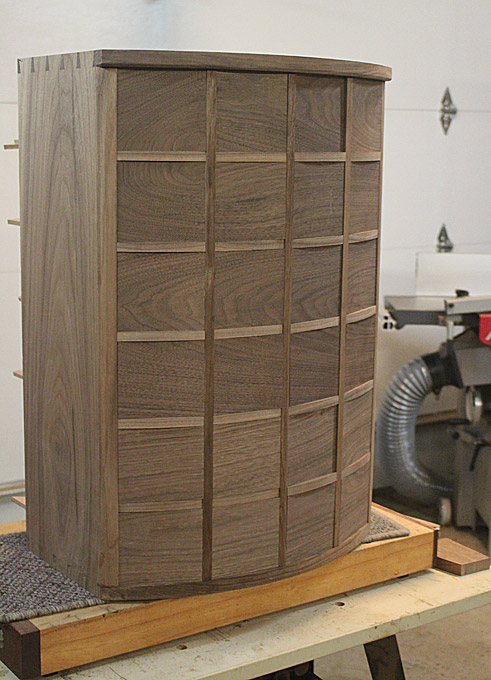
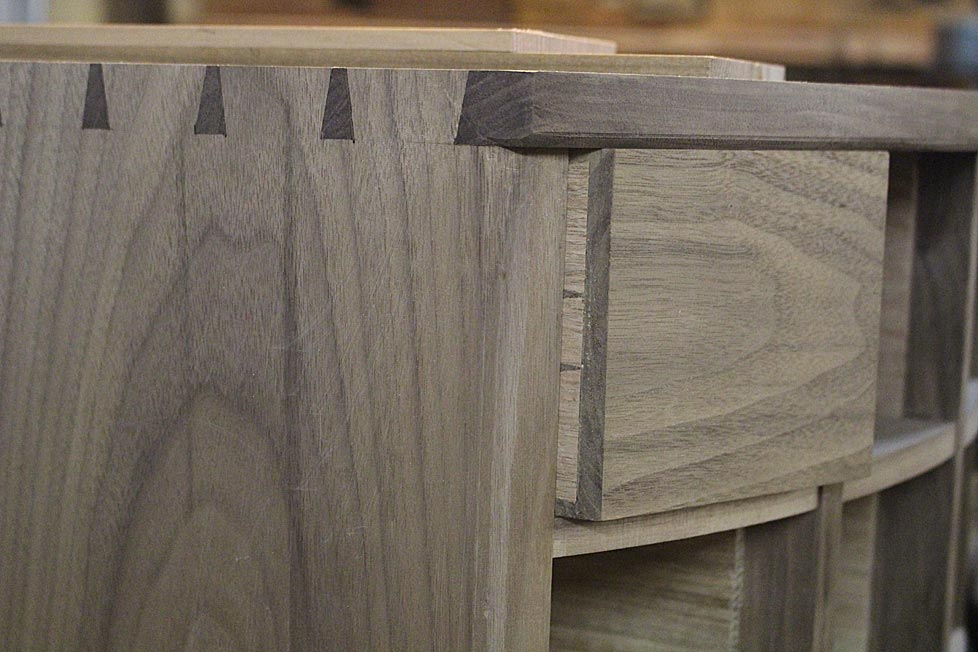
    Each row has 4 drawers, and these will be shaped to match the bow across the chest.


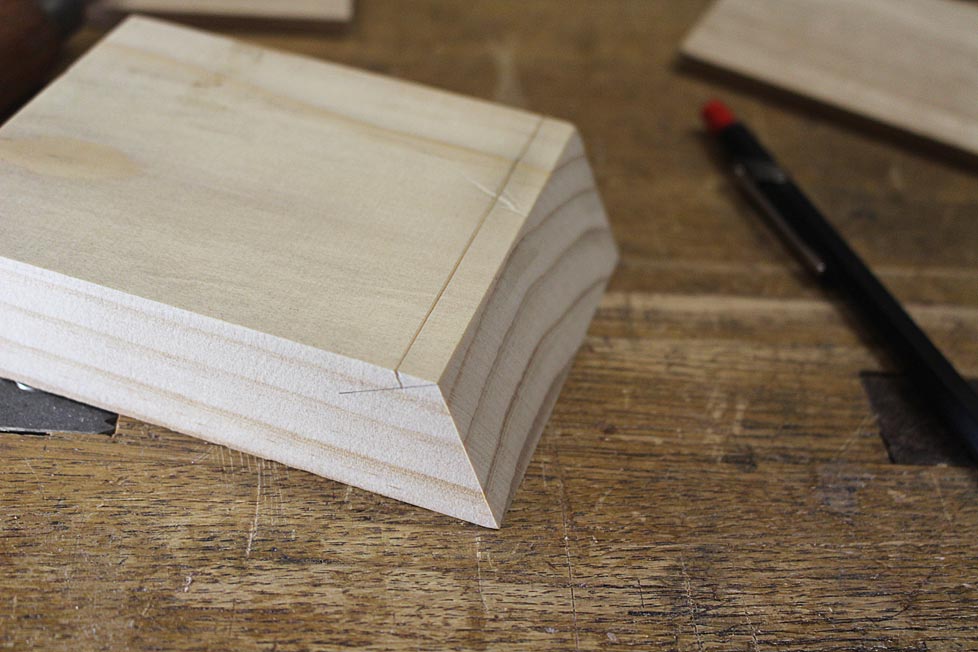
    At the start, the drawer fronts are to be left straight. This maintains the reference sides. The ends of each drawer front have been bevelled to match fit the bow of each drawer blade.


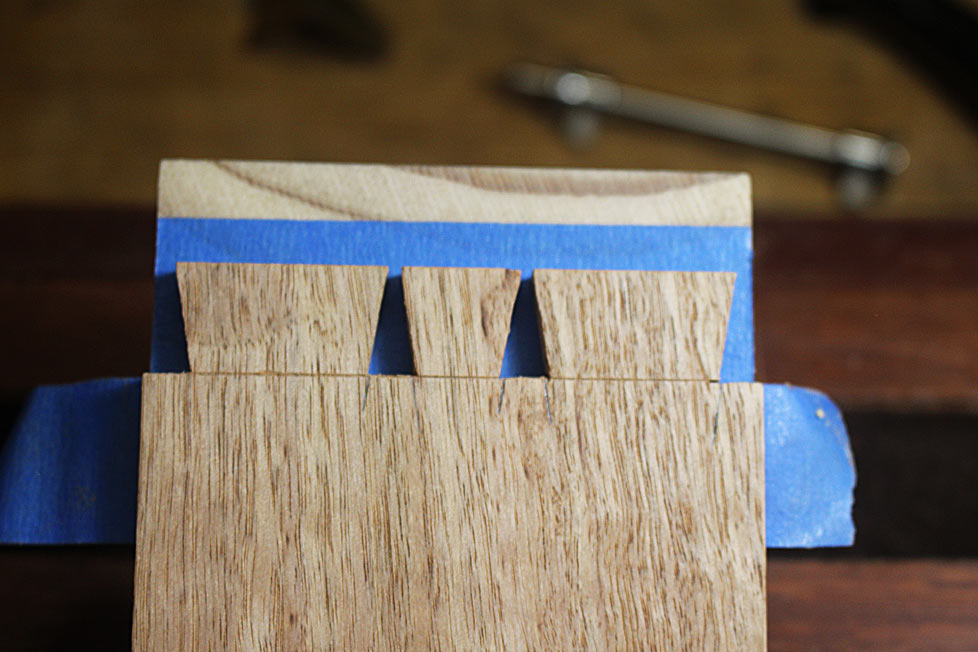
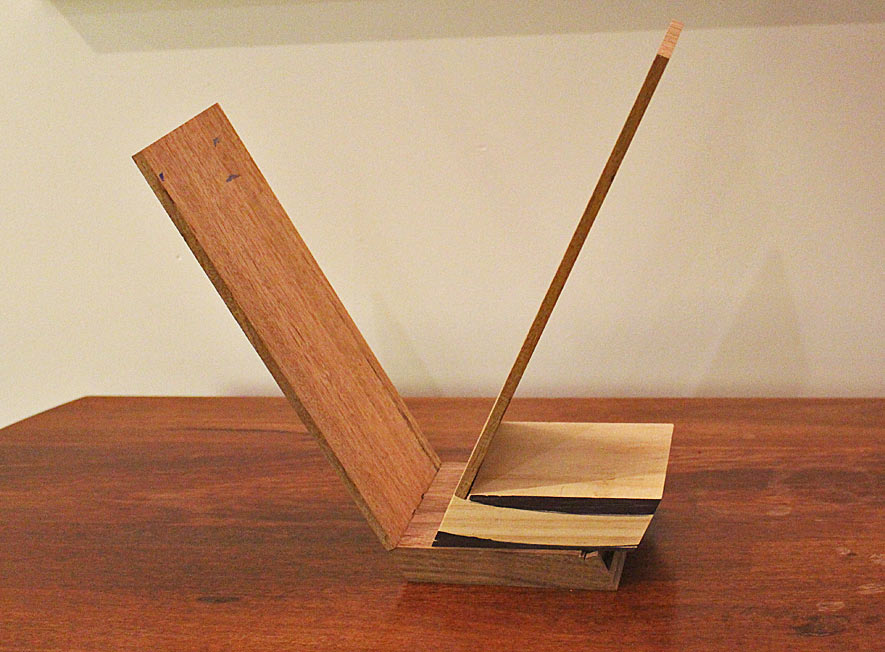
    This is a fitted (practice) drawer front (posted last time) ..


    The drawer side has been dovetailed to the obtuse angled side (again, details in my previous post: http://www.inthewoodshop.com/Furnitu...tWeekend8.html) ...


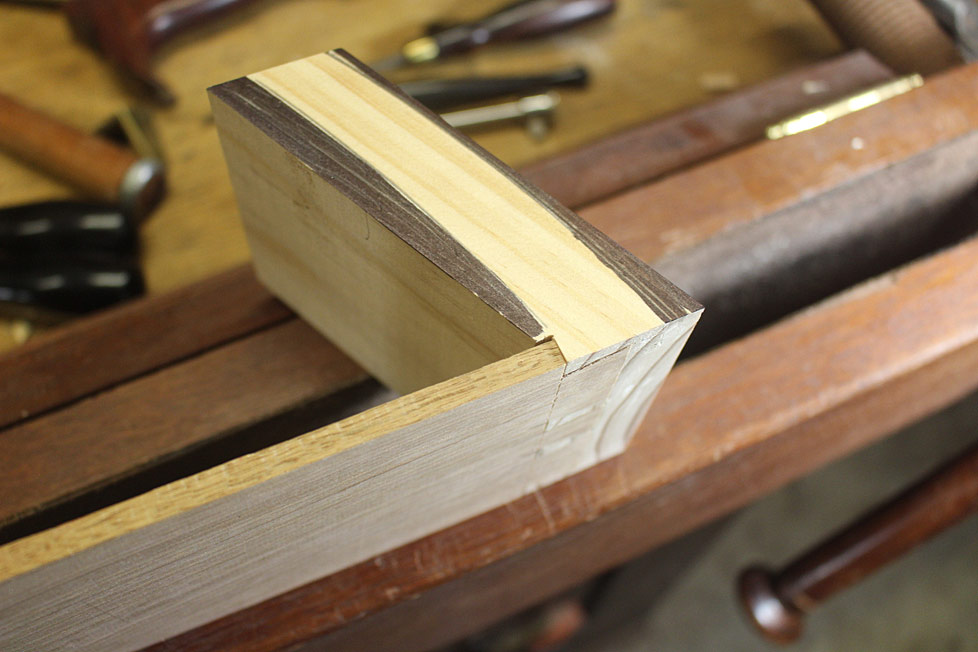
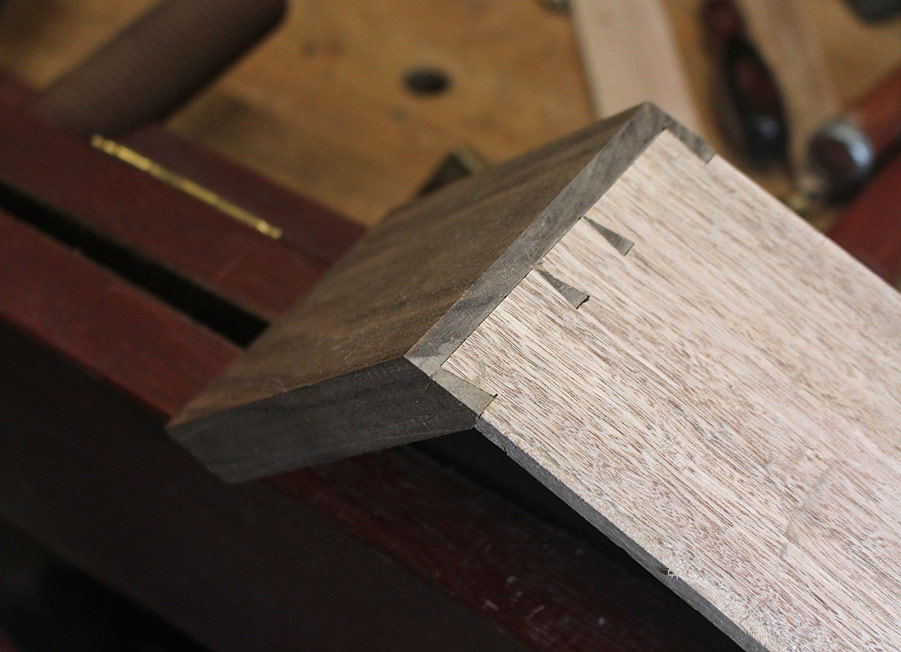
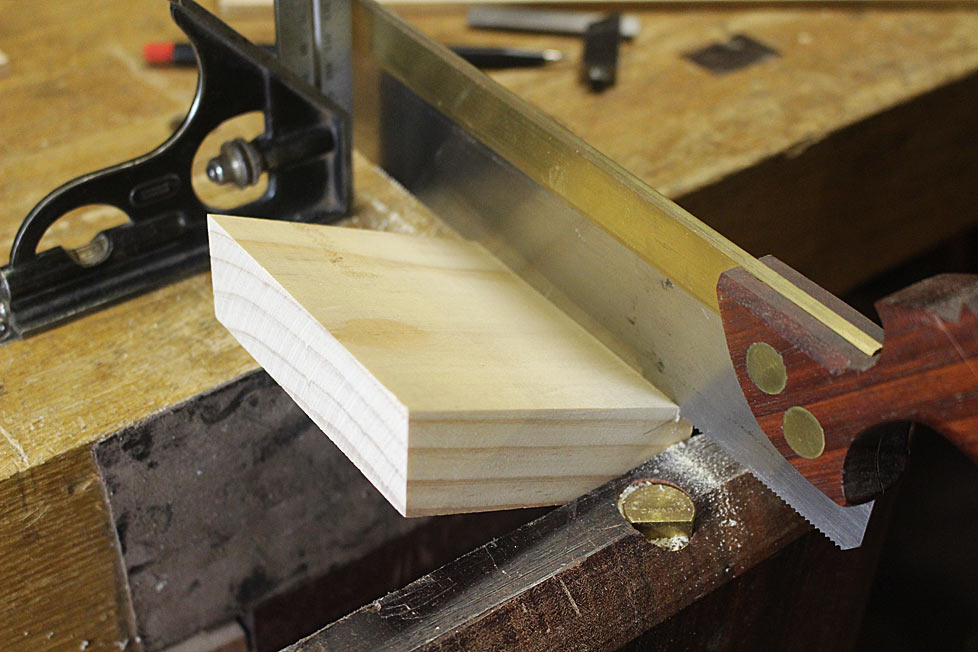
    The need now is to dovetail the acute angle ...


    This is where it gets interesting. It you look at the lines drawn on the drawer side, if made coplanar with the drawer front, the dovetails will need to me cut at an angle. That is much too complicated, and likely to be a poor fit.


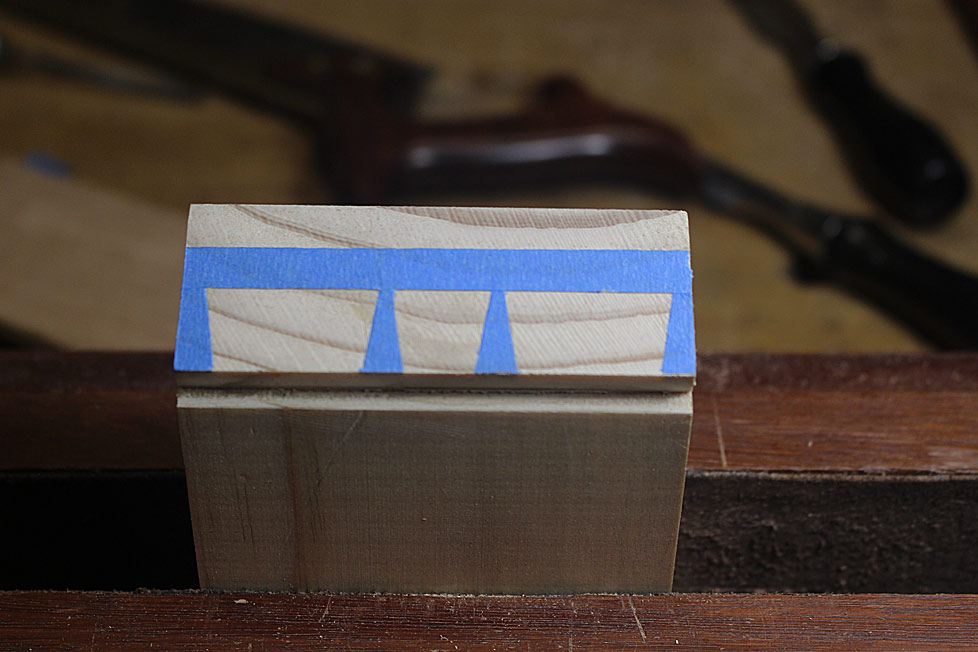
    Then, if the baseline is cut square (as usual), the dovetail will end up in the centre of the side (and not extending up from edge of the board).


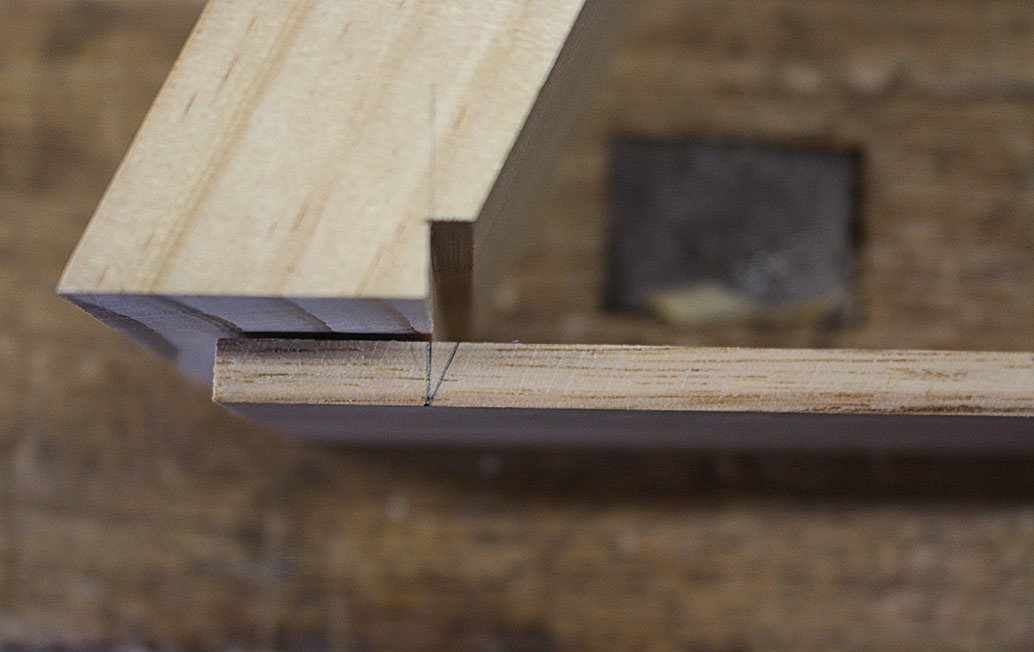
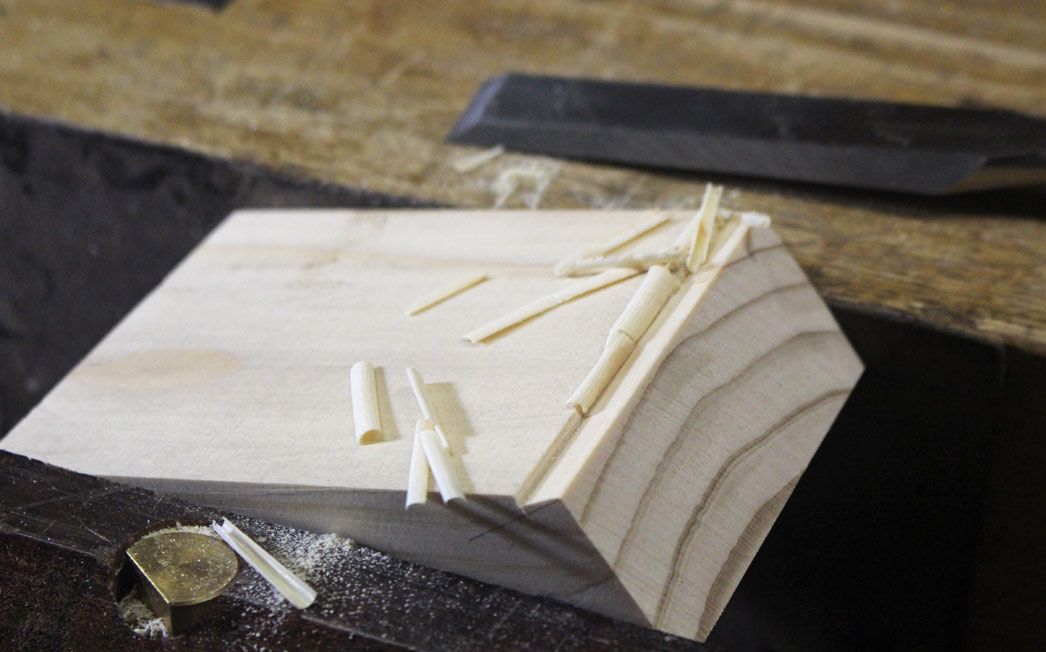
    The only way I could come up with for a fit that simplified the tail board was to rebate the pin board, so ....


    The rebate needs to be as deep as the drawer side (for a flush fit), and square to the side (so the baseline of the tail board fits flush).


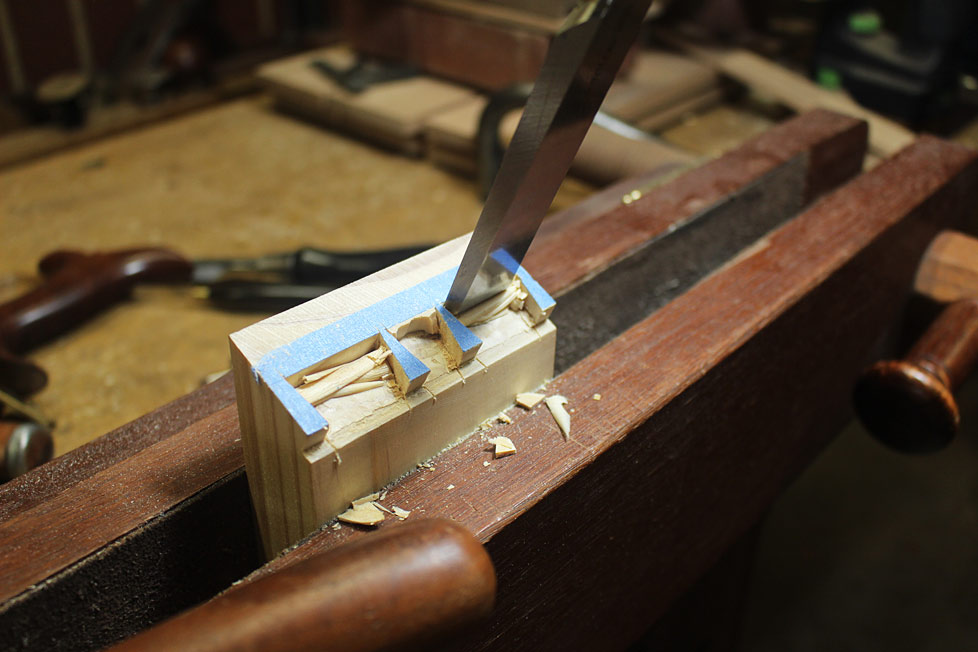
    The first step is to mark the baseline ...


    On the piece above, you can also see the rebate markings.


    The rebate is now cut parallel to the side ...


    Remove some of the waste with a chisel ...


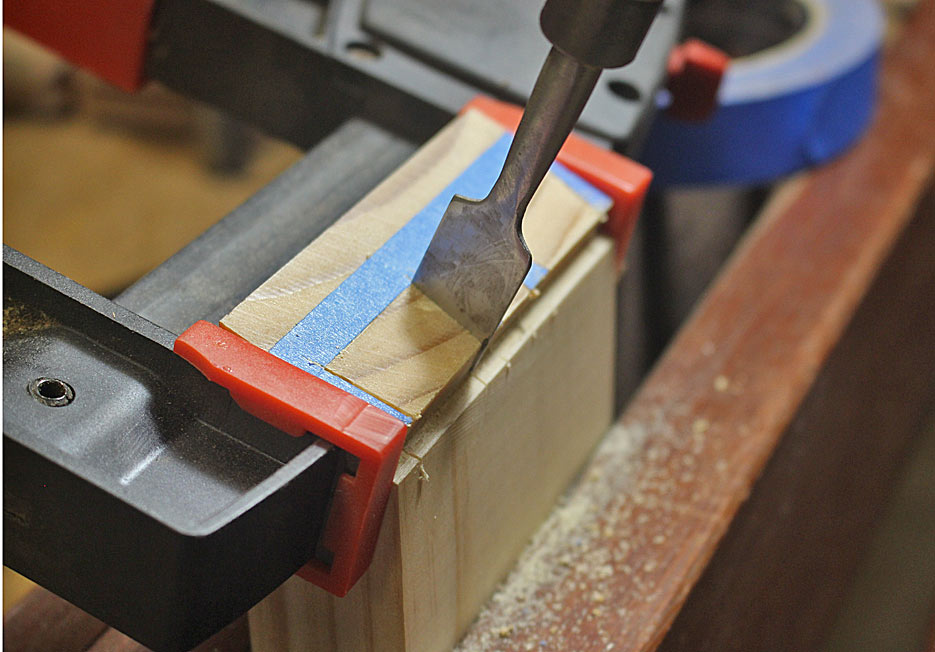
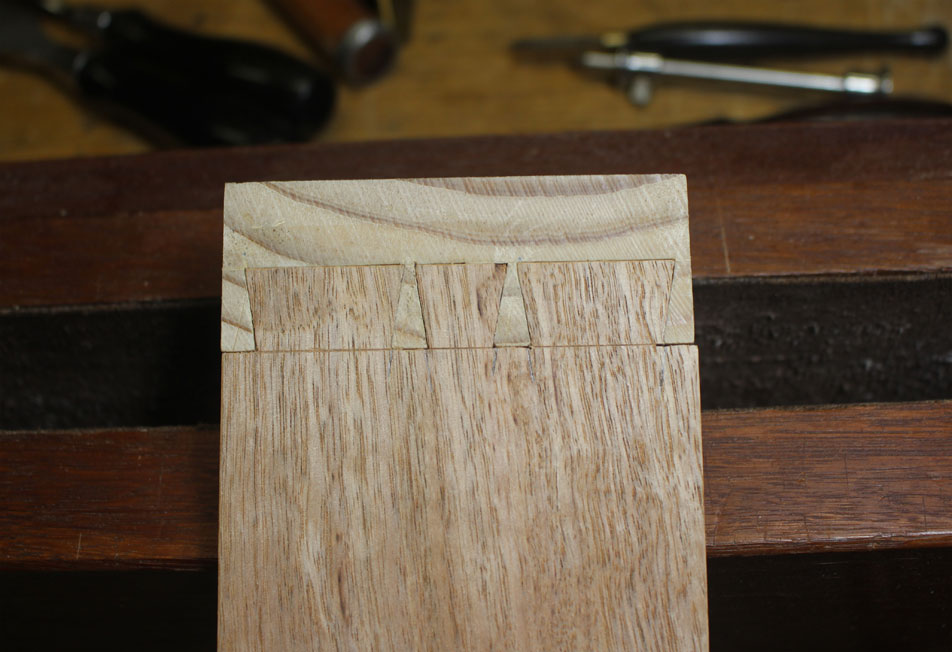
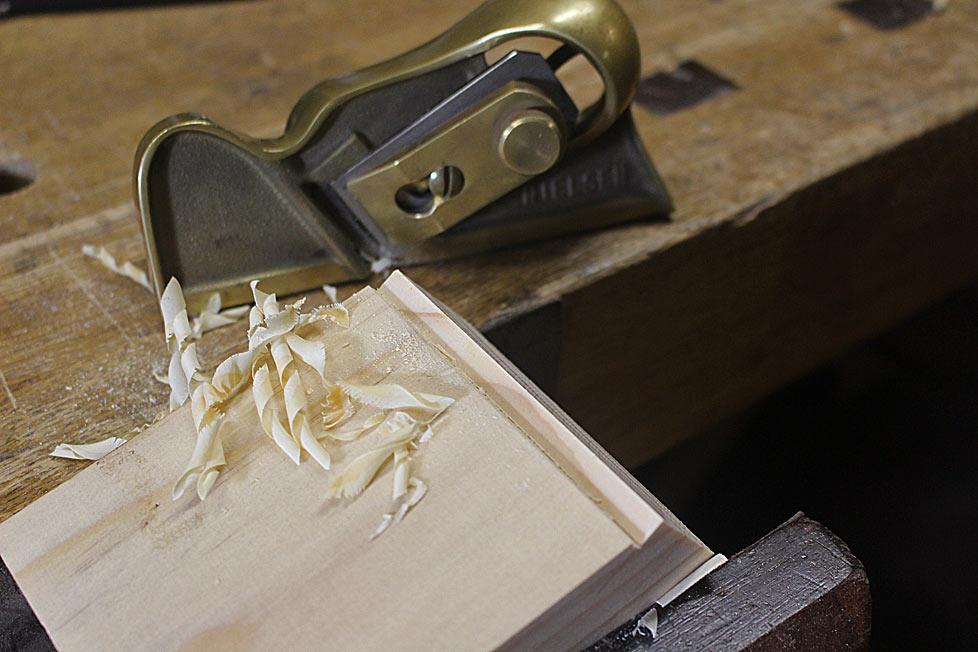
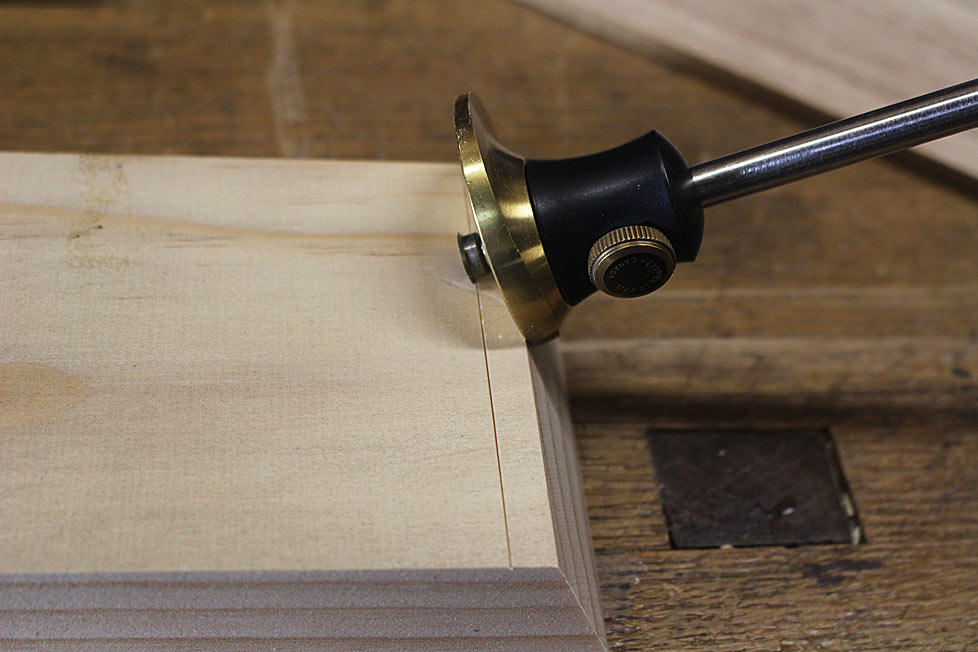
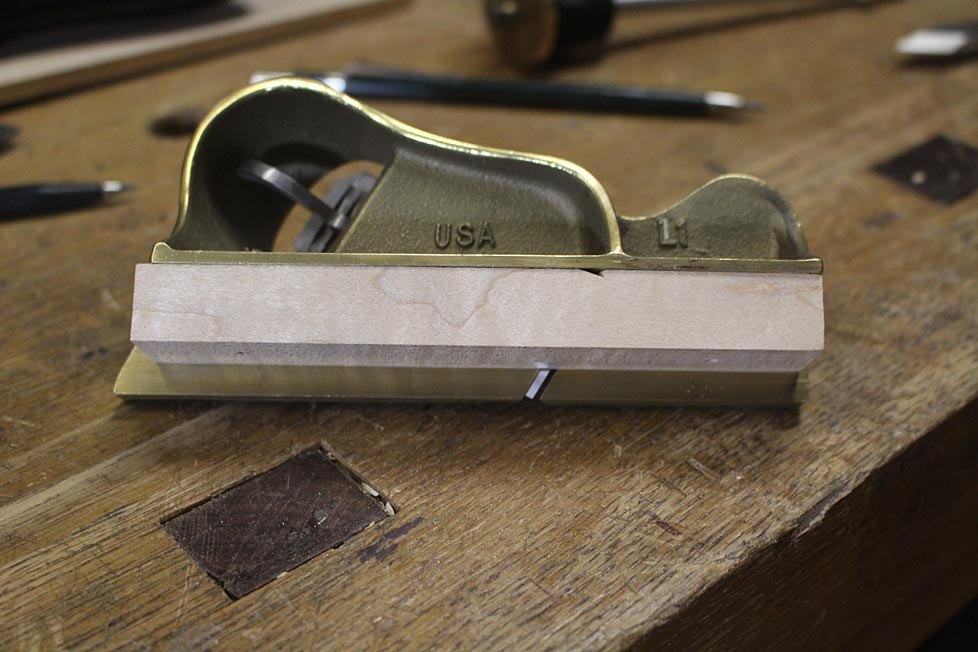
    Now that rebate needed to be both straight and flat. It needs to be an equal depth along its length.


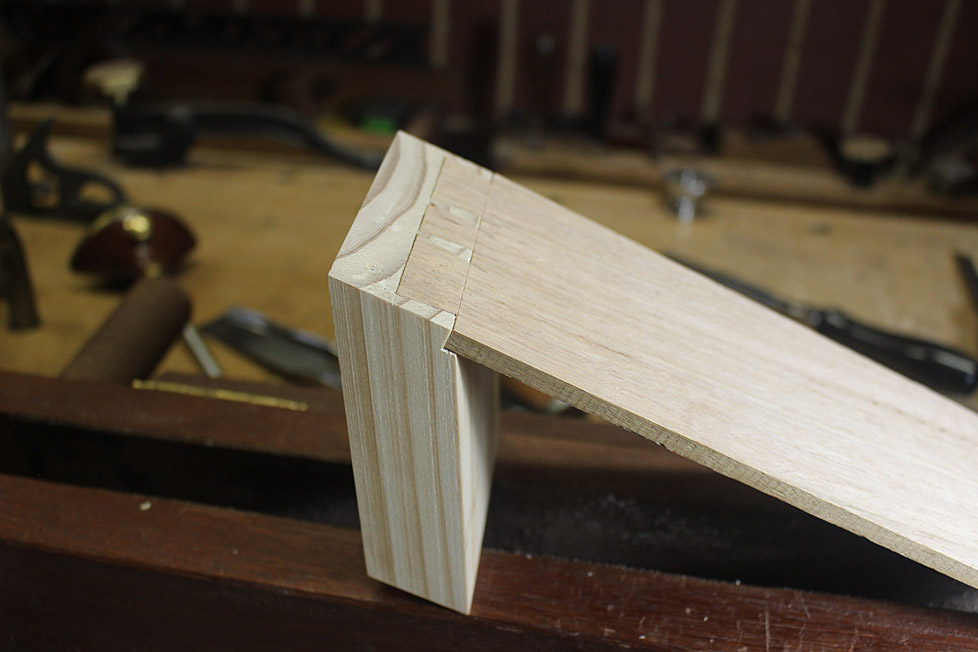
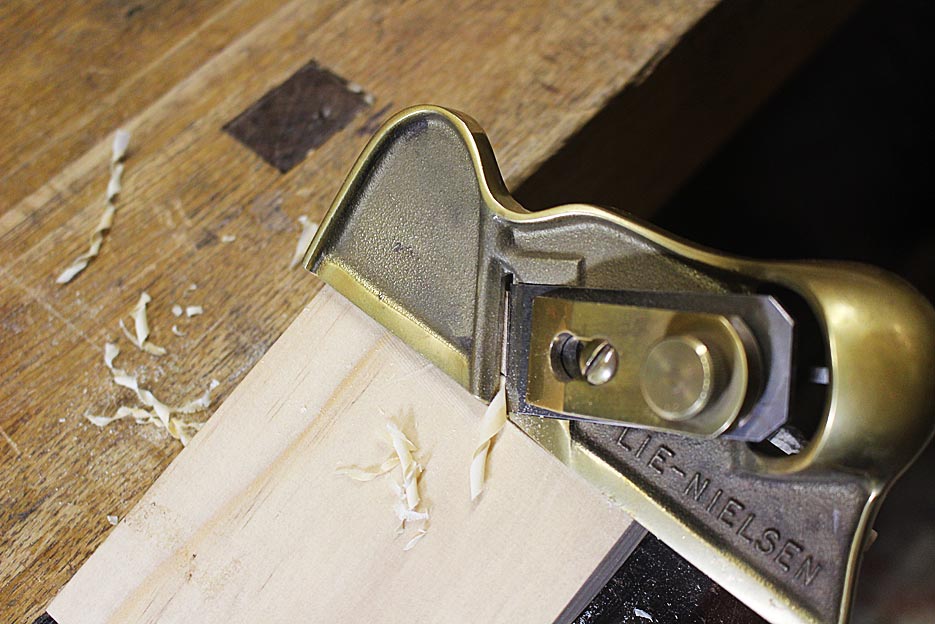
    It could have been chiselled, but that is less efficient. A shoulder plane as this would not ensure a square shoulder without extra work to create an absolutely square edge for a tight fit. In the end I came up with this idea to plane it using a LN Edge Plane.


    A spacer was attached to plane to the 1/4" depth ...


    The finish was spot on ...


  2. #2
    Join Date
    Feb 2004
    Location
    Perth, Australia
    Posts
    9,491
    Transferring


    The rear of the tail board, with blue tape used to create a fence ...


    Tails on pins ...


    The socket shoulders are deepened to create a socket that undercuts the baseline ..


    Because the angle was so difficult to chisel, a trimmer router was used to remove most of the waste ...


    ... before the remainder was removed ...


    Coming together


    The fit ...


    The angle ...


    This is a rough idea of what it will look like once the drawer front is shaped ...


    The two sides that must be made for all drawers ...


    Regards from Perth


    Derek

  3. #3
    Derek,

    My head hurts.

    As always beautiful work,

    ken

  4. #4
    Join Date
    Feb 2004
    Location
    Perth, Australia
    Posts
    9,491


    Thanks Ken.

    Regards from Perth

    Derek

  5. #5
    Join Date
    Sep 2007
    Location
    Longview WA
    Posts
    27,428
    Blog Entries
    1
    Amazing, does each column of drawers will have different angles to work with?

    jtk
    "A pessimist sees the difficulty in every opportunity; an optimist sees the opportunity in every difficulty."
    - Sir Winston Churchill (1874-1965)

  6. #6
    Join Date
    Feb 2004
    Location
    Perth, Australia
    Posts
    9,491
    Hi Jim

    Each column (vertical row) should be the identical. The two outer columns and the two inner columns should each be very similar with perhaps a minor variation.

    Regards from Perth

    Derek

  7. #7
    Join Date
    Sep 2007
    Location
    Longview WA
    Posts
    27,428
    Blog Entries
    1
    Quote Originally Posted by Derek Cohen View Post
    Hi Jim

    Each column (vertical row) should be the identical. The two outer columns and the two inner columns should each be very similar with perhaps a minor variation.

    Regards from Perth

    Derek
    Won't they be mirror images of their opposite column?

    jtk
    "A pessimist sees the difficulty in every opportunity; an optimist sees the opportunity in every difficulty."
    - Sir Winston Churchill (1874-1965)

  8. #8
    Join Date
    Feb 2004
    Location
    Perth, Australia
    Posts
    9,491
    Yes, that's what I was saying. Close to, or exactly, a mirror image of each other.

    Regards from Perth

    Derek

  9. #9
    Pfff, high class work. My hat off!

  10. #10
    Join Date
    Feb 2004
    Location
    Perth, Australia
    Posts
    9,491
    Thanks Kees

    Regards from Perth

    Derek

  11. #11
    Join Date
    May 2015
    Location
    NJ
    Posts
    1,389
    Derek, that rebate is an awesome and creative solution. Kudos. I love doing stuff like this where you really have to think outside the parameters of the basics...
    "The reward of a thing well done is having done it." - Ralph Waldo Emerson

  12. #12
    Join Date
    Feb 2004
    Location
    Perth, Australia
    Posts
    9,491
    Thanks John. I got the idea from the conversion I did on a Stanley #79 (into a sliding dovetail plane).

    Regards from Perth

    Derek

  13. #13
    Your precision astounds (as usual).

    Just a thought, but might it be easier to cut the baseline of the tails board at the (known) rebate angle you are currently cutting on the drawer front?

    20M.jpg
    Last edited by Joe Bailey; 06-13-2018 at 6:02 PM. Reason: add doctored image

  14. #14
    Join Date
    Feb 2004
    Location
    Perth, Australia
    Posts
    9,491
    Hi Joe, I did mention at the start one option was angling the baseline of the tail board. However, it is extremely difficulty to keep the angle consistent and coplanar with one another. The fit will end up with gaps. I have experimented with this method in the past to experience the issue.

    Regards from Perth

    Derek

  15. #15
    Join Date
    Aug 2012
    Location
    Missouri
    Posts
    2,151
    I always enjoy figuring things out. You have a solution that works for you and you are comfortable with it. Sometimes it amazes me that something really bad happens to us when an angle is thrown into the work. We go to great lengths to be rid of that angle. I try to tell myself that it is just cutting to a line. It does absolutely no good. I'll spend hours and go through all kinds of twisting and turning to make it the most complicated thing. Then I see someone pick up a saw look at the reflection and just cut it.
    Jim

Posting Permissions

  • You may not post new threads
  • You may not post replies
  • You may not post attachments
  • You may not edit your posts
  •