Good points on the Z, but I would place the Spindle motor in such a way that the shortest tool ever used would be pretty close to flush with the lowest hanging portion of the carriage, that way you can take advantage of all the Z you can get.


 Contributor
Good points on the Z, but I would place the Spindle motor in such a way that the shortest tool ever used would be pretty close to flush with the lowest hanging portion of the carriage, that way you can take advantage of all the Z you can get.
Brian Lamb
Lamb Tool Works, Custom tools for woodworkers
Equipment: Felder KF700 and AD741, Milltronics CNC Mill, Universal Laser X-600
 [OP]
Contributor
[OP]
Contributor
Ah, tricks of the trade - Thanks!! I'm new to the CNC world so tips are appreciated.Originally Posted by Brian Lamb

David
CurlyWoodShop on Etsy, David Falkner on YouTube, difalkner on Instagram
[OP]
Contributor
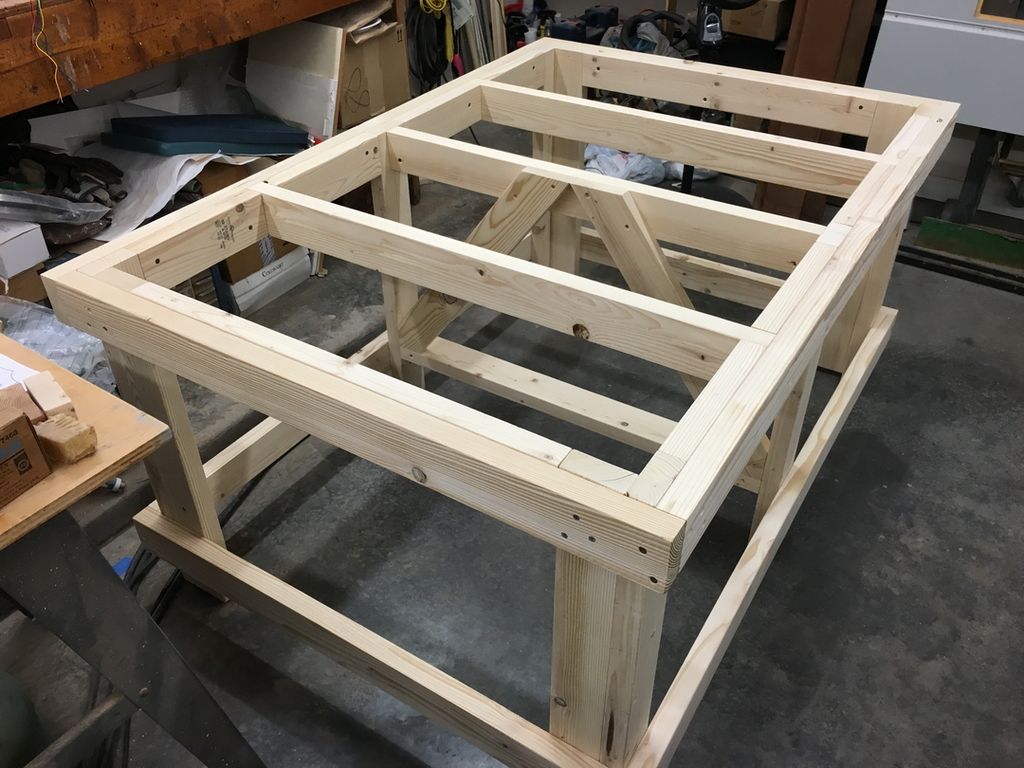
Finished the stand today. I know I'm thorough but this took me about 20 hours to build and I have no idea if that's slow or fast or about average. It's actually fast for me and I managed to do it in two sessions - 8 hours yesterday and 12 today.
All the pieces that will contact the CNC frame are jointed to ensure they're flat and straight and each hole was drilled with 1/8" for threads, 3/16" for the barrel, countersunk for the head, and securely tightened, so about 4 operations for each of the hundred or so fasteners. Each joint is square and tight and then the entire stand was sanded. I may come back later and put some Shellac on it but not today.
A friend is coming over tomorrow and bringing his engine hoist so we can lift the frame onto the stand. More later!!
David
David
CurlyWoodShop on Etsy, David Falkner on YouTube, difalkner on Instagram
[OP]
Contributor
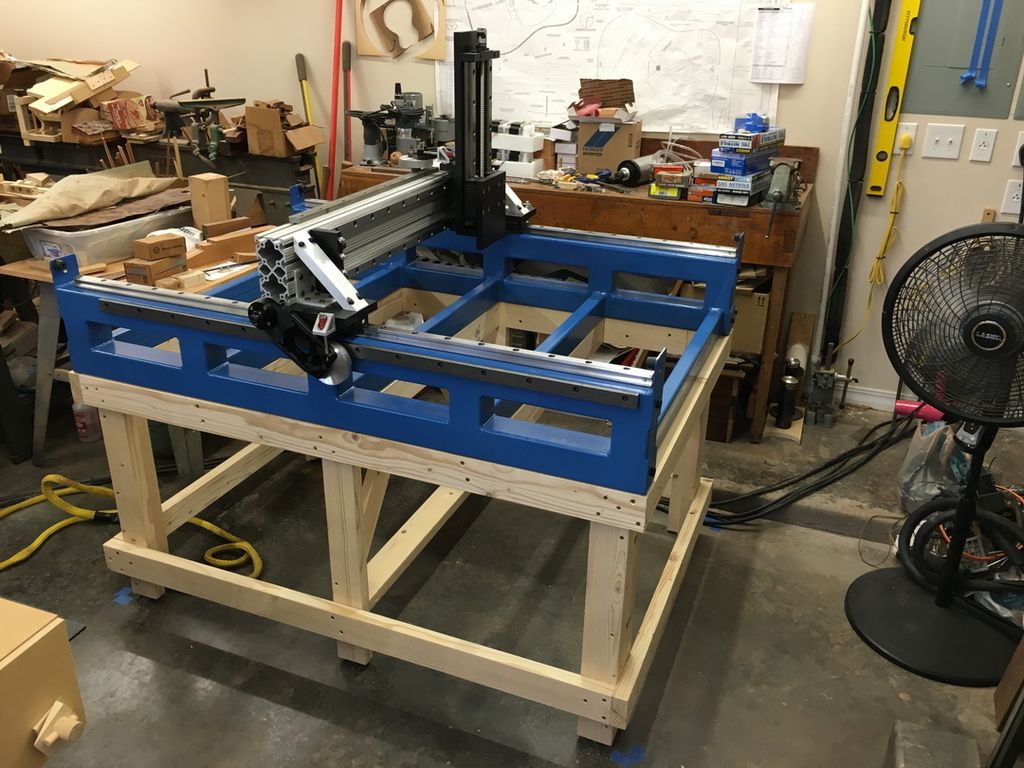
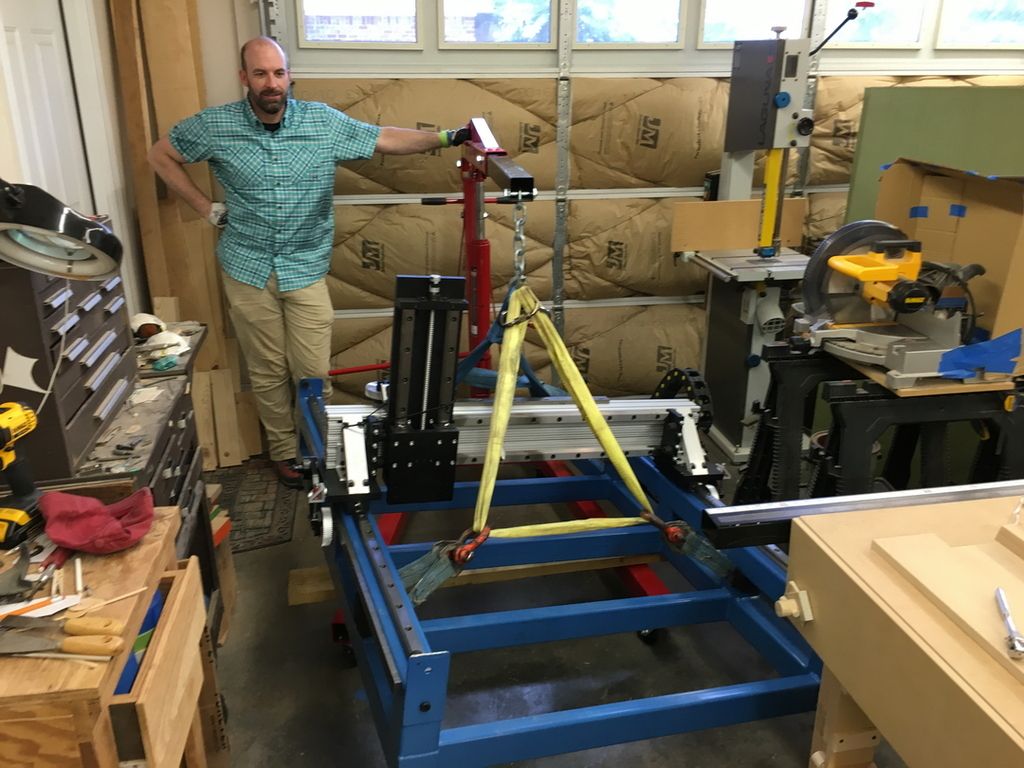
We managed to get the CNC frame lifted over the table saw extension and on to the stand. The stand worked perfectly, so that's a good feeling. Nothing creaked or moved and it is dead level with the additional nearly 500 lbs. of weight just as it was without the frame weighing it down.
My friend Adam, also a good woodworker, brought his engine hoist over and we managed to maneuver the CNC over the obstacles and set onto the stand and only had to move my air compressor to make room. That's not a bad feat given how tight this was.
CNC frame on the stand -
David
CurlyWoodShop on Etsy, David Falkner on YouTube, difalkner on Instagram
Member
Getting closer. Looks great. You get a serious time catapult when buying your machine built for you for sure. They built a nice stout looking machine.
Glad its my shop I am responsible for - I only have to make me happy.
[OP]
Contributor
Thanks, Mike! I agree on the jump forward; I was going to get this machine from Nate but when I started talking to him I learned he was coming out with a Pro line. So I jumped on the bandwagon and got the first one. His website now has this Saturn CNC listed (and the photos are of our CNC). And yes, it is very stout!
David
CurlyWoodShop on Etsy, David Falkner on YouTube, difalkner on Instagram
[OP]
Contributor
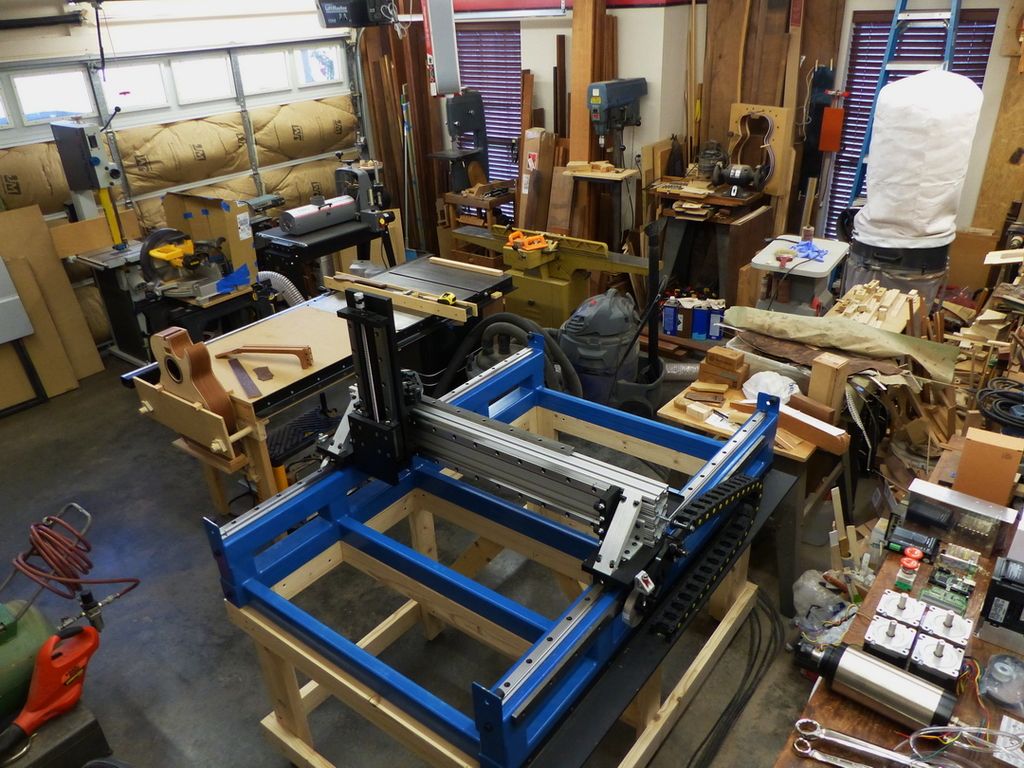
Here's a good shot of the CNC in our shop. There's some clutter from moving things around to make room for this but I'll get that organized and cleaned up soon. You can see the spindle, steppers, and other components on the bench so hopefully I'll get a chance to start mounting those over the next few days.
David
CurlyWoodShop on Etsy, David Falkner on YouTube, difalkner on Instagram
Member
Nice machine! I am considering one of these Saturn CNC routers. A question, what is the foot print dimensions of the square tube frame? I am looking either build a stand or buy one that might be close in size to work.
Thank you!
Ed
[OP]
Contributor
Thanks, Ed! The frame and stand are both 43" x 62" although the cable tray and steppers will hang over the stand a bit. With the stand I designed and built that places the steppers about 38" high and at that height the width of the machine is 52". Does that help?
David
CurlyWoodShop on Etsy, David Falkner on YouTube, difalkner on Instagram
 Moderator
I didn't think I would ever be able to say this but your shop is more crowded than mine!
[OP]
Contributor
LOL! There is a lot packed in there but thankfully I have room to do what I want and that is staying focused on building acoustic guitars. If I was building cabinets or large sheet goods items this wouldn't work at all. But the longest piece I typically cut is 36" or less. It's packed but it flows well from task to task. Let's just say it's efficient
David
CurlyWoodShop on Etsy, David Falkner on YouTube, difalkner on Instagram
[OP]
Contributor
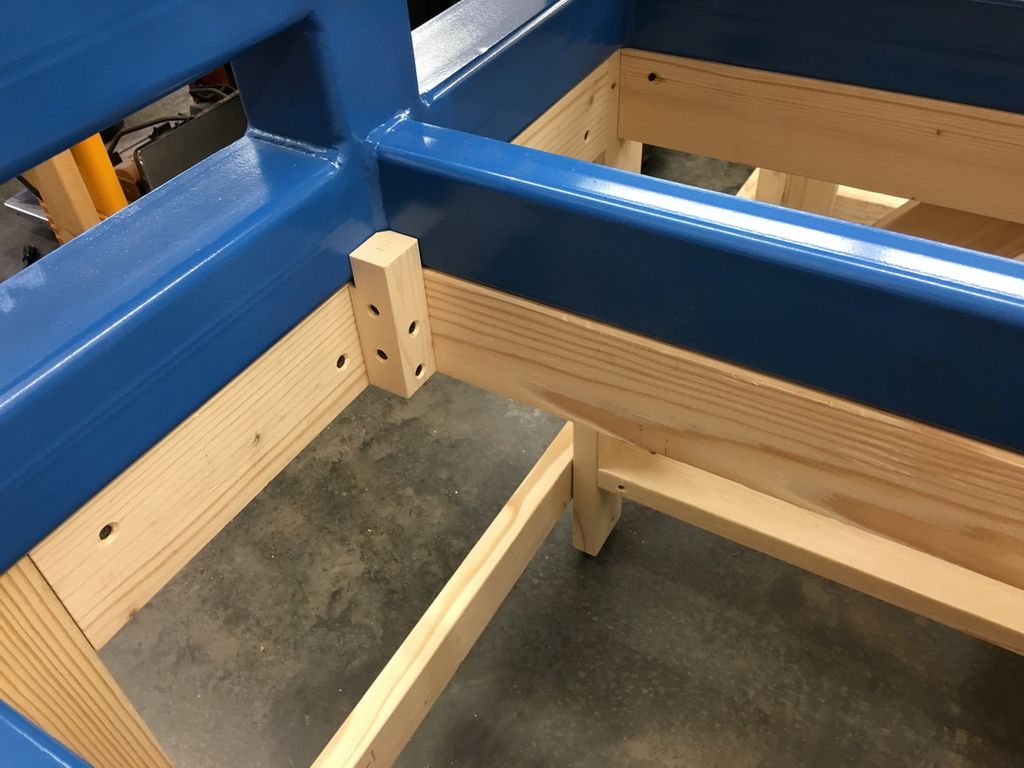
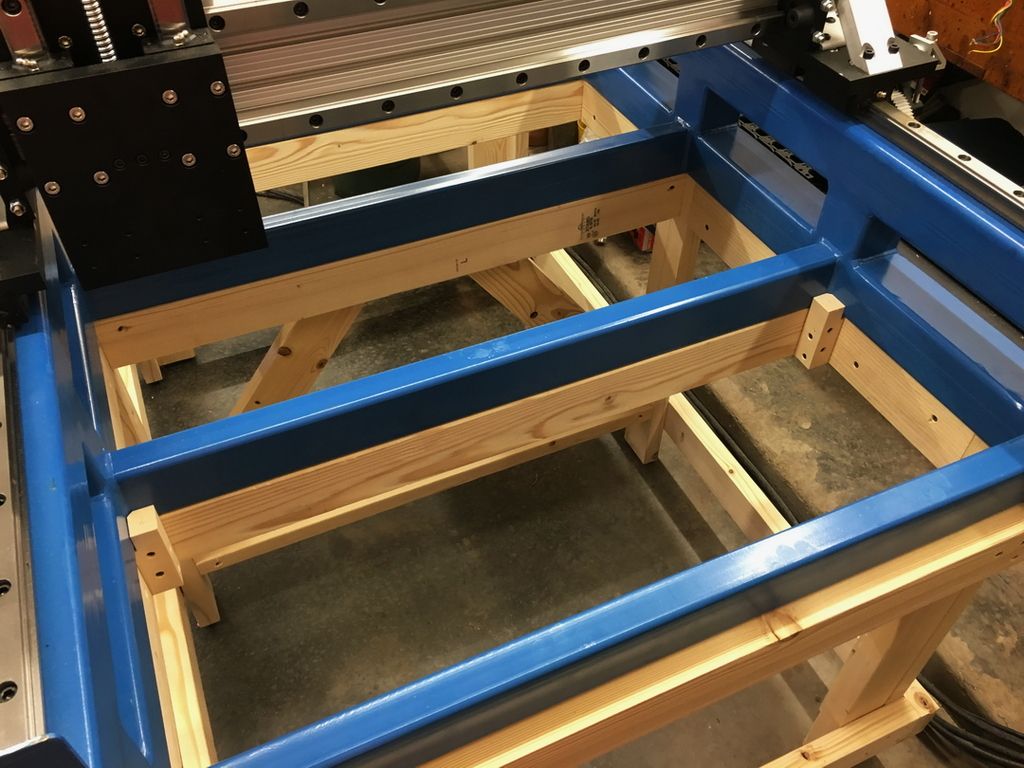
Added some locator blocks to keep the frame on the stand. I figure gravity will do its part to hold the machine down onto the stand but inertia and momentum may persuade the unit to slide on the stand. Hopefully this will suffice. There are 4 of these blocks in opposing directions, two on each end.
David
CurlyWoodShop on Etsy, David Falkner on YouTube, difalkner on Instagram
Member
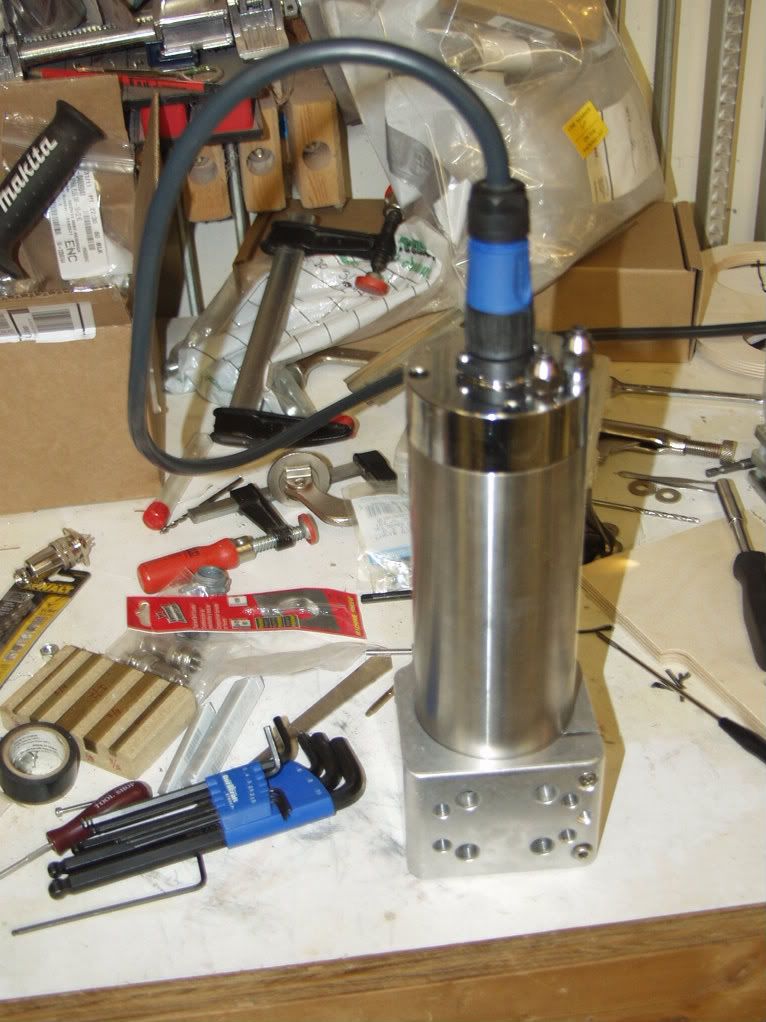
For my spindle I ran Igus Chainflex power cable to the Amphenol Ecomate connector. I changed out the chinese solder cup junk connector for the ecomate.
connectors
http://www.digikey.com/catalog/en/pa...mate-c016/2185
power cable
https://www.google.com/url?sa=t&rct=j&q=&esrc=s&source=web&cd=10&ved=0ahU KEwj269_Mn_fNAhVKgiYKHUxwC2YQFgheMAk&url=http%3A%2 F%2Fdatasheet.octopart.com%2FCF30-100-04-igus-datasheet-28917.pdf&usg=AFQjCNEIHYChvnPIbR25ZV6A8fiB0K4EcQ&s ig2=pi3aMxtb4LduDHT4Aiofbg&bvm=bv.127178174,d.eWE& cad=rja
Pics of how I changed the plug out are here:
http://s39.photobucket.com/user/Bloo...?sort=3&page=2
Last edited by Mike Heidrick; 07-16-2016 at 1:39 AM.
Glad its my shop I am responsible for - I only have to make me happy.
Member
David,
Thanks for the dimensions, just what I was looking for. Your machine is looking really good. When you ordered it, how long did it take to receive it?
Regards!
Ed
[OP]
Contributor
Thanks so much, Mike! I had seen those connectors on one of the many machines I looked at and wanted to find a source because I don't care for the 'toy' one that came with the spindle. And I need cabling so this really helps!
David
David
CurlyWoodShop on Etsy, David Falkner on YouTube, difalkner on Instagram
 Posting Permissions

 Reply With Quote
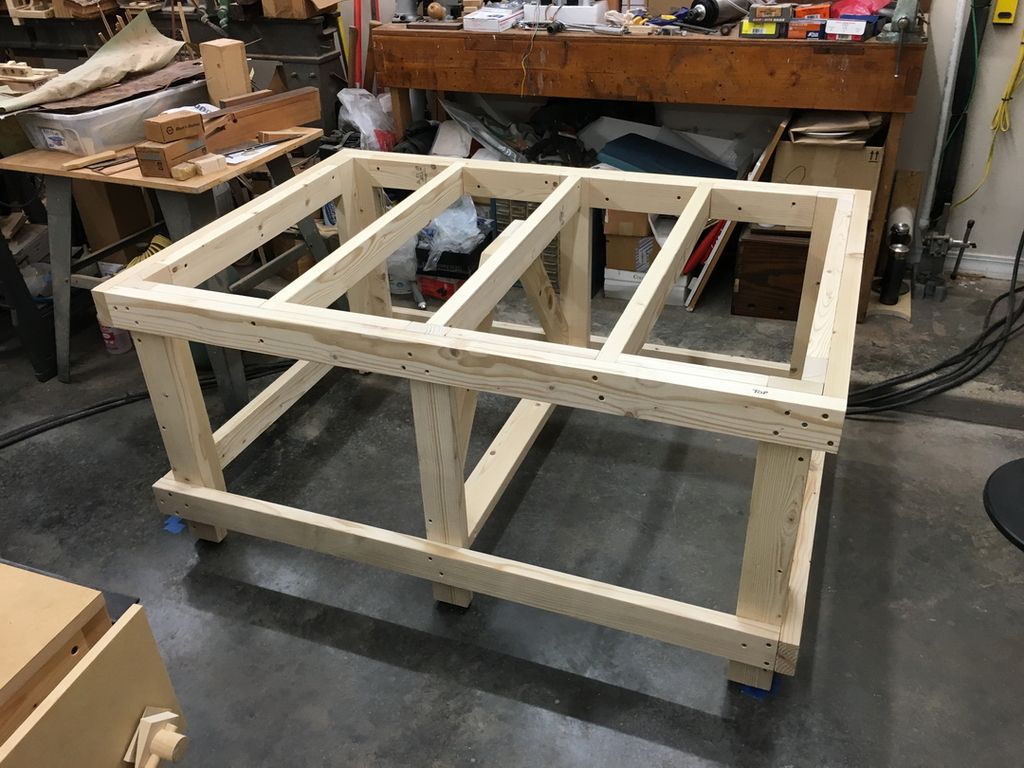
 Please help support the Creek.