Howdy Robert,
The plans are roughed out in terms of height and joinery layout, overall length/width is determined by what goes in the box.
Here is a link to the plans.
http://www.thecarpentryway.com/Craft...t=108&start=10


 [OP]
Contributor
[OP]
Contributor
Howdy Robert,
The plans are roughed out in terms of height and joinery layout, overall length/width is determined by what goes in the box.
Here is a link to the plans.
http://www.thecarpentryway.com/Craft...t=108&start=10
Bumbling forward into the unknown.
 Member
At long last, a sartorial choice I can relate to...Originally Posted by Brian Holcombe


"For me, chairs and chairmaking are a means to an end. My real goal is to spend my days in a quiet, dustless shop doing hand work on an object that is beautiful, useful and fun to make." --Peter Galbert
[OP]
Contributor
I was wondering when my flannels would get some attention.
Bumbling forward into the unknown.
 Contributor
Always a pleasure watching craftsman build something useful. Keep posting, please.
Member
I'm fine with your flannels--shirts or robes, whatever. Sorry I can't get past having a carpeted shop.

[OP]
Contributor
Thanks Ron!
Hah, thanks Evan....lol...there is a certain genius to the carpet....but actually my wife insists I wear it out before replacing it with something more appropriate. Sorry to say the stuff wears like steel plate.
Bumbling forward into the unknown.
[OP]
Contributor
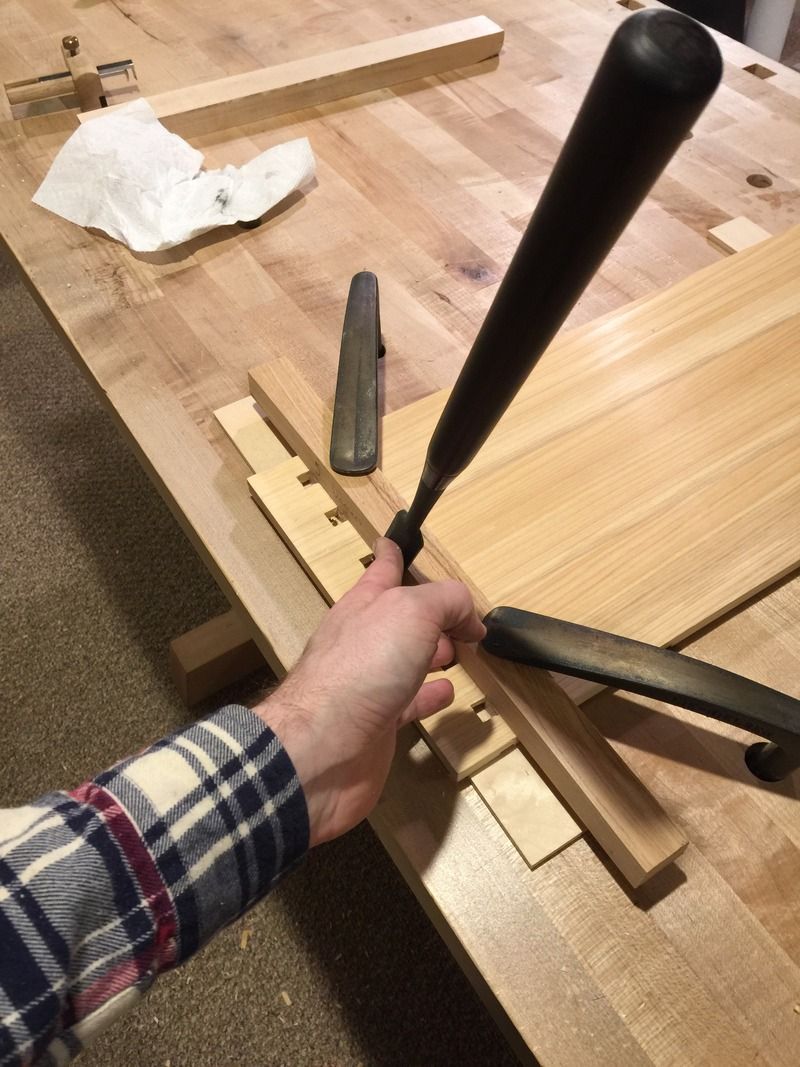
Evening fellas. I've got part II ready to go. I seem to be attempting to see how much material I can resaw.
https://brianholcombewoodworkerblog....l-box-part-ii/
Bumbling forward into the unknown.
Interesting wood choice. I am about to embark on a search for some in Metro Atl. I need to make outdoor shutters for the house. Cypress works very well for bee boxes too.
I was immediately interested in your choice of plaids, but I would never presume to question your choice of wardrobe, especially after Stanley set me right about your expertise regarding robe and slipper choices.
[OP]
Contributor
It's a great wood to work, I think that you will enjoy making those shutters. If you can find really old tight growth that is best, I sorted through a bit of stock before finding material with tight growth rings.
Hah, Stanley is certainly leading the charge on behalf of the planing robe and slippers
Bumbling forward into the unknown.
 Member
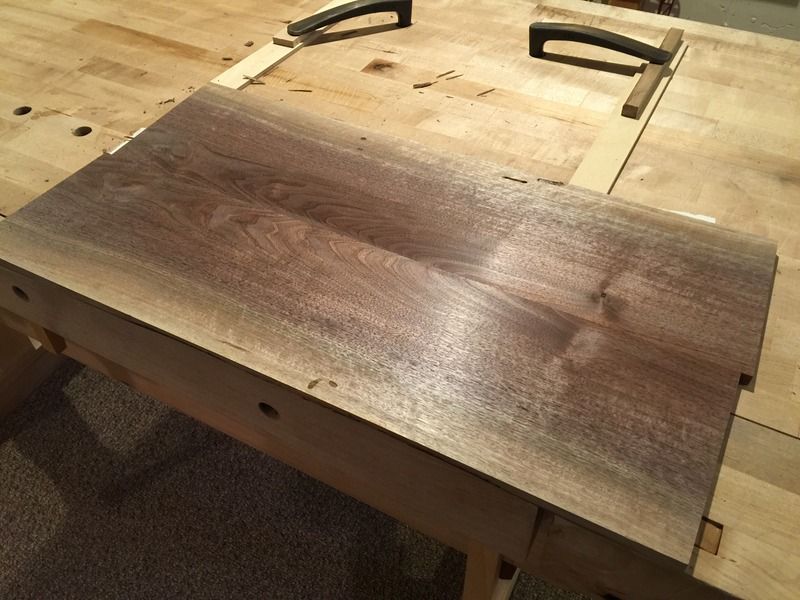
Those beautiful walnut remind me: The handles are hands-down my favorite feature of this style toolbox. The sliding lid gets all the attention, but the handles are the first time the line between form and function really clicked for me when building something. They're just so dang clean and simple but work like a charm.
Oh, and if a desire to dress the handles in plaid seeds and grows during the build, don't fight it. Feed it.
(Digging the blog, too.)
[OP]
Contributor
Thanks Barry!
I have more work to do on the handles and I'll certainly detail that work specifically.
Plaid seeds, eh? Hehe.
Bumbling forward into the unknown.
[OP]
Contributor
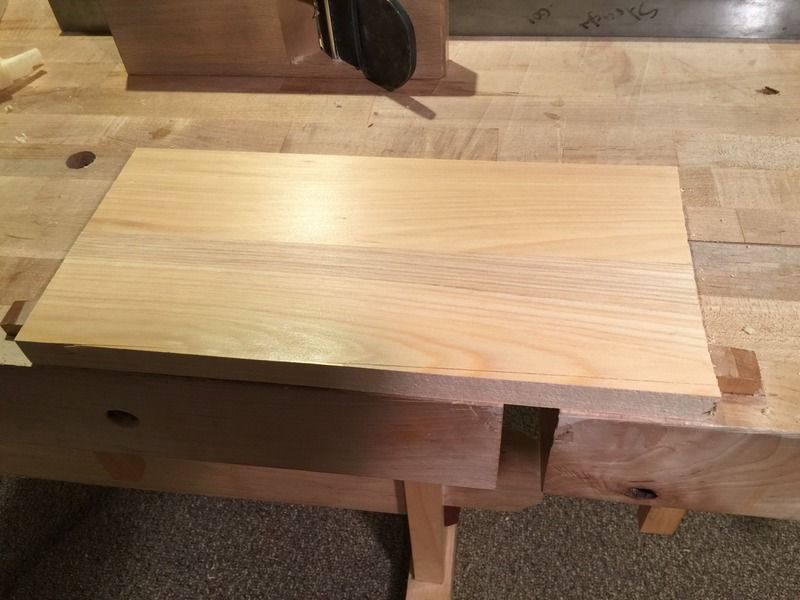
Cruising along with part III. Got the top panel finished and ready for battens, along with quite a bit of the mortising.
https://brianholcombewoodworkerblog....lbox-part-iii/
Bumbling forward into the unknown.
Guest
Brian:
I am enjoying the thread very much. Your carpeted workshop makes me envious. And while the sartorial splendour I anticipated has yet to be revealed, mine is the impatience of a child on Christmas eve.
However, (and I write this without any satire intended) the beautiful wood and advanced joinery techniques you are employing are discordant with my experience in Japan, and even a bit grating.
I am writing this during my lunch break at my construction jobsite in Yokohama. There are lots of toolboxes close at hand even now, but none of those, nor any I have seen here in Japan in the past, resemble the one you are currently making.
All are very utilitarian, workman-like boxes, badly scratched and dinged. Most are made of inexpensive pine or Akita Sugi cedar. Infrequently, I have see Hinoki used. But never anything at the level of walnut. Construction-grade plywood is very frequently employed, especially for lids. Most boxes are nailed with ordinary plain wire nails (sans fancy heads or coloration). Some are screwed. Some are doweled. If fancy joinery is used, I have never seen it go beyond the not-especially-attractive pinned big-finger joint (not sure of correct terminology in English) used in traditional Japanese casework since forever. I am talking about the toolboxes of craftsmen that do high-quality woodworking for their employers everyday but Sunday, not hacks or tobis.
Some guys give their boxes a coat of spray paint from a can, or whatever the painter is squirting at the jobsite on a particular day, but never a fancy finish. Any decoration is limited to the Owner's name, and maybe the name of company he works for if he takes advantage of the company truck to convey his toolbox to the jobsite.
As a matter of fact, many are replacing their wooden toolboxes with high-impact plastic ones because the little green fellas are tougher and keep one's tools much drier than a wooden box could ever hope to do.
Different continent, different culture, I suppose. Don't get me wrong, I am not scoffing at your toolbox, Brian, nor am suggesting that it is not worthy of admiration. I am only saying that it is as Japanese as a California Roll.
And to those reading this who dunna no how to reed good, or don't bother to comprehend before jumping to mistaken conclusions and flaming (too many of those at SC), I say hire a tutor and get some remedial training before commenting. After that, have someone translate my signature below, and get some for yourself.
Stan
Last edited by Stanley Covington; 02-23-2016 at 10:29 PM.
 Member
Stan, is at least the style of the "japanese toolboxes" commonly made here true to form?
Contributor
I've always heard the boxes were such as Stan represents. I think T. date says as much as well. However, many of the ones I've seen in America look much like Brian's - including the recent one in FWw or PopWoid (can't remember which).
 Posting Permissions

 Reply With Quote