Results 1 to 5 of 5

Thread: Vacuum System completed

  1. #1
    Join Date
    Feb 2010
    Location
    Hanover, Ontario
    Posts
    405

    Vacuum System completed

    Hi everyone;
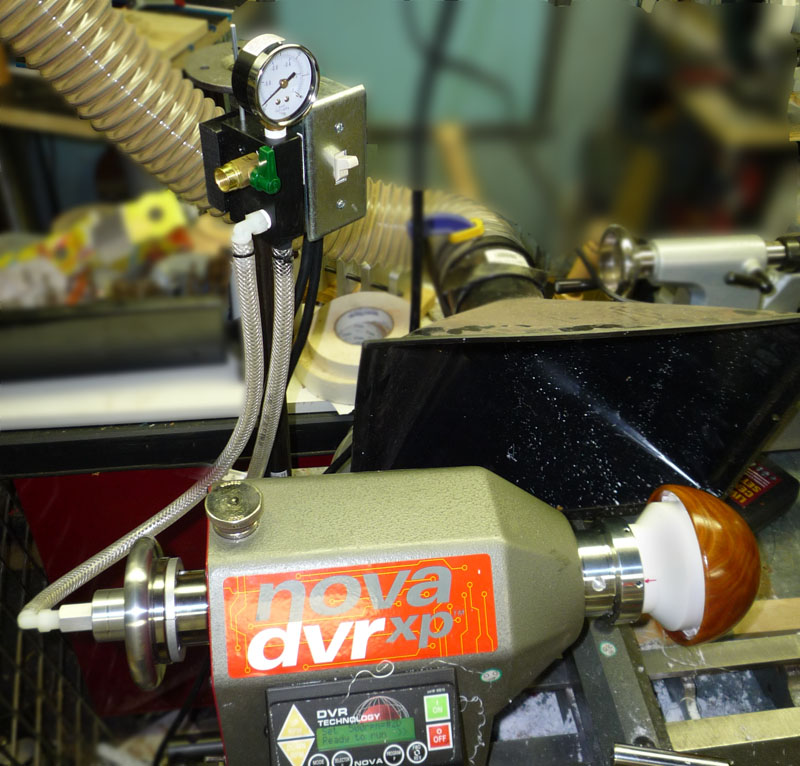
    I have completed the installation of my vacuum system. I am using a vacuum pump from the hospital setting so it comes complete with the little glass jar and filter on the intake side. Also, a little hand screw to let in by-pass air for vacuum control.\
    I have been having trouble with the Nova vac attachment, it leaks like a sieve. I think it is intended for a shop vac and depends on high volume air flow, which in not possible from a vac pump. So, I built a new adaptor using an old sealed bearing and a piece of 1/2 inch aluminum tubing to attach the hose to it. Works pretty well even though I think there is still some leaking going into the handwheel. I get 22" when putting my finger over the tube and only 17" with the vac chuck and a piece of solid wood on it.
    Still the hold is good and workable.

    Looking forward to using it on a Spalted Maple bowl currently in progress.
    Peter F.


    tn_IMG_2922.JPG tn_IMG_2919.JPG

    Oops; This picture was not intended, but it is my latest project. Three Turkins Whorls, these are drop spindles with the cross pieces removable for easy storage. The wool is wrapped around the cross pieces and then spun into yarn, when it is about 3 feet long it is wrapped around the cross pieces and the spinning continues. When done it makes a ball of yarn when you pull out the cross pieces and then it can be used to knit stuff.
    Attached Images Attached Images
    Last edited by Peter Fabricius; 02-08-2011 at 7:33 PM. Reason: added info on the turkisk whorls

  2. #2
    Join Date
    May 2009
    Location
    Washington's Coast
    Posts
    1,767
    Vacuum system???? All I see is a Makita poster. Oh, wait, there it is Good job-you'll wonder how you ever got along without it.

  3. #3
    Peter,

    It's hard to tell from the photo, but you might want to make sure that your bypass valve is easily reachable from your normal turning position. You'll find that handy when trying to adjust the vacuum amount at the same time that you're positioning a bowl on the vacuum chuck. If necessary, it would be a simple matter to put the valve at the end of a hose closer to the top of your lathe.

    I have the same lathe as you, and I opted to put the bypass valve above my headstock, as in the photo below

    I hope this is useful.

    Last edited by Alan Zenreich; 02-08-2011 at 6:45 PM.
    Lathes: Nova DVR XP, Delta 46-460, Jet 1014vsi; Bader III 2"x72" belt grinder; Triton 2.25 router; CMT Industrio table; Jointech fence; SC planer; Dewalt miter; Delta 14" bandsaw; Festool TS55, MFT/3, CT22, ETS150/3, OF1400, PSB300EQ, CXS; Hegner Scrollsaw; JJ-6CS jointer; Grizzly 1023s cabinetsaw, Jet 17" drill press; Rigid OSS; 9" SandFlee; 3M AirStream & Breathe Easy PAPRs

  4. #4
    Join Date
    Jan 2005
    Location
    Goodland, Kansas
    Posts
    22,605
    Good looking system. I did the same as Alan. Wanted the bleeder valve close by.
    Bernie

    Never put off until tomorrow what you can do the day after tomorrow.

    To succeed in life, you need three things: a wishbone, a backbone and a funnybone.


  5. #5
    Join Date
    Feb 2010
    Location
    Hanover, Ontario
    Posts
    405
    Thanks Alan and Bernie;
    The bleeder valve is located right at the little glass jar and is within easy reach from the lathe head. The on/off switch is a little further back but still reachable. No chance of accidentally switching off the pump while turning.
    thanks
    Peter F.

Posting Permissions

  • You may not post new threads
  • You may not post replies
  • You may not post attachments
  • You may not edit your posts
  •