


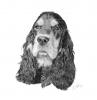


Okay a lot of people have been saying the difficulties of using Photograv and have been shown the manual method using Adobe Photoshop.
Now Rodney Gold who is one of the moderators and guru from this site, conceived a method of using Photoshop and manual settings. The method gives a remarkably similar result and I quite often use it more than Photograv. Unfortunately either not many people wrote it down, don't know about it or have got confused trying to do it or they cannot be bothered because it is quite a long process. Rodney has already suggested in another post that we get together to try and make a fast method. I think I have created this solution. Read on.
Attached there is a zipped file. Extract it and inside you will find another file appropriately named The Gold Method.exe (that one's for you Rodney). Double click on it and please read the instructions, especially the beginning where it will extract the file to.
If you are using Adobe Photoshop CS3, it is a no brainer. If you are just using Adobe Photoshop then you will have to extract the contained file to this location:
C:\Program Files\Adobe\Adobe Photoshop\Presets\Actions
This will be the location of your preset action folder, if you still get it wrong then manually copy them over.
Okay there is a feature in Adobe which is seldom used called 'ACTIONS'. By activating one of these actions it will automatically allow you to convert any picture, colour or otherwise into a suitable engraving ready image in seconds, using Rodney's tried and tested method, but without any input from you other than pressing a button. (Anybody have a problem pressing buttons??????)
I have made actions for the following processes;
300dpi positive
400dpi positive
600dpi positive
300dpi negative
400dpi negative
600dpi negative On the negative ones, I have flipped the image as I was thinking about reverse engraving when I created them. If you are not reverse engraving (i.e. a mirror) then just click flip horizontal. It must be done in Photoshop before you save it.
Here are a couple of things you need to do. SIZE YOUR IMAGE FIRST (8"x10" etc) and then save it. Then run The Gold Method.
The installation will only ever need to be done the once.
Please don't be a lurker, if you try it, post your thoughts or suggestions so that we can look at them again or if it works for you, let's hear that also. We try to help one another so please make the effort.

 Reply With Quote