Results 1 to 8 of 8

Thread: Completed Walnut Chest w/pics

  1. #1
    Join Date
    Mar 2007
    Location
    Upstate NY
    Posts
    554

    Completed Walnut Chest w/pics

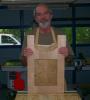
    I've spent the last three weeks working on this blanket chest for my living room. It's my second major project and the first one I've done with walnut.

    Some of you might remember that I was asking about doing glue ups with tapered stock for this project a few weeks ago. In the first picture you see the stock I started out with, it presented a bit of problem in glueing up the panels, as the pieces wanted to slide apart under the clamp pressure. Luckily the upward/downward friction from the LV panel clamps I eventually used seemed to counteract this enough to make it work. When I tried with just bar clamps it was a major pain. The stock was 4' long, 8" wide -4" wide and 3/4 (surfaced) thick. I got it for about $1 bf from a guy who got it as CNC router offcuts from the place he works. Panels ended up being just shy of 5/8 by the time I got them flattened out (jet drum sander).

    The box is butt jointed (not ready for that many hand cut dovetails yet) with 4 pocket holes per end edge and 8 per bottom side. Each side piece has a dado 1" off the base (no feet) to accept a 3/4" piece of plywood, which is glued in as the structural bottom. To hide the plywood and side pocket screws (none visible on the long sides) I covered the interior base with sanded T&G cedar and the sides with 1/8" spanish cedar that I resawed myself (first resaw project).

    The moulding strip around the outside is 2 1/4" walnut from left over pieces, tacked in with old fashioned nails for asthetic purposes. The nails only catch 1/4" of the case, so the moulding is also held in from the back (1" gap below plywood) with wood screws. I didn't use any glue here. The top is close to 3/4" walnut with figured big leaf maple breadboard ends. I debated pinning them but I haven't done it before and didn't want to risk it at that late stage.

    Handles and lid stays (right term?) are from Lee Valley.

    Let me know what you think, and please point out any design flaws you see. I'm posting it for fun but also (primarily) to learn to do a better job, so I welcome any comments even if it's "hey, that wasn't a good design, it's going to fall apart with moisture change because xyz..."

    Thanks,
    Andy
    Attached Images Attached Images

  2. #2
    Great job Andy. Using those offcuts was real ingenuity; the kind that makes an excellent woodworker.

    FYI - Kreg sells walnut pocket screw plugs, you might try them next time.

  3. #3
    Join Date
    Apr 2007
    Location
    Phoenix, AZ
    Posts
    1,417
    Nice work, I love walnut/maple. What finish did you use?
    Thread on "How do I pickup/move XXX Saw?" http://www.sawmillcreek.org/showthread.php?p=597898

    Compilation of "Which Band Saw to buy?" threads http://www.sawmillcreek.org/showthre...028#post692028

  4. #4
    Join Date
    Oct 2006
    Location
    Windsor, ON
    Posts
    657
    Blog Entries
    3

    not predicting it will fall apart! hehe

    Hi Andy,
    Good looking project for only your second major!
    You did well, in using up those off-cuts, way to think...
    I know it's not a race, but you are ahead of me...
    I have walnut ambitions, but have not used it as yet.

    keep working on your skills,
    great work, what's next?
    you can't just rest on your laurels forever!
    Thanks for giving us a peek,
    Walt
    There are no shortcuts to anywhere worth going! WCC

    Be who you are and say what you feel, because those who mind don't matter and those who matter don't mind - Dr. Seuss

    Crohn's takes guts. WCC

  5. #5
    great looking chest.

  6. #6
    Join Date
    Mar 2003
    Location
    SE PA - Central Bucks County
    Posts
    65,875
    Nice work, Andy...clean lines and a unique look! Very nice, indeed.
    --

    The most expensive tool is the one you buy "cheaply" and often...

  7. #7
    Join Date
    Mar 2007
    Location
    Upstate NY
    Posts
    554

    thanks

    Thanks for the compliments everyone, I'm pretty happy with how it turned out.

    The finish is three coats of watco medium walnut on the base portion and three coats of watco natural on the top. I also coated the top inside portion, it has retained a little smell inside (figthing with the cedar right now) but I'm hoping it will fade over time.

    I plan to wax the top and inside top in the near future. I've considered using a low gloss poly on it, any thoughts as to this over wax? Right now it doubles as a coffee table, so I might gain some protection there.

  8. #8
    Join Date
    Dec 2006
    Location
    Atlanta , Ga.
    Posts
    3,970
    Very nice Andy, as I believe I pointed out at some truck-stop down the highway a piece wihle sipping coffee.

    Again... very nicely done.

    Sarge..

Similar Threads

  1. Maple and walnut toy chest
    By david kramer in forum Woodworking Projects
    Replies: 12
    Last Post: 05-08-2008, 7:29 PM
  2. Walnut blanket chest and chair done.
    By Rick de Roque in forum Woodworking Projects
    Replies: 26
    Last Post: 12-01-2007, 7:00 AM
  3. Finished Walnut chest of drawers.
    By Rick de Roque in forum General Woodworking and Power Tools
    Replies: 49
    Last Post: 09-11-2007, 4:08 PM
  4. Pennsylvania Blanket Chest...completed
    By Ron Mitchell in forum General Woodworking and Power Tools
    Replies: 11
    Last Post: 06-15-2006, 10:55 AM
  5. Tall Chest - Completed
    By Lars Thomas in forum General Woodworking and Power Tools
    Replies: 14
    Last Post: 06-08-2004, 3:26 PM

Posting Permissions

  • You may not post new threads
  • You may not post replies
  • You may not post attachments
  • You may not edit your posts
  •