Greetings & Salutations,
I just finished this Assembly table which is 4'x8'
made in a Torsion Box style using the David Marks
DIY Wood Works show as a pattern.
I made the core out of 1/2" MDF and the top and bottom
Skins are also 1/2" MDF with a 3/4" Oak band around the outside.
I beveled all the corners as I am great for hitting my hip on any
sharp edged table or cabinet that is around and I'm tired of
being bruised all the time. LOL
I put a coat of Seal-A-Cell on then a couple coats of Arm-R-Seal
and 3 coats of wax. I am really looking forward to using this
since I am starting 2 Cherry Cedar Chests for my next projects and
this table will sure come in handy.
I made the base so that the table height is exactly the same as
my table saw and will come in handy when cutting long pieces or
sheet stock.
DSCN14552008-03-26-143447_resize.JPG
Gene


 Reply With Quote
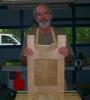


")