Page 1 of 3 123 LastLast
Results 1 to 15 of 37

Thread: Different way of doing the North Bridge

  1. #1
    Join Date
    Nov 2006
    Location
    Amarillo, Texas
    Posts
    151

    Different way of doing the North Bridge

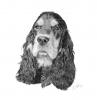
    Ok, even though my photo skills have not improved....this engraving I think is better than my mirror....whadya think?

    I painted a piece of glass with white paint....let her dry...
    engraved photo (after photograved)...spray painted black and wha-la.

    Also no banding in this one. My rep. said it is caused by a cold tube. I needed to warm it up by rastering a box out of focus (optional, this way I do not waste materials) for about 15 minutes. I did an it worked. But it could be because I ran this at 53 speed/100 power. The mirror I did earlier I ran at 23 speed/100 power twice. I am not totally convinced. I will try it again later.
    Attached Images Attached Images
    Equipment - LaserPro 30w, Explorer II, Camaster Stinger III,
    Software - CorelDraw X3, Aspire 8.02

  2. #2
    Join Date
    Oct 2005
    Location
    Moreton, Wirral, UK
    Posts
    3,287
    Now that, is good!
    Epilog 45w Helix X3/X5 Corel Microflame Generator (flame polisher) Heat Bender


  3. #3
    Very good! How does it look to you - up close and personal? Your picture looks like you may have found a marketable process.

    Do you think using other colors like beige and sepia would produce an antique look?
    Last edited by Mike Null; 10-15-2007 at 6:35 AM. Reason: add'l comment
    Mike Null

    St. Louis Laser, Inc.

    Trotec Speedy 300, 80 watt
    Gravograph IS400
    Woodworking shop CLTT and Laser Sublimation
    Dye Sublimation
    CorelDraw X5, X7

  4. #4

    Nice Job!

    Scott,

    I reiterate what Mike said! Your North Bridge would look really nice framed up, too! I'm going to ask a silly question but I'm assuming you painted the back of the glass white, reverse engraved, and then painted the back black. Right!?! Just wanted to verify what may be the obvious for others!

    Thanks!

    Jim

  5. Do you just engrave through the paint? or do you also engrave the glass?

  6. #6
    That is excellent.

  7. #7
    Join Date
    Nov 2006
    Location
    Amarillo, Texas
    Posts
    151
    Thanks everyone. I did paint the back white--engraved through the white paint--painted it black. I think it will look good in a variety of colors. I plan to try different colors.

    Now has anyone been able to prove what my rep said--warming up laser?
    Equipment - LaserPro 30w, Explorer II, Camaster Stinger III,
    Software - CorelDraw X3, Aspire 8.02

  8. #8

    Banding & Shifting, according to what I've heard

    Is due to alignment issues. Have you tried bottom-up engraving, it really helped me with larger letters. Since we had the tube replaced, we've had no issues with slow to start burns.
    good luck
    Barb
    epilog legend ext 60w

  9. #9
    Join Date
    Nov 2006
    Location
    Amarillo, Texas
    Posts
    151
    Quote Originally Posted by Barb Macdonald View Post
    Is due to alignment issues. Have you tried bottom-up engraving, it really helped me with larger letters. Since we had the tube replaced, we've had no issues with slow to start burns.
    good luck
    Barb
    epilog legend ext 60w
    Both were done bottom up. I have not has any issues with any other material. I am still not convinced it has to warm up. It could just be my settings. I did this one at 53/100/250 and the mirror at 23/100/250.
    Equipment - LaserPro 30w, Explorer II, Camaster Stinger III,
    Software - CorelDraw X3, Aspire 8.02

  10. Scott,

    The photo is absolutely beautiful. You did great! Congratulations!
    God Bless,
    James & Zelma (Psalm 18:2)
    "Inscriptions Of The Heart"
    Texas
    ~A person is only as good as their word~

  11. #11
    Join Date
    May 2007
    Location
    Lake Tapawingo, a suburb of Blue Springs, a suburb of Kansas City, MO. The Kansas City you know is in Missouri.
    Posts
    338

    Question

    What did you paint the glass with? It is really hard to get "normal" paint to bond to the surface of glass long term. Tends to flake off with expansion of glass. We have had reasonably good success by using etched glass to paint. It is available from most glass shops, though rather pricey compared to regular glass. Ask for satin etch. Have not tried engraving paint over satin etch. Will give it a go first chance.

  12. #12
    Join Date
    Nov 2006
    Location
    Amarillo, Texas
    Posts
    151
    I used Krylon. I plan to seal it with something to avoid the flaking. Not sure what yet.
    Equipment - LaserPro 30w, Explorer II, Camaster Stinger III,
    Software - CorelDraw X3, Aspire 8.02

  13. #13
    How about using that technique in perspex, using different colours to vary the burn depth slightly- might give an awesome 3D-ish effect.

    Incidentally, my banding problems were probably due to alignment problems. When I replaced the laser after repairing it, the beam was massively misaligned (to the extent that the beam missed the exit hole on the head....luckily I noticed).

  14. #14
    Join Date
    Nov 2006
    Location
    Amarillo, Texas
    Posts
    151
    Quote Originally Posted by Darren Null View Post
    How about using that technique in perspex, using different colours to vary the burn depth slightly- might give an awesome 3D-ish effect.

    Incidentally, my banding problems were probably due to alignment problems. When I replaced the laser after repairing it, the beam was massively misaligned (to the extent that the beam missed the exit hole on the head....luckily I noticed).
    Darren, I am not sure how that would work on varying the depth because I can't get any depth in glass unless I sandcarve it.
    Equipment - LaserPro 30w, Explorer II, Camaster Stinger III,
    Software - CorelDraw X3, Aspire 8.02

  15. #15
    Same technique. Acrylic material.

Posting Permissions

  • You may not post new threads
  • You may not post replies
  • You may not post attachments
  • You may not edit your posts
  •