Originally Posted by
Alex Berkovsky

I am not sure if copying and pasting from another forum is permitted, but I do know that linking to another forum is against the TOS. I would like to credit the poster, but not sure what is the proper way of doing so. Moderator's help is appreciated.
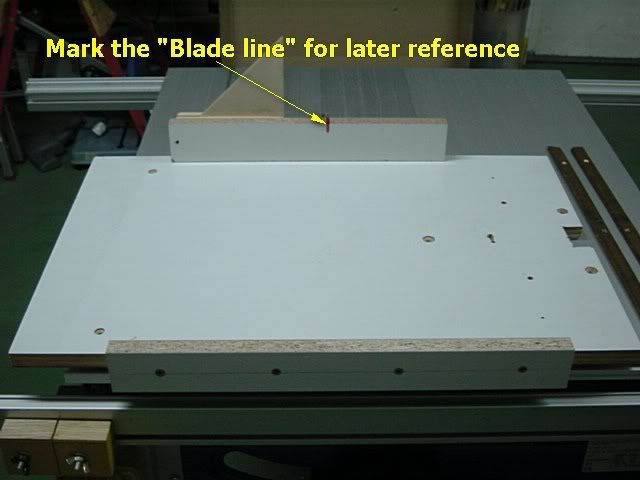
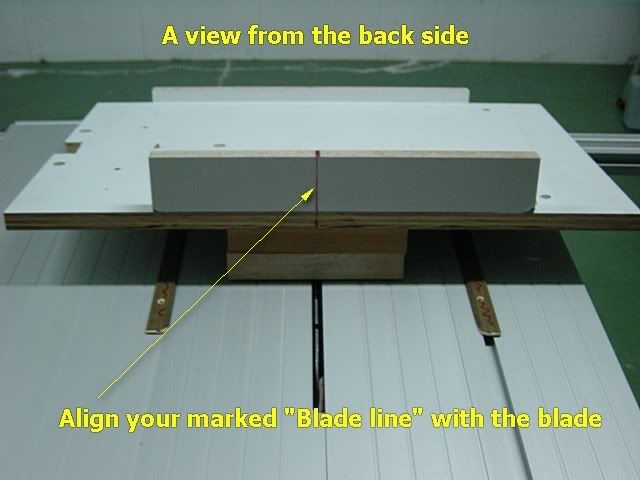
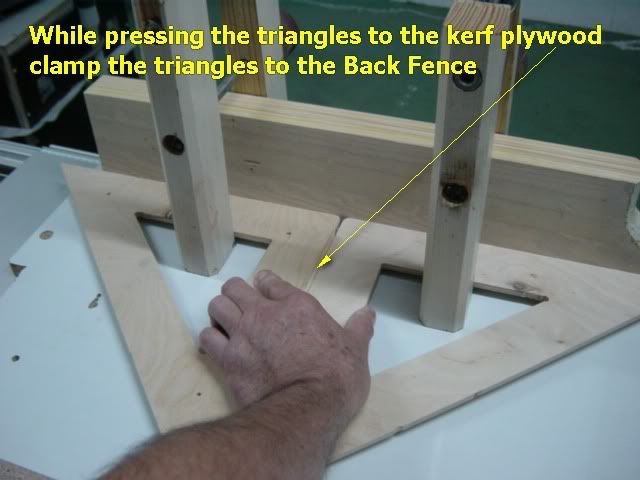
Here's how to use the table saw itself to automatically align the carriage to the highest accuracy while maintaining the perfect amount of clearance of the runners in the slots to allow smooth travel.
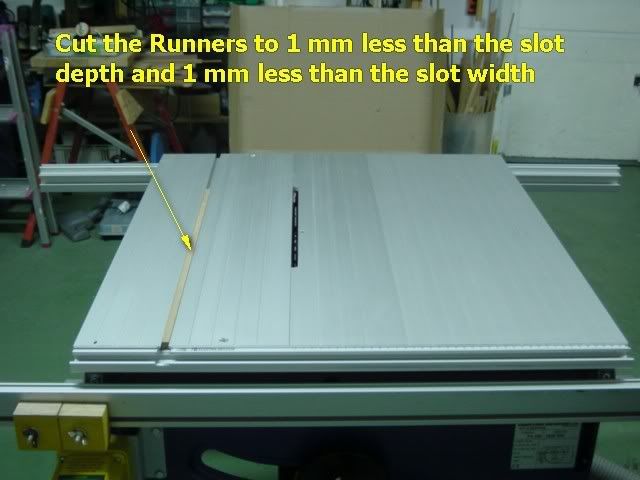
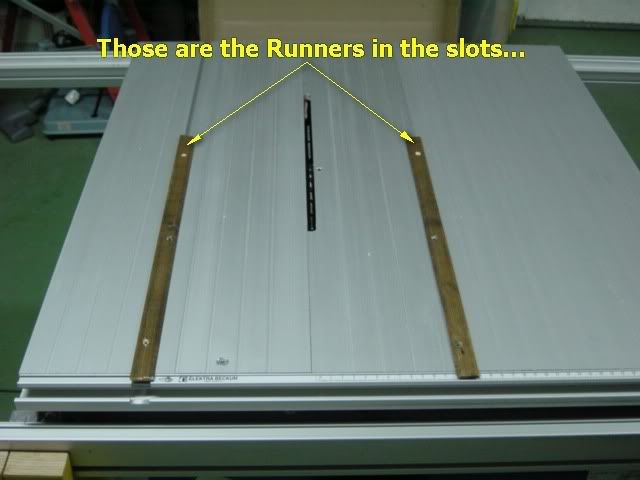
The trick is that the runners should NOT fill the width of the slots. Make them out of hardwood (yes wood!)and make them slightly more narrow than the slots. They will run against the inner walls of the miter slots against which they will press firmly. They will not touch the outer walls of the slots. It is infinitely easier to achieve machine accuracy to two surfaces than to all four surfaces (inner and outer walls of both slots). Any swelling or shrinking of the runners will be inconsequential.
The technique is very easy. The description below may sound complex, but once you make one like this, you will realize that it is ridiculously fast and easy to make a perfectly-fitting sled, and you'll want to make more for specialized cutting. Read the instructions a few times until you can picture the process.
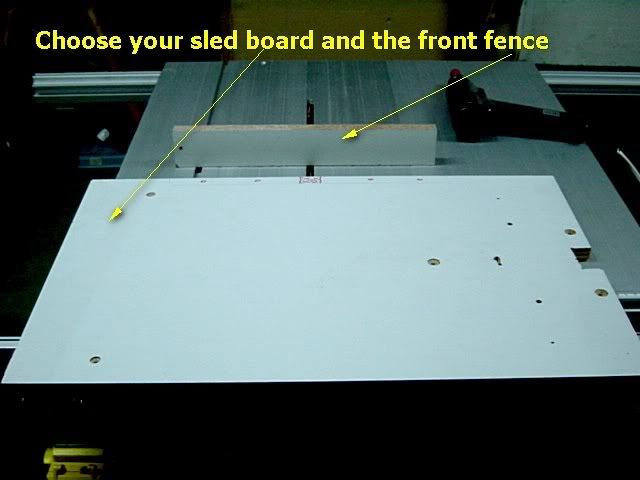
Picture the sled as 2 separate halves, left and right. Use plywood or MDF for the sled body halves. Prepare 2 x 4 stock or hardwood, planed square for the front and rear fences.
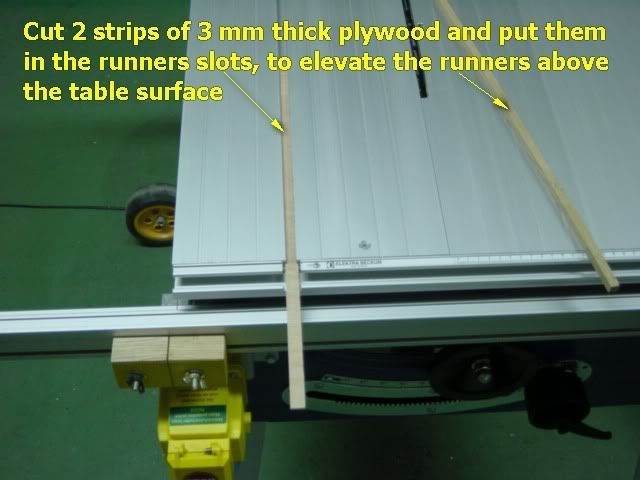
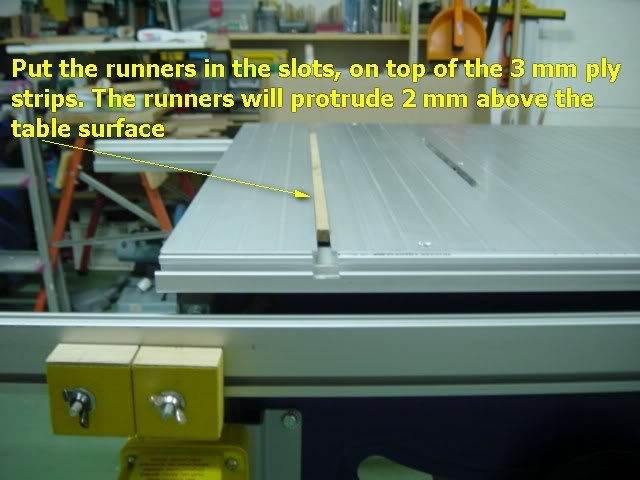
Mill the hardwood runners and attach one each to the underside of each sled half. Work carefully to keep each runner reasonably perpendicular to the sled. Absolute accuracy is not essential at this step. I route a shallow slot in the underside of the sled body and glue the runners in there. Or you can screw and glue them.
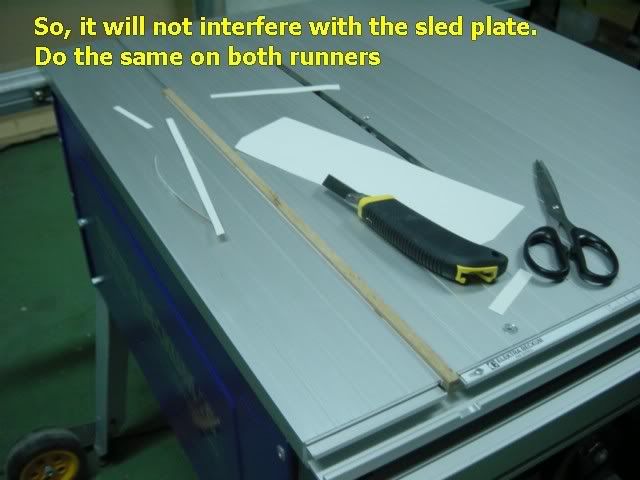
THE RUNNERS MUST BE POSITIONED UNDER THEIR SLED HALVES, SO THAT WHEN THEY ARE IN THEIR MITER SLOTS, THE LEFT-HALF SLED PIECE PROTRUDES TO THE RIGHT OF THE BLADE BY ABOUT AN INCH, AND THE RIGHT-HAND SLED PIECE PROTRUDES TO THE LEFT OF THE BLADE BY ABOUT AN INCH.
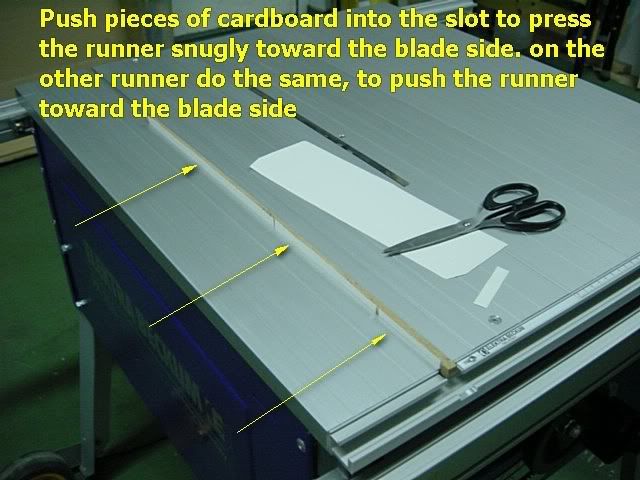
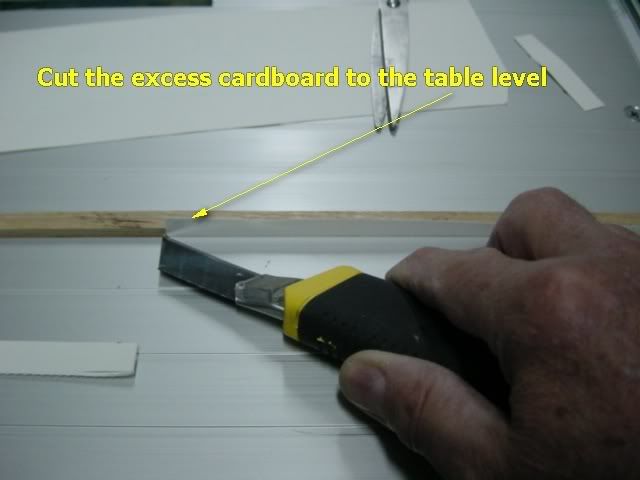
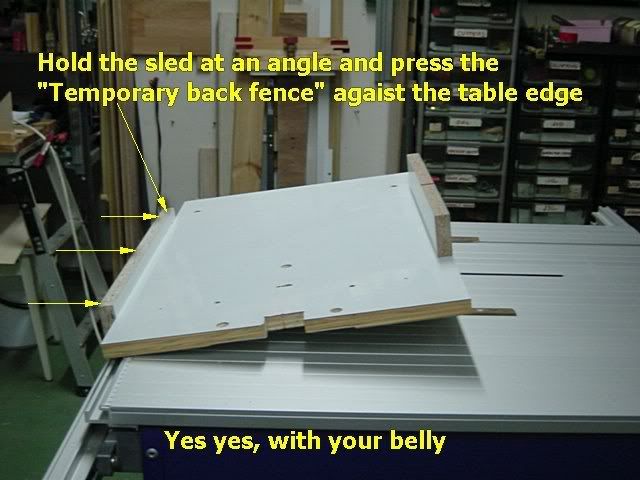
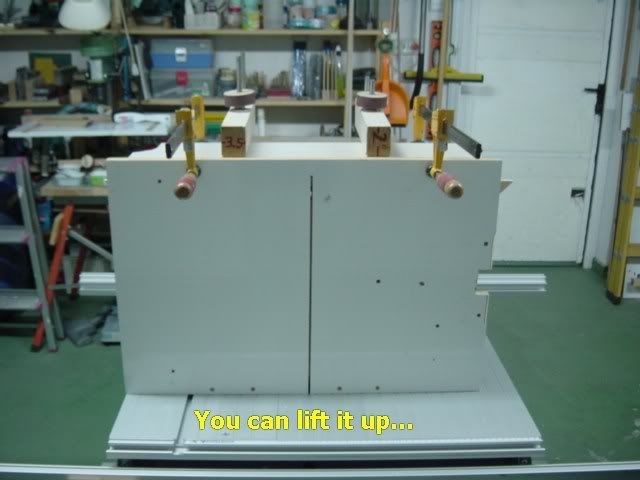
When the glue has set, place the left-hand sled piece in its miter slot (it will be a sloppy fit). Turn on the saw, and, WHILE PUSHING THE SLED PIECE FIRMLY TO THE RIGHT AGAINST THE MITER SLOT, CUT OFF THE EXCESS OVERHANG OF THE SLED BODY.
Put the right hand sled piece in the right miter slot, and, WHILE PUSHING IT FIRMLY TO THE LEFT AGAINST THE MITER SLOT, CUT OFF THE EXCESS OVERHANG OF THE SLED BODY.
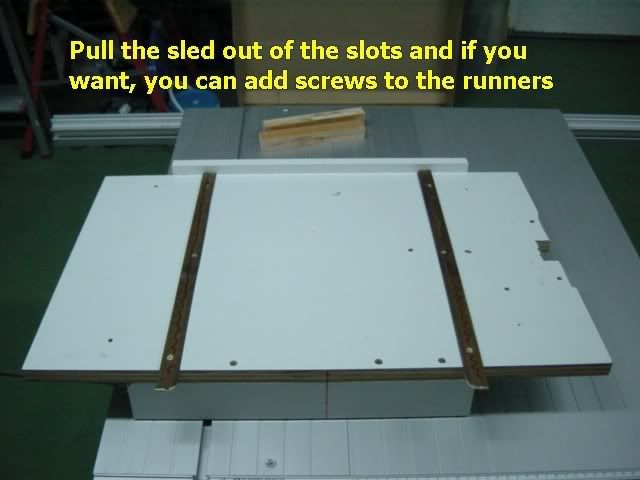
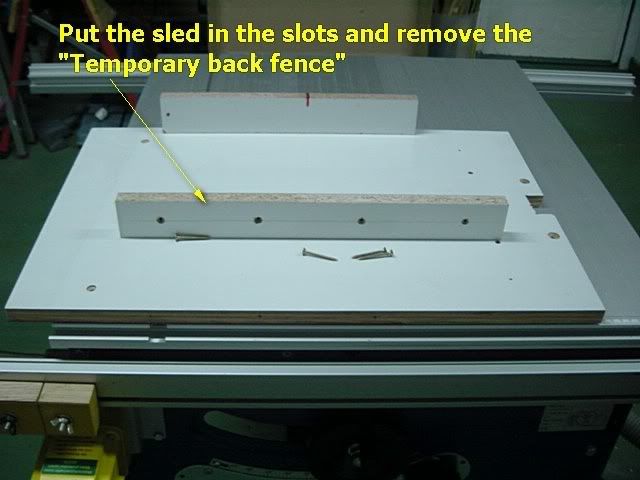
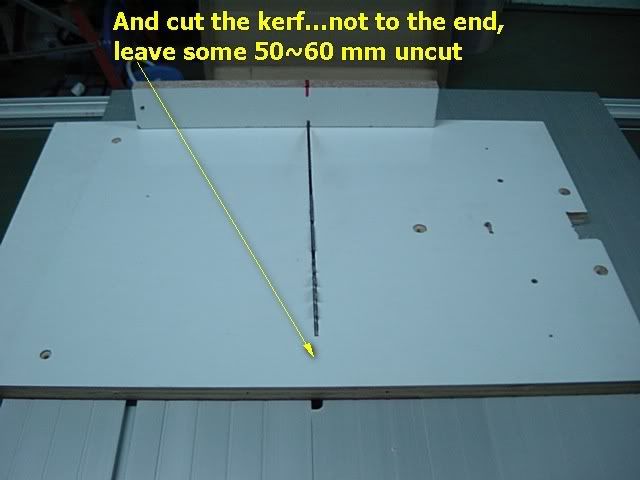
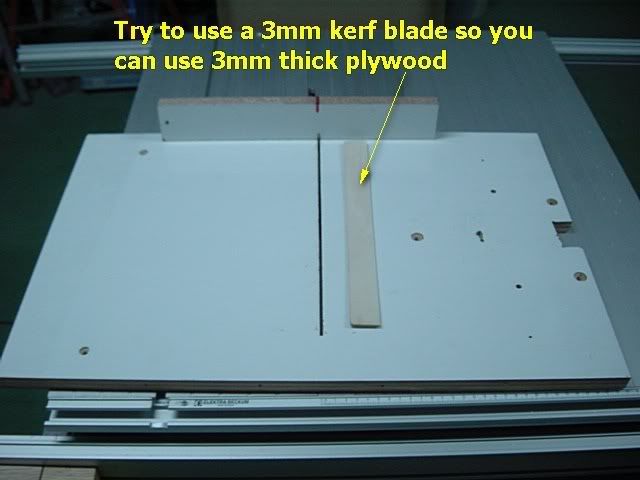
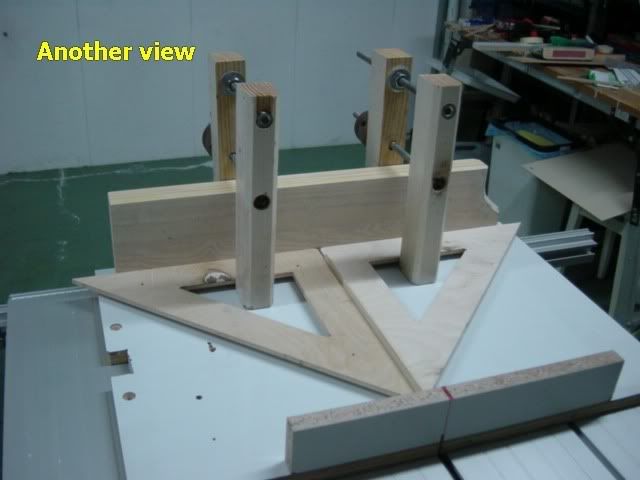
You now have 2 halves, perfectly matched to the saw and the blade, which will now sit in their respective slots so that there is a zero-clearance blade "kerf."
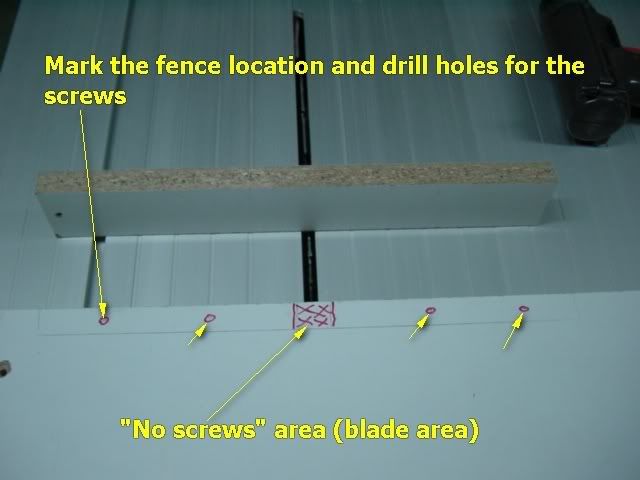
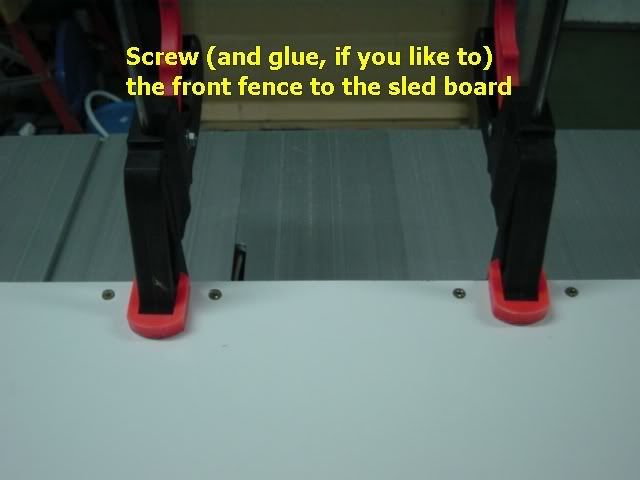
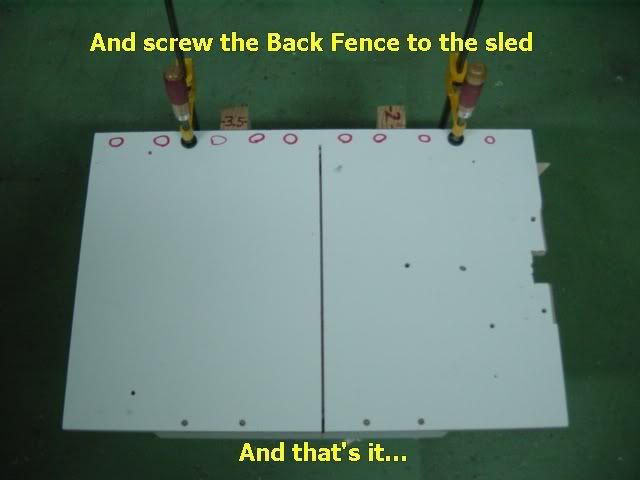
Attach the front fence (the one furthest from you) and rear fence to the left sled piece, ONLY. Glue and screw (countersink) the FRONT fence, only. Attach the rear fence with screws (countersink), DO NOT GLUE. The rear fence gets adjusted later to achieve squareness to the blade.
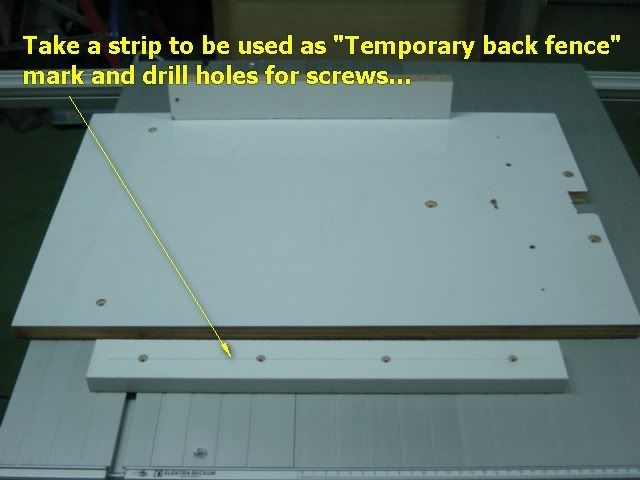
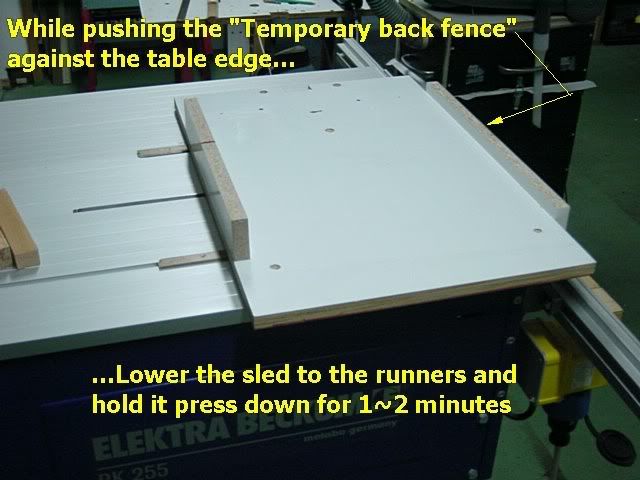
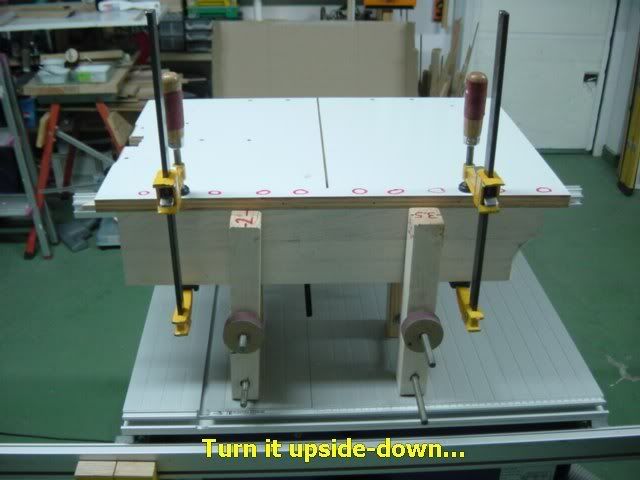
Place both sled halves in their slots. The right ends of the fences will sit loosely over the right sled piece. Using 2 long clamps, bring the 2 sled halves toward each other. Press on the OUTER edges of the beds, near, but not on the ends of the fences. Very little force is needed. Too much and the rails will bind against the inner walls of their respective slots. Too little and the sled will slide very easily and the rails will be sloppy in their slots. Just enough and the sled will slide just right, with no play at all.
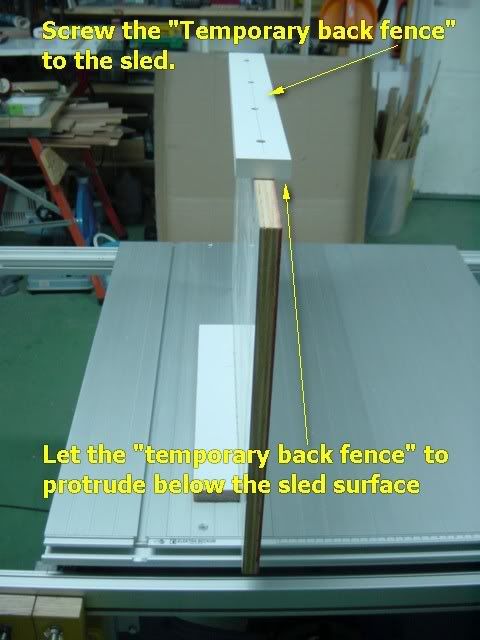
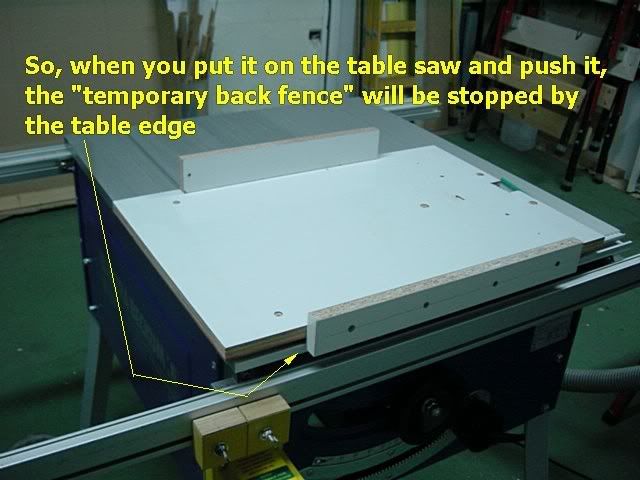
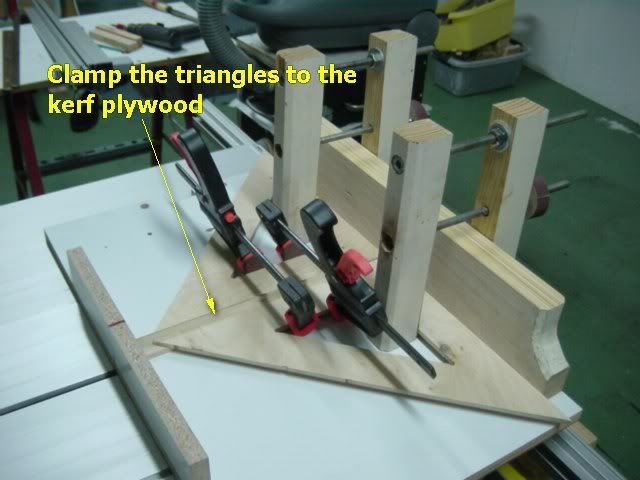
Clamp the REAR (near) fence to the right sled piece with C clamps. Drill, countersink and screw the fence in place (no glue). It's easiest to do all this leaving the assembly on the saw table. Take off the clamps.
Squeeze some glue under the FRONT (far) fence where it overlays the right sled piece and clamp the fence down to the sled with C clamps. Leave the whole assembly in place until the glue sets hard. Remove the sled, drill, countersink and screw the fence.
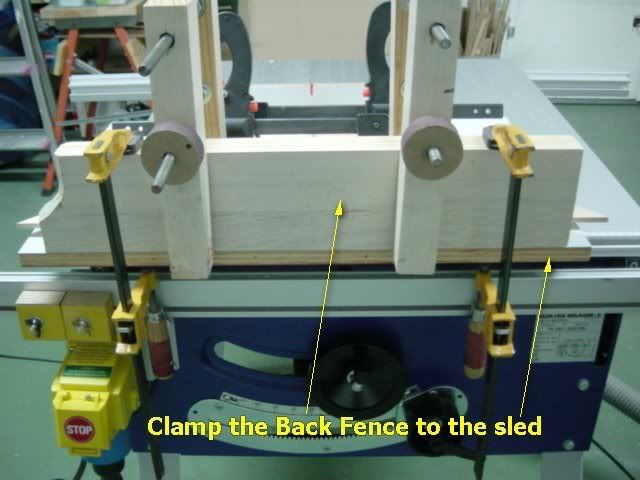
The sled is now ready except for squaring the rear fence. Loosen the screws holding it a little, squeeze some white or yellow glue under and tighten the screws, not quite firm. Align the fence to the saw "kerf" with a large square known to be true. Position the fence with a pipe clamp pulling either the right or left end, as appropriate toward the corresponding front corner edge of the bed (don't pull on the front fence). There will be just enough "give" in the screwed and glued assembly for a few minutes. Then tighten the screws all the way. Don't distort the relationship of the bed to the glued front fence while positioning the rear fence.
Squaring up the fence using a self-aligning method, much more accurate than relying on a square:
This is a general machine-shop technique. With a little imagination, the general method can be used to square up any device including jointer fences, and all manner of saws. The method assumes the fence is straight along its length.
It's twice as accurate as using a square because it magnifies the error of an out-of-square cut by a factor of 2, making any that condition very apparent. It also eliminates the error caused by using a square that's not (very common).
Start with 2 pieces of thin stock about 1/4" x 12" x 12". Plywood, paneling, masonite, etc.
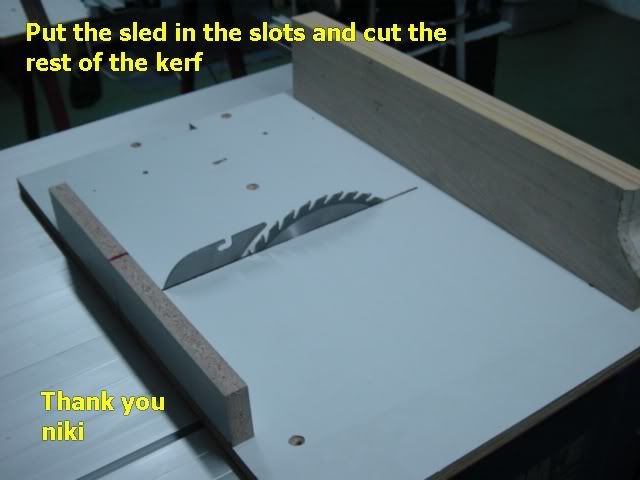
First, align the rear fence to the sled's saw kerf as accurately as you are capable, using whatever method you have.
Trim a fresh, straight edge on each piece. You can use the unadjusted sled to do this. Use a fine-tooth carbide blade that leaves as little tear out or roughness as possible. This is the "trim cut."
Align the 2 pieces, one on top of the other with their trim cut edges firmly against the rear fence, in position to simultaneously trim a new cut from the right edge of the stack. Hold the stack firmly against the fence and firmly down on the sled as you make the cut, so that the 2 pieces do not move out of alignment to each other during the cut. This is the "test cut."
Turn the saw off!
Pull the sled back toward you. Pick up the top piece by its left edge and flip it over as though opening the back cover of a book, so that the 2 test cut edges are together and the top piece lies to the right of the bottom piece, both trim cut edges still against the fence.
The test cut has 3 possible conditions: (there are no other possibilities)
1. It is perfectly square to the trim edge.
2. It is less than 90 degrees.
3. It is more than 90 degrees.
If the test cut was perfectly square, the 2 pieces will align all along their test cut edges while their trim cut edges are held firm to the fence. It will be very easy to see a deviation of even a tiny fraction of a degree from square, in which case a gap will be obvious at one end or the other of the test cut.
In fact, a truly square condition will be so obvious as to be impossible to miss.
If a gap exists, adjust the fence and cut again until the square test condition is achieved.
Once the square condition is achieved, you will have 2 accurate square references. You can test any machine square you have in the shop. Use the "bookmatch technique" to magnify any potential error in the test square. Lay a refererence square under your left hand, trim edge against the fence, and the square to be tested under your right hand with its base against the fence and its blade against the reference piece's test cut edge.
If you want, you can increase the accuracy of the whole method by a factor of 3 or 4. Rotate the stack of thin stock to make additional cuts, before unfolding, holding the stack tightly together with each rotation, keeping them aligned. It tends to get complicated. Besides it's really over kill.
Using this technique, I have aligned fences so that I can cut parquet pieces square to a tolerance which allows a tightly fitting pattern, consisting of 1"x 2" pieces to cover an area of many square feet, without the slightest gap beginning to occur.


 Reply With Quote