Jim,
As usual, another great project from you. With a lot more practice, I hope to one day be as good. One question though... who's that bearded guy in the pictures doing all the work? Is Paul Giamatti working part-time for you?
Keith


 Member
Jim,
As usual, another great project from you. With a lot more practice, I hope to one day be as good. One question though... who's that bearded guy in the pictures doing all the work? Is Paul Giamatti working part-time for you?
Keith
 Member
Jim, great job so far. You got a lot done. Do you have someone snaping the shots for you or are they tripod/timer? Regardless, thanks for letting us in on this one. I'm sure it'll be a winner.
 [OP]
Moderator
[OP]
Moderator
Jason, I use the timer on my D70 to take all the "action shots". One of the results of taking the pictures is that I have to stop and "smell the roses" as I work. On several occasions, it's resulted in catching a problem before I did something stupid. But not always...
--
The most expensive tool is the one you buy "cheaply" and often...
 Member
You're a woodworker, you're handy around the yard, you've got a home office for work, and you've got a construction project about to start...Originally Posted by Jim Becker
To me this sounds like a dangerous combination. I think it would be far to easy to be out watching or helping the building along, and not hiding in the office getting work done!
"It's Not About You."
Jim,
Thanks for the vanity step by step photos. It is very inspiring to us novice wood workers. I to am thinking of building a double sink vanity for our new addition. Please post the rest of your project when completed and also you larger vanity. It is a great help and motivater in veiwing the way someone else does it from scratch, especialy from a napkin.
P.S. I like your MM combo unit. When is the slider coming??
Regards,
David
 Member
Hey Jim:
COOL....man!!!! as for your 8.5x11 "canvas" in the first photo.........there's a "drawering" and there's a "plan"....... bet most of us go with the plan.
Excellent learning tool........what were you thinking leaving the good side up???
Looking forward to the next installation.
Neil
 Member
Glad the addition is really going forward. I know how you feel about bleeding money before any progress you can see has happened. Hope all goes well and dirt starts getting turned over very soon.
Thanks for the tutorial. Looking forward to the "rest of the story".
I have a question about that drawing you made. What version of "Sketch Up" was used for that?
Looks like you will be getting some "forced" shop time. That can't be all bad.
Karl
Creeker Visits. They're the best.
[OP]
Moderator
That was the yellow number two version of "Scketch Up"...red would have been too much like, umm...well...you know... ;-) ...a color I don't prefer to have in the shop too much...
--
The most expensive tool is the one you buy "cheaply" and often...
[OP]
Moderator
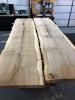
Getting back to work on this project, it was time to prepare stock for the aprons and door rails/stiles. When I constructed the sides of the cabinet from the left-over cherry veneer MDF core sheet stock, I chose to use the straight/rift grain side for "show". For these apron pieces and door components, I wanted the same and luckily found a nice board in the stack that was perfect for the job. Since all of these components will come from one board, (and I'm matching things side-by-side and up 'n down), the end result should be a unified look. (The panels and wide top apron containing two drawers will be more figured stock...more on that later)
This post will be somewhat boring for experienced woodworkers, but it's necessary to tell the story...so here are five shots of material preparation.
The board I was working with had been skim-planed after it was acquired. So the first thing was to rip it down in rough widths so I could lay out the components with chalk.
vanity-25.jpg
Next, it was off to the CMS to cut each component to rough length...leaving a couple extra inches for good measure.
vanity-26.jpg
Each component was then face jointed flat...it's preferable to do this when the material has been made shorter. In fact, one pass was all that was necessary.
vanity-23.jpg
Then one edge was made straight and perpendicular to the face that was previously flattened.
vanity-24.jpg
Lastly, each component was run through the thickness planer to bring it to well...final thickness, alternating sides to insure that equal amounts of stock are removed to avoid moisture differences as best as possible.
vanity-27.jpg
Last edited by Jim Becker; 11-19-2006 at 9:33 PM.
--
The most expensive tool is the one you buy "cheaply" and often...
[OP]
Moderator
Once the stock was prepared, it was time to get some components to final length and fitted. The first piece is the bottom apron which will have a nice arch to lighten the look of the cabinet.
The first step is to lay out the arc using a flexible piece of wood.
vanity-28.jpg
Said curve is then cut at the bandsaw "to the line"...
vanity-29.jpg
And then the curve is sanded smooth at the OSS.
vanity-30.jpg
Lastly, pocket screw holes are milled into the ends of the piece...I'm using a lot more pocket screw assembly on this piece than I've done before and really like it. In fact, as you'll see before today's pictures are finished, this method actually is allowing me to do a "strong" dry fit which in turn makes sizing the extra support components and back a snap...just measure directly off the workpiece!
vanity-31.jpg
The lateral rail that fits into the notches about 8 inches below the top front of the carcass sides needed to be notched to interlock with the corner posts. That was taken care of with one quick cut at the table saw and a finishing cut (and refinement with a sharp chisel) at the bench.
vanity-32.jpg
Last edited by Jim Becker; 11-19-2006 at 9:41 PM.
--
The most expensive tool is the one you buy "cheaply" and often...
[OP]
Moderator
Once those two front lateral components were prepared, it was time to start the dry fit on the bench. I clamped a couple of assembly squares on the end of the bench to support the left side, installed the bottom apron and upper lateral rail (raised off the bench 1/8" for the required reveal) and then added the right side, using two more assembly squares to provide support as I worked. No glue has been used at this point...just pocket screws (not cranked down hard) and friction fit on the upper/mid rail. The sides were shimmed vertical to account for the setback of the side panels/faux rails and the corner posts.
vanity-33.jpg
At that point, I could measure directly off the piece (and confirm with simple math) the lengths of the top and bottom back rails and 1/4" thick cabinet back...all shown installed here. Again, pocket screws hold the rails in place.
vanity-34.jpg
Once I checked for square, I took a final measurement for the 3/4" plywood cabinet bottom and started out by cutting the stock to length at the Festool MFT...'never thought I love that thing as much as I do!
vanity-35.jpg
The bottom panel was then ripped to width at the table saw...and brought back for a slight narrowing after the initial dry fit attempt proved "too tight".
vanity-36.jpg
I had also chosen and prepared a more figured board to be used for the wide top apron...the intention being to have continuous grain across the face, including the inset drawer fronts. With the carcass on the bench, it was easy to make the necessary measurments directly off the workpiece to size this to exact width and determine the rip point to take off the top piece that will be stationary above the drawers. Then, the drawer faces were cross-cut out, leaving a center piece to be reassembled to the top rail with a nearly invivisble glue joint.
vanity-37.jpg
Last edited by Jim Becker; 11-19-2006 at 10:14 PM.
--
The most expensive tool is the one you buy "cheaply" and often...
[OP]
Moderator
The results of this weekend's few hours in the shop are pleasing. The dry fit worked out great and since I can disassemble everything, it gives me the chance to do a lot of final sanding and even pre-finish components if I choose to do so. I'll think about the latter between now and when I get back on this project...I have a few days of joyful deck demolition to bide my time!
Here's the dry assembled carcass without the drawer fronts:
vanity-38.jpg
And with the drawer fronts:
vanity-39.jpg
And for anyone wondering about how I can fit such wide drawers in a vanity...this one will have an above-the-counter bowl that only needs space for plumbing to move vertically into the cabinet. Hence, the narrow center stile between the 13" wide drawers.
Last edited by Jim Becker; 11-19-2006 at 10:26 PM.
--
The most expensive tool is the one you buy "cheaply" and often...
 Member
j,
Beautimus!!! I really like the arched lower rail and the leg tapers. They give the piece a very elegant look. Nice job on the pics too!!! LOML really likes those "on the couter sinks" but I still say they look like somebody forgot to put the dishes away.
t
[SIGPIC][/SIGPIC]
 Member
Very nice work. It must be nice to get to the skill level that you can accomplish so much in a short amount of time. I have not gotten there yet. Thanks for posting pictures. This way I can live vicariously through other creekers until my kids are old enough that I can get a few more hours in the shop. Not that I am complaining. My kids are my life.
How about instead of a vanity, you hang a router in the top of that thing!
Good work!!!
I just want to live happily ever after,
every now and then.
-- Jimmy Buffett
 Contributor
Nice job and thanks for the pics...Enjoying seeing your progress on the project.
Jerry
 Posting Permissions

 Reply With Quote