
In the previous post, I mentioned I just was not happy with the edge of the top. So I fashioned a little jig to use at the spindle sander and carefully worked the edge smooth and even...the way it should have been originally. (I failed to really pay attention to this area and it's critical since it will be so visible)
cs-15.jpg
Again, I sanded back the dye on the top and re-applied. Wow...now this is what I was looking for! (Please note that this picture does not do the piece justice...hopefully, the pictures after the oil and shellac will impart a better impression)
cs-16.jpg
While that was drying, I took the piece that will support the top and drilled the necessary countersunk screw holes. The two outer ones were re-bored with a much larger hole to allow for seasonal wood movement
cs-17.jpg
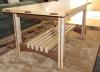
Next, I worked the support piece onto the base so I could trim back the tenon. The original design of this table had the support piece at 3/4" thick with tapered ends, but I "decided" to make it 1/2" thick. In other works, I screwed up when I was milling the stock.No matter. 1/2" is plenty thick for the job!
cs-18.jpg
And the final picture for today is the first coat of shellac going on the base. This is really going to be a beautiful table...enough so that the mistakes will "disappear", as it were...
cs-19.jpg
I did get the top oiled before heading in to cook dinner and it's really jumpin' with the combination of the warm dye and penetrating oil. It really shimmers. Next weekend, I should be able to complete this project...which has taken too long, despite the fact that the actual shop time was not all that much. It's a great project and one of my favorites to-date.


 Reply With Quote


 Creeker Visits. They're the best.