Results 1 to 9 of 9

Thread: Arts & crafts pole lamp from quarter sawn oak

  1. #1
    Join Date
    Jan 2009
    Location
    Indianapolis
    Posts
    1,615

    Arts & crafts pole lamp from quarter sawn oak

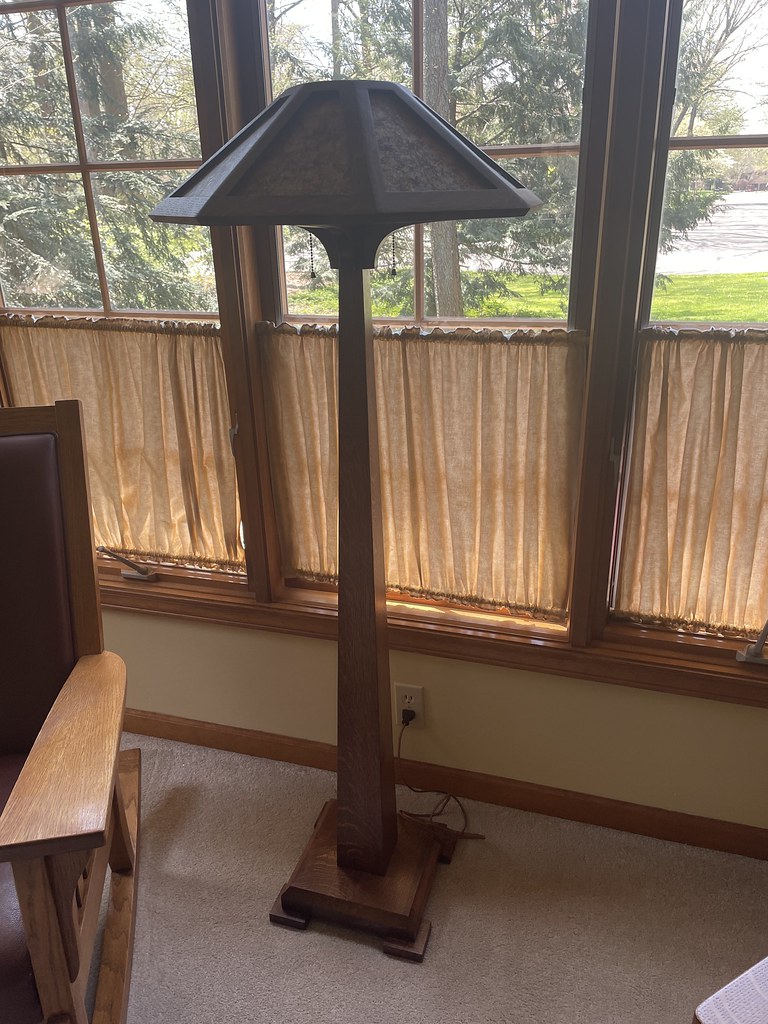
    Starting to thinking about making a pole lamp out of quarter sawn oak and thinking about two different ways to do it so I get quarter sawn faces on all four sides.

    1. Use lock miter bit and join four sides this way.
    2. Make four sides and veneer two sides like I would on a leg in furniture.

    I've work with lock miter bits before so have some experience, but concerned about the corners holding up over time with wear and tear. I feel like the square upright with a hollow center and veneer would hole up better over time.

    Appreciate any input.

    Brian
    Brian

  2. #2
    Join Date
    Feb 2003
    Location
    McKean, PA
    Posts
    15,662
    Blog Entries
    1
    If you glue 4 triangular pieces together you should get the look you want. I don't think the corners would be prone to dings with the design you are planning than if you used solid wood. The advantage of gluing up four pieces is you can leave a wire way up the center of your pole.

    I made three of these lamps by gluing up two pieces of oak with grooves up the center line. I didn't care for the sharp corners so I chamfered all the edges of the various pieces. You can make the chamfer as small or as large as you like.
    lamp.jpg
    Lee Schierer
    USNA '71
    Go Navy!

    My advice, comments and suggestions are free, but it costs money to run the site. If you found something of value here please give a little something back by becoming a contributor! Please Contribute

  3. #3
    Join Date
    Jan 2009
    Location
    Indianapolis
    Posts
    1,615
    Quote Originally Posted by Lee Schierer View Post
    If you glue 4 triangular pieces together you should get the look you want. I don't think the corners would be prone to dings with the design you are planning than if you used solid wood. The advantage of gluing up four pieces is you can leave a wire way up the center of your pole.

    I made three of these lamps by gluing up two pieces of oak with grooves up the center line. I didn't care for the sharp corners so I chamfered all the edges of the various pieces. You can make the chamfer as small or as large as you like.
    lamp.jpg
    Lee, thanks for the feedback. Brian
    Brian

  4. #4
    Join Date
    Jan 2007
    Location
    Michiana
    Posts
    3,080
    Quote Originally Posted by Lee Schierer View Post
    If you glue 4 triangular pieces together you should get the look you want. I don't think the corners would be prone to dings with the design you are planning than if you used solid wood. The advantage of gluing up four pieces is you can leave a wire way up the center of your pole.

    I made three of these lamps by gluing up two pieces of oak with grooves up the center line. I didn't care for the sharp corners so I chamfered all the edges of the various pieces. You can make the chamfer as small or as large as you like.
    lamp.jpg
    That's the way this one is built.


    Attached Images Attached Images
    Sharp solves all manner of problems.

  5. #5
    Join Date
    Jan 2009
    Location
    Indianapolis
    Posts
    1,615
    Rob, thanks, so you did use lock miter joints, just 45 degree joint? Did you use a threaded rod through the center for the wiring and lamp hardware on top? thanks. brian
    Brian

  6. #6
    Join Date
    Jan 2007
    Location
    Michiana
    Posts
    3,080
    Quote Originally Posted by Brian Runau View Post
    Rob, thanks, so you did use lock miter joints, just 45 degree joint? Did you use a threaded rod through the center for the wiring and lamp hardware on top? thanks. brian
    I didn't make the lamp, but discussed the process with the artisan that did (https://www.ragsdalehomefurnishings.com/). I recall they were just 45 degree miters. I've had them over 20 years. At the time he was still making them in a garage shop.

    I understand a threaded tube runs through the center as a wireway and hardware anchor. I have a couple of his Table Lamps too. They are constructed similarly. Beautiful work.

    Sharp solves all manner of problems.

  7. #7
    Join Date
    Nov 2022
    Location
    Northern Colorado
    Posts
    1,153
    Quote Originally Posted by Brian Runau View Post
    Rob, thanks, so you did use lock miter joints, just 45 degree joint? Did you use a threaded rod through the center for the wiring and lamp hardware on top? thanks. brian
    I'm not sure why you'd need a locking miter for that. This is long grain adhesion...it will be insanely strong, even for a short lamp.

  8. #8
    Join Date
    Jan 2009
    Location
    Indianapolis
    Posts
    1,615
    Quote Originally Posted by Michael Burnside View Post
    I'm not sure why you'd need a locking miter for that. This is long grain adhesion...it will be insanely strong, even for a short lamp.
    I felt like the lock miter would give me greater precision on the corners. Thanks brian
    Brian

  9. #9
    Join Date
    Nov 2022
    Location
    Northern Colorado
    Posts
    1,153
    I guess it depends on how comfortable you feel making standard miters on furniture. Set your saw at 44.9 degrees and cut the miter. Glue together and use blue tape to hold the seams. I don't think you need anything else. Sometimes I use a domino or two to help, particularly on thicker waterfall miters on 6 or 8 quarter material, but just a little tape is all you really need.

Posting Permissions

  • You may not post new threads
  • You may not post replies
  • You may not post attachments
  • You may not edit your posts
  •