Results 1 to 15 of 15

Thread: Koi box

  1. #1
    Join Date
    Sep 2008
    Location
    N. Idaho
    Posts
    1,621

    Koi box

    Hi all,

    My BIL is a big fan of koi fish and has a pond in his backyard that's the center of his landscaping. So I took that as inspiration to try a marquetry box with a fish for the first time. I had made two of boxes without the lids last fall, one of which became an anniversary gift for my wife

    IMG_7704.jpg

    Some build notes here: https://sawmillcreek.org/showthread....210&highlight=

    For this design, I made a collage of photos from the interwebs using a koi and a lotus flower that I traced using an ipad and planned on a radial pattern for the background of some sort of fiddle back or curly wood.

    IMG_0087.jpg

    The project would require more pieces than any other piece I've done to date, so spent a weekend wrangling my shop-sawn veneers into a much better storage system and cutting more veneers.

    IMG_7898.jpgIMG_7905.jpg

    I also decided to switch up my approach to the double-bevel marquetry given the detail involved. With DB marquetry, pieces can be cut that 'fall into' the background and the design proceeds from the outside-in or each new piece can be added by cutting with the background on top and adding pieces to the edge of a central design. Each method sounds more complicated than it is after a couple tries, but switching from one to other was a bit like my time in Australia this summer driving and walking on sidewalks---had to pay a lot of attention to make sure I was going the right way!

    Here are the first few pieces of the head coming together
    IMG_7929.jpg

    More to come...
    "You can observe a lot just by watching."
    --Yogi Berra

  2. #2
    Join Date
    Nov 2021
    Location
    Mid West and North East USA
    Posts
    2,940
    Blog Entries
    2
    That is inspiring! I have a project that the client has requested some lettering on. I am trying to get up my nerve to not use my usual rubber stamp and gold ink method.
    Best Regards, Maurice

  3. #3
    Join Date
    Sep 2008
    Location
    N. Idaho
    Posts
    1,621
    Hi Maurice,

    I'd encourage you to give it a try and for lettering, I think you could go either way, especially if the letters are not tiny. Would definitely practice a bit and the key is fiddling to get the cut angle just right. Several good YTs out there.
    "You can observe a lot just by watching."
    --Yogi Berra

  4. #4
    That double swallow box you made was beautiful! Can't wait to see the build progress on your Koi box.

  5. #5
    Join Date
    Sep 2008
    Location
    N. Idaho
    Posts
    1,621
    Thanks Michael!

    IMG_7932.jpg
    Here you can see the head is complete and the body is being built up. Fins were added on next.

    I'm tardy in posting these--the project was a Christmas present and had to be done before we flew to Tucson for a family Christmas in the desert. Consequently, I decided to go with a lily pad instead of the lotus flower. Here you can see the fish packet and the lily packet built up.

    IMG_7947.jpg

    My original plan for a radial pattern of figured maple was also abandoned because that didn't give enough contrast. Discovered only _after_ building up said packet. Picked a piece of rather plain flat-sawn walnut instead that did a nice job of giving the impression of moving water.

    Perhaps the most nerve-wracking step is to cut the fish into the background, which defines the outline and is all-or-done in places like around the eyes:

    IMG_7952.jpg
    "You can observe a lot just by watching."
    --Yogi Berra

  6. #6
    Join Date
    Nov 2009
    Location
    Ellsworth, Maine
    Posts
    1,809
    This is great! I'm looking forward to seeing the rest of the build and the finished product. Something about Koi fish I find beautiful.

  7. #7
    Join Date
    Sep 2008
    Location
    N. Idaho
    Posts
    1,621
    Thanks Tony!

    After both pieces were let into the background, it was time for the cauls and clamps.

    Attachment 514997

    I have a drum sander on loan from a buddy and played around with sanding the veneers to consistent thickness but have found that they come off close enough to consistent thickness with my bandsaw that its not worth it because the panel can be quickly flattened without fear using a toothing plane followed by a card scraper.

    IMG_7963.jpgIMG_7965.jpg

    The next step was to cut grooves and fit the lid to the box

    IMG_7969.jpg


    As I was finishing the marquetry panel, I remembered (again!) that the pencil box design needs a pull or molding along the side of the panel that is last to slide into the box. Rather than cut the panel into a rectangle as originally conceived, I decided to leave the lily whole and let it serve as a pull.

    IMG_7970.jpg

    I did decide that a couple pieces of molding to frame the lily pad to the left and right were need to balance it all out. Since the project was done on a deadline and the task at hand always expands to fill the time available, final finishing with shellac and wax were done on the road but under deadline. 
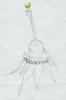
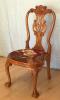
Anyway, it worked out and here's a couple shots of the finished box and the recipient was pleased!

    IMG_8180.jpgIMG_8191.jpg
    Last edited by Christopher Charles; 02-03-2024 at 5:15 PM.
    "You can observe a lot just by watching."
    --Yogi Berra

  8. #8
    Join Date
    Sep 2008
    Location
    N. Idaho
    Posts
    1,621
    And I think I figured out how to add a full sized image!
    Attached Images Attached Images
    Last edited by Christopher Charles; 02-03-2024 at 5:17 PM. Reason: Or not!
    "You can observe a lot just by watching."
    --Yogi Berra

  9. #9
    Join Date
    Apr 2017
    Location
    Clarks Summit PA
    Posts
    1,747
    Chris, an artistic and interesting project. The natural woodgrain creates a background of motion with flowing water. The fish is a jewel and the lily pad over the edge escapes the limiting border of a box. Beautiful!

  10. #10
    Join Date
    Sep 2008
    Location
    N. Idaho
    Posts
    1,621
    Thanks for the kind words Mark!
    "You can observe a lot just by watching."
    --Yogi Berra

  11. #11
    Join Date
    Nov 2021
    Location
    Mid West and North East USA
    Posts
    2,940
    Blog Entries
    2
    Quote Originally Posted by Christopher Charles View Post
    Hi Maurice,

    I'd encourage you to give it a try and for lettering, I think you could go either way, especially if the letters are not tiny. Would definitely practice a bit and the key is fiddling to get the cut angle just right. Several good YTs out there.
    Here is the task. I wanted the bespoke bling to be from the clients material. How to emulate the western font and 3 colors (snipped from there website) has me puzzled. I think I will be trying red only, dyed veneer, and a very simple font.

    IMG_1914 2.jpg
    Last edited by Maurice Mcmurry; 03-07-2024 at 9:45 PM. Reason: spelling
    Best Regards, Maurice

  12. #12
    Join Date
    Nov 2009
    Location
    Peoria, IL
    Posts
    4,531
    I was wondering how the swallows tied into koi?

  13. #13
    Join Date
    Sep 2008
    Location
    N. Idaho
    Posts
    1,621
    Maurice,

    That is a bit of a challenge in the western font. And double bevel marquetry might not be the right approach if the back is already part of the body of the instrument as you need to be able to cut all the way through. In other words, its not an inlay process. Pardon if I'm missing something.

    Richard, the swallows and koi aren't tied together other than I made the body of the boxes at the same time. And both are for family

    Best,
    Chris
    "You can observe a lot just by watching."
    --Yogi Berra

  14. #14
    Join Date
    Nov 2021
    Location
    Mid West and North East USA
    Posts
    2,940
    Blog Entries
    2
    Quote Originally Posted by Christopher Charles View Post
    Maurice,

    That is a bit of a challenge in the western font. And double bevel marquetry might not be the right approach if the back is already part of the body of the instrument as you need to be able to cut all the way through.

    Best,
    Chris
    I use the marquetry and inlay terms even though the inlay will only be .020 inch thick inlayed into .080 solid wood. I will have to use a router, knife and tiny chisels to cut the pockets. The letters could be wrapped with black / white laminated fiber strips but I will skip that and make the letters red only. I will practice with the western font, but am OK with the simpler font. I have several backs made and one with the arch created but it is not glued to the body yet. I will practice. I have a backup plan to send 1/2 of a back to a CNC shop while it is still flat.

    I showed your Koi box to my nephew. He does micro fishing and makes lures and fish decoys. He thought it was amazing as did his mom. She is an art teacher.
    Best Regards, Maurice

  15. #15
    Join Date
    Sep 2008
    Location
    N. Idaho
    Posts
    1,621
    Thanks for the kind words Maurice. If you did want to include multiple colors/layers, you could take a hybrid approach by making the letters as double-bevel marquetry then inlaying the composite letter into the instrument?
    "You can observe a lot just by watching."
    --Yogi Berra

Posting Permissions

  • You may not post new threads
  • You may not post replies
  • You may not post attachments
  • You may not edit your posts
  •