Page 1 of 6 12345 ... LastLast
Results 1 to 15 of 83

Thread: Dining room carver chairs - Take 2

  1. #1
    Join Date
    Feb 2004
    Location
    Perth, Australia
    Posts
    9,497

    Dining room carver chairs - Take 2

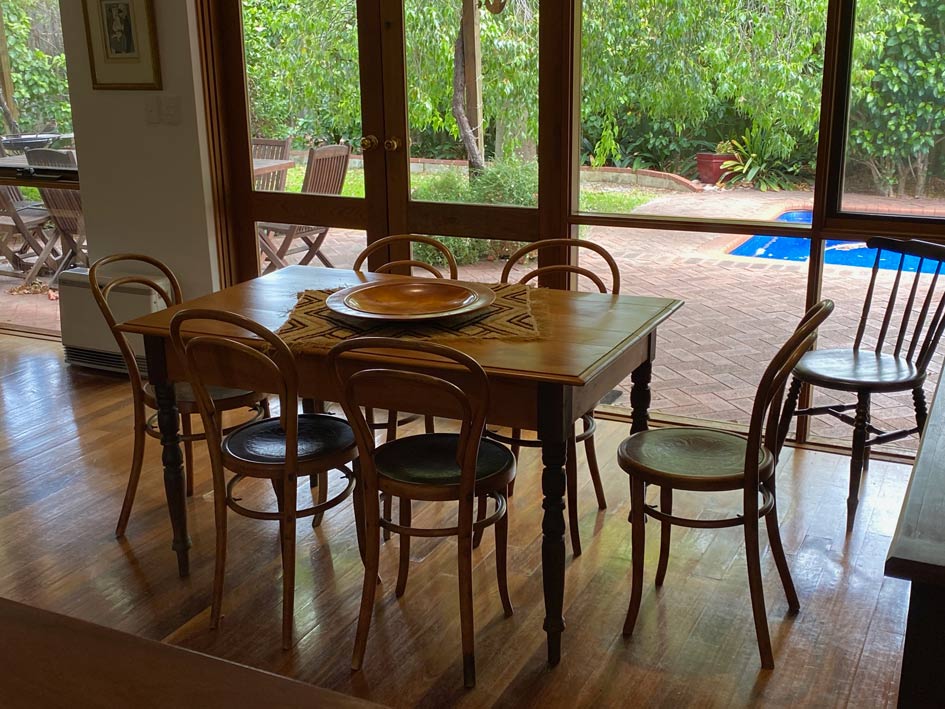
    About a month ago I began a thread about designing and building two carver chairs to accompany the 6 bentwood chairs we have owned for the past 40 years. The chairs were purchased all those years ago along with a table, which is around 200 years old. We need a larger table, and time has come to replace it and add two more chairs.


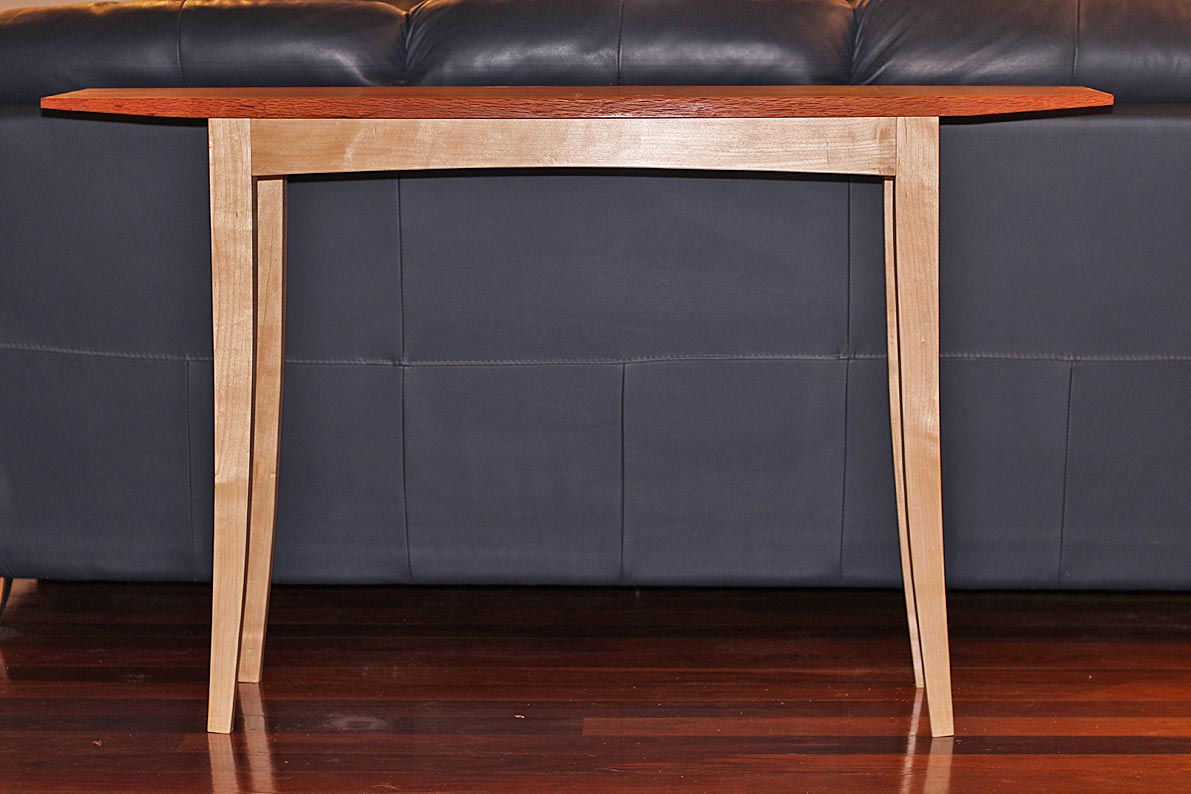
    The table planned will be a modern version of this, in Hard Maple and round Jarrah legs. The carver chairs need to match the table and blend with these chairs. Our taste is minimalist, Mid Century Danish, modern. An example of the lines I seek is this sofa table I built several years ago ...


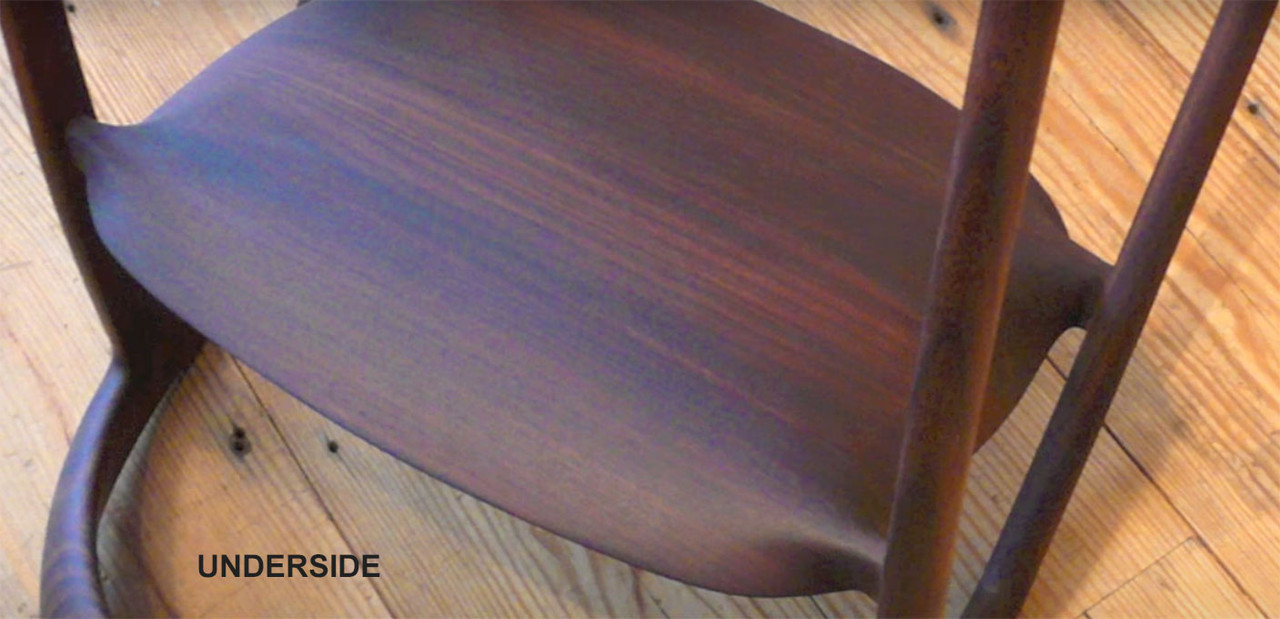
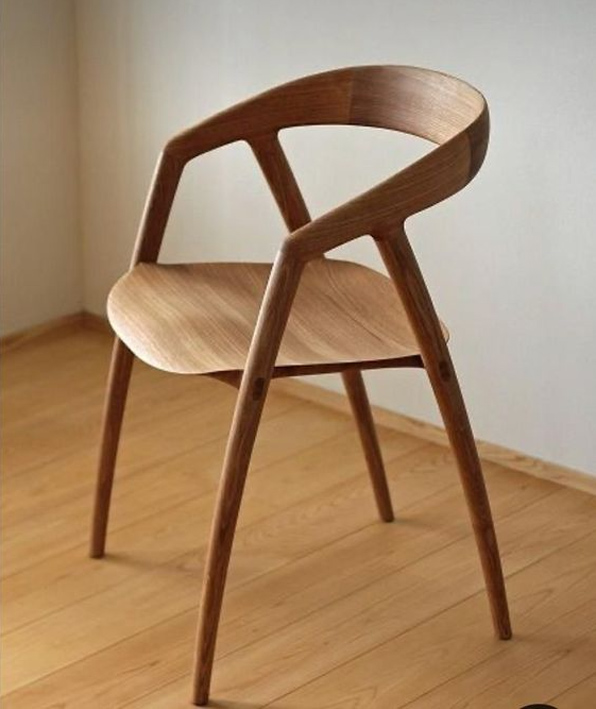
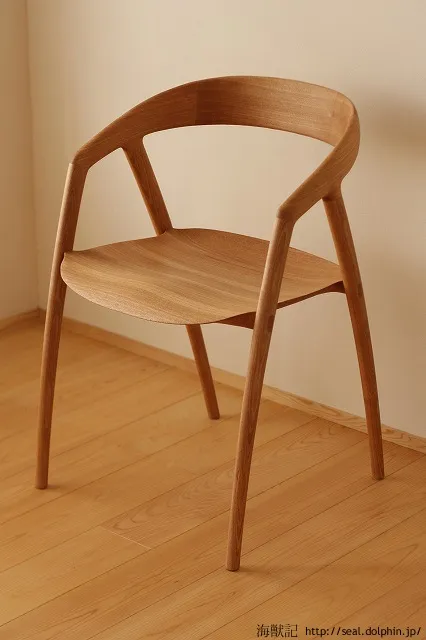
    So I started thinking about the chairs I would build, and I took inspiration from this picture ...


    ... and began to evolve a design along similar lines. The 8 legs were started (just need rounding) and the seats carved, and then the tenons were cut. And that is where the problem arose. I had this idea for integrated tenons into through mortices in the legs. Very few chairs are built like this, and for a good reason - you cannot control for run out in the tenons, and run out make for weak tenons. And that is what I discovered. So I stopped the build, and decided to begin again from scratch.


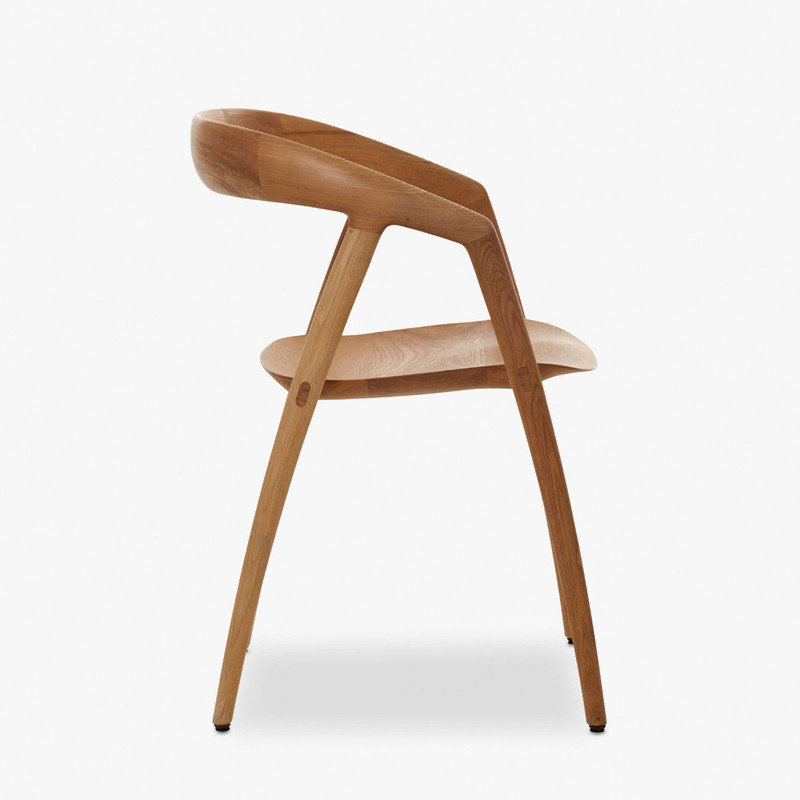
    I started looking more carefully at the chair I had come across and had treated rather casually. It has a name: DC 09, and it was designed by the Japanese- Scandinavian duo, Kyoko Inoda and Nils Sveje, in 2011. It is built by the Miyazaki factory in Japan.


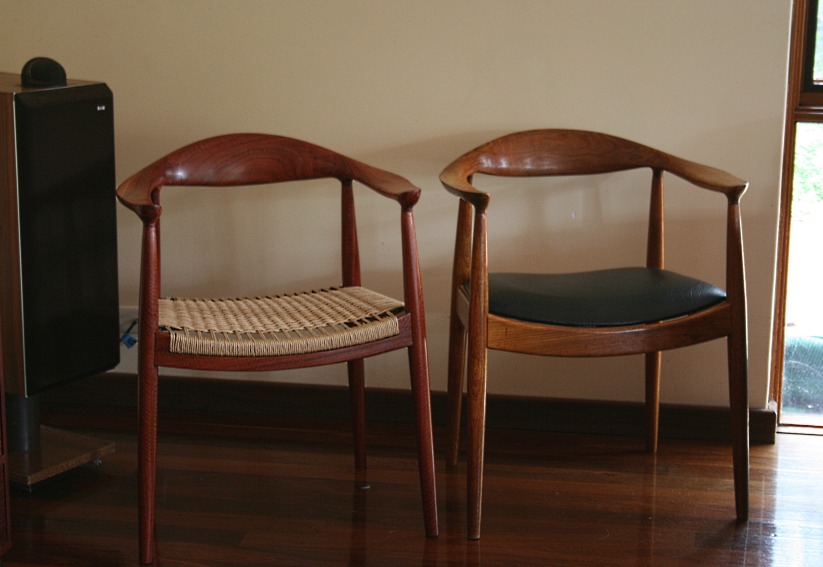
    There is a challenge here - can I replicate it purely from photos? This is unlikely since one needs to examine an object in three dimensions to discover the subtleties of the design and construction. I have experience of this, having made an exact copy of Hans Wegner's "The Chair" or the "Round Chair" several years ago. What made this possible is that I own an original. One is mine and one is Wegner's ...


    So the chairs I build will not be exact, but hopefully close. Actually, I am still on the fence about the arms and back and may modify this ... but will will see. We need to start with the seat. That is the key.


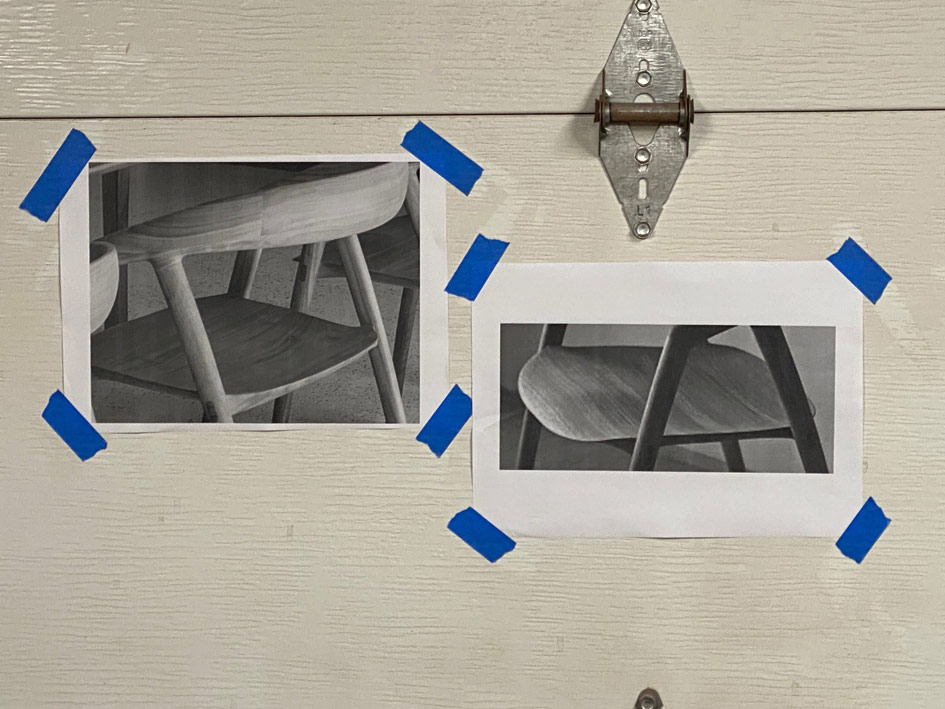
    Help comes from two video I found ...


    https://www.youtube.com/watch?v=5yLS...=yasuhiromurai


    https://vimeo.com/438408781
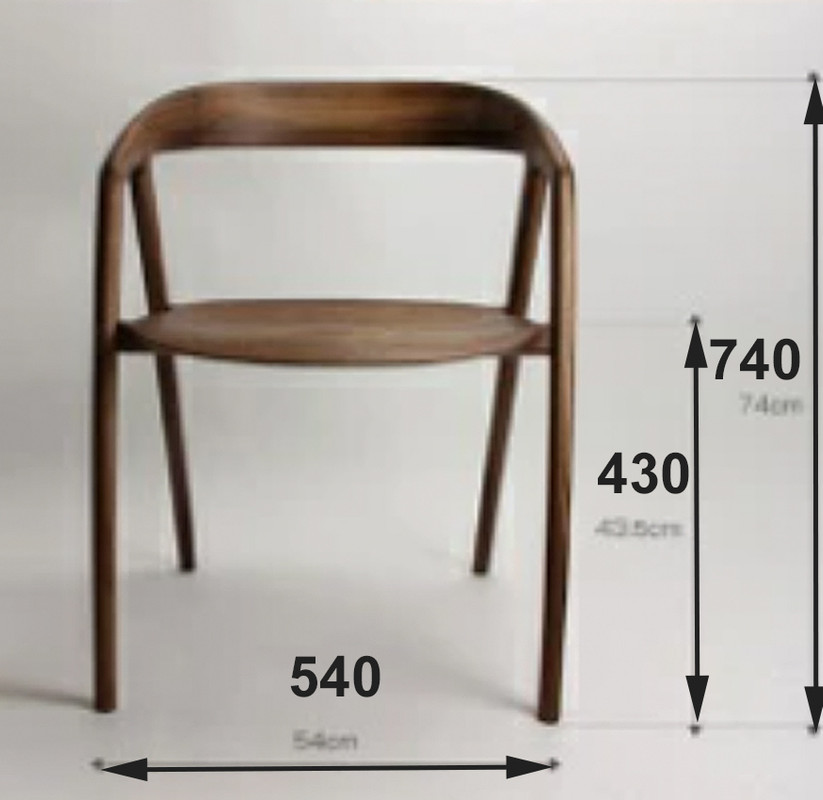
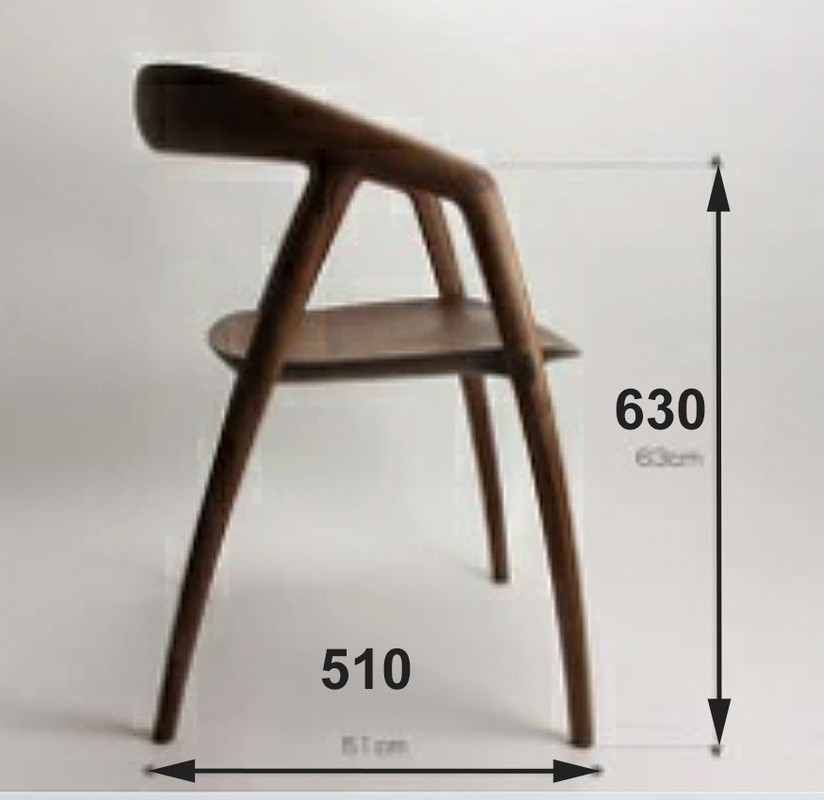

    Some dimensions:


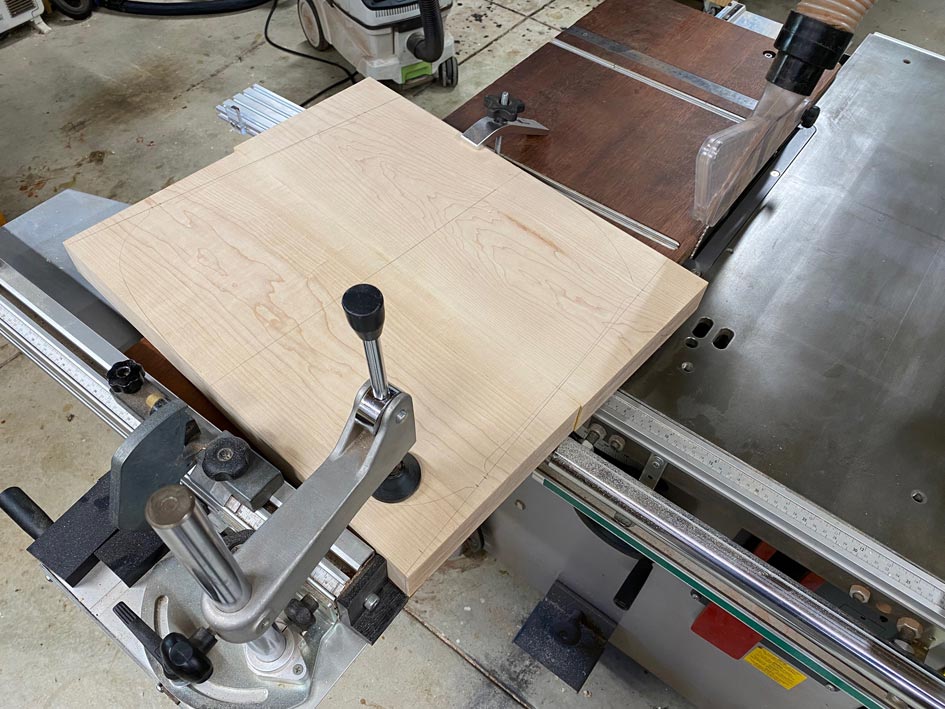
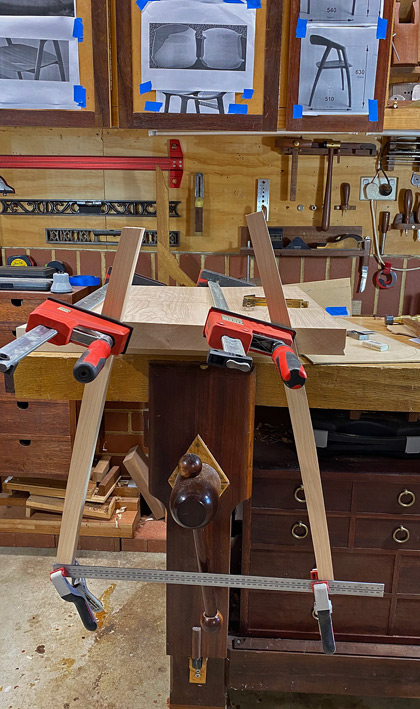
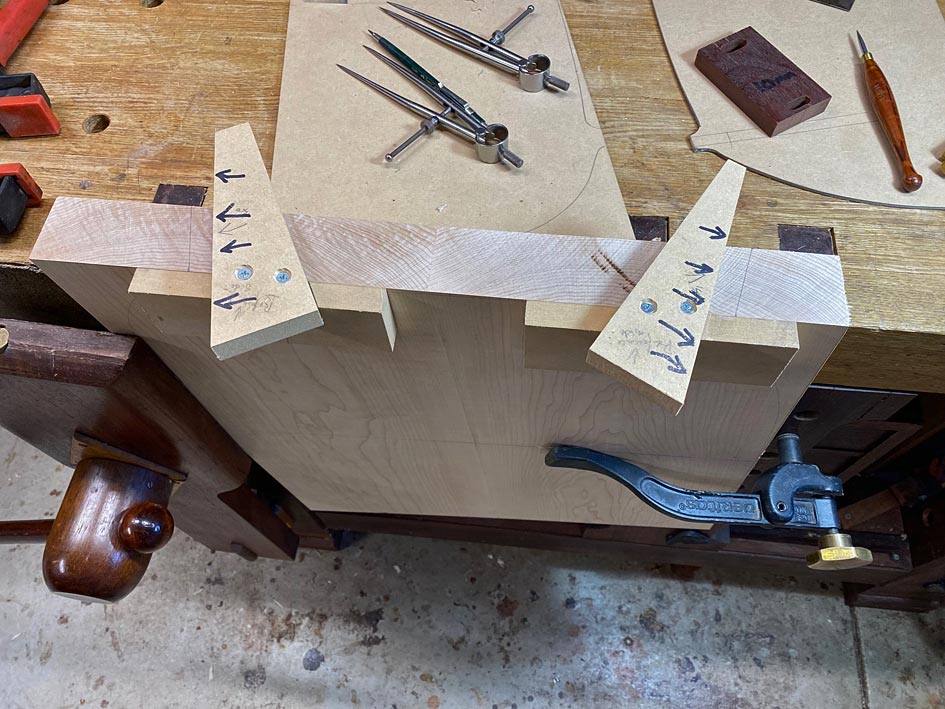
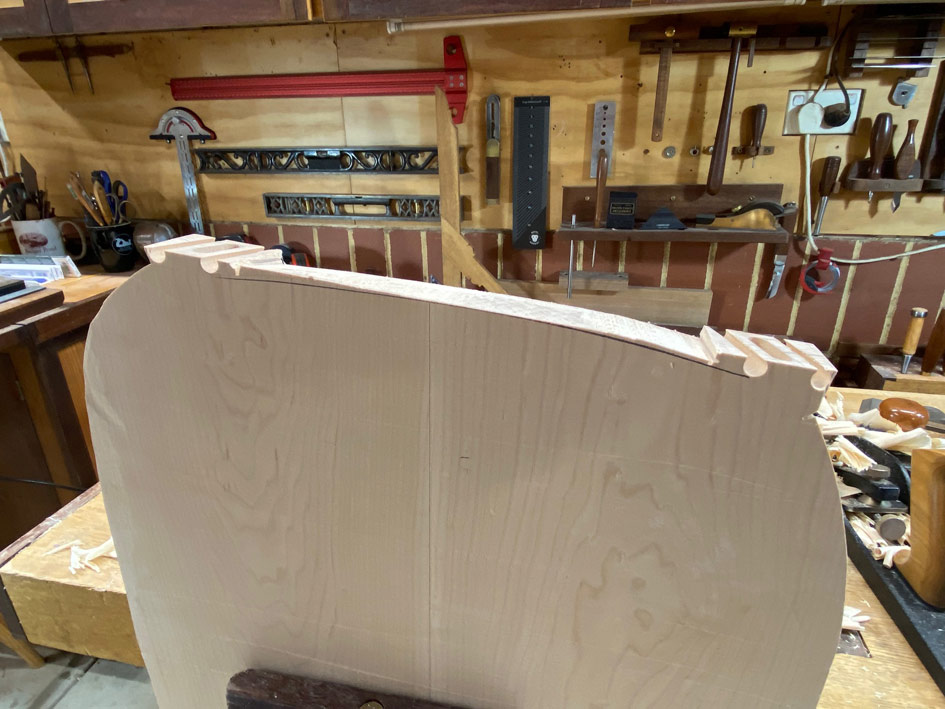
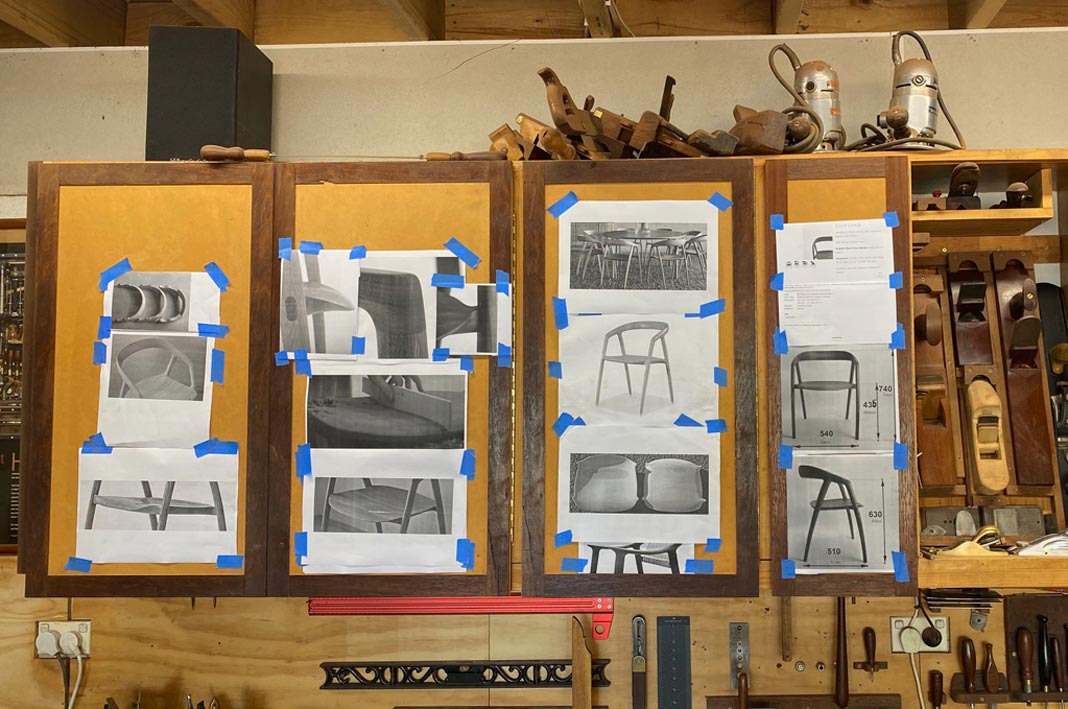
    The doors above my bench make a place to pin details and photos ..


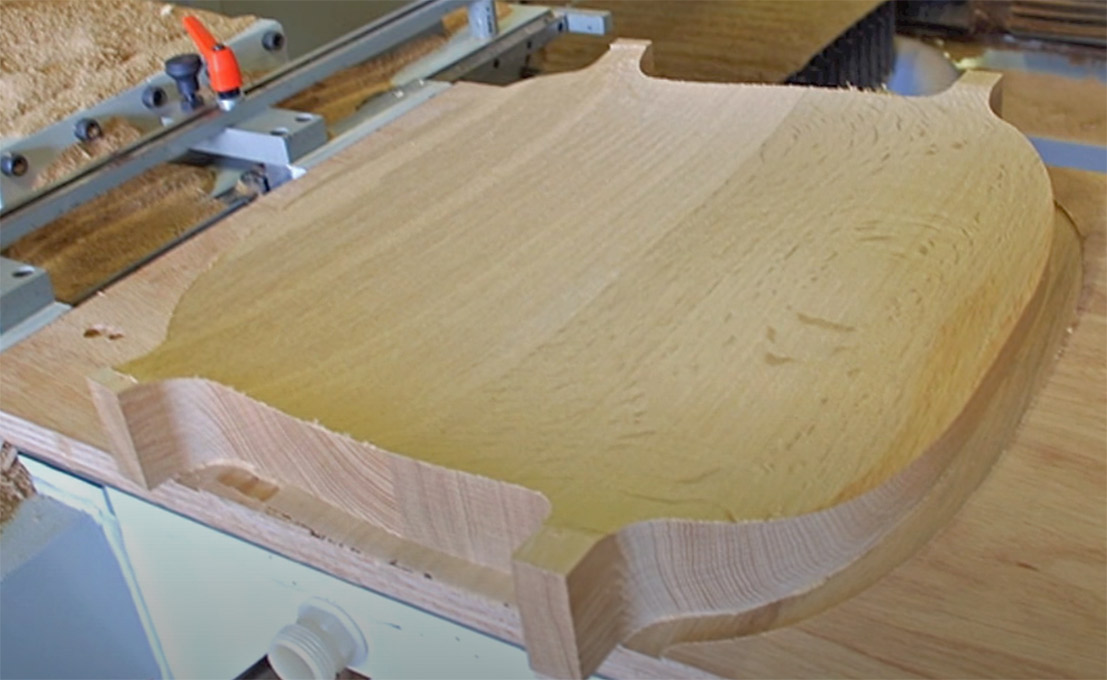
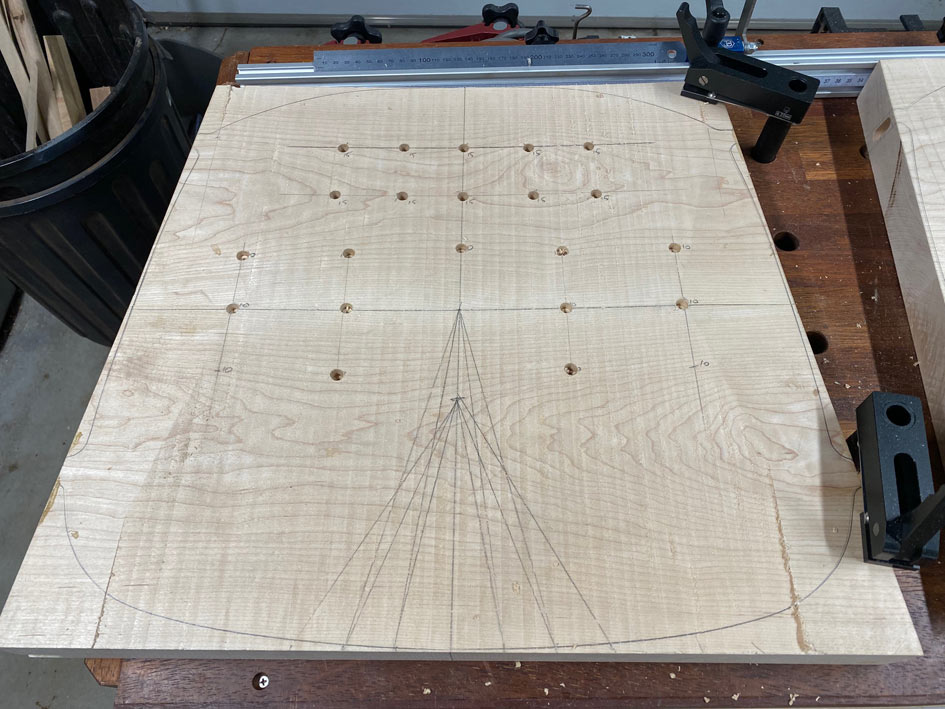
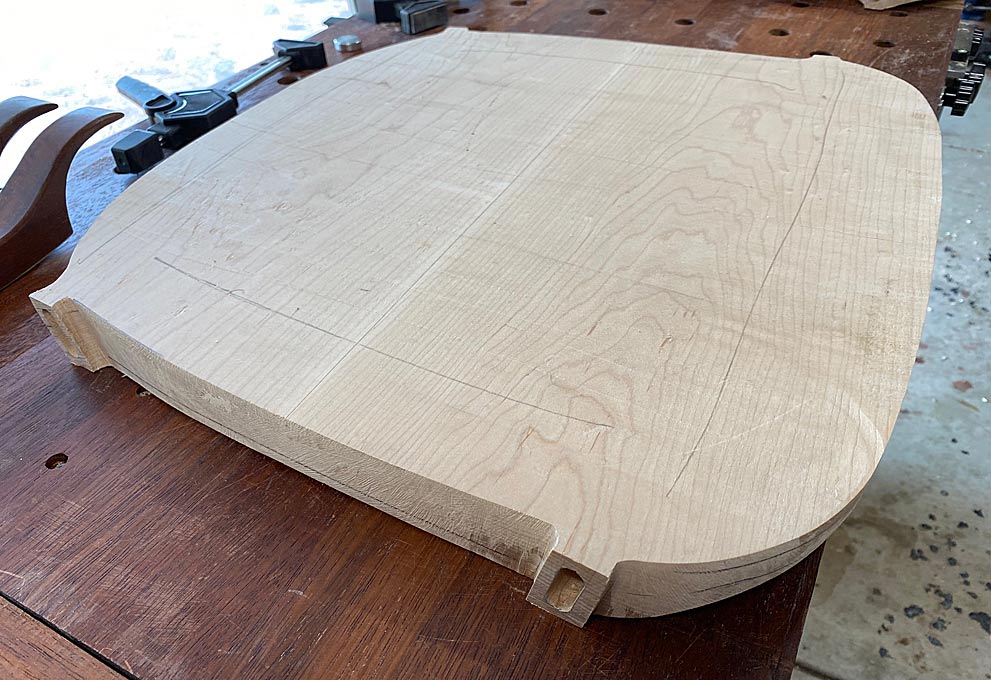
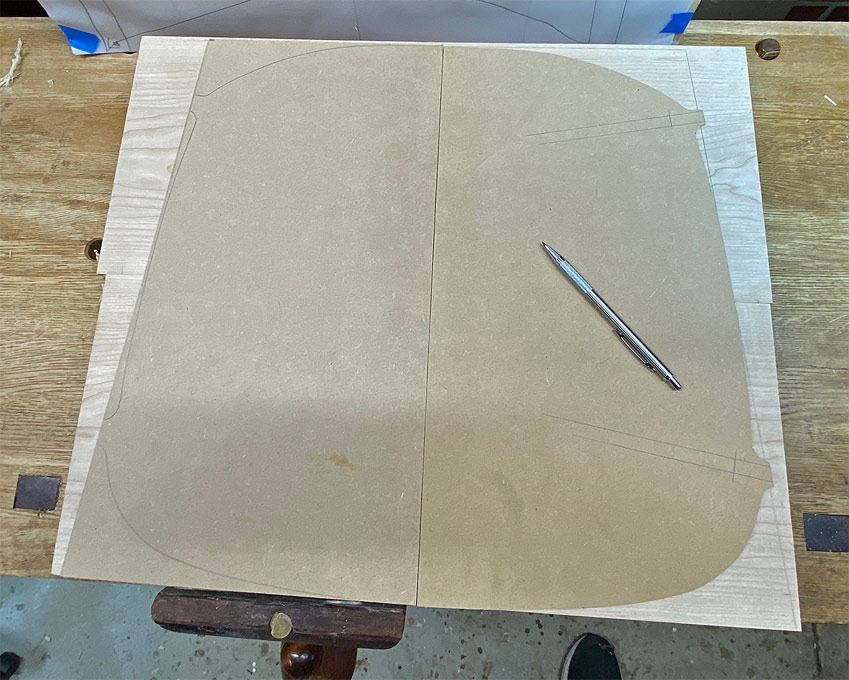
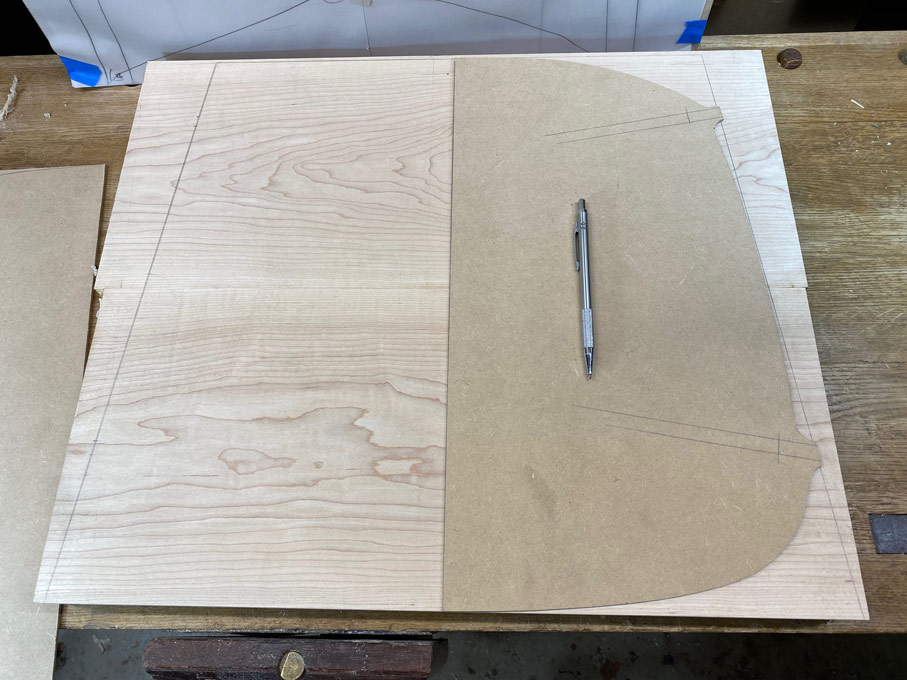
    The seat plan was scaled and drawn using images from the videos and photos.


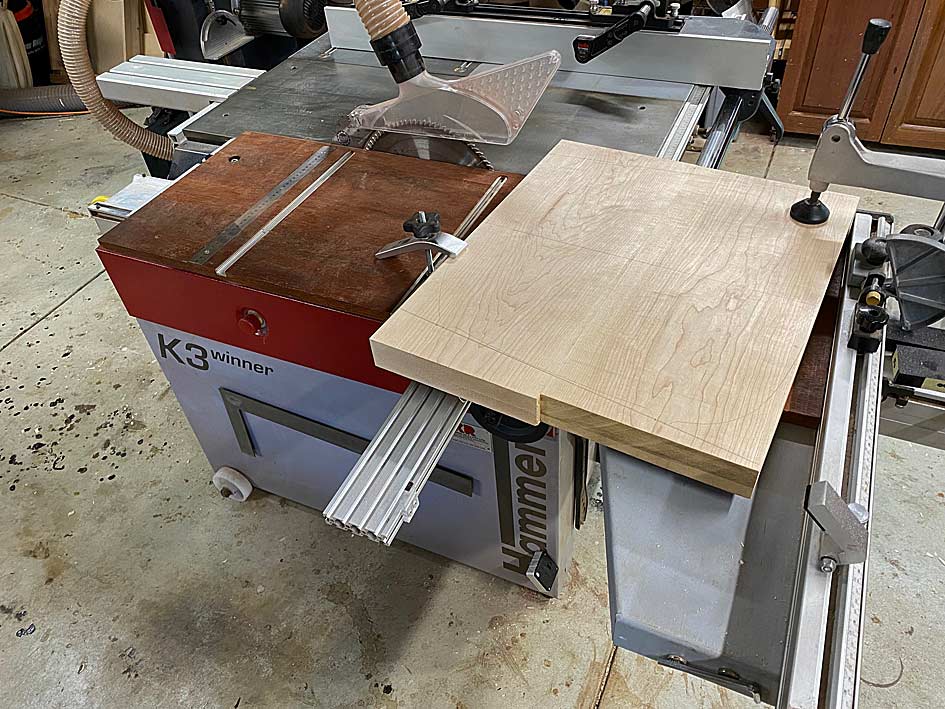
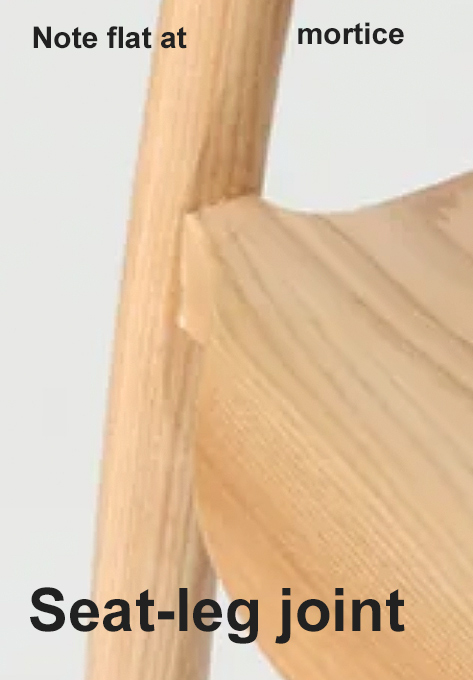
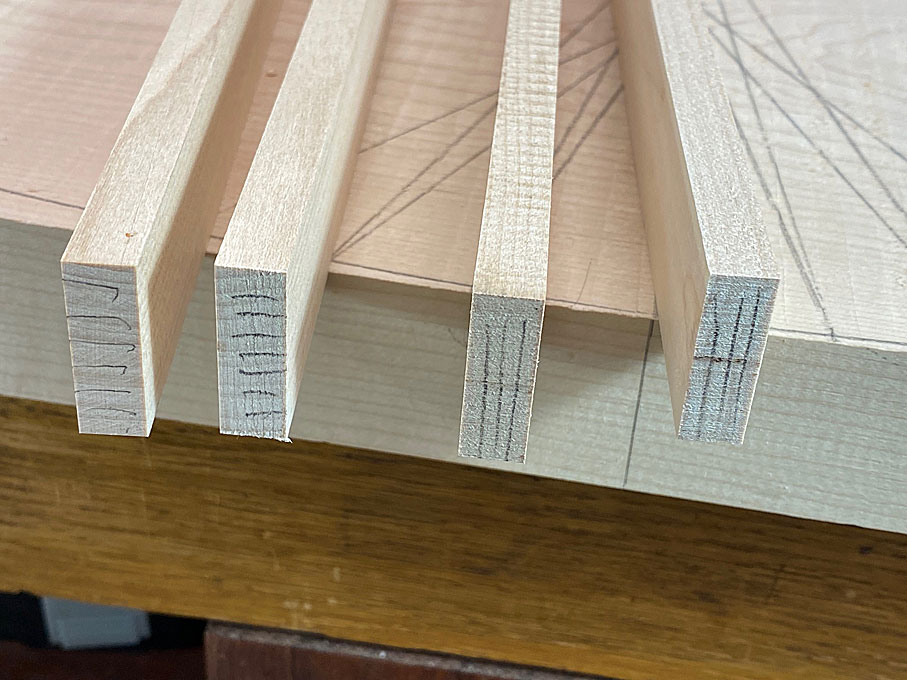
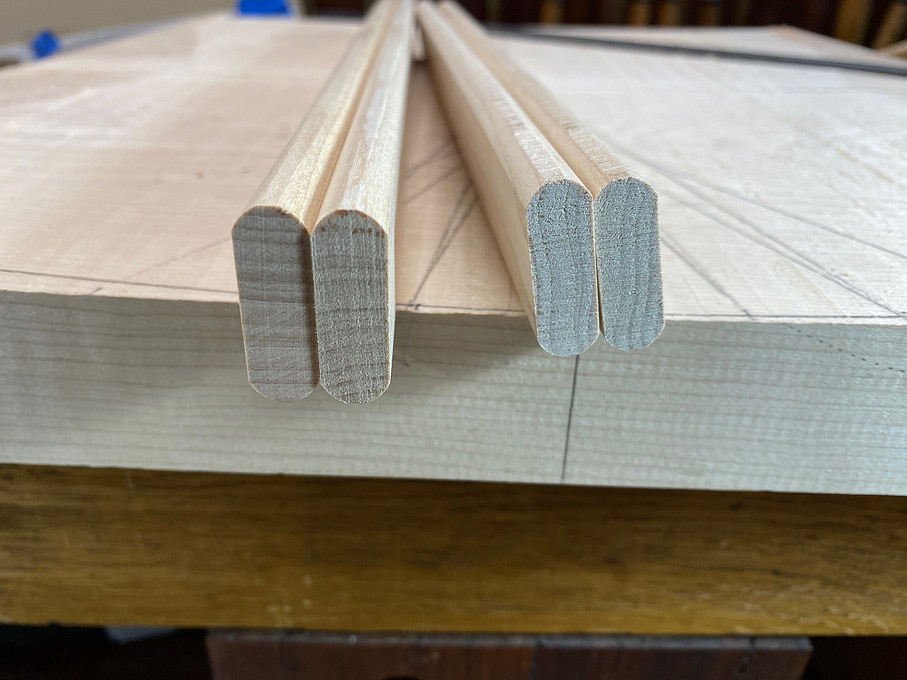
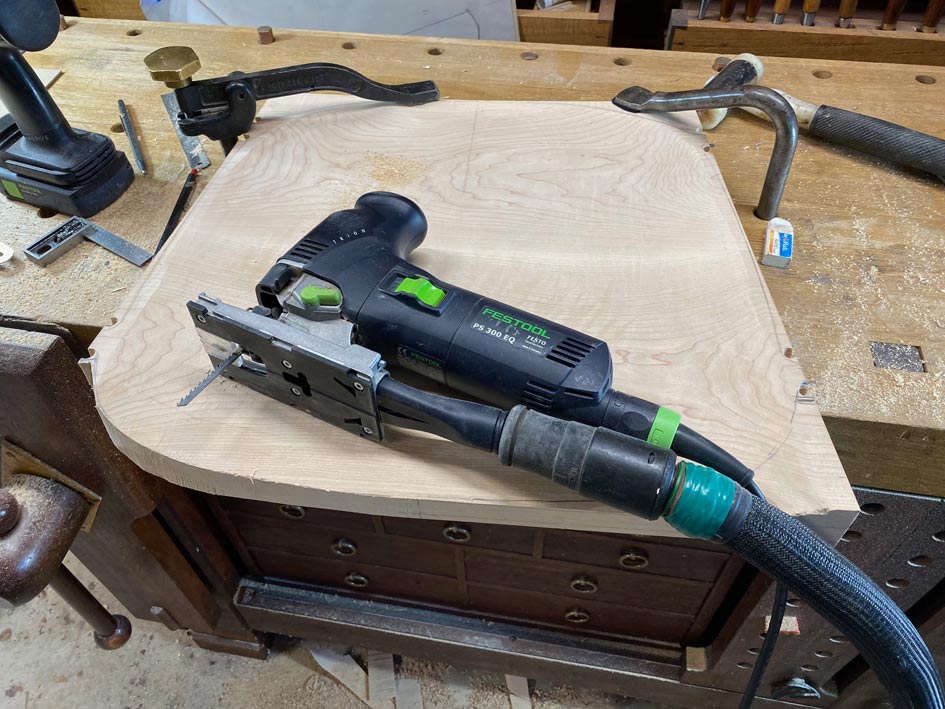
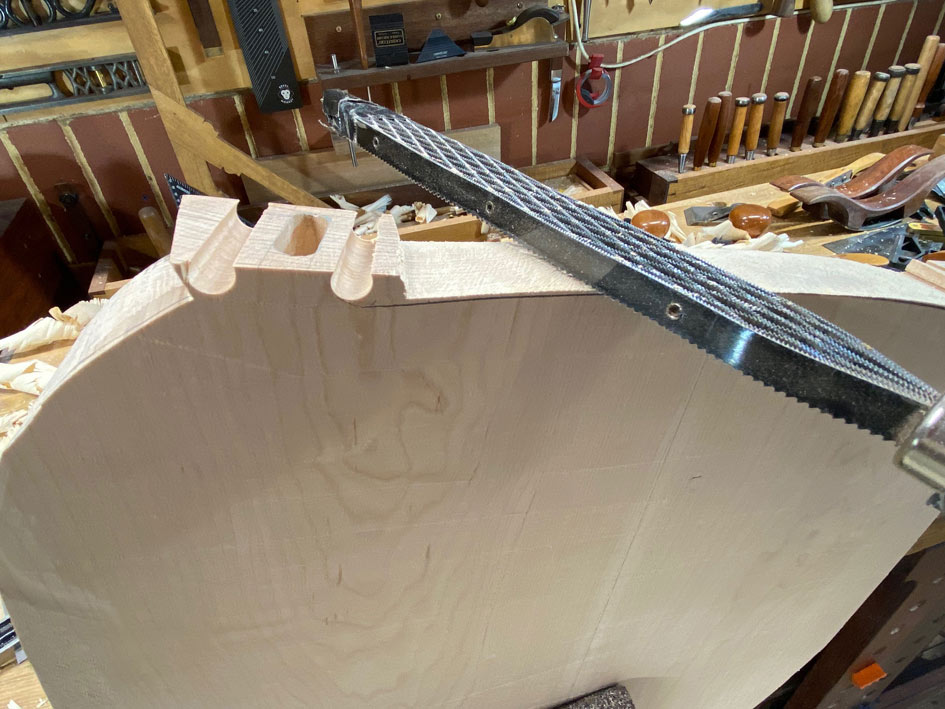
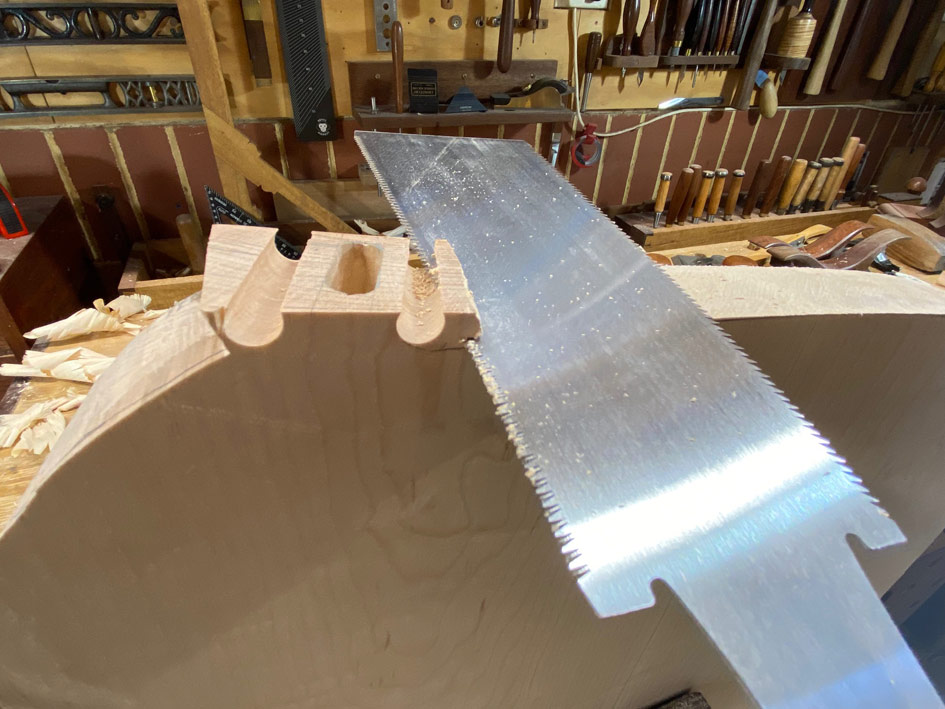
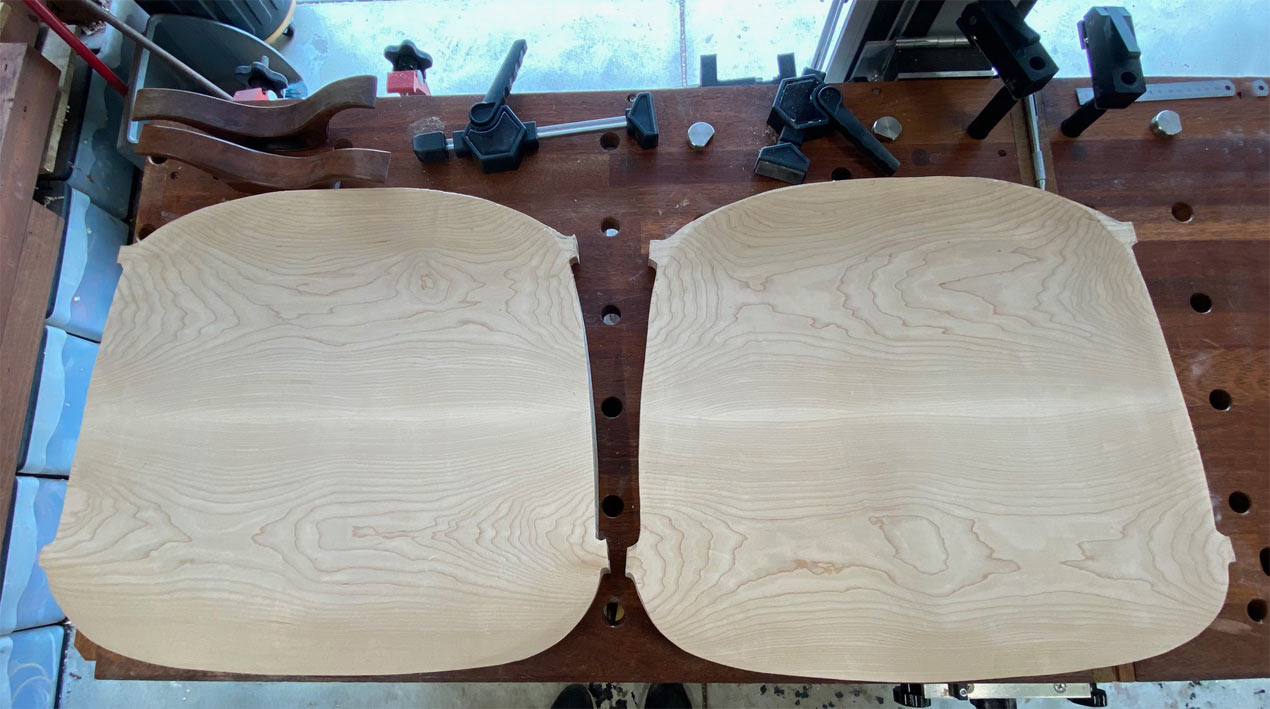
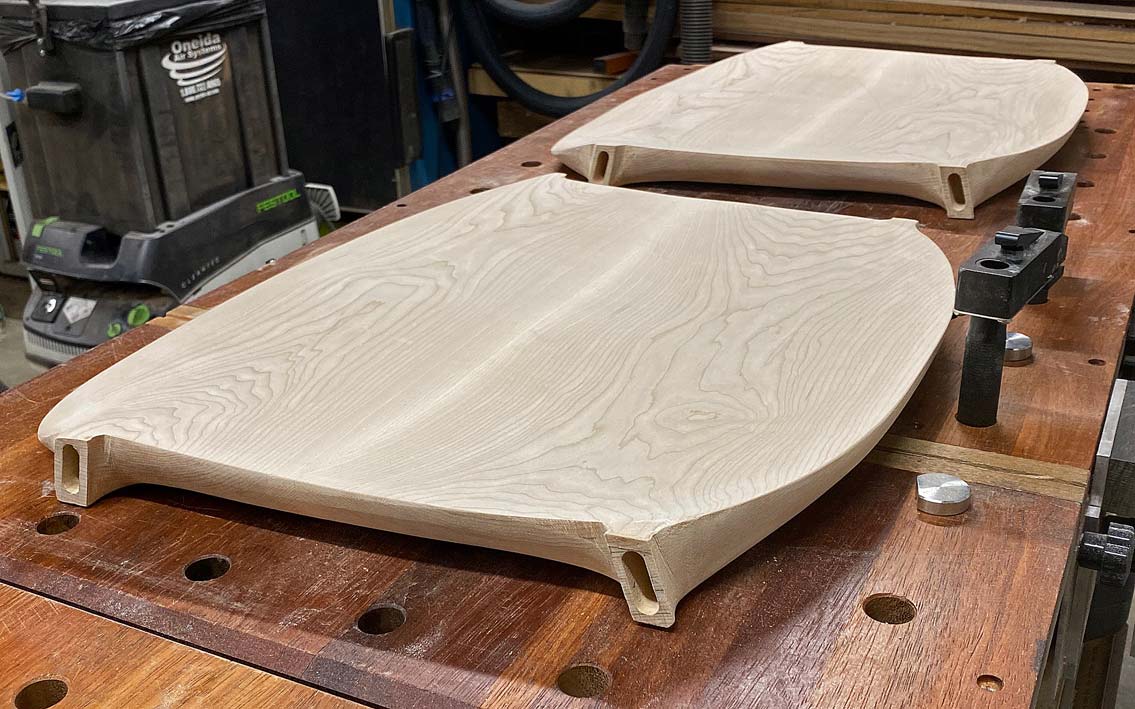
    Two half-templates were created - the first was a straight-sided outline of the seat. The reason for this is that I planned to use loose tenon joinery, which would enable the tenons to have straight grain for maximum strength, and the mortices would be made using a Domino. These would be 30mm long x 10mm wide, in other words would use custom-made loose tenons. The straight sides would make it easier to cut the mortices ahead of shaping the seats.


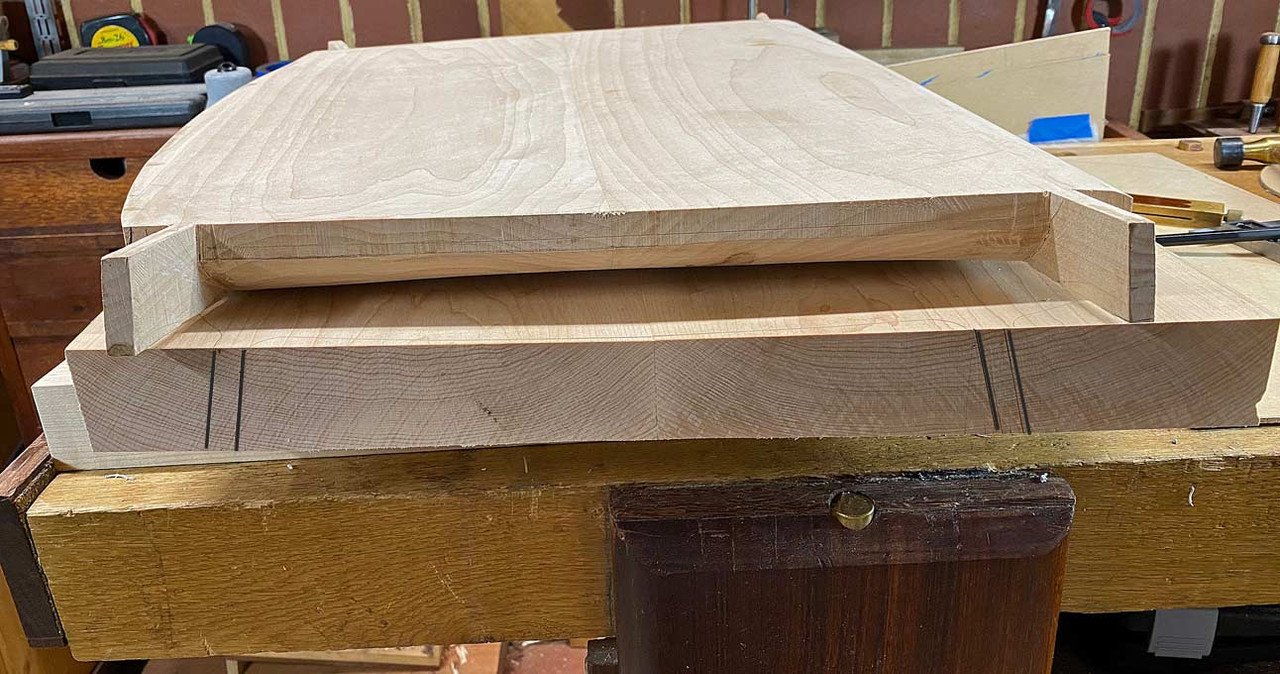
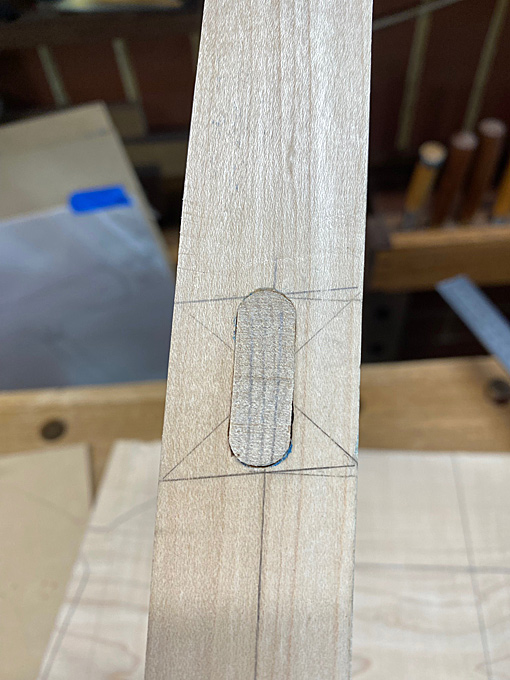
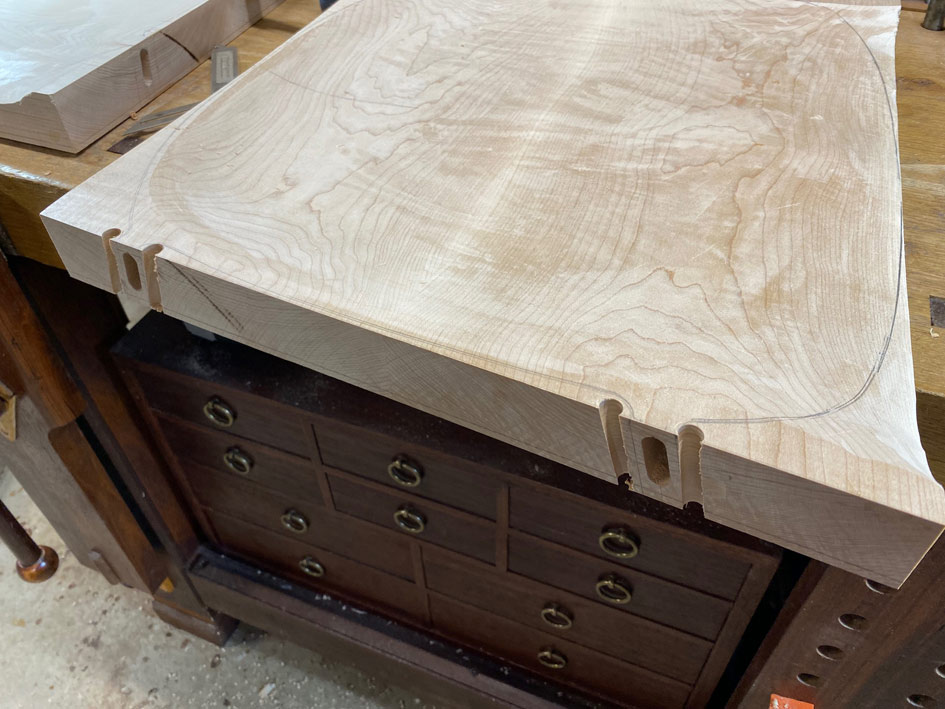
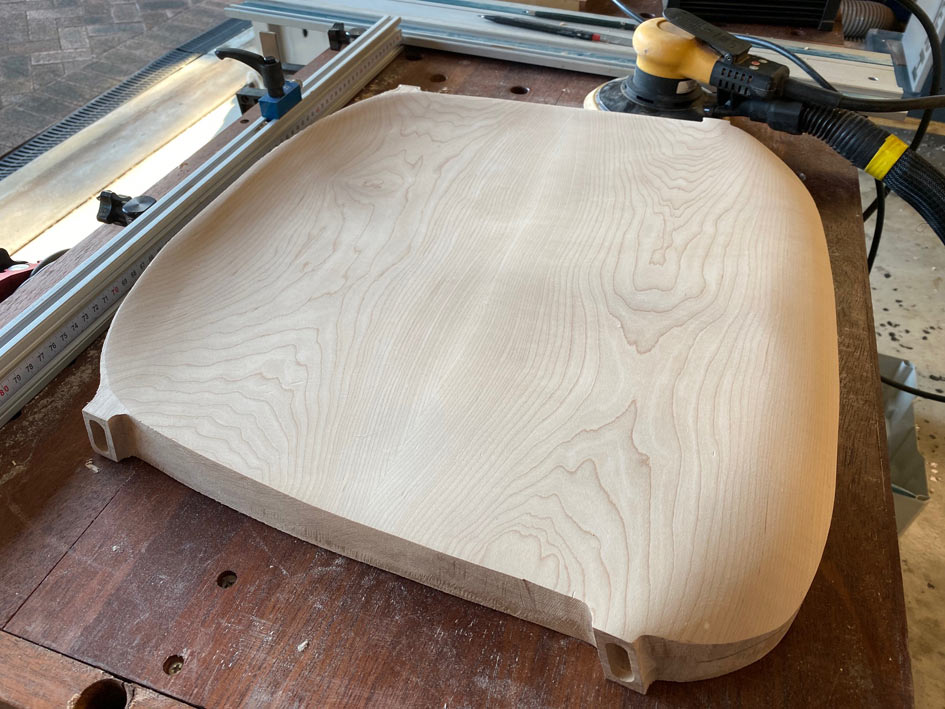
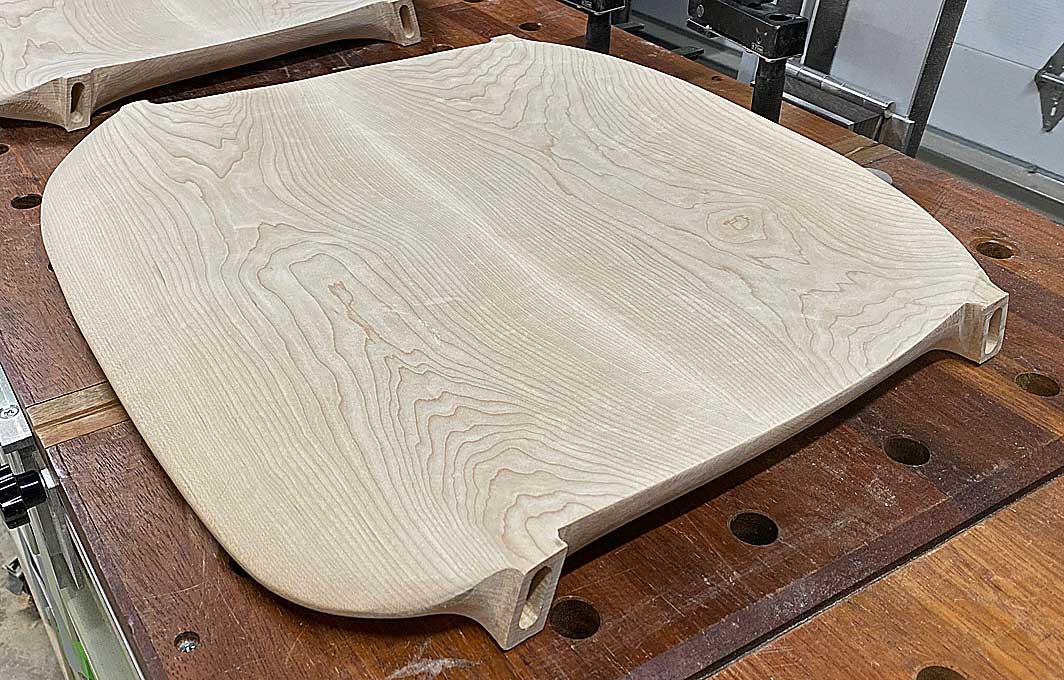
    The second half-template was the actual outline of the seat, and this positions the tenons.


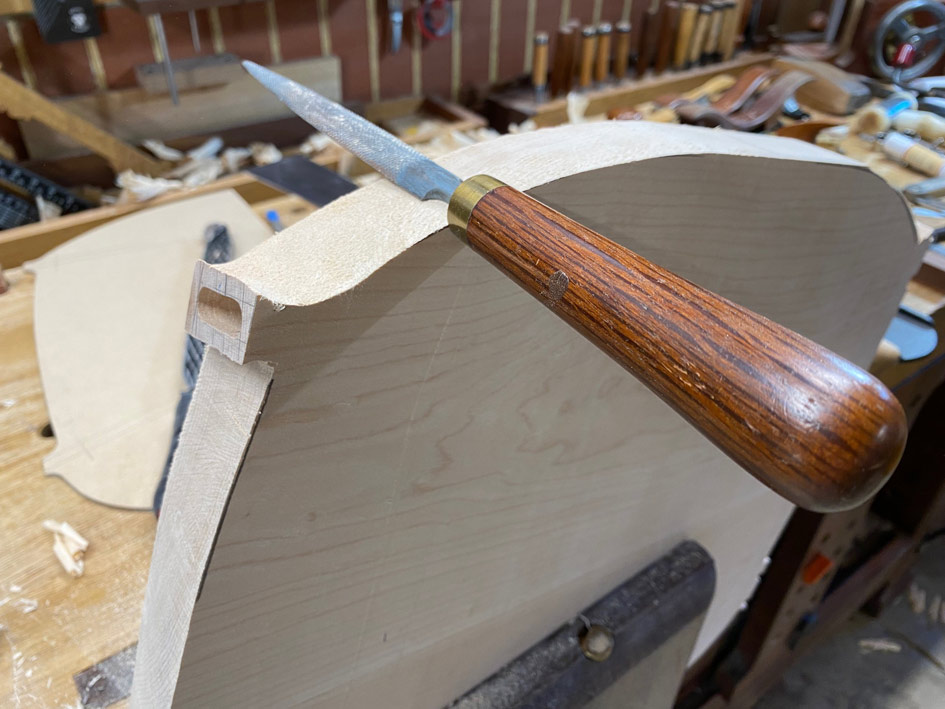
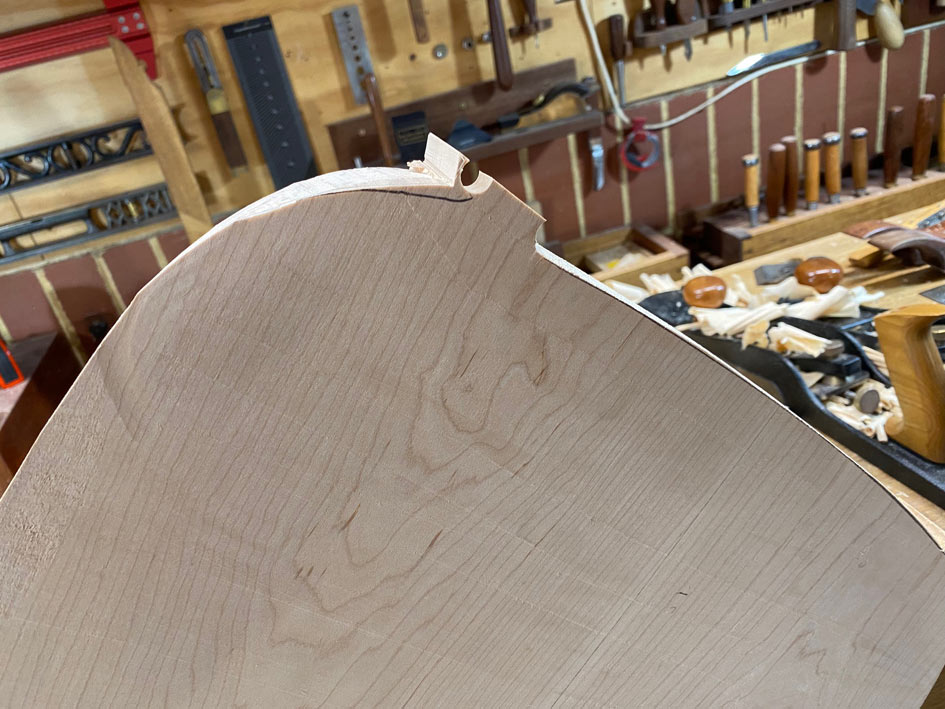
    Here the tenons are positioned ...


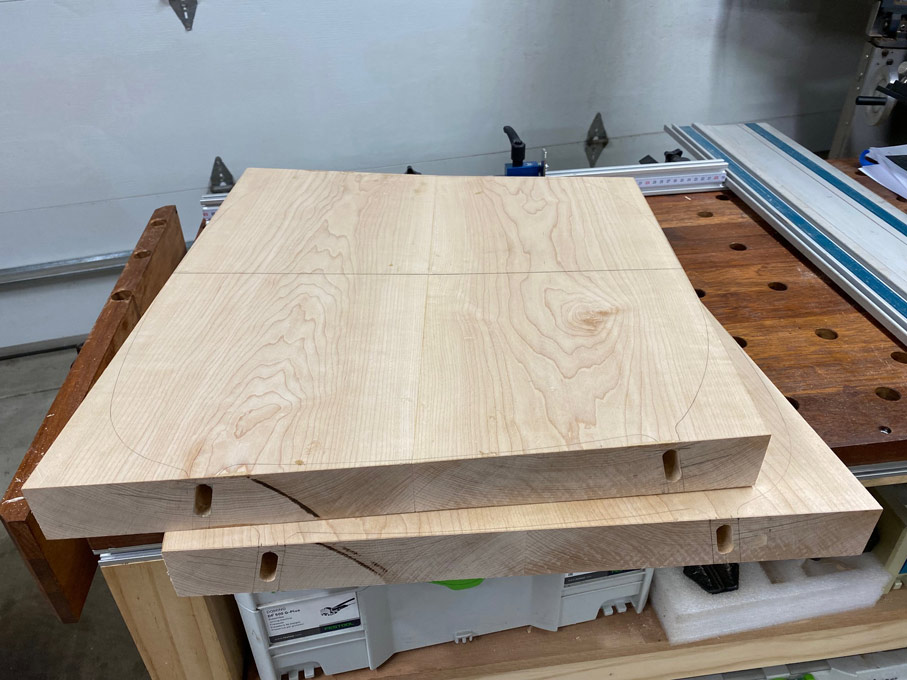
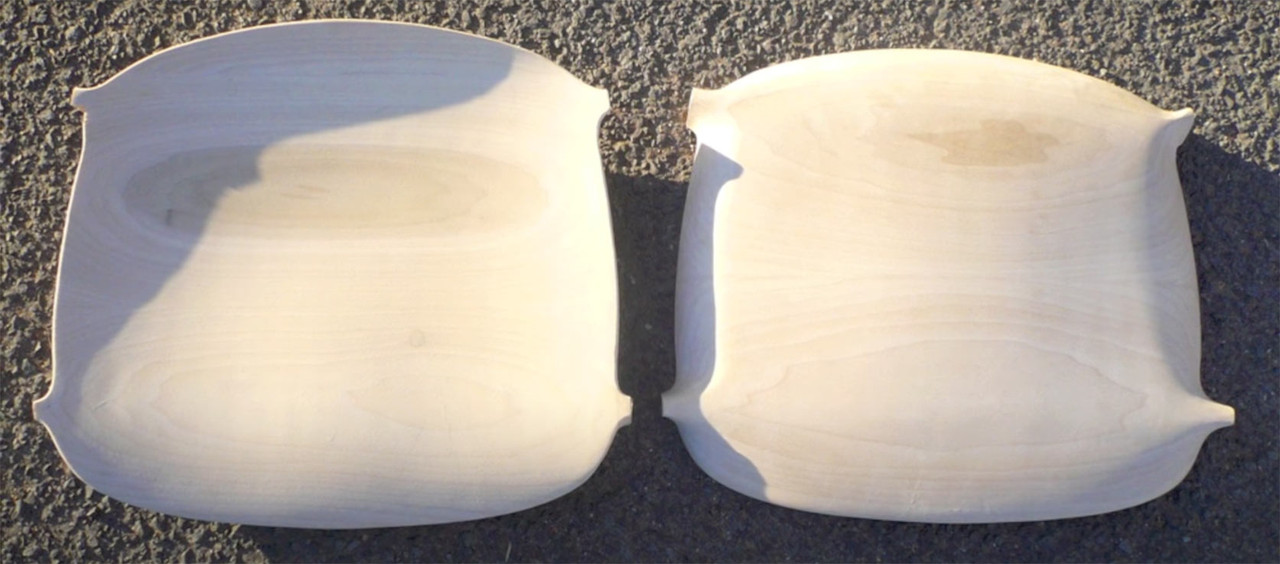
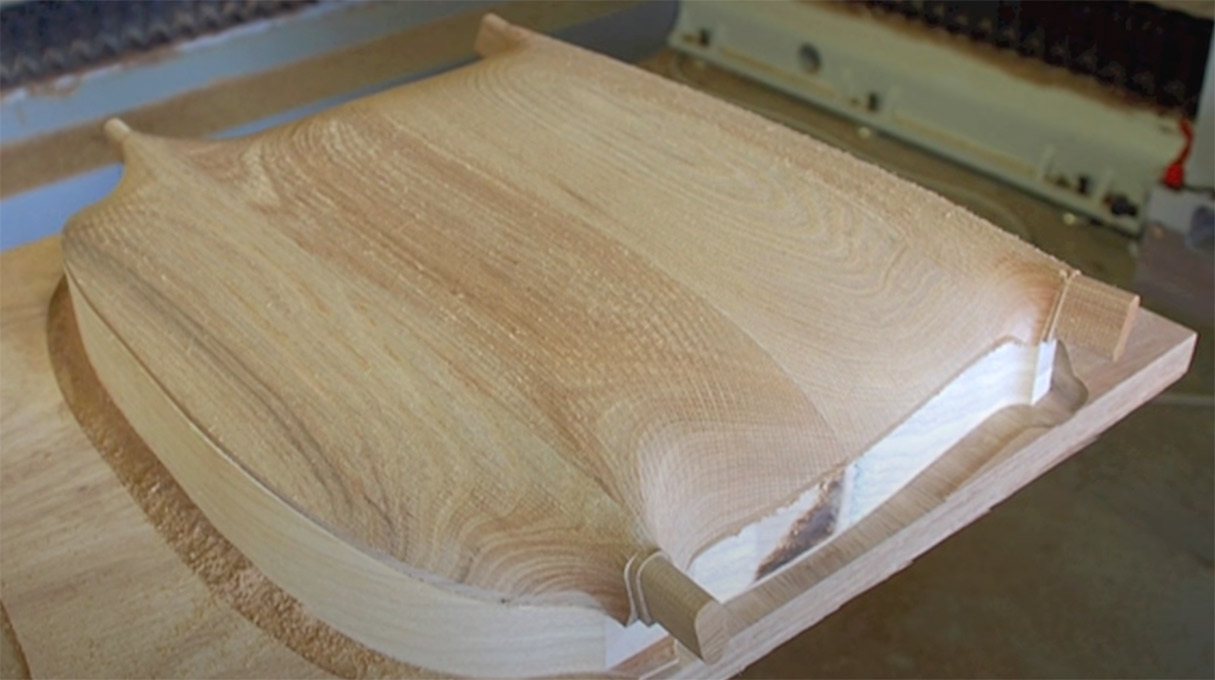
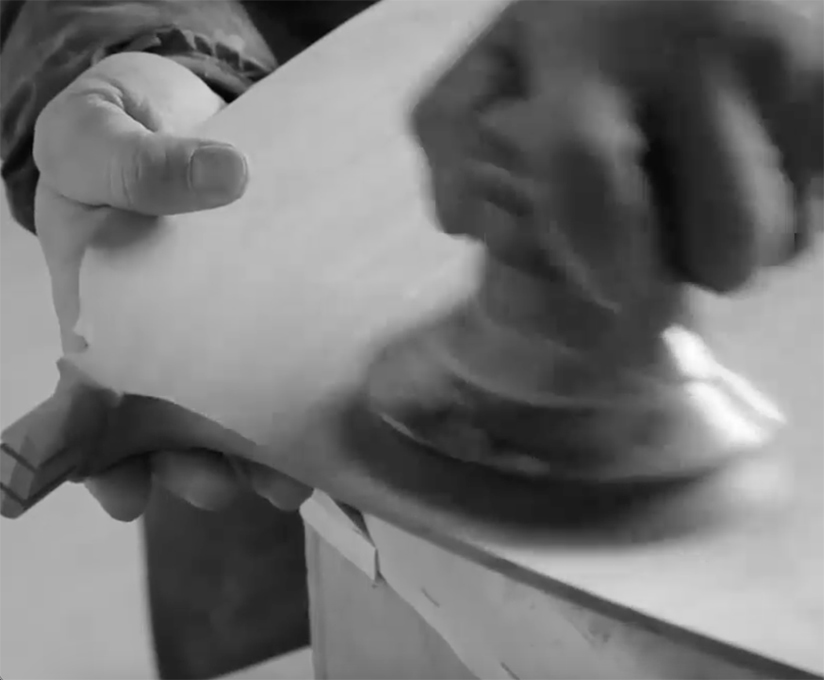
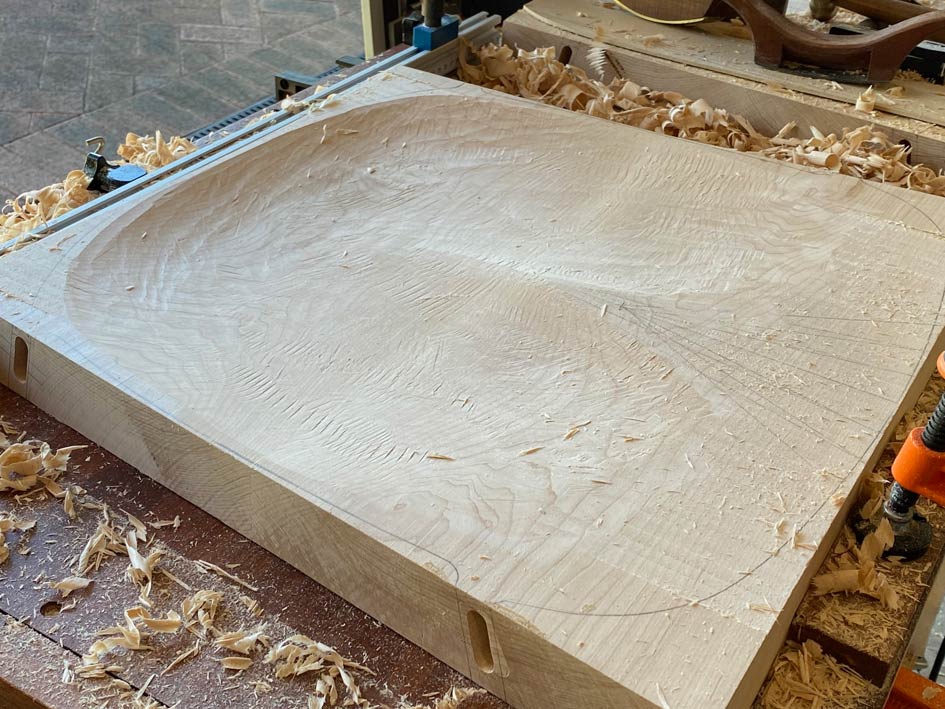
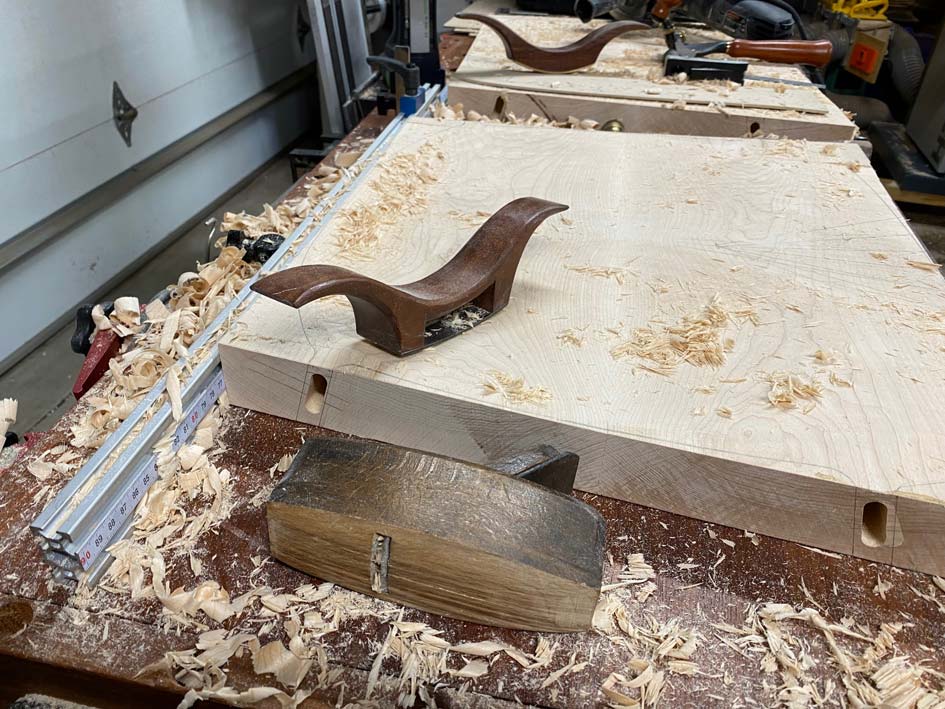
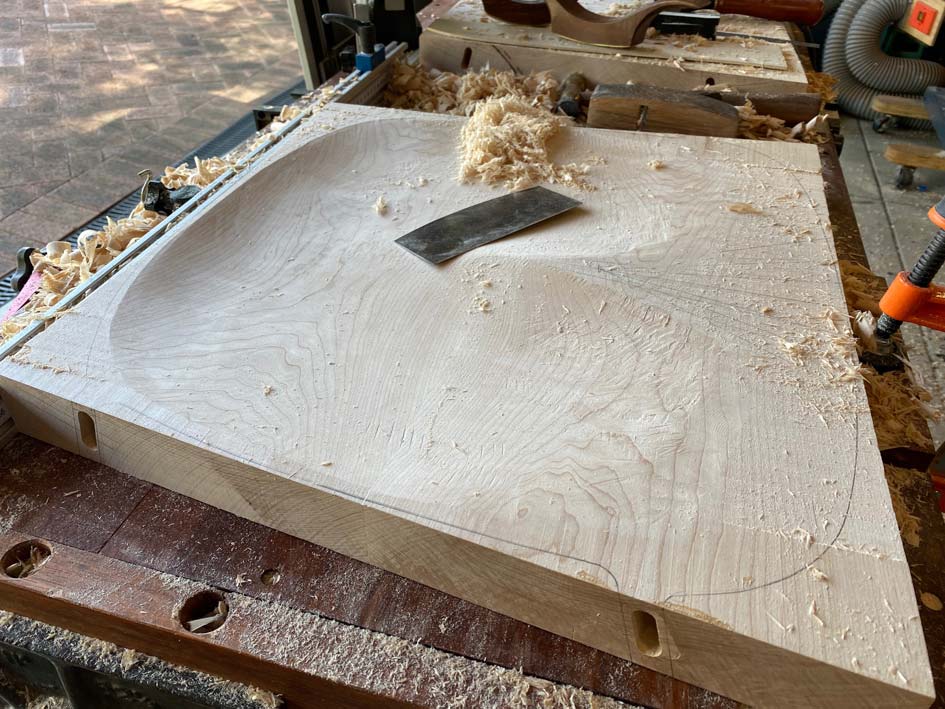
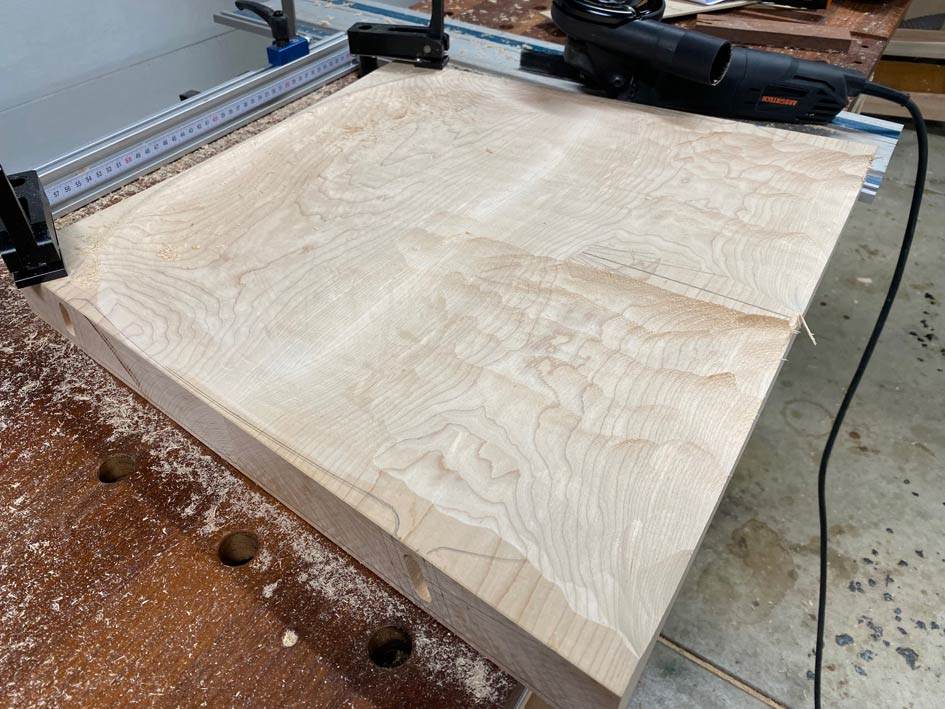
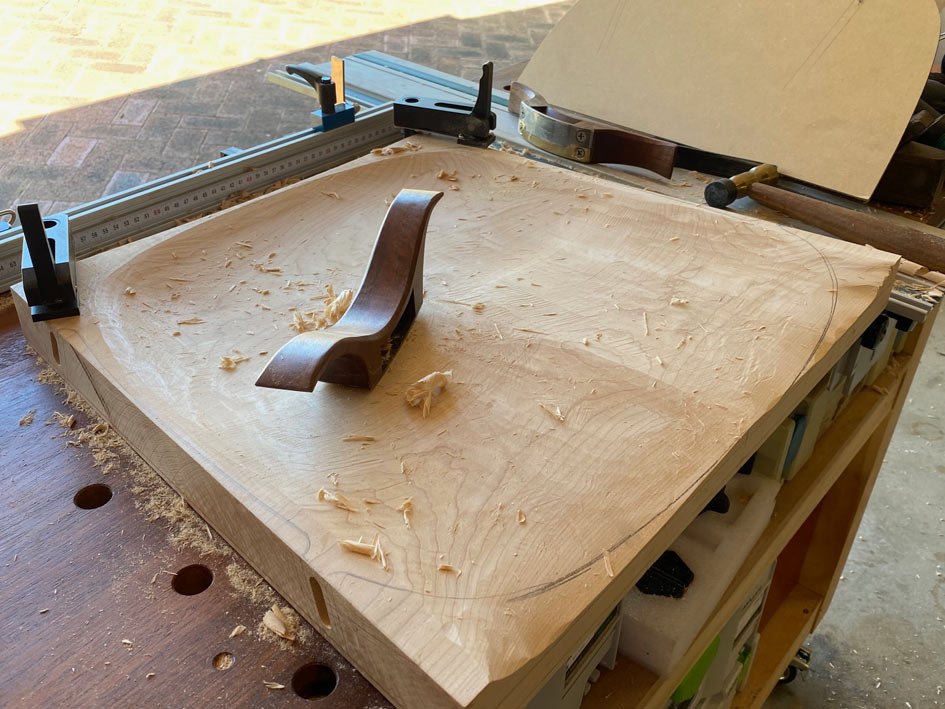
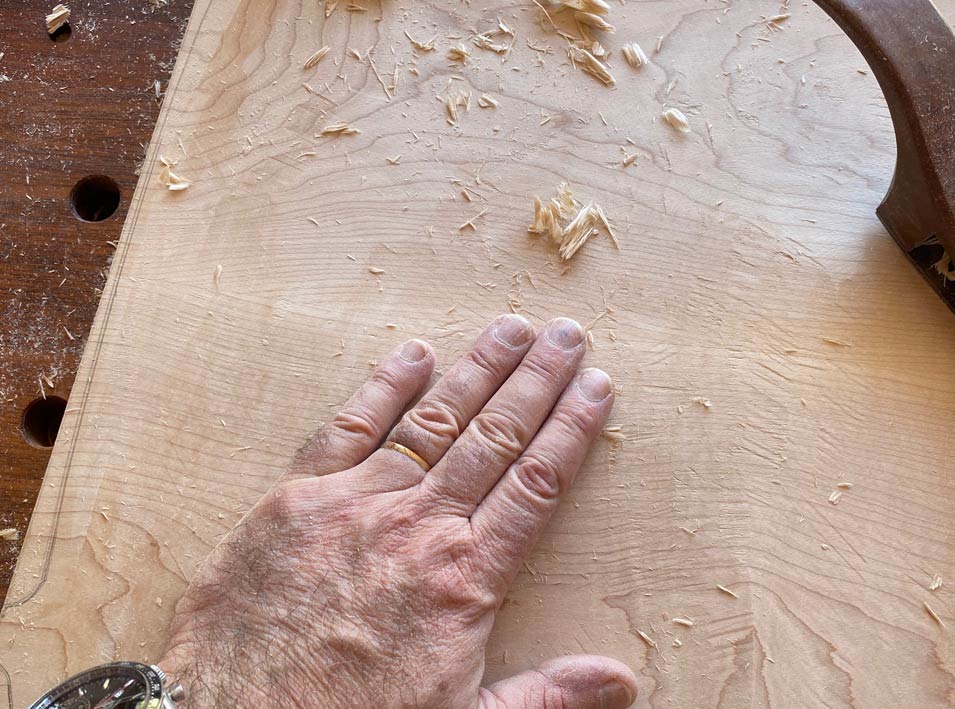
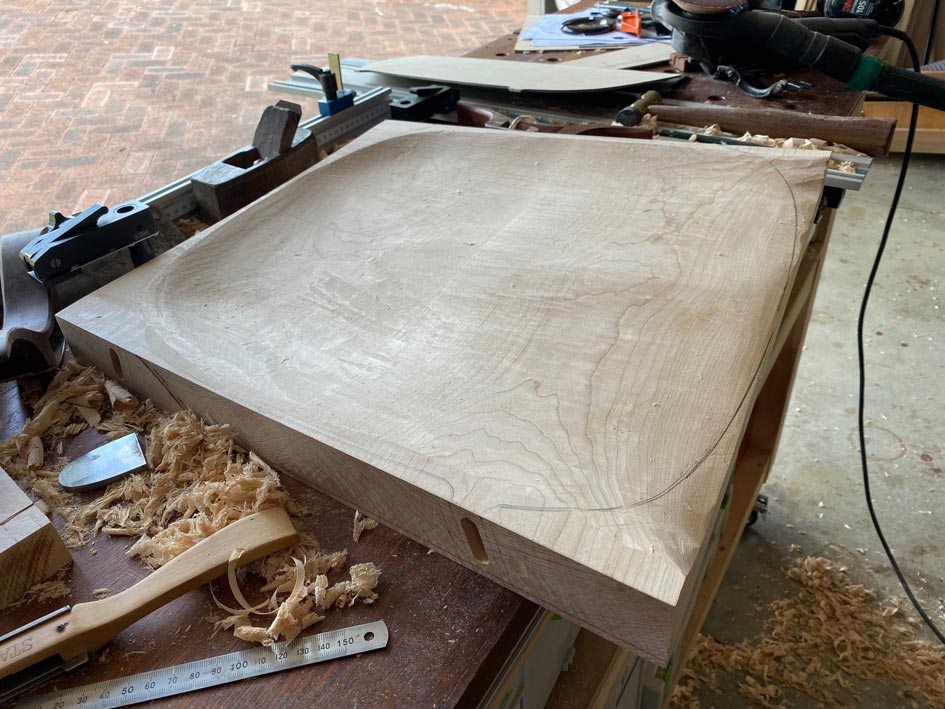
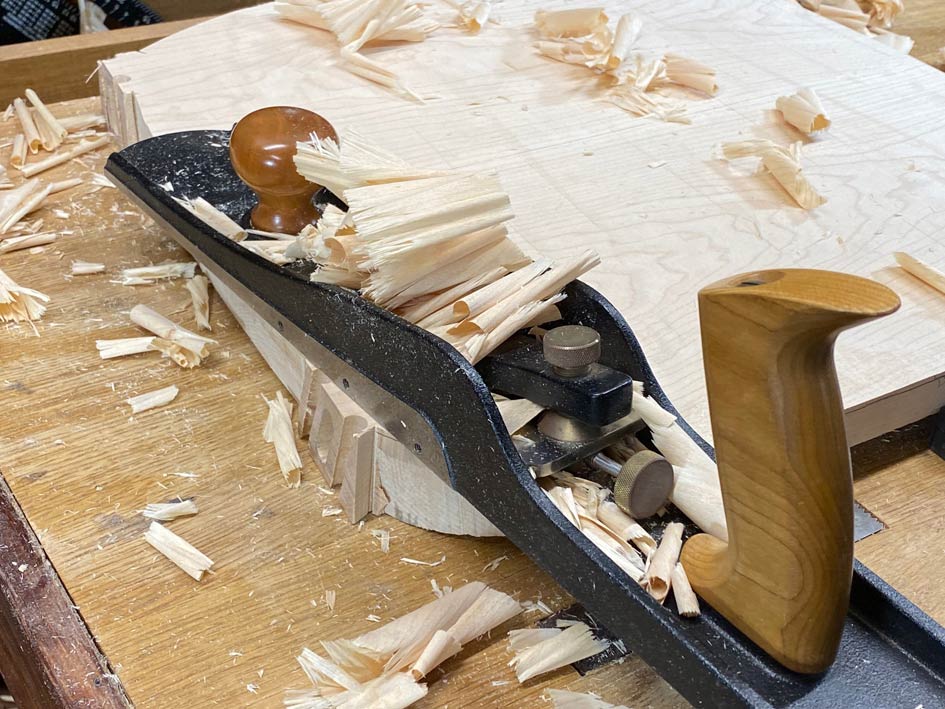
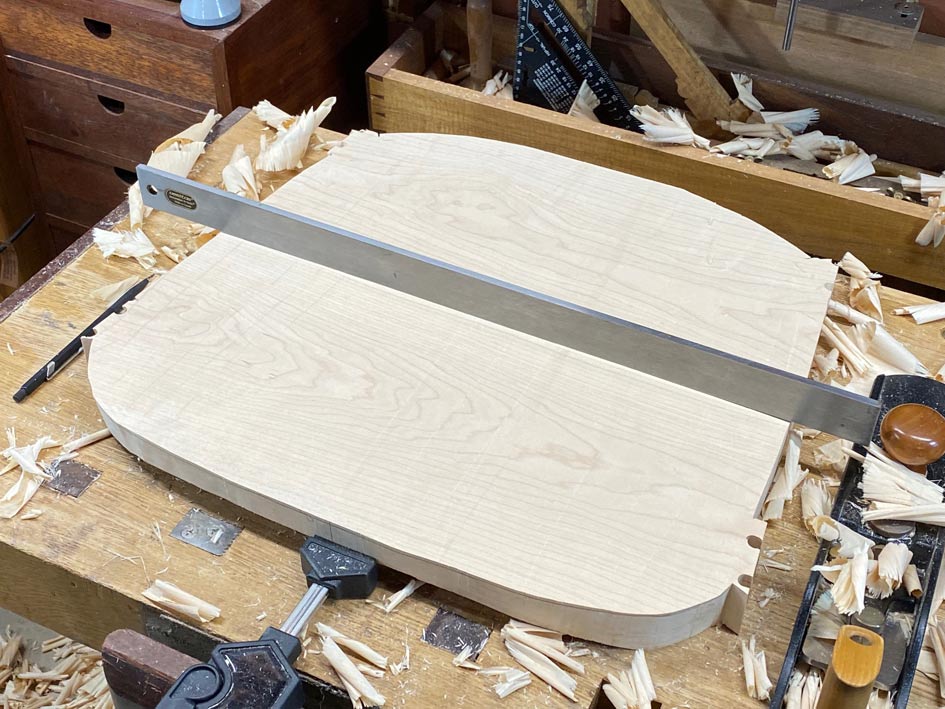
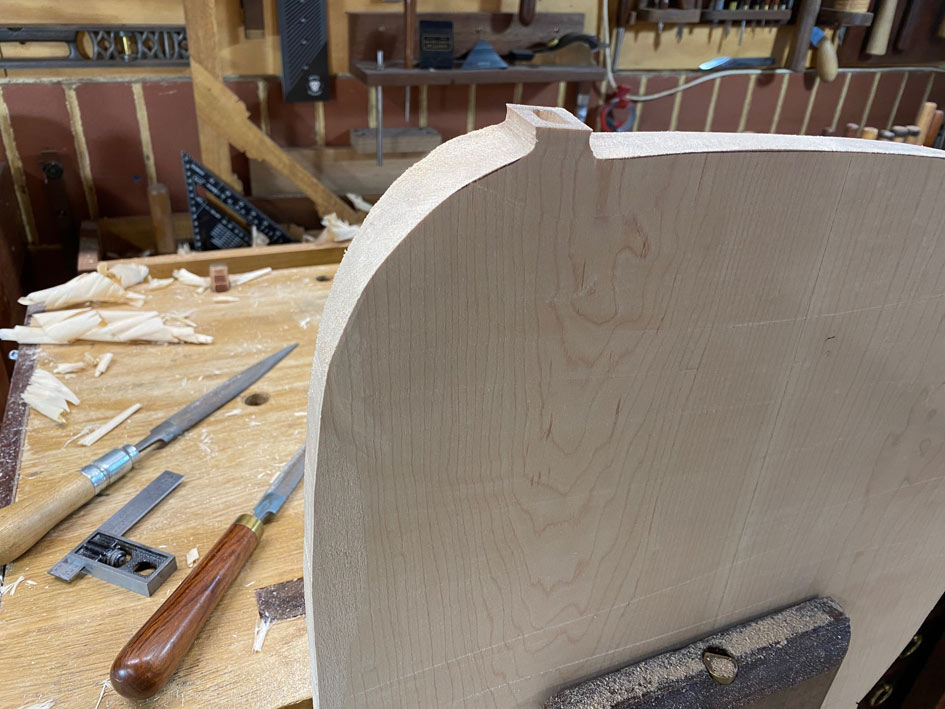
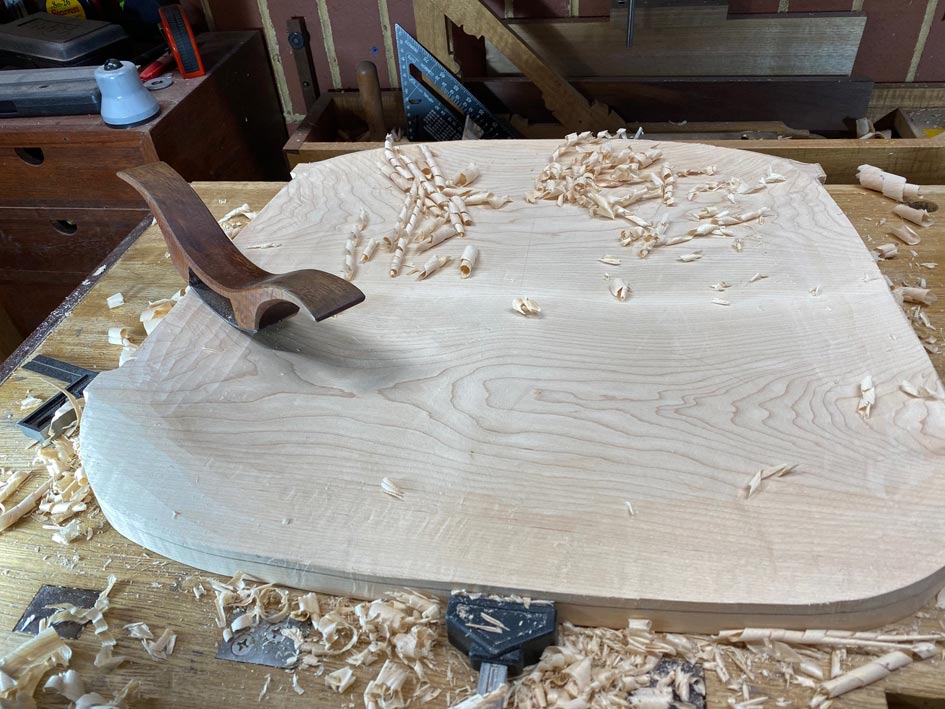
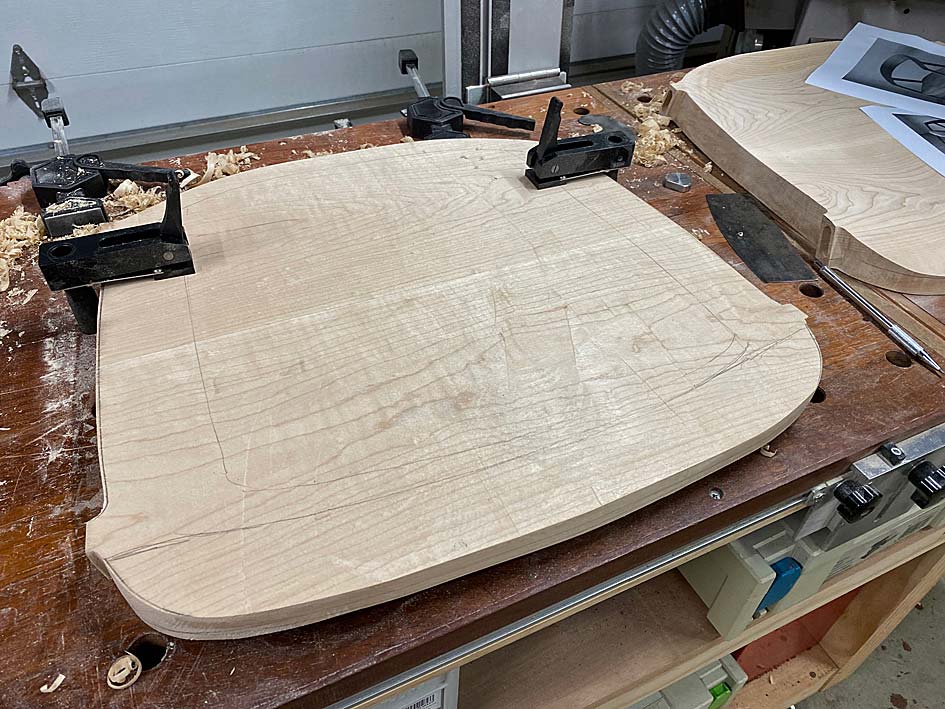
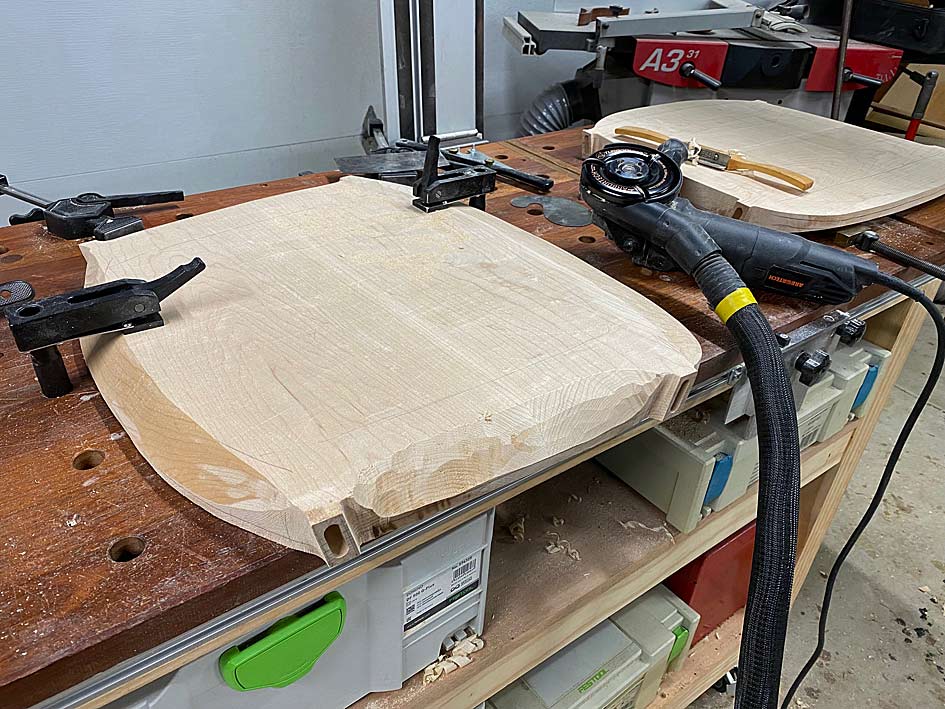
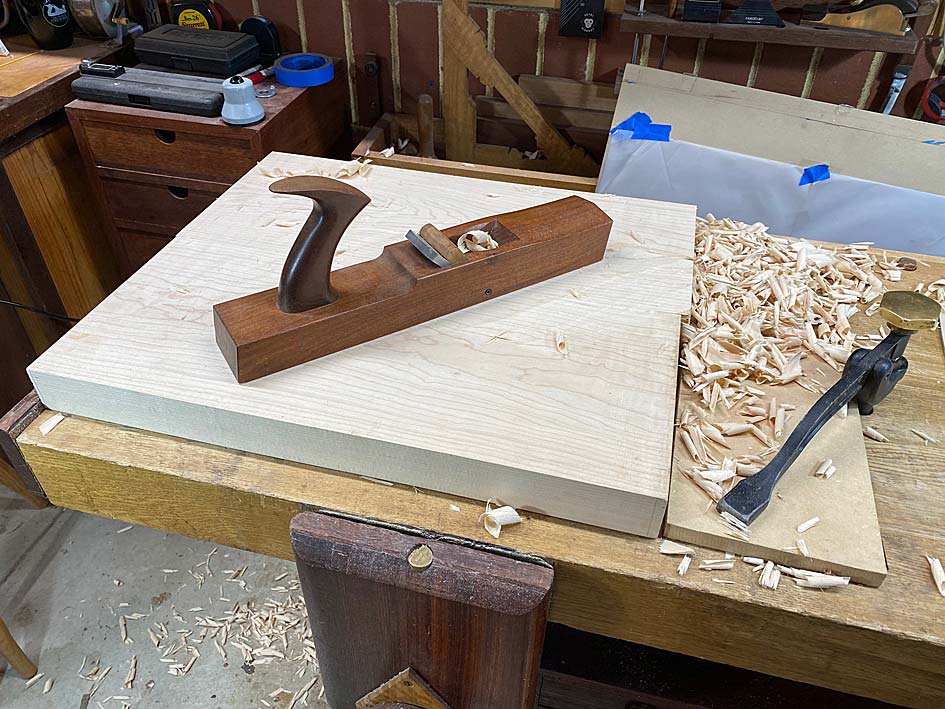
    A little jack-planning to flatten the underside of the seat blanks ..


  2. #2
    Join Date
    Feb 2004
    Location
    Perth, Australia
    Posts
    9,497
    These are now sawn to shape ...


    After this was done it became apparent just how the first shaping of the chairs differed from the DC09 design. Here is the first chair along with two legs. In the background can be seen the plan I had made for that build ...


    It looks quite good, with the angles and spacings appearing correct. In fact, they are quite different from the DC09. Below is the DC09 seat below the first seat. You can see the positioning of the legs ..


    Before I dominoed the mortices, the legs were mocked up to be sure of the angles. I discovered that they should be at 14 degrees and not 10 degrees, as they had been before. In the top right corner you can see a DC09 for comparison ...


    Guides for 14 degrees ...


    Marked and morticed ...


    Tenons were made on the router table ...


    All is looking right so far ...


    All advice gratefully received.


    Regards from Perth


    Derek

  3. #3
    Join Date
    Feb 2004
    Location
    Perth, Australia
    Posts
    9,497
    I was asked how I developed the drawings and plans, especially as there are numerous compound angles. It is a important question for those who want to use the ideas that are around us.

    What I do is explore the videos and all photos, and then screen save relevant examples. From this I estimate or calculate size, approximate dimensions, and refine these over multiple examples. Here are some of the photos I used ....


    Regards from Perth


    Derek

  4. #4
    Join Date
    Feb 2004
    Location
    Perth, Australia
    Posts
    9,497
    A question about loose tenons


    The legs will be joined to the seat with loose tenon mortice-and-tenon joinery. The tenons are Hard Maple, as with the rest of the build. I am in the process of choosing the stock for the 10mm wide x 30mm long tenons. The aim is to ensure that these are the best for a chair. Not any other purpose, but a chair.


    The issue is grain direction: is it better to have the grain running horizontal or vertical?


    Vertical grain should offer more rigidity, while horizontal grain more flexibility. While is preferred - your opinion?


    The square stock is shaped on the router table ...


    This is how it will look in the leg through mortice (minus the wedge and the rounded leg) ...


    Regards from Perth


    Derek

  5. #5
    Join Date
    Nov 2014
    Location
    Baton Rouge, LA
    Posts
    126
    My first impression was to prefer the horizontal grain as that should be more dimensionally stable - essentially quarter sawn.

    Then I decided I’m not sure why it matters as plenty of flat sawn rails are mortised into legs and that orientation also seems to work.

    And now I’m back to the quarter sawn orientation for no good reason other than quarter sawn lumber is generally considered better. Is it not?

  6. #6
    And if you are wedging, would you not want the grain to run horizontal?

  7. #7
    Join Date
    Feb 2004
    Location
    Perth, Australia
    Posts
    9,497
    Quote Originally Posted by Richard Verwoest View Post
    And if you are wedging, would you not want the grain to run horizontal?
    Richard, while that makes sense aesthetically (and the direction I am inclined towards), I am not sure that it is necessary since the saw kerf should end in a drilled hole, which would prevent splitting.

    Regards from Perth

    Derek

  8. #8
    Derek, I see your point....but...if your grain ran vertical, and you wedged, then the wedging forces would be against the vertical grain on the legs. Therefore, possibly splitting the leg? Beautiful chair by the way. And I fully enjoy the detail you give in every build thread. Thank you sir!

  9. #9
    Join Date
    Feb 2004
    Location
    Perth, Australia
    Posts
    9,497
    This is a long post with a good many photos. Treat them like a comic strip - flip by. It's just that there is so much more than one might realise that needs to get done when carving a seat. It is a 3D construction, and more complicated than joining square sections. This will become apparent as we progress.


    These are the two seats. Both have been prepped with drilled holed to carve to depth. My plan is to work two seats alongside one another, completing a section on one and then duplicating it on the other, moving on, back-and-forth. The first stage is to power carve the rear of the seat using the Arbortech ...


    Garage doors make for a handy white board to hang photos. These are the seats, and the angles provide the needed guidance.


    First shaping ..


    It's rougher than it looks. A travisher begins the process of smoothing the curves ..


    Every now-and-then a scraper will refine the tear out ...


    We begin the front section of the seat now, again using the Arbortech carver ...


    And refine with a travisher ..


    ... always feeling the surface with a hand to detect any uinevenness ...


    It is beginning to resemble the photos ...


    At this stage it is time to cut out the seat surround, but before this can be done, the mortices (for the loose tenons) need to be preserved. This is not straight forward as they angle at 14 degrees. As a result, it is not possible to saw from end to end. The area around the tenon will require extra shaping.


    My plan was to drill alongside the base, which would refine it and also create a curved root ...


    Then as much as possible was sawn away with a jigsaw ...


  10. #10
    Join Date
    Feb 2004
    Location
    Perth, Australia
    Posts
    9,497
    Time to refine the front section and tenons. To do this, the underside of the seat needed to be made perfectly flat: this will provide a reference side to mark the boundaries at the front for carving to; also, taking down the bottom will define the bottom of the tenons ..


    The shape of the underside is estimated using the templates for the top side ..


    .. and refined with a rasp ..


    Waste sawn away ...


    .. and shaped ...


    Again and again ...


    Finally the front of the seat can be shaped as it flows from the end of the tenons ...


    With raking light, the tear out and bumps are more easily seen, and now sanded down with 80 grit (more will be done much later on) ...


    And that's it for today. Underside shaping to come.


    Regards from Perth


    Derek

  11. #11
    Join Date
    Feb 2004
    Location
    Perth, Australia
    Posts
    9,497
    Time to finish the seats ... sort of ... well, very close.


    This is where we start - two seats completed on the upper side ...


    Looking at the seat blanks from the side, it is apparent that they are 2" thick ...


    ... and they need to end up looking slim, like this ...


    Clearly, there is a great deal of waste to remove from the sides. That is, not to thin the thickness, but to taper the sides to create the impression of thinness.


    Here is another view, which better illustrates this ...


    The MFT makes a good bench for carving ...


    Lines are roughly pencilled on the seat and then the Arbortech is used to carve away as much waste as possible ..


    I relied on a Auriou 10-grain rasp to do most of the shaping ...


    ... until I was loaned the largest rasp I have ever seen. Large enough to cause most here rasp-envy. It says Nicholson on it, but it appeared larger than a Nicholson #50, and far, far coarser than the 11-grain it is advertised as having. Any ideas?


    I moved between rasps and spokeshaves to shape and smooth the curves ..


    To be frank, I worked without a specific plan other than to create fair curves - the curves almost decided what waste to remove, while I monitored the photos I had for reassurance.


    In the end, with everything sanded to 80-grit, this was the result. From the underside ...


    The upper side, from the rear end ...


    And side ...


    And one more photo, taken at an angle similar to the "slim line" view above ...


    There is still work remaining in the seats: every time I look at the chair photos new details become apparent. So I shall get on with the legs, and return to fine-tune the seats later.


    Regards from Perth


    Derek

  12. #12
    Join Date
    Nov 2007
    Location
    NW Indiana
    Posts
    3,089
    Beautiful seats and amazing work.

  13. #13
    Join Date
    Feb 2004
    Location
    Perth, Australia
    Posts
    9,497
    Thanks Larry.

    Regards from Perth

    Derek

  14. #14
    Join Date
    May 2018
    Location
    Lancaster, Ohio
    Posts
    1,371
    Derek
    While I will never do the style work you do, I enjoy reading about your progress, work methods, and why you do what you do. I do pick up methods that help me with how I build. All the pictures definitely help to understand what you are accomplishing and help me to learn.
    Ron

  15. #15
    Join Date
    Feb 2004
    Location
    Perth, Australia
    Posts
    9,497
    Thanks Ron

    Regards from Perth

    Derek

Posting Permissions

  • You may not post new threads
  • You may not post replies
  • You may not post attachments
  • You may not edit your posts
  •