Page 1 of 5 12345 LastLast
Results 1 to 15 of 65

Thread: Build-along Project for November

  1. #1
    Join Date
    Jun 2010
    Location
    twomiles from the "peak of Ohio
    Posts
    12,211

    Build-along Project for November

    IF anyone wants to follow along? Recently laid in a supply of 1 x 6 Ash planks...about 52 bft worth...got the shop ready...bench cleared of action...
    Thurs. Shoptime, cleared for action.JPG
    Even ran the Stanley No.5 -1/2c around a bit, had a few high spots to level out..
    Thurs. Shoptime, leveling up,down.JPG
    First 2 planks arrived in the shop..
    November Project, first 2 planks to the shop.JPG
    These needed to be rough cut to length @ 41"....
    November Project, one cut.JPG
    And get rid of some split ends..
    November Project, Fugly scrap.JPG
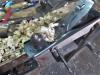
    Then, since both were tapered a bit, best edge against the rip fence...set to take a smidge off...move the fence again, place the freshly ripped edge against the fence, and skim off the other edge..
    November Project, ready to rip.JPG
    2 planks, with no tapered edges, and all parallel..then find the exact center....reset the rip fence to split that line...
    November Project, ripped to 2.75 width.JPG

    Clamp the 4 together, and let them sit a few...I now have 4 stiles for the 2 Frame and Raised Panel sides of a 5 drawer Chest of Drawers ( keep wanting to say "Chesta Drawers)..Finished length will be ~40-1/2"

    Next episode? Milling the rails, and a start on the panels...Goal is to fully build the sides of the case, first...THEN fill in the insides...first with web frames...then 5 drawers, and then got the bread board top out of the clamps and onto the case.
    Stay tuned...
    A Planer? I'm the Planer, and this is what I use

  2. #2
    Join Date
    Jun 2010
    Location
    twomiles from the "peak of Ohio
    Posts
    12,211
    2 more planks to the shop..do a bunch of cross cuts..
    November Project, 2 upper rails, 2 raised panel blanks.JPG
    Just over 11" long...rip fence then to the saw..need 4 pieces ripped to 2" width...need 8 pieces ripped to 1-1/2" width..
    November Project, 8 middle rails.JPG
    8 skinny ones will be the middle rails...the 4 wider ones...will be at the top and bottom of the case's sides..
    November Project, 2 bottom rails.JPG
    2 sides..2 bottom rails...laid out for a spacing layout..
    November Project, setting out spacings.JPG
    And that was as far as I got...

    needed to bring a couple more planks to the shop...as I needed 8 more blanks for the raised panels...already had 2..so..
    November Project, 10 panel blanks,crosscut.JPG
    Used one of those 2 as a length gauge..and rough cut the other 8....there WAS a bit I couldn't quite use...
    November Project, Split ends, scrap barrel.JPG
    Split ends, anyone?

    Set up the rip fence, again..
    November Project, ripping for width.JPG
    Goal was to get one good edge on each...then reset and run the freshly sawn edge against the fence...to get a decent, parallel width...
    November Project, Needs squared up.JPG
    Ends will need squared up...then find out how LONG they have to be...then make them into raised panels..

    Stay tuned..( been in the shop 5 times, so far, about 1 hour each time..)
    A Planer? I'm the Planer, and this is what I use

  3. #3
    Join Date
    Jun 2010
    Location
    twomiles from the "peak of Ohio
    Posts
    12,211
    Blanks for the raised panels have been squared up on their ends..
    November Project, done, for now.JPG
    Will need to be trimmed to their final length, once I figure that out...

    Panels will reside in grooves. Very hard to use a Stanley 45 on the narrow rails,,,fence gets in the way...so.
    November Project, Friday night, Groove maker.JPG
    We have ways....also, it would be nice IF the groove in the stiles was the same...took two set ups..
    November Project, Friday night, 1st rail grooves.JPG
    First set up..2 passes per edge (that will get a groove) then move the fence in a hair..
    November Project, Friday night, second setting, grooves.JPG
    to clean out the strip down the center..again, 2 passes, to make sure this is centered..while this worked for the rails..the stiles were first resaw down to 3/4" thick, before they were grooved..
    November Project, Stiles resawn.JPG
    Since the stiles USED to be 7/8" thick..now they match the thickness of the rails. Will leave the raised panels alone.

    Rails need tenons..
    November Project, Friday night, Tenon maker.JPG
    Consistent tenons...
    November Project, Friday night, 1st tenon.JPG
    as in 24 tenons that are all the same...
    November Project, Friday night, BOTH ends.JPG
    12 rails, means 24 tenons, had to remember to do both ends..


    Next up? Maybe a bit of molding work? miters ? Mortises to be chopped? Once the "frame work" is fitted together, I can start on the Raised Panels..and get them fitted into the frames.

    Stay tuned..
    A Planer? I'm the Planer, and this is what I use

  4. #4
    Join Date
    Jun 2010
    Location
    twomiles from the "peak of Ohio
    Posts
    12,211
    Miters? Well, the rails fit down into the grooves..
    November Project, Friday night, fits like this.JPG
    With a mitered corner where the grooves meet up..
    November Project, Friday night, needs mitered.JPG
    Which means a miter cut on the rails..
    November Project, Friday night, special cuts.JPG
    And something like this on the stiles...so that the molded edges will meet in a mitered corner...
    Whacking Wed., closed up tight.JPG
    And the inside is flush...(detail from another Project chest of drawers)
    Freaky Friday, trouble spot.JPG
    Hard part will be cutting the miters to match..Dovetail saws, and chisels will work....along with a Mortise chisel to chop a 1/2" deep mortise for the tenon..

    Stay tuned...pretty sure that some cussing will get involved...
    A Planer? I'm the Planer, and this is what I use

  5. #5
    Join Date
    Jun 2010
    Location
    twomiles from the "peak of Ohio
    Posts
    12,211
    Ok..needed to set up the router table, today
    November Project, Sat., Riding the fence.JPG
    And mold the outside face of all the grooves..
    November Project, Sat., molded edges.JPG

    As this will be meeting up with a raised panel..
    I also needed to do a miter cut..
    November Project, Sat., Mitered corners.JPG
    mid rails got all 4 corners.. top and bottom rails, only the grooved edge...
    Because the rails need to settle down into the grooves..
    November Project, Sat., 2nd dry fit, better.JPG
    And the molded edge looks like a mitered corner..

    Needed a few other tools, today..
    November Project, Sat., tool kit.JPG
    Along with the mortise jig..

    Have one mortise chopped..only 23 more to go

    Stay tuned..
    A Planer? I'm the Planer, and this is what I use

  6. #6
    Join Date
    Jun 2010
    Location
    twomiles from the "peak of Ohio
    Posts
    12,211
    Raised Panels would be nice..to help set up the rest of the mortises...
    November Project, Raise a panel, 3 fitted.JPG

    Shop does not have a "panel raiser " plane, nor a router bit..so..
    November Project, Raise a panel, frontside.JPG
    Tilt the saw blade to ~15 degrees...run all 4 edges through...reset the blade back to 90 degrees..
    November Project, Raise a panel, backside.JPG
    Takes two settings of the fence and the blade..to rebate the inside of each panel...times 10 panels

    Might leave the inside of the panels rough sawn...
    November Project, Raise a panel, fitting up.JPG
    As the only things that will see this view, will be the sides of the drawers, on their way in and out

    Plan for today?
    November Project, Raise a panel, next 3.JPG
    Chop these 3 mortises..and start on the next stile?

    Stay tuned....more than welcome to stop by and help out...
    Last edited by steven c newman; 10-29-2023 at 12:35 PM.
    A Planer? I'm the Planer, and this is what I use

  7. #7
    Join Date
    Jun 2010
    Location
    twomiles from the "peak of Ohio
    Posts
    12,211
    So..IF you do have that sort of Panel raiser plane or Router bit....by all means, use them. If is was just a couple panels, I'd use the No.4 plane like Paul Sellers does...but..10 panels? Meh, not today..

    Note: 5 drawer fronts are scheduled to MATCH this style of raised panel....

    Will use a panel to check the lay out of the other three mortises,,,and then get to chopping. Thinking about15-20 minutes per mortise...we'll see how my arm holds up...

    Stay tuned...( Son is doing laundry for HIS work clothes, today....may have to wait for the shop to cool down a bit, before I can get to work..)
    A Planer? I'm the Planer, and this is what I use

  8. #8
    Join Date
    Jun 2010
    Location
    twomiles from the "peak of Ohio
    Posts
    12,211
    New 80 grit sanding belt..vs 5 raised panels....to get rid of the worst of the rough sawn look.....then
    Nov. Project, Sunday, planed smooth.JPG
    Stanley No. 4-1/2c, Type 11 to get things smooth...

    Last 3 mortises on this stile are done...time for a very dry fit..show face?
    Nov. Project, Sunday, mortises fitted with panels.JPG
    And the rough sawn inside face..
    Nov. Project, Sunday, inside view, dry fit.JPG

    Need to clear this off, and start on Stile #2 out of 4 stiles...

    Stay tuned...
    A Planer? I'm the Planer, and this is what I use

  9. #9
    Join Date
    Jun 2010
    Location
    twomiles from the "peak of Ohio
    Posts
    12,211
    Was having issues while chopping mortises into Stile #2....as I was using a panel to check spacings...while the mortises between the 2 stiles lined right up...trouble came when I tried to add in a panel.....somehow, the panels no longer fit the spacings? had to go back and re-do the rebates on the back of the panels..all 10 panels..? Panel width was also (now) too wide...removed a blade's width..try again..
    Nov. Project, Sunday Night. panel issues 2.JPG
    Now they slide around? Humidity? Changed by almost an 1/8"?

    At least, I did get 4 out of 6 mortises chopped and fitted, Last night..
    Nov. Project, Sunday Night, 4 mortises done.JPG

    Today being a Monday....so unless I get VERY BORED...shop will be closed for today....had enough "Monday-itis" last night..

    Stay tuned...waiting on Tuesday to blow in with the wind...
    A Planer? I'm the Planer, and this is what I use

  10. #10
    Join Date
    Jun 2010
    Location
    twomiles from the "peak of Ohio
    Posts
    12,211
    Just bored, and thinking aloud...

    IF my posting these "Build-along Blogs" inspire others here to post some of their own....maybe a chance to see how others work on their Projects?

    I do have some tidy-ing up to do...but will save a glue-up until tomorrow. Work sessions only last an hour..maybe 90 minutes, before I have to stop...and, trying to keep sawdust out of these new eyes..
    A Planer? I'm the Planer, and this is what I use

  11. #11
    I really want to do a build along. In the new year when I can actually build something in reasonable amount of time. My daughter says she wants some more display things. I can't wait to start another one. Recovering from knee surgery today and it will be a week or so before I he'd to the basement.

  12. #12
    Join Date
    Jun 2010
    Location
    twomiles from the "peak of Ohio
    Posts
    12,211
    Taking today off....last night had a HIGH fever...could not get warmed up, and stop shivering....then, during the night, the fever must have broke...because I was soon a sweaty mess...

    This morning, still felt like crap...food doesn't taste right...I don't think I would be very safe around sharp objects in the shop....will try again, tomorrow..
    A Planer? I'm the Planer, and this is what I use

  13. #13
    Join Date
    Jun 2012
    Location
    Lubbock, Tx
    Posts
    1,490
    Hope you feel better.

  14. #14
    Join Date
    Jun 2010
    Location
    twomiles from the "peak of Ohio
    Posts
    12,211
    Felt well enough this morning, to go for 2 hours of shop time, today...

    Last 2 mortises were chopped and dry fit up...Raised panels needed sanded and planed flat...rails and stile also were planed smooth and flat....

    Then the cussing could begin..
    Nov. Project, Hump Day, 5 clamps, so far.JPG
    Must be something to do with there being 13 parts that have to go together..all at once...with glue spread on the tenons with a brush..and five clamps...two of which were pipe clamps...checked for square...not quite there, yet. We have ways..
    Nov. Project, Hump Day, pull the diagonals.JPG
    Needed a wee clamp to pull the diagonals...until this..
    Nov. Project, Hump Day, now we squared.JPG
    Said I was square...always leave enough room under the clamps, to slide a square under them..
    Nov. Project, Hump Day, let sit a day.JPG
    Will let this sit until tomorrow..no rush...

    Back at the bench..
    Nov. Project, Hump Day, NEXT.JPG
    NEXT! have to start on Side #2...only 12 more Mortises to chop....

    Stay tuned...
    A Planer? I'm the Planer, and this is what I use

  15. #15
    Join Date
    Jun 2010
    Location
    twomiles from the "peak of Ohio
    Posts
    12,211
    Maybe later today, I might venture back to the shop...kind of sore today.....

    Somedays, I just sit down on the job...
    Poplar Box Project, sitting down on the job.JPG
    Easier on the back, that way..
    A Planer? I'm the Planer, and this is what I use

Posting Permissions

  • You may not post new threads
  • You may not post replies
  • You may not post attachments
  • You may not edit your posts
  •