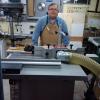
Pull handles for bird's eye maple drawers. 75 mm wide. Other dimensions on drawing. The angles cut will be about 15 degrees, all others square. Any suggestions on how to cut this safely? I like to work in MM but also added image with fractions Ashampoo_Snap_Sunday, August 6, 2023_14h13m50s_002_.pngAshampoo_Snap_Sunday, August 6, 2023_14h07m56s_001_.jpgIMG_0765.jpg

 Reply With Quote