Page 1 of 3 123 LastLast
Results 1 to 15 of 35

Thread: How to cut the lid of a box.

  1. #1
    Join Date
    Sep 2015
    Location
    Colorado Rocky Mountains.
    Posts
    50

    How to cut the lid of a box.

    I’ve struggled w/ the top/lid on more than one box.
    And so I’ve wandered the web, and posted my question here.
    The usual answer is that I make a box that’s the same on the top as it is the bottom. Sure. I like that idea. Nice and square, pert near perfectly ready to have it cut off, then hinges added.

    But my ripping skills are rickety at best.
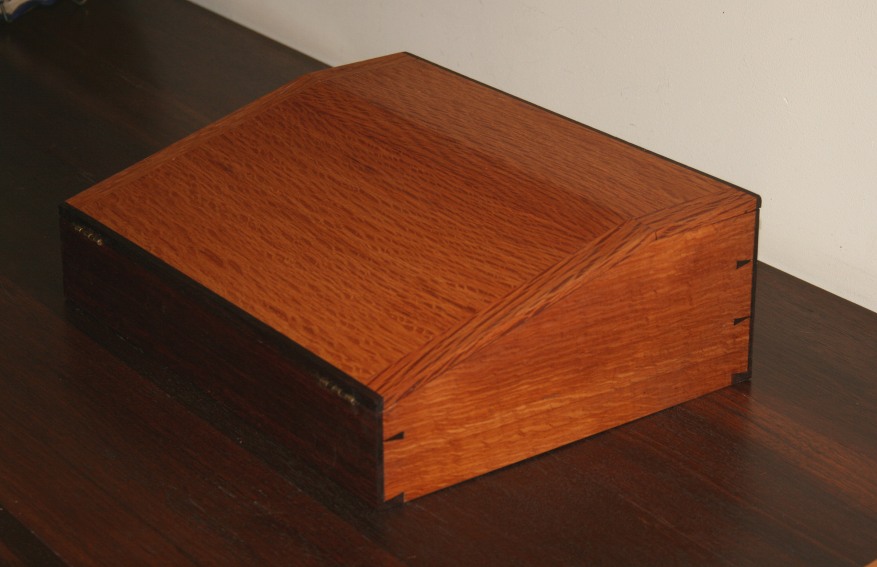
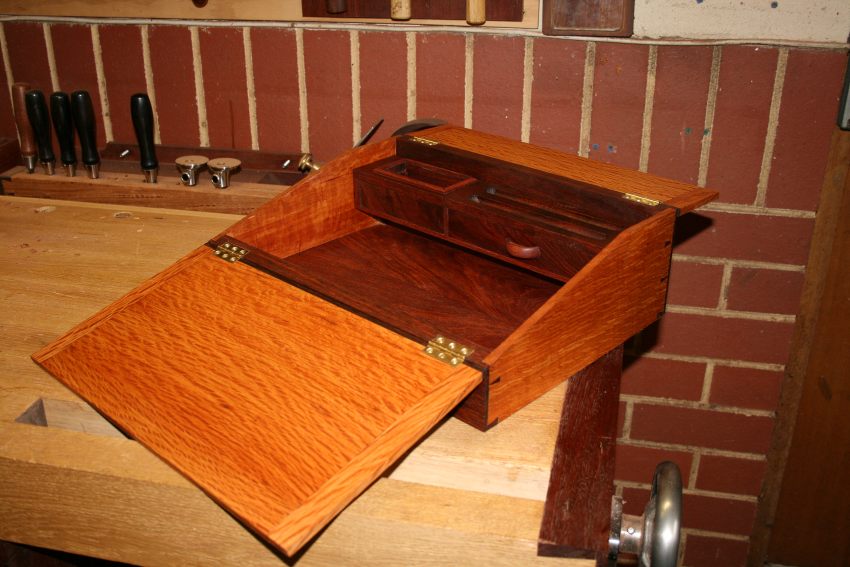
    So how does a clown go about cutting the top of a box off? Perfectly?
    Each one I’ve done results in less than perfect cuts and nothing close to square.

    I used a fence of sorts, it helped, but the resulting edges still were’s as clean as I’d like.

    I tried w/ western saws and pull saws.

    Thanks in advance.
    —P
    If your chute doesn't open, you have the rest of your life to fix it.

  2. #2
    Join Date
    Jun 2010
    Location
    twomiles from the "peak of Ohio
    Posts
    12,166
    Boxes that I build...I just use a Disston No. 4 backsaw....I cut the ends first...then connect them to the sides...last cut, I add a shim in the kerf.

    One other tip: Use a cutting gauge to mark the cut line exactly where you need to saw the lid free at...and let the saw follow that.
    Last edited by steven c newman; 01-24-2023 at 8:11 PM.
    A Planer? I'm the Planer, and this is what I use

  3. #3
    Join Date
    Feb 2020
    Location
    Camarillo, CA
    Posts
    422
    I’ve done it on several boxes with both western and pull saws. If I have a western back saw that is big enough, I’ll use that. A ryoba is a little trickier for me, but I’ve gotten good results with one. The really thin kerf is a plus with a ryoba.

    Stevens advice about marking out your line is important. I’ve also marked each side I want to keep first, then cut in the middle of the two lines.

    For me the biggest thing is to take my time. If you start feeling rushed step back for a second. I’ll pick one corner and start working down from it, always cutting only one side at a time.

    I’m pretty sure I got all four corners started last time before completing the cut across any one face. Once I get close to done I’ll use some painters tape to hold the lid on the opposite side so it doesn’t flop too much as I finish my last cut.

    Finally, plan ahead when you lay the box out. If you know you’ll need 3/16” or a 1/4” of wiggle room, make the box that much bigger, then just commit to planing the excess off after you’ve cut the lid off. No one will be able to tell once you get everything cleaned up.

    The first couple I did definitely took a lot of clean up.

  4. #4
    Join Date
    Nov 2009
    Location
    Peoria, IL
    Posts
    4,502
    I would use a plow plane with a fence and an 1/8" cutter in it.

  5. #5
    Join Date
    Sep 2007
    Location
    Longview WA
    Posts
    27,428
    Blog Entries
    1
    Don't feel bad Peter, I have had trouble with a handsaw cutting off the top of a box.

    Good advice above. The top does not need to be the same as the bottom. Pre-cutting a kerf around the outside (and even inside) of the box before assembly can be very helpful when working with handsaws. This can be done with a marking gauge or a plow plane.

    Cleaning off the saw marks is easy with a small bench plane:

    Planing the Saw Marks.jpg

    The bevel down blade with a chip breaker makes for easier planing compared to a block plane.

    But my ripping skills are rickety at best.
    As others have already mentioned, don't try to cut it all at once. Take one side at a time.

    Also important is to secure the work. It is one less thing to cause a problem.

    jtk
    "A pessimist sees the difficulty in every opportunity; an optimist sees the opportunity in every difficulty."
    - Sir Winston Churchill (1874-1965)

  6. #6
    It has taken me longer than I thought it should to improve my hand sawing, and still not great. A lot of practice and patience and let the saw do the work. Helped me was Concentrate on keeping my wrist forearm and elbow in line.

  7. #7
    Join Date
    Jun 2010
    Location
    twomiles from the "peak of Ohio
    Posts
    12,166
    Episode #3, connect the dots.JPG
    Called connect the dots...Sellers just used a knife line.
    Episode #3, hole to fill, cut lines.JPG
    Cut lines....This is on the end of the box...Backsaw to saw both corners towards the center of the end, until..
    Episode #3, one end cut.JPG
    Break through! Repeat for the other end...then, lay the box down...and connect two corners ...
    Episode #3, almost done.JPG
    I replace this backsaw with another saw blade ...as a shim....then rotate the box and clamp it back into the vise....backsaw to connect the other 2 corners, until the parts separate.
    (Note: Clamp the box as high as you can for this last cut, so things do not bind up)
    Episode #3. separation.JPG
    Use a long enough bench plane to span....level the saw cuts..
    Episode #3, leveling the cuts.JPG
    Can be a #4....that one is a Millers Falls No. 11 Junior Jack...test for high spots...
    Episode #3, checking for high spots.JPG
    And that is about it..
    A Planer? I'm the Planer, and this is what I use

  8. #8
    Join Date
    Sep 2007
    Location
    Longview WA
    Posts
    27,428
    Blog Entries
    1
    Quote Originally Posted by Matt Carr1 View Post
    It has taken me longer than I thought it should to improve my hand sawing, and still not great. A lot of practice and patience and let the saw do the work. Helped me was Concentrate on keeping my wrist forearm and elbow in line.
    Yes, keeping your hand, wrist, elbow and forearm in line is an important element of sawing straight. This took me a while to get in synch. (BTW, this is also important with nailing. Once this was learned my nails stopped bending.)

    Another helpful clue is to watch the reflection in the saw plate:

    Reflection on Sawing.jpg

    For a straight 90º cut the reflection should look like an extension of the piece being sawn. This has even helped me with angled cuts like dovetails and miters.

    The reflection is 3D. A rising or falling reflection indicates the saw is not plumb.

    A turning reflection indicates the saw is not square to the edge.

    At 45º the reflection will look like a perfect right angle.

    jtk
    "A pessimist sees the difficulty in every opportunity; an optimist sees the opportunity in every difficulty."
    - Sir Winston Churchill (1874-1965)

  9. #9
    Join Date
    Feb 2004
    Location
    Perth, Australia
    Posts
    9,491
    Hi Peter

    There are two methods I use to get perfect cuts (is there any other way ).

    The first is to use a tablesaw, and cut through all but a few mm of each side. Then use a backsaw or pull saw to cut the remainder. Finally, clean up with a hand plane.

    That is my preferred method. No mucking about. However, since this is a hand tool forum, here is how I do it with hand tools. The example comes from a box I built about 10 years ago, and converted into two separate builds.

    Started with this box …


    … and needed a diagonal cut, as in the photo ..


    First made a template (as it was more reliable than measuring and scribing) …


    Drew/connected the lines.

    Used a fence (this one has rare earth magnets to keep the saw plate from wandering) …


    Sawed one side …


    Then supported it from any movement with a hot-glued patch ..


    The result was a clean, accurate set of cuts …


    One piece became this lap desk …


    .. and the other piece became a box for a plough plane I built …


    Regards from Perth

    Derek
    Last edited by Derek Cohen; 01-25-2023 at 8:40 PM.

  10. #10
    Join Date
    Mar 2006
    Location
    SoCal
    Posts
    22,510
    Blog Entries
    1
    Spacers with tongues the same width as your blade kerf.
    Jewelry Boxes 20220423 (57).jpgJewelry Boxes 20220423 (58).jpgJewelry Boxes 20220423 (59).jpg
    Easy peasy.
    "A hen is only an egg's way of making another egg".


    – Samuel Butler

  11. #11
    Join Date
    Mar 2016
    Location
    Tokyo, Japan
    Posts
    885
    My best advice when ripping is to mark two lines and rip between them. Somehow, that helps your eye track better.

    That, and leave plenty of extra room to clean things up afterwards with a plane and plane it down flat. You'll always be a little off.

  12. #12
    That is definitely a great fool proof way. Great looking box.

  13. #13
    Join Date
    Aug 2019
    Location
    Pittsburgh, PA
    Posts
    850
    I would use a marking gauge, saw above the line, mark the lid w the matking gauge and then plane the saw marks w a smoother.

  14. #14
    Join Date
    Sep 2015
    Location
    Colorado Rocky Mountains.
    Posts
    50
    Now that's everything I was hoping for! So many great techniques.
    Naively, I didn't know I should have to plane the edges to something useable. Figured maybe some light sanding and it would be perfect.
    This step of a project has me daunted. So much work behind me with a box, then (if history repeats) I'll make some beautiful long project into frustration.

    But, I'm on it. I'll set it all up carefully. Use two lines. And will carefully work on the sawing.

    And as for Paul Sellers? Well, I've watched and re-watched sooo many of his videos.
    Parts of his techniques make sense. The knife wall is one that I've tried to repeat often. And still my cuts and edges are rarely as clean.
    (but im happy to keep practicing and practicing.)

    Thank you all.
    -Peter
    If your chute doesn't open, you have the rest of your life to fix it.

  15. #15
    Join Date
    Feb 2020
    Location
    Camarillo, CA
    Posts
    422
    Go for it!

    it is definitely a procedure that feels easier after the first few times you perform it.

Posting Permissions

  • You may not post new threads
  • You may not post replies
  • You may not post attachments
  • You may not edit your posts
  •