


Hi,
Potential customer asked about covering a fir down to make it look like an exposed timber. I built a custom bar for him a while ago and he likes the look of veneer.
If I was to use veneer, I was thinking 1/4" mdf + veneer VS resawn lumber ~1/4" thick. I haven't done something like this yet. Maybe 1/2" lumber is more appropriate?
Thoughts?
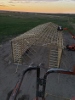
20221121_194350.jpg

 Reply With Quote


") )
)

