Page 1 of 2 12 LastLast
Results 1 to 15 of 18

Thread: A Couple Little Totes

  1. #1
    Join Date
    Feb 2020
    Location
    Camarillo, CA
    Posts
    423

    A Couple Little Totes

    So I’m on a mission making presents for relatives I haven’t seen due to Covid. I got the boxes done for my Aunts on one side of the family. I decided to make some little totes for my aunt and uncle on the other side. He keeps himself busy with projects fixing things up and doing wood turning. She rides and races horses. So, these might end up getting used for tools or they may just end up as a place to drop keys and mail by the front door.

    I decided to keep these simple. The sides will have some splay, but the ends will be vertical. I’ll fix some uprights to the ends and the handle will run the length of the box. I won’t divide the interior. I have some 1/2” cherry that will be enough for one box. I’ll either have to plane some 4/4 oak down for the other, or get some more wood.

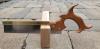
    I broke down the wood for the first box earlier this week and got the tails cut. I got the first joint done tonight. Pretty happy how it turned out.

    4BE6F05B-1252-4924-B466-FB629016D45E.jpg7EDE12D6-644A-4EDB-8752-6452C5E35D35.jpg1E34D362-FEB5-44CB-889A-D739B9CA7BF2.jpg

    Also, I got a Veritas clamping device and drilled some new holes in my bench to try out the concept of a tail vise. I think I’ll like this. I’m already looking forward to plowing grooves for the bottom and thinking about other operations that will be quicker/easier with this set up.

    AEAEB52A-1047-42E5-BE0F-35F3DFBA7C87.jpg

  2. #2
    Join Date
    Feb 2020
    Location
    Camarillo, CA
    Posts
    423
    I got my Covid booster and flu shot yesterday. Definitely feeling the effects today, but I worked a bit this morning and more this afternoon. Got the box done and glued up.

    I think I’m going to like this tail-ish vise. It made plowing grooves and beveling the bottom easy. For the grooves you have to be square to the bottom, not the face, so you hold the plow plane at an angle. It is pretty simple, but having the piece secure definitely makes it easier.

    I decided against stopped grooves or some other solution on the ends. The bottom is cut just a tiny bit short of the internal length and isnot captured by the ends. After the box is out of clamps I’ll glue little strips on each end to give the bottom support. Looking at it now I don’t think I’ll need trim on the inside to cover the gap between the bottom and the end.

    27658CF0-8BD5-40D1-901D-8CC0FD198A8B.jpgCE7E4709-8124-4F3B-8C3F-6EDEECBE3CB5.jpg263E3E36-DA09-4579-8FFA-4BDD3E914DA3.jpg

    Once I was happy with the dry fit I cut little blocks to use when clamping up. I spent some time getting clamps set and thinking about the process before starting the glue up. I used the bar clamps and blocks to get everything seated, switching them from one end to another, then came back with F clamps to be sure the first side didn’t shift while I got the second side seated. In hindsight, the angles on the sides are pretty small. I probably could have just clamped up with F clamps without any problems.

    my smallest set of clamps are 24”. They are kind of unwieldy for something this size. I guess I should get a set of four 12” F-clamps…

    F3F64CAB-4FB2-4F57-9906-388A29FB3E9B.jpg

    I cut the pieces roughly to height, but didn’t try to plane the tops flush or get bevels correct before glue-up. After it is out of clamps I’ll clean up the top, then make the handle.

  3. #3
    Join Date
    Feb 2020
    Location
    Camarillo, CA
    Posts
    423
    I was gone for the last few days on a work trip. Got back and started on the handle last night. Made the uprights and got the handle sized and tenons started. I’ll get the joinery done, then shape everything and make it look pretty. The uprights will be attached with bridle joints, and the handle will be joined to the uprights with protruding through-tenons. I cut the uprights first, then marked the length of the tenon shoulders directly off the piece.

    Pro tip: when you’ve been cutting bridle joints then move to cutting tenons, stop and remind yourself which side of the line you need to cut on. I didn’t make a mistake, but it was close.

    A big chisel was nice for cleaning up the inside of the bridle joints after I sawed them just a little shy of the marking gauge line. I got them close with the chisel, then used a rasp for the final tuning. I won’t tune up the tenons until I’ve cut the mortises.

    88FA8E51-BB67-4AD1-A002-BC4617AE10B6.jpgE27FEC9E-2351-4E39-B224-2673A571CAAC.jpgBD78DB5F-21EC-4989-88F6-6750EE52469D.jpg7CE9A2D0-425A-46CF-A44D-FA7AB91AA8EE.jpgCDD2362E-F09E-4F0C-ACC3-48782808BB6E.jpg

  4. #4
    Join Date
    Sep 2007
    Location
    Longview WA
    Posts
    27,453
    Blog Entries
    1
    Looking good Ben.

    Having made a lot of totes, there still hasn't been any dovetails on mine.

    My initials in Morse code was included on one of them:

    Morse Initials.jpg

    A bead was cut with a Stanley #45 and then was carved using a gouge to make dots and dashes.

    jtk
    "A pessimist sees the difficulty in every opportunity; an optimist sees the opportunity in every difficulty."
    - Sir Winston Churchill (1874-1965)

  5. #5
    Join Date
    Feb 2020
    Location
    Camarillo, CA
    Posts
    423
    I like the Morse code personalization!

    if you want to try a dovetailed tote you should go for it. Cutting dovetails with one side angled is pretty straightforward. Cutting them when both sides are angled makes layout a little trickier, but the actual process of cutting them is still the same.

  6. #6
    Join Date
    Feb 2020
    Location
    Camarillo, CA
    Posts
    423
    I got the handle and the uprights fitted and the handle mostly shaped. Just need to shape the uprights, do any final cleanup, then glue it up. Think I’ll be able to get that done tomorrow.

    90190DE9-0D36-4A25-987B-7BEB284C8748.jpg

  7. #7
    Join Date
    Sep 2007
    Location
    Longview WA
    Posts
    27,453
    Blog Entries
    1
    Quote Originally Posted by Ben Ellenberger View Post
    I like the Morse code personalization!

    if you want to try a dovetailed tote you should go for it. Cutting dovetails with one side angled is pretty straightforward. Cutting them when both sides are angled makes layout a little trickier, but the actual process of cutting them is still the same.
    I am thinking on it and may put it on my to do list. I may try to do one like this with angled corners:

    Tote Stool .jpg

    I sold that one and always though it would be nice to have another.

    jtk
    "A pessimist sees the difficulty in every opportunity; an optimist sees the opportunity in every difficulty."
    - Sir Winston Churchill (1874-1965)

  8. #8
    Join Date
    Feb 2020
    Location
    Camarillo, CA
    Posts
    423
    This one is done except for the finish. I need to mix up some fresh shellac so that will probably happen tomorrow. I might post this to the hand plane courage thread after the finish is on. This was all planed and scraped, with just a quick pass with green 3M abrasive pad at the end. I’m happy with how the handle came out. I cut stop cuts with a saw, then removed the majority of the waste with a chisel. I used a spoke shave to get close to the final shape, then shifted to rasps and finally card scrapers to smooth out the curve. The chamfers were done with a spoke shave and I used a chisel to get into the spots the spoke shave couldn’t reach. The shaping went really quick.

    I’ll start breaking down stock for the next one. I’ve got 4/4 red oak, so that’s what the next one will be made out of. I’ll have to take it down to 1/2” thickness, so I’ve got a jack plane session in my future. The tote doesn’t take much material, so it shouldn’t take too long to thickness enough stock.

    75BA7B78-A55D-47E3-8EFC-E8DA66DAD314.jpegB6316BB8-2939-49E3-801B-16F1AABC7C12.jpg

  9. #9
    Join Date
    Sep 2007
    Location
    Longview WA
    Posts
    27,453
    Blog Entries
    1
    Very nice Ben.

    jtk
    "A pessimist sees the difficulty in every opportunity; an optimist sees the opportunity in every difficulty."
    - Sir Winston Churchill (1874-1965)

  10. #10
    Join Date
    Jan 2010
    Location
    Lafayette, Indiana
    Posts
    1,378
    I agree with Jim. This is a nice little tote. A lot to like about it. Nice job. I’m glad you posted this project.

  11. #11
    Join Date
    Apr 2019
    Location
    Madison, Wisconsin
    Posts
    283
    Quote Originally Posted by Joe A Faulkner View Post
    I agree with Jim. This is a nice little tote. A lot to like about it. Nice job. I’m glad you posted this project.
    +1 here as well; looks great, and thanks for posting the build thread.

  12. #12
    Join Date
    Feb 2020
    Location
    Camarillo, CA
    Posts
    423
    I broke the 4/4 stock down and roughly thicknessed it a few days ago. I let it sit for a day or two before coming back to flatten and get it down to about 1/2”. It was a bit of work, but didn’t take too long since this isn’t a very big project.

    I picked an angle for the sides of this one that is a little larger than the last. At least I think I did; I just held the bevel gauge against an end piece and played with the angle until it looked good to me. I’ll have to hold the gauge up to the one I’ve already finished to be sure.

    On the last one I cut each corner one at a time. On this one I laid out all the tails at once and cut them all. I’ll probably transfer and cut the pins one corner at a time.

    01B4B81C-2870-4F30-B030-446A15A752CA.jpg51F833CB-B178-4703-BC56-4AF405B9CEB3.jpg

  13. #13
    Join Date
    Sep 2008
    Location
    N. Idaho
    Posts
    1,621
    Hi Ben,

    I agree that the tote has great lines. Nice work on the shaping. How is the handle attached to the box of the tote? Is there a pin that isn't obvious in the picture or some other way to keep the handle from separating?

    Great work and thanks for sharing.
    "You can observe a lot just by watching."
    --Yogi Berra

  14. #14
    Join Date
    Feb 2020
    Location
    Camarillo, CA
    Posts
    423
    Quote Originally Posted by Christopher Charles View Post
    Hi Ben,

    I agree that the tote has great lines. Nice work on the shaping. How is the handle attached to the box of the tote? Is there a pin that isn't obvious in the picture or some other way to keep the handle from separating?

    Great work and thanks for sharing.
    The uprights for the handle are just glued to the side of it. I considered putting a peg through them for extra security, but they are essentially a big bridle joint. There is a huge amount of glue surface. For something that would live a hard life I’d probably still put a peg through, but I expect this will last for decades.

  15. #15
    Join Date
    Feb 2020
    Location
    Camarillo, CA
    Posts
    423
    I got the pins cut and fit. My first two came out really well, but the last two were a little loose. When I get this out of the clamps I’ll have to see how it looks and whether it needs any clean-up to hide gaps. Instead of beveling the bottom of this one I decided to use a rebate plane and cut rebates. First I had to take a 4/4 piece of oak down to 3/8 with a jack plane. That was a bit of exercise, but went fairly quick.

    Have I said how much I’m liking my tail-ish vise? It makes holding pieces for thicknessing and rebating very quick and easy.

    I used off-cuts as clamping blocks and put a clamp over every tail to make sure everything seated properly. I’ll take it out of the clamps tomorrow and clean it up.

    0F06A23E-74BD-460A-8B86-B94848D96133.jpg4CAC8EB0-2E9A-47EE-912B-B57ABE1C2D70.jpg229992DA-5713-4818-8043-60A40FA14CF0.jpg

Posting Permissions

  • You may not post new threads
  • You may not post replies
  • You may not post attachments
  • You may not edit your posts
  •