Results 1 to 13 of 13

Thread: Knife Block

  1. #1
    Join Date
    Jan 2007
    Location
    Michiana
    Posts
    3,071

    Knife Block

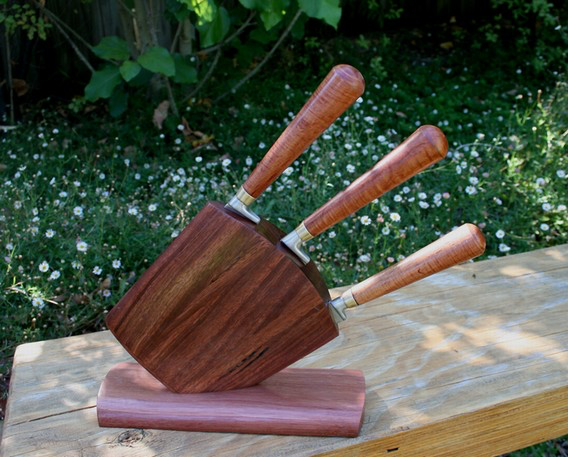
    Anyone had any experience making knife blocks? I have an abundance of kitchen knives and my blocks are overflowing. I have taken to putting them in a drawer and frankly it's not safe since I sharpen them to the same degree as my chisels and planes. I need to make a big one.

    I have a nice piece of maple to use. It was a bench from a locker room at a local school so I have plenty of material to laminate together. I'd just rather avoid any pitfalls that my fellow Creekers might have experienced. Just like there's no sense reinventing the wheel, there's no sense is stepping in something that's already been stepped in.

    All suggestions welcome. Thanks in advance.
    Sharp solves all manner of problems.

  2. #2
    Join Date
    Mar 2019
    Location
    Los Angeles, California
    Posts
    970
    Yes, start by making a template for each layer of the block, and you'll probably have three such rows. Draw out the width and depth of each blade. You may have specialty pieces like scissors or one of those round file things for knives, although I've never used mine. Small steak knives in front, medium slicers in the middle row, and large chef knives, bread knives at the top plus scissors and the file thing, whatever you call that. I used a table saw and a dado blade to make the slots on only one side of the row. I ran the dados all the way, top to bottom. No stopped dados.

    Also, the whole block will be angled towards you, so a band saw would be a big help, although a hand saw would do a good job. I'm not sure that I would use a table saw, as it will be a pretty big piece of wood. And there might be a larger base to hold the block because it may want to tip forward. Rubber mat glued on the base keeps the rascal well planted on my counter.
    Regards,

    Tom

  3. #3
    Join Date
    Feb 2004
    Location
    Perth, Australia
    Posts
    9,491
    Rob, basically what Tom suggests. Cut open the boards, create a space for the blade, glue the boards back together. Now have fun shaping the block.

    This one I made for my son and daughter in law.. The knife blades were derelict Sabatiers, and I re-handled them in a Sheoak. The base is Jarrah …


    You are only limited by your imagination.

    Regards from Perth

    Derek

  4. #4
    Join Date
    Jan 2019
    Location
    Fairbanks AK
    Posts
    1,566
    I built mine up from half inch stock. Electric router freehand to pencil outlines drawn of the various blades. The one thing I did wrong on a previous iteration was make the routed slots exactly perfect in the winter, then the humidity went up that spring...burn pit. Mine is mounted the underside of a cabinet to keep it off the countertop.
    Attached Images Attached Images

  5. #5
    Join Date
    Jun 2014
    Location
    Western PA
    Posts
    1,245
    Expensive and sharp steel clanging around in a drawer makes me cringe. Im so anal that my wife and guest cooks have their own set of wustoff ikons to use. Ive had shuns for 6ish years, and only recently started down the road of handmade japanese knives. Specifically, a nakiri. The geometry is nicer on the handmade nakiri, because its a thinner spine, but i dont know that its next level better than the shun nakiri. Anyway, this isnt about knives, but i have to say i prefer magnetic bars over blocks. I have a large variety of knives, and each has a specific use. I dont want to accident grab a deba out of my knife block(handles are all identical), when i wanted a nakiri/santoku/yanagiba/bread knife. It is very nice to have everything display right in front of you on your backsplash versus occupying countertop space in a knife block.

    Derek's knife block is very interesting! I dont know what that looks like with 12-13 full sized knives, however.

  6. #6
    Join Date
    Feb 2003
    Location
    McKean, PA
    Posts
    15,635
    Blog Entries
    1
    I have made two knife blocks using the design shown in the photos.
    20220921_142635.jpg20220921_142623.jpg
    The slots for the knives were cut on the individual pieces of the block before they were assembled using screws. I started by determining the width and thickness of the blades and then determined how may could easily fit with the 3/4" thickness spacing of the block layers. The slots were cut on my table mounted router. I didn't glue the layers together in case we changed knives, I could just make a new layer or two for the newcomers. This block with the knife slots is only about 2" thick and made up of 6 layers. I made it this way to reduce the weight of the total piece. The paring/steak knife section is solid but also made up in glued up pieces. The slots in that section were cut on my TS. The slotted block slides into the outer shell and is held in place with two pocket hole screws you can see in the last photo.
    20220921_142653.jpg20220921_142729.jpg

    This knife block has been in use for over 20 years.
    Last edited by Lee Schierer; 09-21-2022 at 2:57 PM.
    Lee Schierer
    USNA '71
    Go Navy!

    My advice, comments and suggestions are free, but it costs money to run the site. If you found something of value here please give a little something back by becoming a contributor! Please Contribute

  7. #7
    Join Date
    Feb 2003
    Location
    McKean, PA
    Posts
    15,635
    Blog Entries
    1
    Quote Originally Posted by Patrick Kane View Post
    Expensive and sharp steel clanging around in a drawer makes me cringe. ..........Anyway, this isnt about knives, but i have to say i prefer magnetic bars over blocks.
    I don't care for magnetic holders for knives because they become magnetized and it makes it harder to remove the swarf from sharpening.
    Lee Schierer
    USNA '71
    Go Navy!

    My advice, comments and suggestions are free, but it costs money to run the site. If you found something of value here please give a little something back by becoming a contributor! Please Contribute

  8. #8
    Join Date
    Mar 2016
    Location
    Exeter, CA
    Posts
    693
    Quote Originally Posted by Lee Schierer View Post
    I have made two knife blocks using the design shown in the photos.
    20220921_142635.jpg20220921_142623.jpg
    The slots for the knives were cut on the individual pieces of the block before they were assembled using screws. I started by determining the width and thickness of the blades and then determined how may could easily fit with the 3/4" thickness spacing of the block layers. The slots were cut on my table mounted router. I didn't glue the layers together in case we changed knives, I could just make a new layer or two for the newcomers. This block with the knife slots is only about 2" thick and made up of 6 layers. I made it this way to reduce the weight of the total piece. The paring/steak knife section is solid but also made up in glued up pieces. The slots in that section were cut on my TS. The slotted block slides into the outer shell and is held in place with two pocket hole screws you can see in the last photo.
    20220921_142653.jpg20220921_142729.jpg

    This knife block has been in use for over 20 years.


    I've made one that looks very similar to the above, maybe a tad larger. My goof was using a finish on it instead of oil. After about 10 years the finish looked really beat up, but to late to change to oil so just refinished with more poly, looks like new. Just recently made a smaller one for a set of steak knives and used oil. Fun little project. More to it than it looks (like all things I guess). Randy
    Randy Cox
    Lt Colonel, USAF (ret.)

  9. #9
    Derek, I love that "perched" design!

    I did mine a little differently than others have described - I used my sliding table saw to dado the slots for the individual knives, then glued the pieces together. For the "lower" slots, I started them at the same height as the "upper" slots, then used the slider to cut out a block to let them sit lower.
    Attached Images Attached Images

  10. #10
    Join Date
    Jul 2007
    Location
    NE OH
    Posts
    2,626
    I went a different direction as I don't like "stuff" cluttering the countertops:

    IMG_1309.jpg

    Those are stunt double knives, BTW, except for the steak knives. As built it holds 23 knives but easy to make larger or smaller.
    --I had my patience tested. I'm negative--

  11. #11
    Join Date
    Dec 2010
    Location
    WNY
    Posts
    9,712
    A much easier and more universal approach is to fill a wooden box with wood straws, like this. No custom slots required.

    61X+kVf5F3L._AC_SL1000_.jpg

    John

  12. #12
    Join Date
    Feb 2016
    Location
    NE Iowa
    Posts
    1,241
    I've made several, of very different designs. My favorite was made from maple blocks into which I cut saw kerfs for the knife slots, then backfilled with walnut stock to close the open side of the kerf. I then glued the blocks together with walnut divider between them before cutting the final shape of the piece. It's not the usual way to make the slots, but I liked the effect.
    PXL_20220924_003858567.jpgPXL_20220924_003855024.jpgPXL_20220924_003935462.jpg

    This was a gift to my wife in our 40th year, and to complete it, I handled all the knives, each with a different species of wood collected from trees and projects on our farm - one from Black Locust that we planted the year we moved here, one from the giant Red Oak in which our daughter's treehouse lived, one from a bittersweet trunk from a huge old vine growing in the Cottonwood that shades our old chicken coop (which is now my shop), one from a Lilac bush that she planted the second year we were here, etc.
    Last edited by Steve Demuth; 09-23-2022 at 9:03 PM.

  13. #13
    Join Date
    Mar 2010
    Location
    Quorn United Kingdom
    Posts
    776
    The knife block in the link below is the most attractive I have seen


    https://www.robertwelch.com/products...nife-sharpener

    https://images.app.goo.gl/AkQ6w2tnYeFjGNZq9

Posting Permissions

  • You may not post new threads
  • You may not post replies
  • You may not post attachments
  • You may not edit your posts
  •