Hello once again everyone, this is the start of project two of seven projects I'll be working on this fall / winter.


 [OP]
Contributor
[OP]
Contributor
Hello once again everyone, this is the start of project two of seven projects I'll be working on this fall / winter.
My Handle is Splinterz25 on most forums.
Jack Of All Master Of None
[OP]
Contributor
And as the carving begins. I removed the large sections with a scroll saw first.
My Handle is Splinterz25 on most forums.
Jack Of All Master Of None
[OP]
Contributor
The bowl section project two Ambrosia Maple with under cut rim. I really like this carbide cup cutter tool from Simple Tools. I used this first then the goose neck carbide scraper to cut the inside to less than 1/4" thick.
My Handle is Splinterz25 on most forums.
Jack Of All Master Of None
[OP]
Contributor
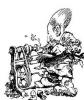
More photos.
My Handle is Splinterz25 on most forums.
Jack Of All Master Of None
[OP]
Contributor
Todays progress photos, The cross grain carving on the Ash shells is a bit slower than carving them in Maple. I just really like how the grain makes the shells look real. Everything has been laid out and rough cut on the scroll saw. Here are some shots with things at various stages.
My Handle is Splinterz25 on most forums.
Jack Of All Master Of None
Contributor
Appreciate seeing these Bruce. It's always interesting to see how you actually do the work!
Question? When you glued the segments together in Post #1, they were glued end-grain-to-end-grain. Then you rough-cut on a scroll saw, which reduced the width of the glue joint down to about an inch. I'd expect that to be somewhat fragile. Is it really? If so, how do you prevent joint breakage when carving inevitably applies pressure to that 1" wide end grain joint?
Sorry if that's a dumb question - Im not much of a Turner. I just kept wondering as I studied the pictures.
Fred
"All that is necessary for the triumph of evil is that good men do nothing."
If you want to know what a man's like, take a good look at how he treats his inferiors, not his equals.
[OP]
Contributor
Fred Yes it is end grain to end grain then it is cut to about 1/2" then carved to even less. If the glue seams are done correctly it's very strong, but I'm still careful while carving.
My Handle is Splinterz25 on most forums.
Jack Of All Master Of None
[OP]
Contributor
Okay here's a video of my carving process, this is the outside of the shells part one.
<font color="#050505"><span style="font-family: &quot">
Last edited by Bruce Jones; 09-23-2022 at 6:33 PM.
My Handle is Splinterz25 on most forums.
Jack Of All Master Of None
[OP]
Contributor
Part Two of the video.
My Handle is Splinterz25 on most forums.
Jack Of All Master Of None
 Moderator
Your WIP posts keep getting better and better.
I looked at your first photos and got to the point where I could understand where you were heading and my first thought was "a class with Bruce would be amazing." Then a few more posts and there was the carving class in video!! So interesting, so valuable.
I love the leather pad. I also learned from your v-gouge handling. I often carve away from me or sideways/at an angle but I can "see" now that your carving method would allow watching and controlling the cut better. I've only had time to watch part of the first one, maybe more tomorrow. (I've been digging and moving a lot of dirt and rock today and recently, a form of carving and shaping but in a different medium)
Well done. My earlier thoughts are reinforced, seeing (and watching) the work in progress adds new dimensions to the finished piece, not only an inspirational glimpse into your thought processes but a powerful feel for the depth of the effort that goes into the finished piece. Very well done. (Hey, feel free to interpose a few more drawings from your sketch book, even some early concept sketches!)
BWT, if anyone else had trouble at first with the videos, for my computer making them full screen worked.
[OP]
Contributor
Thank you John, I'm glad you were able to get something from the videos. I have a great deal to learn about cinematography. People would probably learn even more in person and would be able to see how I move the piece for different cuts. Believe it or not I do not really draw sketches of my pieces, I just work with the different parts rearranging them. This helps me with scale and proportions while designing pieces. I will be making another video showing how I create the inside of the shells, stay tuned.
My Handle is Splinterz25 on most forums.
Jack Of All Master Of None
[OP]
Contributor
Carving the inside of the shells.
Last edited by Bruce Jones; 09-25-2022 at 11:38 PM.
My Handle is Splinterz25 on most forums.
Jack Of All Master Of None
[OP]
Contributor
So the work continues, at about the half way point on this section. The Shell rim is carved from Ash and the main body is Ambrosia Maple at this point it is 12" D x 4" tall still a good bit of work yet to do.
My Handle is Splinterz25 on most forums.
Jack Of All Master Of None
Moderator
Hey, will the finished shell carvings be up or down? Quite a different look!Originally Posted by Bruce Jones

[OP]
Contributor
The inside of the shells will face up. I will be adding more to this piece so I don't want to reveal everything just yet, but I will show all of the build once I have it completed. I think you'll like the finished piece.
My Handle is Splinterz25 on most forums.
Jack Of All Master Of None
 Posting Permissions


 Reply With Quote