Results 1 to 8 of 8

Thread: square pedestal table base construction methods?

  1. #1
    Join Date
    Oct 2007
    Location
    Fort Worth, TX
    Posts
    1,389

    square pedestal table base construction methods?

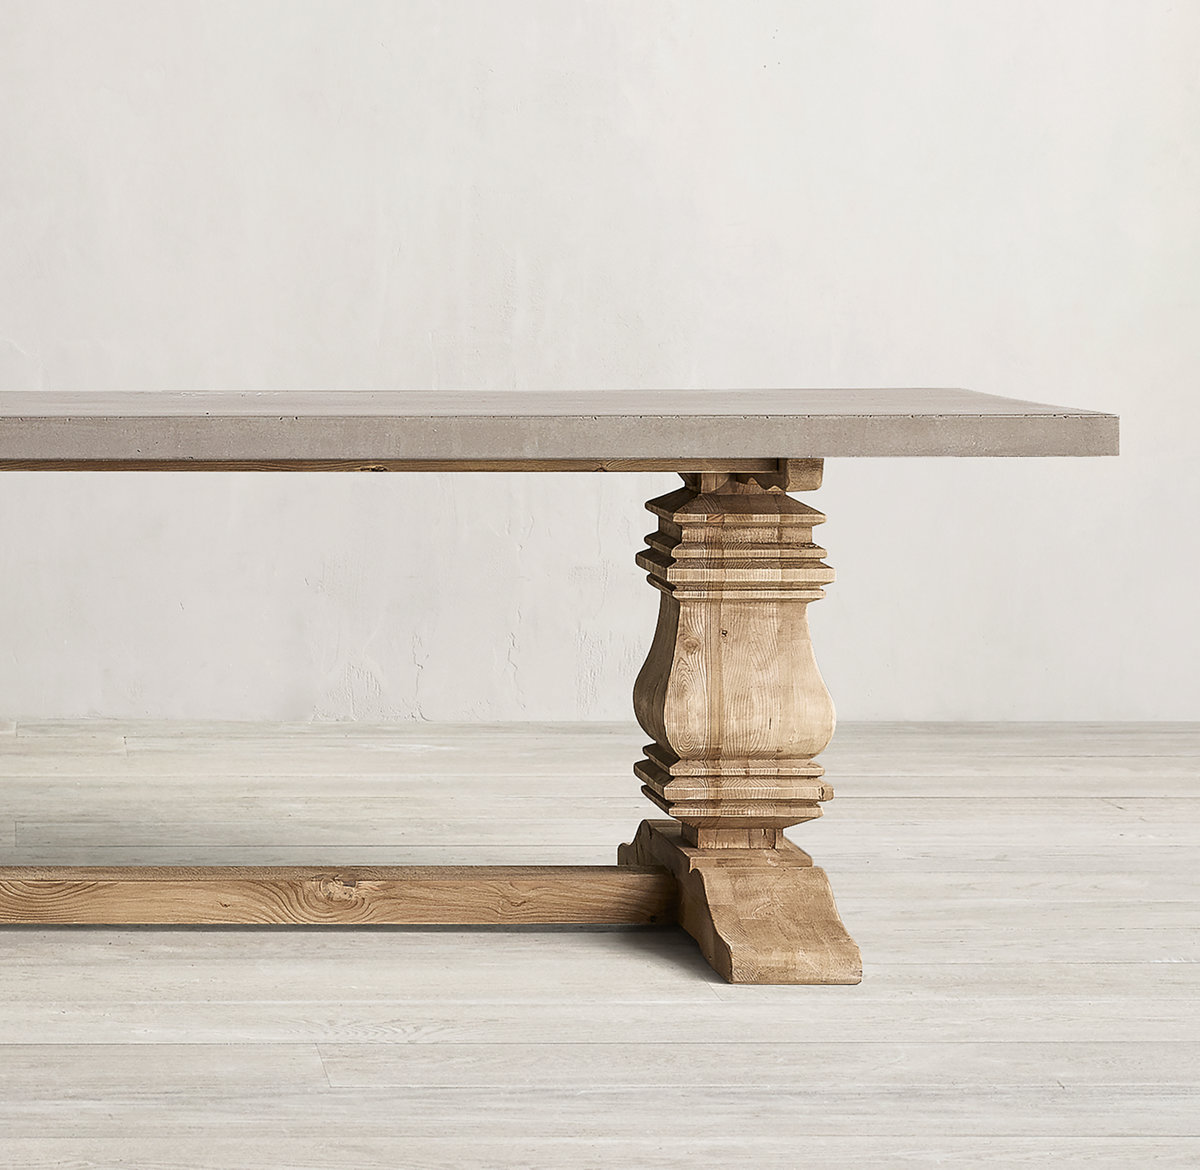
    I was looking at making a table with larger (10-12" square) pedestal base and was looking at two options on how to make it.

    The general style:


    The two methods I was thinking were

    -a full on 12" square glue up, then use the tablesaw to cut the main profile roughly and hand shape

    - glue a plank together and profile it on the tablesaw, then cut that into the 4 faces and mitre it up against a square center post (probably simpler, but if the angles aren't perfect it could be a mess on such a longer (20" joint line).

    I am thinking the first. There is a third option of just making a square post and wrap it in various moldings... but not sure that will give the look I want.
    Grady - "Thelma, we found Dean's finger"
    Thelma - "Where is the rest of him?!"

  2. #2
    Join Date
    Mar 2003
    Location
    San Francisco, CA
    Posts
    10,320
    I know it is common, but the pictured approach has always bothered me. I don't like seeing all those lamination lines. It looks like the too-easy way out. If the depth of your profile allows it, I'd make the leg a tube constructed of four 12"-wide planks running vertically, mitered together at the corners. The glue-up seam at the corner is way less obvious.

  3. #3
    The old ones are stone …or wood with heavy duty coating to look like stone. Gesso? I guess-so.

  4. #4
    Quote Originally Posted by Jamie Buxton View Post
    I know it is common, but the pictured approach has always bothered me. I don't like seeing all those lamination lines. It looks like the too-easy way out. If the depth of your profile allows it, I'd make the leg a tube constructed of four 12"-wide planks running vertically, mitered together at the corners. The glue-up seam at the corner is way less obvious.

    +1

    Cut molded profile on 4 matching pieces, beveled at 45 and glue to create the column

  5. #5
    Join Date
    Jun 2014
    Location
    Western PA
    Posts
    1,245
    I think you can still laminate multiple pieces of 8/4 in a much more attractive manner than the example presented. Above has whacky mismatched grain between boards. It also looks like a coarse grain softwood. Anyway, if you have a tight grain species that is flatsawn, then you should have very straight grain on the edge of the boards. This should give you a much more cohesive and seamless look.

    Grain/aesthetics aside, I dont know how you intend to cut that curved profile on your TS. That looks like a bandsaw cut, tape the offcut back on, rotate, cut, tape the offcut back on, rotate, cut....

  6. #6
    Join Date
    May 2015
    Location
    NJ
    Posts
    1,391
    I don't think 8/4 is enough for that piece, which means have fun finding kiln dried material of proper thickness (for me anyway). Regardless, assuming the stock is available (and the piece is for yourself or the client understands what you're using and is willing to pay), I would create the box around the center column and as others stated, miter the edges. Once assembled, throw it on a sled for all the straight and bevel cuts on the table saw. Rough cut the curvature on the bandsaw and finish that area by hand with 'quality' rasps (using a template or two to check as you go).

  7. #7
    Join Date
    Nov 2009
    Location
    Peoria, IL
    Posts
    4,506
    Main issue is that is a sanding nightmare! Those are often bandsawed out and that means even more sanding. Most of it cross grained to start then tiny little strokes with the grain. Just an evil task!!!!! Early in my career I did a laminated square base of 8/4 white oak and then sawed it into an octagon. The customer was undecided about the finish, so it sat in their home unfinished during the fall into winter. I got a call that the base was cracking. It was a mess. 8/4 white oak is notorious for being difficult to kiln dry and I bought a bad batch. I got to make a new pedestal for free. Luckily, I guess, was the supplier made good on the material. I cut and beveled 6/4 white oak for the hollow mitered column and did not get a call back. Miters are a pain, but not nearly as painful as redoing the work a second time at very little profit on the job. Considering all that is under a table with chairs slid up to them, it's a ton of effort with little return. You know it's good, but most people just see a table top.
    Last edited by Richard Coers; 07-22-2022 at 6:09 PM.

  8. #8
    Join Date
    Sep 2016
    Location
    Modesto, CA, USA
    Posts
    9,978
    I bought a black diamond drill sharpener and it came with. a nice single pedestal mounted table. The pedestal is hollow cast iron. The top is 1/2 plate bolted to to pedestal. For size reference the blue cube on top is about 6" square.
    Bill D
    Attached Images Attached Images

Posting Permissions

  • You may not post new threads
  • You may not post replies
  • You may not post attachments
  • You may not edit your posts
  •