Page 1 of 2 12 LastLast
Results 1 to 15 of 24

Thread: Tips, thoughts, advice on planing ash?

  1. #1
    Join Date
    Nov 2019
    Location
    Big Bend/Panhandle, FL
    Posts
    122

    Tips, thoughts, advice on planing ash?

    I am hoping for some wisdom from the collective on planing ash. I have some ash that is currently kicking my rear. The wood in question was 6/4 kiln dried and sat in my workshop for about 2 months with a moisture content of ~8% before I began working with it.

    It is highly figured with interlocking and wild grain throughout. I chose it for that reason because it will be table top and my wife loves figured wood and I wanted to work with ash before it is extinct. I also enjoy a challenge.

    I have worked all sorts or pine, cherry, and soft, hard, and quilted maple, but this batch of ash is making me look (more) foolish.

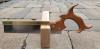
    My tools of choice are well set Stanley type 11 4,5, and 7.

    My primary issue is that this ash has rebuffed my best sharpening. I hollow grind, freehand hone on 1000 and 8000 grit water stones, and finish with green compound on horse butt strop. I sharpen frequently, maybe to often because I enjoy how a wood responds to a freshly sharpened iron. This process has worked well for my previous projects including on woods that are harder than ash. Because the ash resisted my sharpest iron, I refreshed the hollows and started from scratch. This worked for a few passes but then then wood began to respond as if my irons were dull. Have others that have worked with ash experienced this or have I suddenly lost my ability to sharpen? I thought the latter was the case. Earlier this week I carefully sharpened everything and pulled out some hard maple to test on. The plane worked wonderfully. With the same plane, I returned to the ash and I could not get a consistent shaving for anything.

    Second issue is tear out. I anticipated some difficulty as started because of the grain pattern but it has become ridiculous. Even with an incredibly sharp and close set cap iron and very light passes, the tear out is uncontrollable and quite hideous. Any thoughts as to how I might overcome this? I’m pulling my hair out! I know my planes are capable of working without tear out so this is definitely operator error but I have been unable diagnose the problem and develop a solution.

    Last issue is also wood related. When I picked up the wood. It had slight cup and twist. No big deal as I have worked with much worse. Despite my problems with the wood, I have managed to joint one face and edge on a couple of pieces but the wood continues to twist. I am not sure what I am doing wrong. I can’t keep removing the twist because I want have any wood left.

    Any thoughts on any of this or do I have an expensive stack of firewood on my hands?

    Thanks in advance.

  2. #2
    Join Date
    Jun 2008
    Location
    So Cal
    Posts
    3,767
    My experience with some woods that are kiln dried. Not worth my time to handplane.
    Something happens to kiln dried wood that changes it. While it might make it more stable it looses so much moisture its dead. Add figure or Rowed interlocking grain makes it harder to figure out. It used to mean a lot more to me get my Lie Neilson planes to cut everything. Not so much anymore

    Air dried woods is the secret we don’t about.
    Good Luck
    Aj

  3. #3
    Join Date
    Jun 2010
    Location
    twomiles from the "peak of Ohio
    Posts
    12,169
    trying skewing the plane?
    April Project, board #5.JPG
    have USED quite a bit of Ash in the past year...
    Jointing Da1, Old Heff & Hubris.JPG
    Laundry Detail, working on it.JPG

    usually, I push the planes along at an angle....trying more for a slicing cut...
    A Planer? I'm the Planer, and this is what I use

  4. #4
    Join Date
    Apr 2019
    Location
    Madison, Wisconsin
    Posts
    283
    I don’t have any additional planing advice for you per se, though I do have a couple of questions. First, on sharpness: can you plane end grain softwood cleanly with the same plane? If not, maybe it’s still not quite sharp enough. Second, when you mention very light passes are you talking about shavings thin enough that you can easily read newsprint through them?

    Wood that has been thoroughly dried but continues to move as it is worked is a strong indicator of internal stresses in the wood. Often, this is due to improper drying, which isn’t uncommon in kiln dried lumber as Andrew pointed out. It can also be a simple question of how the tree grew. You can easily test for internal stresses using an offcut; make a few saw kerfs in the end and watch what happens. If there’s a problem with internal stresses, the kerfs will either pinch shut or spread open. The worst I ever experienced was a particular oak board (dry for over 5 years) that I planed flat for a reference surface for marking and then resawed to about 1/4 inch thick: I had to wedge the kerf to keep it open and then within minutes, the resawn piece was cupped almost an inch.

    I hope that’s not the case for your figured ash.

  5. #5
    Join Date
    Aug 2019
    Location
    Pittsburgh, PA
    Posts
    853
    Are the soles of your planes flat? Can you take very fine shavings with the cap iron very close set, like 1/64" or less? There's no magic distance, you have adjust until you get proper shavings.

    Regarding the twisting, this is how I would consider proceeding if I were in this situation, this is my opinion, I won't try to pass as a guru. If it is stll moving, I'd let it sit for a while longer and see if it settles.

    Another option is to rip the board into narrower strips and then joint them together.

    Lastly, in Chinese joinery, a panel or table top is fitted with sliding dovetailed battens to give it stability (https://youtu.be/aD6qdJNU7GE).

    Good luck!

  6. #6
    Try setting the chip breaker as close as possible to the blade trip or using a high cutting angle on a bevel-up plane. Wetting the surface can sometimes help with tearout. If the wood is unstable and won't stay flat there's no point fighting it.

  7. #7
    Join Date
    Apr 2015
    Location
    New England area
    Posts
    588
    Prediction: The "I've planed everything, and in any direction I choose without tearout" crowd will be noticeably absent from this thread. If not, they probably should be because it's bunk with the ash you have on your bench.

    There's a world of difference between wild grained ash, very brown and gnarly in the heart, and cherry -- one of the easiest woods in the world to plane. And that's a shame, because the ash like we're talking about can look gorgeous in the right kind of project.

    You can try using a long plane, with more mass, set up as a smoother. Close the mouth down some, move the cap iron close, maybe put a back-bevel on a spare iron as well. This might help you get close enough to finished thickness without so much tear out that your No. 80 followed by your card scraper won't get you all the way there. That said, I've seen ash that couldn't even be scraped. Worth a try though.

    If this doesn't work, then time for machine sanding of some sort.
    Last edited by Charles Guest; 07-16-2022 at 10:53 AM.

  8. #8
    Three problems: sharpening, tearout, twist.

    I think all three are solvable, but difficult to diagnose from a distance.

    On the tearout: the cap iron is not doing its job. It is either too far from the edge or too low an angle where it meets the iron. Try putting it even closer than you have. I hope it isn't one of the new low angle cap irons. The original issue would be better.

    On twist: try taking short, with the grain stokes, working only the corners that are high and completely avoiding the low spots. A lot of schemes you see on U-tube are made up by people with very little experience, and are wasteful of timber thickness.

    On sharpening: something is very wrong, but I don't know what. Make sure you are spending enough time on each stone to smooth the scratches made by the previous operation.

  9. #9
    Join Date
    Jun 2010
    Location
    twomiles from the "peak of Ohio
    Posts
    12,169
    My chipbreakers are normally set 1mm back from the iron's edge.

    Have found the WR #62 to be very good...at producing tear-out.
    Its Friday, almost done.JPG
    This is a Millers Falls No. 11, Type 2.....cleaning the surface on some resawn Maple....

    Tuesday Tune-up, No. 3 front.JPG
    Was using this Stanley No.3, Type 11 to clean up a glue joint...
    Tuesday Tune-up, top cleaned.JPG
    between the back of the case, and the spalted maple top....the plane was pushed along at a skew....and using a slicing cut..

    Since I am NOT holding the OP's planes, I am unable to tell how HE sharpened his planes. I do however like working with Ash a LOT better than working with Oak...Red or White...

    Oh, and FYI, have been using planes since High School, back in the late 60s....may have learned a thing or two, by now.....
    A Planer? I'm the Planer, and this is what I use

  10. #10
    Join Date
    Jun 2010
    Location
    twomiles from the "peak of Ohio
    Posts
    12,169
    April Project, blanks laid out.JPG
    Last load of Ash...
    2 hour Saturday, drawer fits.JPG
    made a nice little table..
    Sunday Funnies, 4 corners done.JPG
    4 board top, with Bread board ends...
    Thursday Morning, Drawer parts.JPG
    Drawer parts...
    A Planer? I'm the Planer, and this is what I use

  11. #11
    Join Date
    Apr 2015
    Location
    New England area
    Posts
    588
    Some nuance is needed here, rather than glibly posting some photos of ash in a sort of state though I'm not sure what.

    Not all ash is a bear to plane. Some, really most, is easily or fairly easy under plane. But what I believe the OP has in his shop, and some I've had to deal with, is a different beast altogether. I don't know what happens to it while it's growing -- maybe in standing water, on the side of hill, in severe drought. Don't know. But whatever it is, it's not good. It's usually really attractive and that's the allure of trying, wanting, to deal with it.

  12. #12
    If you'd like your questions explained in video format, the two David's will set you right.
    Mr Charlesworth for teaching the proper use of the plane, i.e no bad habits
    Then Mr Weaver's videos for your tearout concerns, (thanks to Warren above)

    Have a look at using the bench for reference in this Cosman video.
    I've timestamped it to the part which is about what I'm talking about.
    No vices, no dogs, just a flat bench and a stop. (edit: forgot to mention, a long reach angle poise lamp with a decent sized shade)
    https://youtu.be/GGuGFGAQTxE?t=933
    This section hints at such, like Charlesworh suggests also, but Rob's older better production is paid for content, so you will have to pick up some of the tips from
    a bit of back and forth of the freebies from Cosman's video above and everything from Mr Charlesworth that you can get your hands on!

    Another user of the cap iron is Derek Cohen which has some good articles on the subject, although I can't understand why the toothed surface of the bench.
    That is another matter related to the first hurdle which can all be learned in a day if studying Charlesworth.

    All the best
    Tom
    Last edited by Tom Trees; 07-16-2022 at 2:59 PM.

  13. #13
    Join Date
    Jun 2010
    Location
    twomiles from the "peak of Ohio
    Posts
    12,169
    MEH.....other's mileage may vary....depending on whether they are making money from giving out "advice".....

    All I know is that a few hundred board feet of Ash has been through MY shop....been HAND planed, and been made into Projects....both for around MY house, and for Family and a few friends...

    Currently working with Spalted Maple.....several years ago, it was all White Oak...with a bit of Red oak thrown in. There has been a few projects in both Poplar and Pine.

    My shop is a Hobby one, NOT some Production Shop. BTDT...too much paperwork hassles...Gave up punching any sort of "time card" years ago.

    Have have Walnut come through the shop...and even some Flame Grain Cherry ( From Charles Neil's shop)

    BTW: since someone has NEVER been in my shop, nor seen any of the woods I work with...does make it rather hard to tell exactly what lumber I do use, don't it.

    So..I am calling BS to the above post.....as it does NOTHING to help the OP. Surprised he isn't trying to sell a boutique plane to the OP, as the ONLY way to fix the OP's Problem...
    A Planer? I'm the Planer, and this is what I use

  14. #14
    Join Date
    Sep 2007
    Location
    Longview WA
    Posts
    27,441
    Blog Entries
    1
    It is highly figured with interlocking and wild grain throughout.
    Sometimes the more beautiful the wood the harder it is to get a plane to work well.

    It could be the "interlocking and wild grain" is due to the tree growing in a windy environment. This could also cause an incurable twisting in the lumber. It could also make the fiber in the lumber to be more open grained, stringy or separated than in normal lumber.

    Being tough on a blade's edge could be from a high amount of silica where the tree grew. Some of my projects have had even softer woods that could dull a blade in two passes. Other pieces from the same lot planed easily.

    My philosophy may be wrong but it works for me. The thinner the shaving the less tear out.

    As one user from the past said about adjusting the chip breaker, "slide it up until there is just a slight glint of blade sticking out." One member here mentioned adjusting their chip breaker to 0.004". This would work for very thin shavings, not so well with thicker shavings.

    Do you have a slightly cambered blade to use in your #5? Not sure if it would help in your case, but my experience with difficult lumber has found that starting diagonally across the grain with a scrub plane can help.

    jtk
    "A pessimist sees the difficulty in every opportunity; an optimist sees the opportunity in every difficulty."
    - Sir Winston Churchill (1874-1965)

  15. #15
    Guessing your making money comment was referring to Cosman?
    I was strictly referring to the technique of a flat bench, cost's nothing.
    Although you could spend money on Charlesworth's dvd's, you could get the jist from the youtubes, that and the timestamped video
    is about the most effective planing videos on the web in regards to accurate efficient work.

    No one has yet tried to make a cent in producing a paid for video concerning the cap iron, maybe Richard Mcguire I suppose,
    This info is free to watch by the very few on youtube who uses it to its full potential, namely David W's channel is where you will not be misguided.
    No scraping or sanding necessary, though it's a two plane deal, no scrub plane, just a panel plane and smoother.

    Tom
    Last edited by Tom Trees; 07-16-2022 at 5:43 PM.

Posting Permissions

  • You may not post new threads
  • You may not post replies
  • You may not post attachments
  • You may not edit your posts
  •