Results 1 to 11 of 11

Thread: Completed my benchtop upgrade (pics - long)

  1. #1
    Join Date
    Jan 2004
    Location
    Ringoes,NJ
    Posts
    1,492
    Blog Entries
    15

    Completed my benchtop upgrade (pics - long)

    Have had a nice supply of time lately to devote to my long planned benchtop upgrade in my shop. I originally built the bench top using 2X lumber and over time, well, let’s just say that 2X lumber is not exactly what you would want to use. It twisted slightly over the years and became unacceptable. My recent purchase of the new DeWalt planer moved the upgrade closer to reality since it had long been planned to build my next planer into the bench top so that the bench itself would be utilized as an infeed and outfeed table. I also had plans on working another feature into the new surface also which will be shown later in this post.

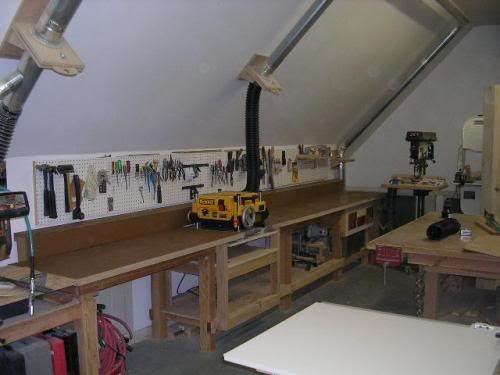
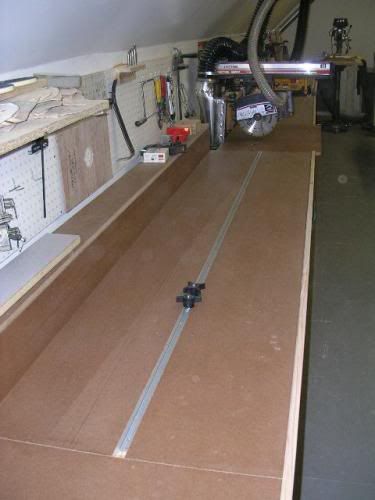
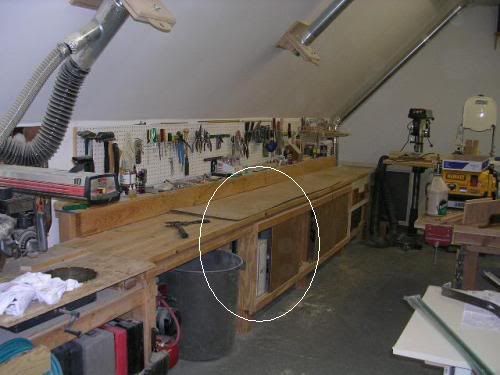
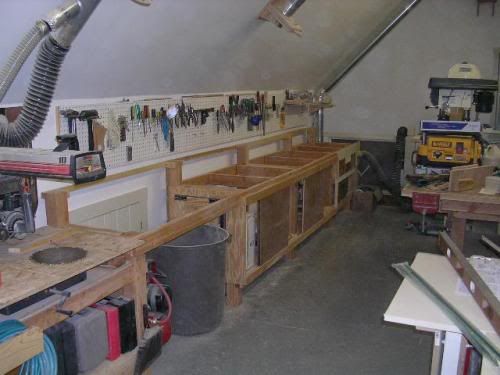
    The total length of the bench is roughly around thirty two feet and is divided somewhere near the middle by a Craftsman radial arm saw that is also built flush into the benchtop. Below is the half of the bench that will house the new DeWalt planer and the area that it will be located is circled. The collection drop above that area was put in place back when I installed the system with this future planer installment in mind.


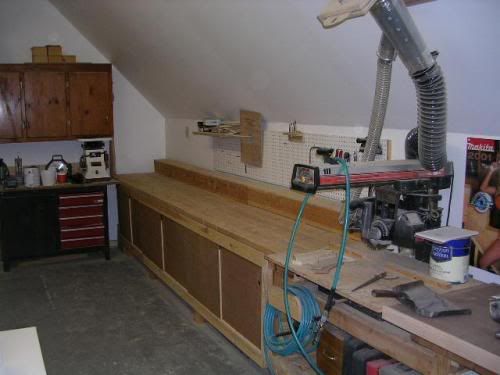
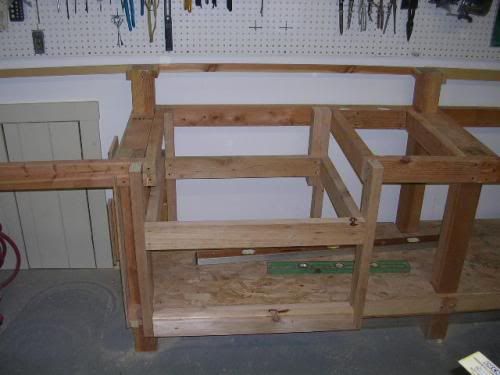
    Below you can see the bench stripped of its former top and pretty much ready for the adaptation framing to house the planer area.


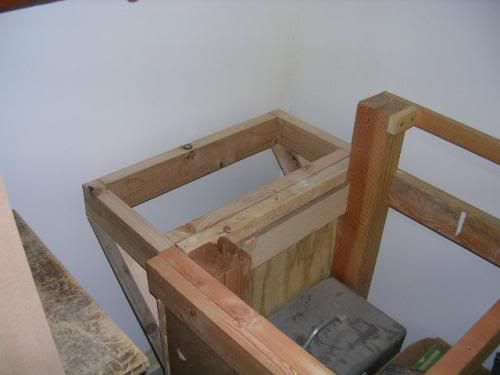
    With plenty of 2X lumber available from the former tops, I was able to rip down some of them to use as 2X4’s for the framing parts. Here is the majority of the framing work done.


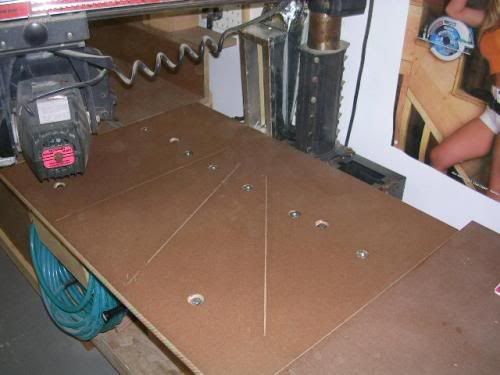
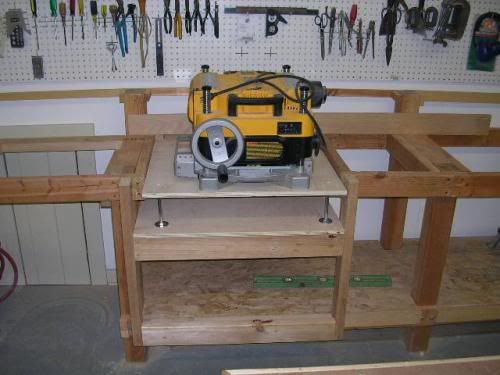
    And here is balance of the framework done and the first test fitting of the planer in place. I’ve also added some additional framing over the empty spot over where the knee wall space access door is. This will provide more support for the new top.


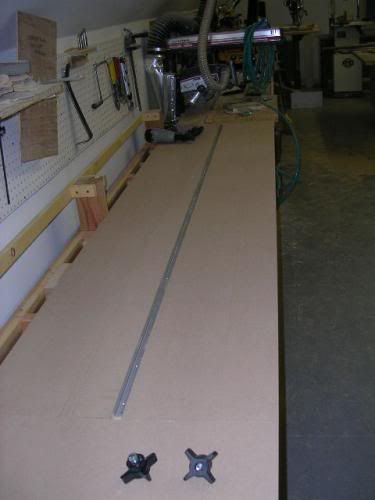
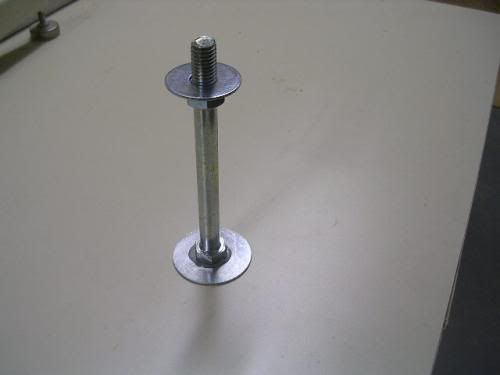
    The raising/support system was simple enough. As you can see in the previous picture, I used these 7/16” hex head bolts and epoxied large fender washers to the heads for a bigger “footprint” for stability. A nut and another washer on the upper part provided plenty of support to hold up the actual piece of ply that the planer sat on. With careful measuring during the framing process, and using the nuts on the five 7/16’ bolts, it was a simple process of adjusting the planer to be flush with the work surface.

    There's one in every crowd......and it's usually me!

  2. #2
    Join Date
    Jan 2004
    Location
    Ringoes,NJ
    Posts
    1,492
    Blog Entries
    15
    Here is this half of the benchtop pretty much completed with two layers of ¾” MDF applied as a surface (treated with a coat of boiled linseed oil). I had plenty of oak beadboard paneling left over from my big bar room project and that is being used to cover over the front framing of the planer area which will be seen in a later picture. I also used some of the former 2X lumber to mill down to use as edging for the work surface.


    This is the second half of the benchtop and the only change for this area is that I am going to recess a t-track into the surface to act as a “stop-block” mechanism for use with the radial arm saw. This will come in handy for the occasional times when I have a multitude of repetitive cuts of the same type. Set up the stop block (which I have yet to fabricate) and start cutting!


    I wanted to run the benchtop almost right to the far corner of the room, but I needed to add additional support and this bit of carpentry did the job.


    Below is the fitting up of the T-track and the following picture is that half of the benchtop surface completed with linseed oil and the edging applied.


    Last edited by Fred Voorhees; 01-19-2006 at 6:57 PM.
    There's one in every crowd......and it's usually me!

  3. #3
    Join Date
    Jan 2004
    Location
    Ringoes,NJ
    Posts
    1,492
    Blog Entries
    15
    The radial arm saw got a new surface also. The fence needed to be removable since it was in the way of the full width of the planers 13” capacity. I accomplished this by recessing 5/16” T-nuts into the table and this would allow me to bolt down the fence and remove it when needed for longer/wider pieces of lumber needed to be planed. With the fence in place, I still have over five feet of infeed capacity for the planer and eight or nine feet of outfeed. With the fence removed and a little other work, I can in reality have up to fourteen feet of outfeed. Infeed can actually be up to 21 feet, but with the max of 14’ of outfeed, that point is mute.


    And the job as it stands right now. The oak beadboard is applied to the front of the planer framing and I’m just waiting for the epoxy at the T-nuts to dry before attaching the radial arm fence. A fairly simple job that adds quit a bit to my shop environment and utilization. A great upgrade project that I have been planning for a long time. Total cost was around 200 bucks.

    There's one in every crowd......and it's usually me!

  4. #4
    Join Date
    Jun 2005
    Location
    Meridian Id
    Posts
    528
    Fred, well thought out improvement and well executed also. The documentation for the post is very thurough also, well done.

  5. #5
    Join Date
    Mar 2003
    Location
    SE PA - Central Bucks County
    Posts
    65,850
    Excellent job, Fred! That's really transformed the whole bench.
    --

    The most expensive tool is the one you buy "cheaply" and often...

  6. #6
    Join Date
    Feb 2003
    Location
    Ft. Thomas, KY
    Posts
    289
    OK Fred, I've been wondering for ever. Exactly what type of car is that in your avtar? An old east-coast style mod, newer IMCA mod, midget? I just can't see it well enough.

  7. #7
    Join Date
    Jan 2004
    Location
    Ringoes,NJ
    Posts
    1,492
    Blog Entries
    15
    Quote Originally Posted by Mike Vermeil
    OK Fred, I've been wondering for ever. Exactly what type of car is that in your avtar? An old east-coast style mod, newer IMCA mod, midget? I just can't see it well enough.
    Mike, you hit it exactly with the guess of an old style east coast modified. To be exact, it was originally a line sketch of one of Ken Brenn's Grant King built big block modifieds. I have been going to the local dirt track races since I was five years old back in the very early sixties. I spent almost thirty years doing various duties in the sport including writing for various publications, announcing, public relations and publishing and both television and radio work. That was all as a side hobby kind of thing, but grew into something that was eventually consuming upwards of 40 or so hours per week of my time, and that was besides my 40 hour per week job. It got to be to much and I began to cut back and I eventually, about three years ago, dropped the last of the duties and am now just your average everyday racing fan again. If your interested, PM me and I can give you some insight into the racing that consumes us out here on the East coast.

    Here's the sketch a bit larger.

    Last edited by Fred Voorhees; 01-19-2006 at 8:45 PM.
    There's one in every crowd......and it's usually me!

  8. #8
    Join Date
    Feb 2005
    Location
    Tampa Fl
    Posts
    246
    Too bad you didn't replace the Radial Arm Saw table with the table and use the same set for leveling the Radial Arm to the table as you did with the planer. My buddy took the table off his Radial Arm saw and then installed the RAS into a workbench and used bolts much like your planner adjusting bolts to align the whole Radial Arm up to the table. Now he can drop 4x4 stock on his table without worring about it knocking his Radial Arm table out of adjustment. He swears it has made a night to day difference in his RAS, as it always stays in adjustment and adjusting is so much easier.
    Ed

  9. #9
    Fred, that is one great looking bench!!! Perfect use of your space.

  10. #10
    Join Date
    Jan 2004
    Location
    Ringoes,NJ
    Posts
    1,492
    Blog Entries
    15
    Quote Originally Posted by Ed Blough
    Too bad you didn't replace the Radial Arm Saw table with the table and use the same set for leveling the Radial Arm to the table as you did with the planer. My buddy took the table off his Radial Arm saw and then installed the RAS into a workbench and used bolts much like your planner adjusting bolts to align the whole Radial Arm up to the table. Now he can drop 4x4 stock on his table without worring about it knocking his Radial Arm table out of adjustment. He swears it has made a night to day difference in his RAS, as it always stays in adjustment and adjusting is so much easier.
    Ed, take another look. The radial arm saw IS built into the benchtop also. It had been in the previous benchtop, I just renewed the table surface of the saw and realigned it with the new top.
    There's one in every crowd......and it's usually me!

  11. #11
    Fred it sure does look great! Now you can plane down lumber, leave it where it sits and cut it down too!
    Jeff Sudmeier

    "It's not the quality of the tool being used, it's the skills of the craftsman using the tool that really matter. Unfortunately, I don't have high quality in either"

Similar Threads

  1. Oneida upgrade to external filter completed!
    By David Brown in forum General Woodworking and Power Tools
    Replies: 14
    Last Post: 04-28-2004, 11:11 AM
  2. Mesquite computer desk pics (long)
    By Kirk (KC) Constable in forum General Woodworking and Power Tools
    Replies: 17
    Last Post: 03-22-2004, 2:32 PM
  3. Roughing out a Bowl - Long with pics
    By Bill Grumbine in forum General Woodworking and Power Tools
    Replies: 14
    Last Post: 02-23-2004, 11:31 AM
  4. Except for finishing...it's finsihed!!!!!!!! Long...PICS
    By Terry Hatfield in forum General Woodworking and Power Tools
    Replies: 22
    Last Post: 01-12-2004, 10:21 AM
  5. Well, I Finally.......(long)
    By Mike Leonard in forum General Woodworking and Power Tools
    Replies: 3
    Last Post: 08-23-2003, 10:25 AM

Posting Permissions

  • You may not post new threads
  • You may not post replies
  • You may not post attachments
  • You may not edit your posts
  •