Page 1 of 2 12 LastLast
Results 1 to 15 of 16

Thread: Parallel Guide for Hammer K3 from shop scraps

  1. #1
    Join Date
    Feb 2004
    Location
    Perth, Australia
    Posts
    9,492

    Parallel Guide for Hammer K3 from shop scraps

    I have a short stroke Hammer K3 slider (wagon is 1250 long). The wagon is used with a reversed Fritz and Frans jig (as the crosscut fence is at the start of the wagon). This pushes against the crosscut fence and locks in place ...


    Or I have used a parallel guide, such as this ...


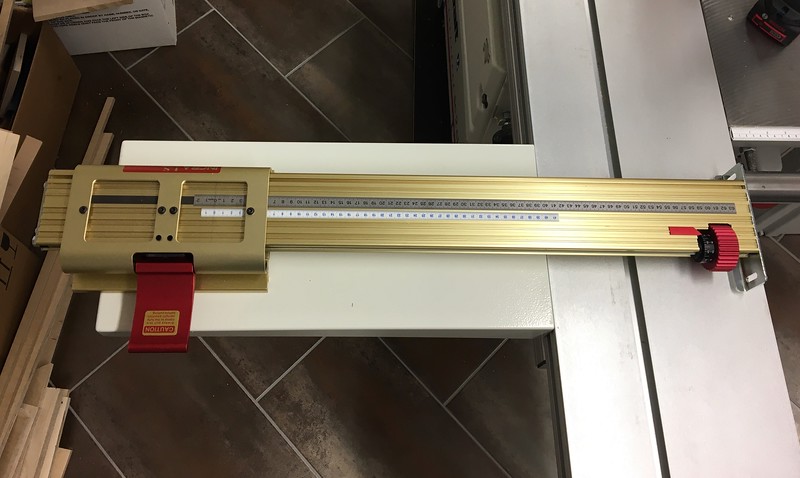
    That PG is really quite good in use, but it is a bother at times to bolt to the wagon when needed. What I liked was the one Mike Kreinhop made using an Incra LS25 positioner ...


    Two years into Covid and many tools are not available. In the case of the Incra Positioner, it is not available in Australia, and if it was, it would cost $1000 (AUD). So I decided to look elsewhere.

    The parts used here were items lying around the workshop. If purchased, there is probably about $100 worth.

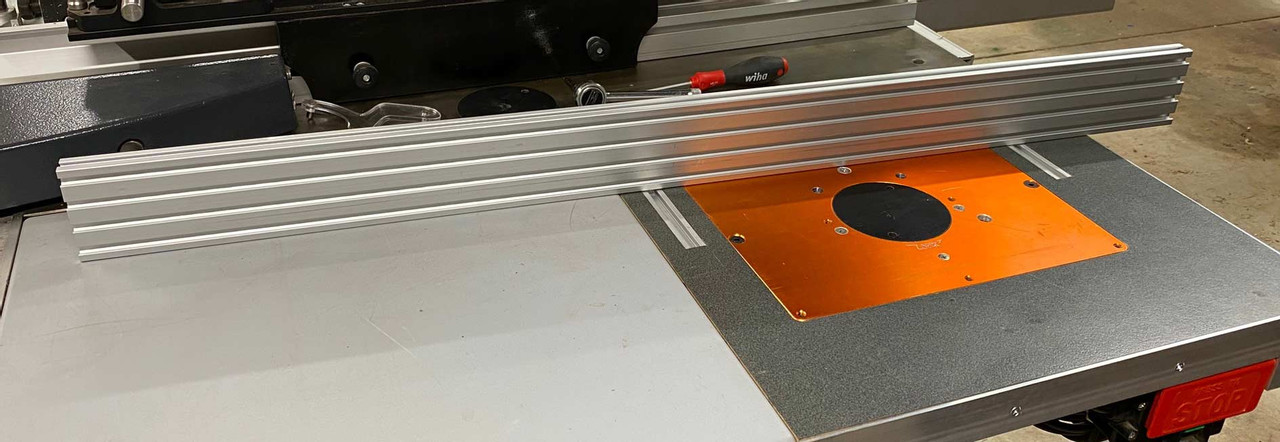
    The main component was a 1m length of 8020 aluminium extrusion, identical to the one I used for my router table fence ...


    The fence came from an Incra mitre fence (which had been used with the original F&F I made a few years ago, and discarded when the reversed F&F was built).


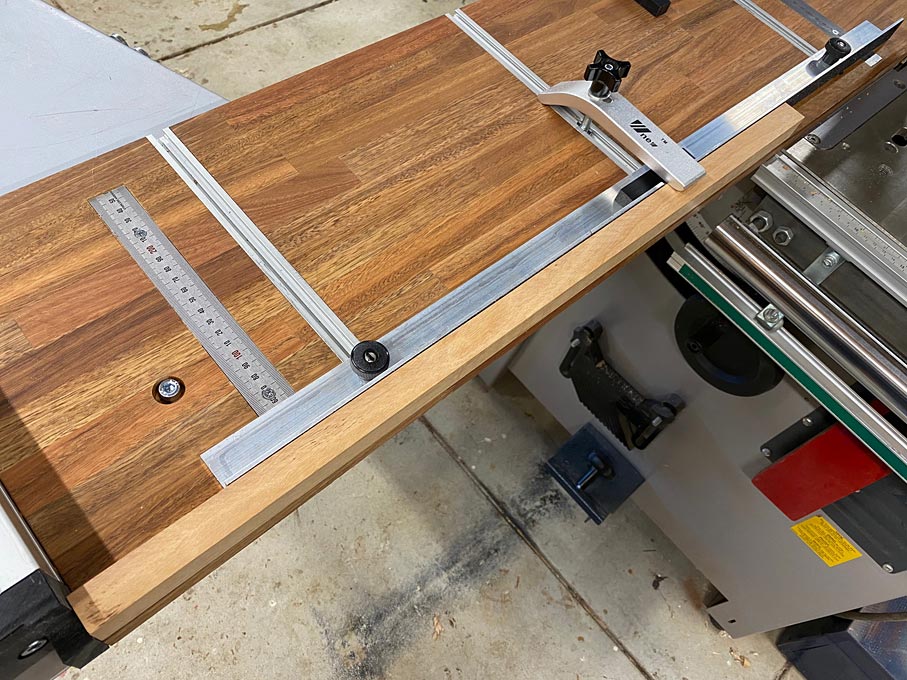
    This is what I came up with ...


    The fence along with the stop, which can be used or removed ...


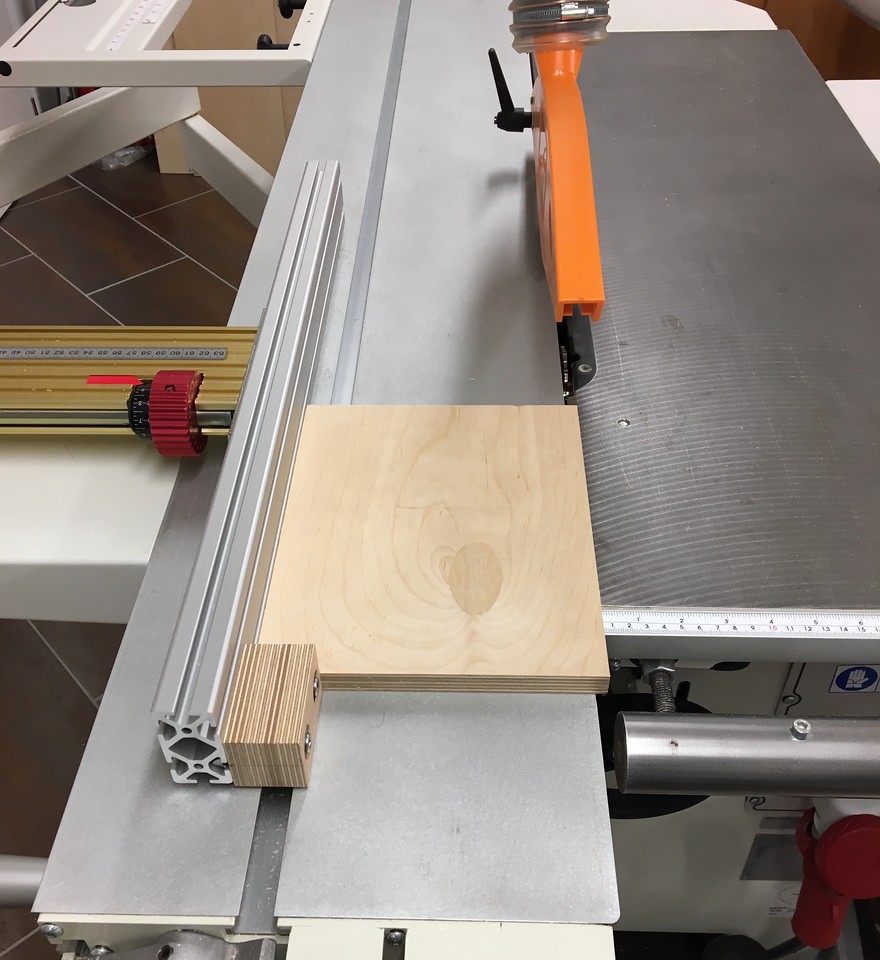
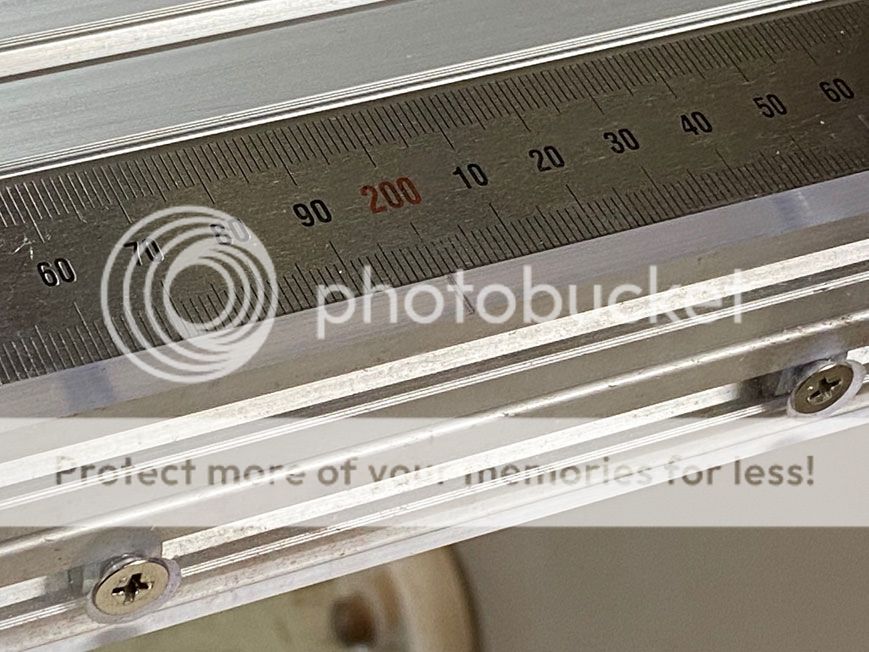
    My aim is the use the parallel guide in conjunction with the crosscut fence. The parallel guide is set up square to the blade and, like the stop on the crosscut fence, it can be set at a specific distance.


    The maximum setting distance from the blade is 500mm.

    The underside of the parallel guide: tracks made of UHMW ...


    The rear perspex guides double as a position locater ..


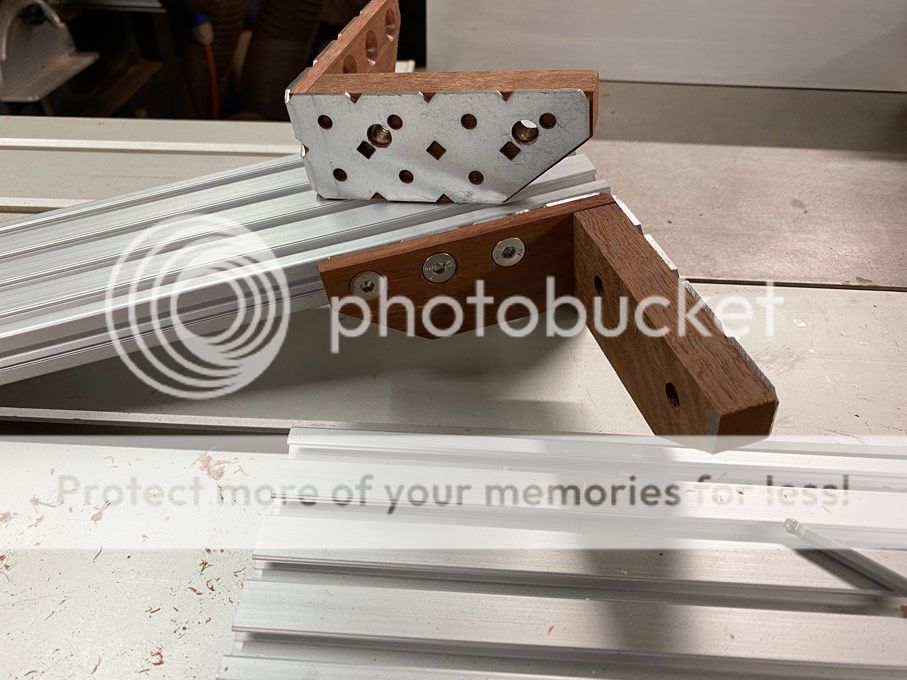
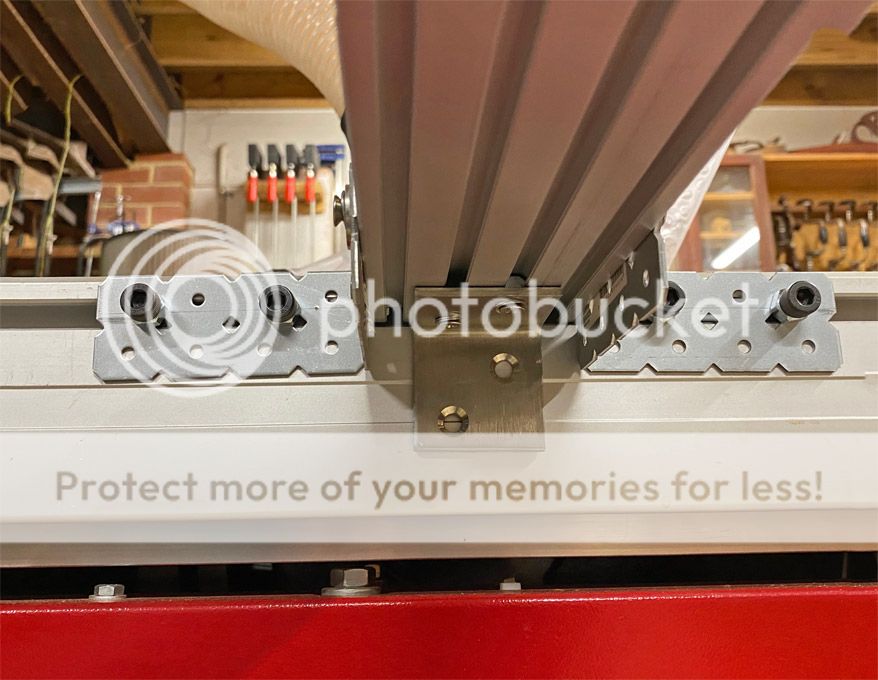
    Everything is adjustable. Below, the fence is adjusted for parallel by the side screws ...


    Steel angle brackets are used to connect the base to the wagon. The L-bracket on the underside ensures the base is square. This is also adjustable ...


  2. #2
    Join Date
    Feb 2004
    Location
    Perth, Australia
    Posts
    9,492


    Regards from Perth

    Derek

  3. #3
    Very nice, Derek! I've been meaning to build a version of your parallel guide, but this is also quite ingenious.

    The parallel guide seem to have the advantage that it must have a long strip engaging with the T-slot on the slider, guaranteeing it stays parallel to the slider (and blade). Two-piece parallel fences (like the Lamb Tool Works version) also seem to, by design, guarantee good stability and repeatability. For this design (yours or Mike's), do you feel like you're getting enough stability from the single mounting point (albeit, a wide mounting point)? My first thought seeing the Incra version was that it might be easy to deflect it by pushing too hard on one end, but perhaps not.

  4. #4
    Join Date
    Mar 2003
    Location
    SE PA - Central Bucks County
    Posts
    65,854
    You really have a lot nicer "shop scraps" that I do, Derek! 
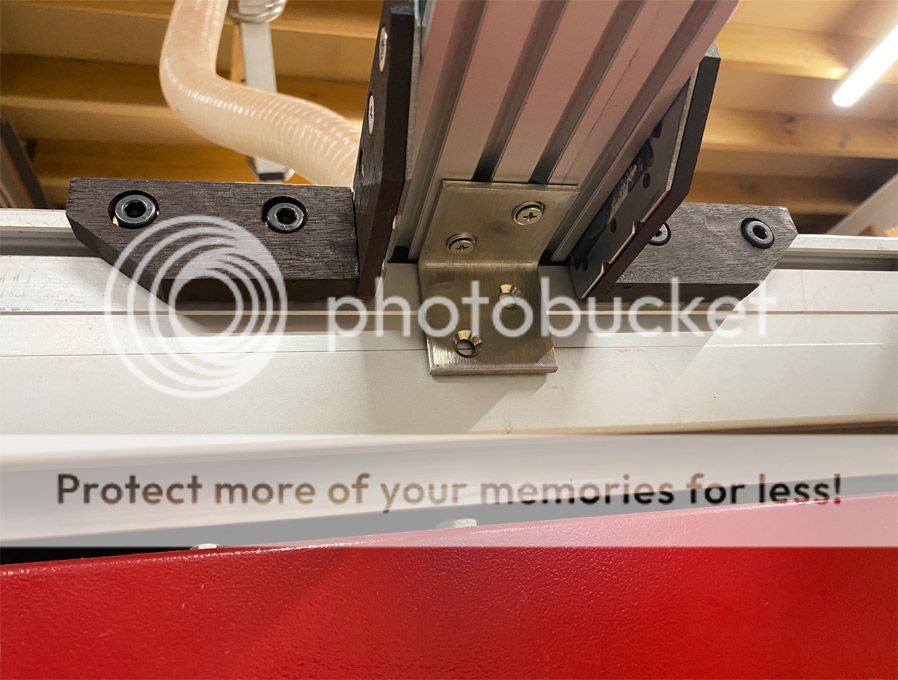
. Seriously, very nice parallel solution!
    --

    The most expensive tool is the one you buy "cheaply" and often...

  5. #5
    Join Date
    Nov 2013
    Location
    Waterford, PA
    Posts
    1,237
    Nice job. It looks well designed and pretty impressive for scraps!

  6. #6
    Join Date
    Feb 2004
    Location
    Perth, Australia
    Posts
    9,492
    Quote Originally Posted by Dan Friedrichs View Post
    Very nice, Derek! I've been meaning to build a version of your parallel guide, but this is also quite ingenious.

    The parallel guide seem to have the advantage that it must have a long strip engaging with the T-slot on the slider, guaranteeing it stays parallel to the slider (and blade). Two-piece parallel fences (like the Lamb Tool Works version) also seem to, by design, guarantee good stability and repeatability. For this design (yours or Mike's), do you feel like you're getting enough stability from the single mounting point (albeit, a wide mounting point)? My first thought seeing the Incra version was that it might be easy to deflect it by pushing too hard on one end, but perhaps not.
    Dan, Lamb Tool’s version, especially with the digital readout, is to kill for. Sigh. It occurred to me that his use of two parallel guides (compared to the single one of Mike and, especially, Sam Blasco, my original inspiration) is that his is designed for long wagons, which all have the crosscut fence at the far end. By contrast, my wagon is quite short (long enough to rip solid wood but not ply panels). My original F&F jig attempted to copy everyone else, and it proved to be extra work as it was necessary to bolt a fence to the end of the wagon. Then it occurred to me to reverse the direction of the F&F and use the crosscut fence as a part of the design. I assume others do not use the crosscut fence at the end of the wagon as it is so far away. In my case, using the crosscut fence at the start of the wagon, it is quick to set up and feels solid in action.

    Here is a video of Sam using his, and you will see what I mean. His wagon is an aircraft carrier …

    https://m.youtube.com/watch?v=9AHMTu...st=WL&index=20

    The construction of the PG built here is rock solid. There is minimal flex. I am looking forward to using it on the next build.

    The old PG is not to be discarded. I cannot conceive of anything better for tapering legs.

    Regards from Perth

    Derek

  7. #7
    Nice design. Thanks for posting this (and your excellent previous saw fixtures, too). A question: What's your approach for clamping/securing relatively narrow stock, which (I presume) needs to be secured to the sliding table in some fashion for safety and good results with a parallel guide? For example, how would you use this guide to rip rails and stiles? With eccentric hold-down clamps located in the table slots fore and aft to keep the workpiece in place?

  8. #8
    Join Date
    Oct 2005
    Location
    Helensburgh, Australia
    Posts
    2,710
    I have built a system using 20 series extrusion using the same basic ideas as Derek but it is digital and a bit clunky. My saw came without the outrigger and I added that later and this opened up another possibility. Mine had the fence the same as Derek's but the outrigger came with another fence as well so the two can be used at the same time. Set up both fences and clamp a 20 series extrusion to both flip stops and you now have an instant parallel guide that can also be clamped to if needed. An extra fence can be bought from Felder to do this and if you don't have an outrigger a fence can be mounted at the leading end of the table quite easily by buying the hardware from Felder. I changed the fence from the factory position to the leading end of the table to simplify using a F&F jig before I bought the outrigger.
    Chris

    Everything I like is either illegal, immoral or fattening

  9. #9
    Join Date
    Feb 2004
    Location
    Perth, Australia
    Posts
    9,492
    Quote Originally Posted by David Stone (CT) View Post
    Nice design. Thanks for posting this (and your excellent previous saw fixtures, too). A question: What's your approach for clamping/securing relatively narrow stock, which (I presume) needs to be secured to the sliding table in some fashion for safety and good results with a parallel guide? For example, how would you use this guide to rip rails and stiles? With eccentric hold-down clamps located in the table slots fore and aft to keep the workpiece in place?
    David, I see the value of the new parallel guide to straighten boards. It is possible to achieve a glue line finish on the wagon. The advantage of this guide is that it is so quick to set up. On the other hand, although it is early days, I am nervous about very narrow boards on it. I would rather rip those, or rip to taper, using the earlier model ...


    The Incra fence does have non-slip across its length, and the wagon does have a hold down. I will see how that goes ...


    Narrow and small pieces are still best on the reversed Fritz and Franz jig (here cutting a piece of UHMW to 50mm) ...


    Regards from Perth

    Derek

  10. #10
    Join Date
    Feb 2004
    Location
    Perth, Australia
    Posts
    9,492
    Quote Originally Posted by Chris Parks View Post
    I have built a system using 20 series extrusion using the same basic ideas as Derek but it is digital and a bit clunky. My saw came without the outrigger and I added that later and this opened up another possibility. Mine had the fence the same as Derek's but the outrigger came with another fence as well so the two can be used at the same time. Set up both fences and clamp a 20 series extrusion to both flip stops and you now have an instant parallel guide that can also be clamped to if needed. An extra fence can be bought from Felder to do this and if you don't have an outrigger a fence can be mounted at the leading end of the table quite easily by buying the hardware from Felder. I changed the fence from the factory position to the leading end of the table to simplify using a F&F jig before I bought the outrigger.
    Any photos of your set ups, Chris?

    Regards from Perth

    Derek

  11. #11
    Join Date
    Oct 2005
    Location
    Helensburgh, Australia
    Posts
    2,710
    Quote Originally Posted by Chris Parks View Post
    I have built a system using 20 series extrusion using the same basic ideas as Derek but it is digital and a bit clunky. My saw came without the outrigger and I added that later and this opened up another possibility. Mine had the fence the same as Derek's but the outrigger came with another fence as well so the two can be used at the same time. Set up both fences and clamp a 20 series extrusion to both flip stops and you now have an instant parallel guide that can also be clamped to if needed. An extra fence can be bought from Felder to do this and if you don't have an outrigger a fence can be mounted at the leading end of the table quite easily by buying the hardware from Felder. I changed the fence from the factory position to the leading end of the table to simplify using a F&F jig before I bought the outrigger.
    Two fences set up as a parallel guide system with my apologies for the poor photo. Looking at the photo it is obvious more explanation and and more pics are required to show it properly and I will do that tomorrow.

    IMG_2589.jpg
    Last edited by Chris Parks; 04-21-2022 at 5:48 AM.
    Chris

    Everything I like is either illegal, immoral or fattening

  12. #12
    Join Date
    Feb 2004
    Location
    Perth, Australia
    Posts
    9,492
    Thanks for the photo Chris. How it works is clear.

    Potentially exciting! The issue for me with this set up is that you will need to move one of the crosscut fences nearer or further, depending on the size of the board you are ripping. That requires careful resetting - or is there a quick way to do this?

    Regards from Perth

    Derek

  13. #13
    Join Date
    Oct 2005
    Location
    Helensburgh, Australia
    Posts
    2,710
    Quote Originally Posted by Derek Cohen View Post
    Thanks for the photo Chris. How it works is clear.

    Potentially exciting! The issue for me with this set up is that you will need to move one of the crosscut fences nearer or further, depending on the size of the board you are ripping. That requires careful resetting - or is there a quick way to do this?

    Regards from Perth

    Derek
    This idea has been floating around in my head for a while and though I haven't tried it I think the following may work. Set up the CC fences the maximum distance apart and clamp a length of 20 series extrusion to the flip stops after setting the same dimension on both fences and use that as a parallel fence to set the material against while cutting. It might be possible to do tapers using that method by packing one end of the wood and clamping from the extrusion and to do narrow cuts use packers off the fence and clamps. A CC fence is not a huge cost and can be set up as I mentioned above at the leading end of the sliding table very easily.
    Chris

    Everything I like is either illegal, immoral or fattening

  14. #14
    Join Date
    Oct 2005
    Location
    Helensburgh, Australia
    Posts
    2,710
    Here are the pics of how I can set up a parallel guide using two fences and a length of aluminium extrusion. It can have a low or high position which could be an advantage as well.

    This is in the early days showing the CC fence on the front of the table without an outrigger. If my saw did not now have the outrigger I would leave the front fence on the saw and add a fence in the original rear position at the operator end of the table to use this method.

    Fence on the Front of the Table 2.jpg

    IMG_2597.jpgIMG_2598.jpgIMG_2599.jpg

    Low position fence

    IMG_2600.jpg
    Last edited by Chris Parks; 04-24-2022 at 2:27 AM.
    Chris

    Everything I like is either illegal, immoral or fattening

  15. #15
    Join Date
    Feb 2004
    Location
    Perth, Australia
    Posts
    9,492
    Really good, Chris!

    Does it take long to set up?

    Regards from Perth

    Derek

Posting Permissions

  • You may not post new threads
  • You may not post replies
  • You may not post attachments
  • You may not edit your posts
  •