Page 1 of 2 12 LastLast
Results 1 to 15 of 18

Thread: Need a little help on torsion box work bench.

  1. #1

    Need a little help on torsion box work bench.

    Looking to make my first torsion box work bench. Have a few questions though. I plan to have the sacrificial top overhang the torsion box by 4” on all sides. I plan to make my grid out of left over 3/4” oak plywood and have the top and bottom be left over 1/2” birch plywood, then use a full 4x8 sheet of melamine for the sacrificial top. Which as I stated will over hang 4” all the way around. So that will make the torsion box itself be 41” wide x 89” long. And have the grid ribs be 4” tall. Now for my questions.

    1.) are there any certain formulas on the grid pattern or spacing of grid?

    2.) with regards to the grid. Can I use butt joints? Or would half laps be that much better? If I use butt joints with glue and brad or finish nails, I would have to offset each of the internal ribs so that I could get my nail gun in there. Is that ok?

    Thanks in advanced to anyone who takes the time to help me on this. You guys are the best!

  2. #2
    Join Date
    Oct 2008
    Location
    Columbus, OH
    Posts
    3,064
    Regarding overhanging the melamine, if the melamine you are going to use is the standard particle board stuff, that overhang is going to break off fairly easily at some point.
    Last edited by Brian Tymchak; 03-16-2022 at 8:10 AM.
    Brian

    "Any intelligent fool can make things bigger or more complicated...it takes a touch of genius and a lot of courage to move in the opposite direction." - E.F. Schumacher

  3. #3
    You can do some research and find an engineering approach for the optimum scantlings. I can tell you from experience that with a 1/2" top and 3/4" core members 6" o.c. will work fine, as will an overall thickness of 4". Thicker is stiffer.
    I would make the 1/2" top full size to support the melamine spoilboard. Make sure you have a flat surface to build on. I use clamps and cauls but you can make do with epoxy and a lot of evenly distributed weight or a (big enough) vacuum press). If you are organized and have a helper pva can work but I prefer to use epoxy for a longer working time.
    Half laps are a lot easier to assemble than butt joints. Just gang up the warp and woof pieces and dado them on your slider, then slot them together like an egg crate.

  4. #4
    I would run 3 ribs the full length, and cross ribs every 12" or so. This also gives you enough room for the air nailer.

    Butt joints are fine. Use glue. I've used both nails and screws. I like screws better. Stagger to access with a nailer or driver.

    The melamine overhang is fine. I would rim it with some hardwood with a rabbet to accept the melamine and protect the edge.

    Mark Spagnolo has a very good video that yields a perfectly flat surface.

  5. #5
    Join Date
    Mar 2003
    Location
    SE PA - Central Bucks County
    Posts
    65,887
    I agree with Kevin...if you want that Melamine to overhang, do the same with the .5" plywood top to provide support for the sacrificial surfaces edge which can break VERY easily.
    --

    The most expensive tool is the one you buy "cheaply" and often...

  6. #6
    There won't be an "optimum" formula for the grid spacing as the strength and stiffness will always be "better" with more slats. You'll definitely hit diminishing returns at some point though, so I'd just go with what someone else has tried before and said works well. You could go all in with formulas to calculate the sag between slats and decide you want no more than 0.001" or whatever, but that's quite a lot of work you probably don't need to do.

    I'd just go with 6"-12" like the other posters have said since they've done it and it works for them.

    Alternatively, you could build a little prototype box. Just make a single 6" square and put your plywood and melamine on top of it. Stand on it or put some weight on it and see if it's rigid enough for you. I bet you'll find it's fine at 12". That won't tell you whether the bulk stiffness is good, but it'll tell you if you're adequately supporting the skin.

    Calculating the bulk sag (how much the whole table itself moves) is a lot easier mathematically speaking but I think you'll be fine without it. You didn't say if you're just screwing legs to the torsion box top or if you'll have a frame underneath. If you have a frame then you're totally fine. Even without one I think you'll be PLENTY rigid unless you're working on engine blocks or something.

    Just my $0.02. I haven't built one but I am very familiar with the math. Spacing two 1/2" thick plywood boards apart by 4" will give you some SERIOUS stiffness. It's been a while since I reviewed the numbers, but if I recall the stiffness is proportional to the distance cubed. You'll be A LOT stronger than two 1/2" pieces sitting on top of each other.

  7. #7
    Join Date
    Apr 2017
    Location
    Michigan
    Posts
    2,772
    A torsion box is fine for an assembly table but to do serious work a more massive approach is better. Let's do a mental test. Make a 12 x 12 box and pound on it in the center, then on the edge. Way different!

  8. #8
    If you think you might ever drill holes for a Festool like MFT be aware the standard grid is on 96mm centres. That might affect your rib spacing. I used all 18mm MDF construction on mine with ribs on 288 centres. But jointed ribs, pinned and glued.

    The bench is very solid.

  9. #9
    Join Date
    Mar 2003
    Location
    SE PA - Central Bucks County
    Posts
    65,887
    Yes, the grid for the Festool MFT series is 20mm holes on 96mm centers. But the spacing of the grid doesn't matter much as long as it's a regular spacing that can support clamping at 90º, etc., unless one is going to use some thing that has fixed posts that are built for the 96mm grid. For a larger surface like this that might be used for assembly including clamping to the table, a combination of holes and slots is popular because it's more flexible for clamping "down" ot the table. Of course, that also has impact on the internal grid, so good pre-planning pays off.
    --

    The most expensive tool is the one you buy "cheaply" and often...

  10. #10
    Join Date
    Nov 2006
    Location
    Vancouver, BC
    Posts
    858
    Quote Originally Posted by Greg Quenneville View Post
    If you think you might ever drill holes for a Festool like MFT be aware the standard grid is on 96mm centres. That might affect your rib spacing. I used all 18mm MDF construction on mine with ribs on 288 centres. But jointed ribs, pinned and glued.

    The bench is very solid.
    I used 192mm spacing on the ribs in a torsion box outfeed table. You lose some flexibility with the festool and bessey clamps. They can't swing freely in the holes adjacent to an inner rib. They still work fine but something to be aware of.

  11. #11
    Join Date
    Mar 2003
    Location
    SE PA - Central Bucks County
    Posts
    65,887
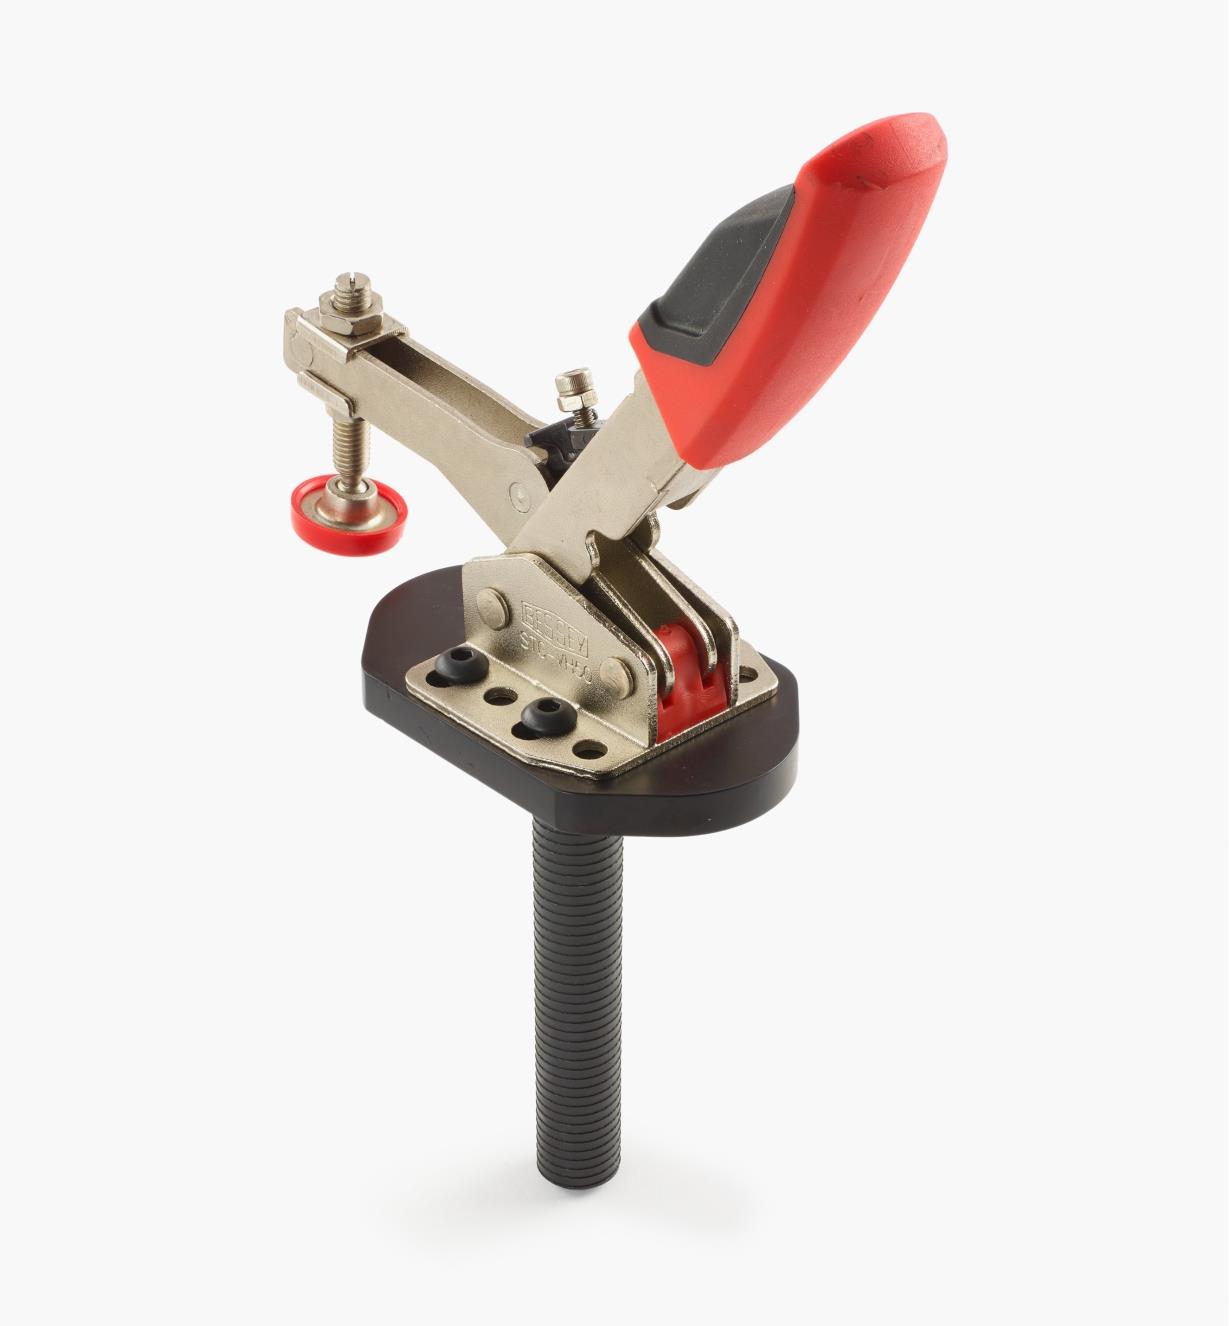
    Some of the "expanding post" type clamps might work for those holes near partitions, too.
    --

    The most expensive tool is the one you buy "cheaply" and often...

  12. #12
    Join Date
    Nov 2006
    Location
    Vancouver, BC
    Posts
    858
    Quote Originally Posted by Jim Becker View Post
    Some of the "expanding post" type clamps might work for those holes near partitions, too.
    I don't have any of those yet. Would they work in 3/4" MDF or are they designed for a thicker top?

  13. #13
    Join Date
    Mar 2003
    Location
    SE PA - Central Bucks County
    Posts
    65,887
    Quote Originally Posted by Greg Funk View Post
    I don't have any of those yet. Would they work in 3/4" MDF or are they designed for a thicker top?
    I just ran out to the gara...err....shop...and took a look at the one clamp I have with that kind of arrangement. That one happens to be for lateral clamping and it indeed does tighten up in a hole in the thinner area of my bench. (nominal 25mm/1 inch thick and the hole I used happened to be 20mm but the device is designed for 3/4" dog holes) You might take a look at some of the bench clamps that Kreg offers to see if any of those are a solution. I don't happen to own any at present so I can't actually test/check them for this.
    --

    The most expensive tool is the one you buy "cheaply" and often...

  14. #14
    Join Date
    Nov 2006
    Location
    Vancouver, BC
    Posts
    858
    Quote Originally Posted by Jim Becker View Post
    I just ran out to the gara...err....shop...and took a look at the one clamp I have with that kind of arrangement. That one happens to be for lateral clamping and it indeed does tighten up in a hole in the thinner area of my bench. (nominal 25mm/1 inch thick and the hole I used happened to be 20mm but the device is designed for 3/4" dog holes) You might take a look at some of the bench clamps that Kreg offers to see if any of those are a solution. I don't happen to own any at present so I can't actually test/check them for this.
    I found one from Axminster that would work but from the pictures I think it might damage the holes if much clamping pressure was applied.

    I think the simplest is to just get a longer bar clamp with a removeable jaw and push it up through the bottom of the table.

    rachet-hold-down-clamp-hero__77353.1527058316.jpg

  15. #15
    Join Date
    Mar 2003
    Location
    SE PA - Central Bucks County
    Posts
    65,887
    Here's one example of the type I was referring to:

    https://www.leevalley.com/en-us/shop...xoCXwYQAvD_BwE

    --

    The most expensive tool is the one you buy "cheaply" and often...

Posting Permissions

  • You may not post new threads
  • You may not post replies
  • You may not post attachments
  • You may not edit your posts
  •