Page 2 of 2 FirstFirst 12
Results 16 to 30 of 30

Thread: Need a tip to finesse some dovetails.

  1. #16
    Join Date
    Jan 2019
    Location
    Fairbanks AK
    Posts
    1,566
    Appreciate the input. I am not seeing a multiquote option.

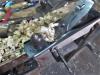
    Derek, there is indeed a bruise on the pictured baseline. I see the picture doesn't show it well, but the sidewall of the tail was janky. Like the teeth are unevenly set on the DT saw. They were set good when my Veritas DT saw was new, I have put many many dovetails into my woodstove this winter so there is no evidence for later. COnfident my DT saw needs to be sharpened and set. I did switch to my 3/16" chisel for ongoing baseline paring, that one has enough taper to the lands to not bruise.

    Jim, for the next joint cut tonight, I did exactly that. I cut as well as I could with my DT saw, then used (thank you Jason) the bare iron out of a #3 Bailey to smooth up the janky cut walls on the tails BEFORE marking the pin cuts using the tails as a guide. Appreciate your kind supportive input as always.

    For the next one tomorrow I will try to leave the layout line with the saw and then pare to it with the unfettered plane iron. My wife is getting antsy about all the items on the top of the chest freezer that need to be in the drawers I am making.

    Intuitively I think Robert is correct that dovetails are 88% sawing skill and 12% chisel skill. I spent two years of free time, perhaps 200 hours shop time, learning to make mortise and tenon joints. It was having to (forcing myself to) pare to fit after sawing that brought my sawing game up to speed. Having MT joints fit off the saw takes confidence and experience, makes perfect sense to me that dovetails are the same.

    One thing I did notice tonight is my kerfing chisel is not exactly the same width as my DT saw kerf. ( sound effect) First thing I did was pare the extra left behind by the kerfing chisel off the pin walls and I was halfway done with the chisels.

    I think James' idea about a custom ground Xacto blade has merit. I don't have one to fool with, but it is a keeper idea.

    Thank you Jack. I may need to upgrade my coping saw also. I got it out for the first set of tails, but it would have been like trying to use a bulldozer to clean out a moderate sized horse stall, too clunky for the job.

    John, thanks for the idea.

    It is clear to me, with all y'alls input and looking over my process and results I need to practice a LOT more, and set or at least check the set on my DT saw. In the interests of short term domestic tranquility I am instead going to saw on the waste side of the line, pare tails to my knife marks with a #3 Bailey iron, then mark the pins, pare off the kerfing chisel waste on the pin walls and get this thing done. Besides spousal consternation I am up against the time pressure of season change, the melt is starting here and daily humidity swings are impressive.

    Thanks again everybody.

  2. #17
    Join Date
    Apr 2015
    Location
    New England area
    Posts
    588
    In the fullness of time, you may very well want to settle in with a lower tooth count DT saw. In the meantime, a high tooth count gent's saw -- 18+ is much less sensitive to problems with the set of the teeth. If something looks amiss, it's probably not the saw's fault. At thirty to thirty five bucks each, you might just want to buy a new one when it gets dull. You can make scratch stocks out of the old one(s) for frugality's sake. You can sharpen them however, but the teeth are mighty small. Long story short-- you need one less problem to diagnose then solve, i.e. a honked up sharpening/setting job. That stuff can come later, or not at all. Your choice.

    I'd lose the coping saw. They're notorious for imparting bruises as you make the turn across the baseline. Just chop out the waste. You don't need two saws to worry about. You're already having enough trouble with your dovetail saw.

    Less is more. Simplify.

  3. #18
    One thing that helped the accuracy of my saw cutting immensely was to level the board front to back and side to side so that the cut is either vertical or horizontal prior to cutting. I line my body up so the natural motion of my arm is as close to straight in/out as possible. Then, I like to cut as close to straight up/down as possible. That first pass of the saw is critical to setting the cut correctly, and then let the saw cut.. Never "push" or "pull" or try to horse it into alignment, just glide the saw through the wood, back and forth. I figure "minimum resistance" means it's as centered in the cut as it will go. If I do my part to keep everything aligned, and the saw is sharp and properly set, it will follow the line.

    Things go awry when the saw is dull or the set is off. Then, they go squirrelly, barrel, wander, stick, and generally cause havoc. If you're having a saw problem, fix that first.
    Last edited by John C Cox; 03-03-2022 at 9:00 AM.

  4. #19
    Join Date
    Jun 2010
    Location
    twomiles from the "peak of Ohio
    Posts
    12,184
    Saws like this one can be found about anywhere...
    Scrap Box Projects, Disston No. 68.JPG
    This is a Disston No. 68.....is filed Rip, and only has 9ppi....right now it is cutting Oak and Ash....

    An expensive guide for the saw? My left thumb does a nice enough job....thumbnail at the line, maybe set the knuckle against the side of the saw. Once I am 1/2 down into the cut, the kerf is the guide, all I then worry about is not going deep enough, or...too deep....I usually try to stop just a hair short of the line..

    For the tasks I do....this is how I saw the parts. Whether you do tails or pins first....you then use them to mark out the Pins/tails on the mating piece...And cut on the waste side of the layout lines, trying to leave the lines....as it usually makes for a tighter joint...plus, you can pare away excess wood more easily than add wood back in...

    One last tip: S L O W D O W N! take your time.
    A Planer? I'm the Planer, and this is what I use

  5. #20
    Join Date
    Sep 2007
    Location
    Longview WA
    Posts
    27,457
    Blog Entries
    1
    Quote Originally Posted by Scott Winners View Post
    Appreciate the input. I am not seeing a multiquote option.

    [heavily edited]

    For the next one tomorrow I will try to leave the layout line with the saw and then pare to it with the unfettered plane iron.

    Thanks again everybody.
    Down in the lower right corner:

    Multi Quote.png

    Click on the little Balloon + symbol for each post to be included in the MultiQuote. Then on the last post to be included click on Reply With Quote.

    Here is something to remember to help step up your dovetail production. Saw to the line. Not sure if my first hearing of this was a Frank Klaus video or what. With the first part of dovetail cutting it isn't as important to saw perfectly to the line or through the line. If the kerf is fairly straight, smooth and square to the face of the piece it will be fine. A minimum of paring is all that is needed. If it isn't perfect, that is okay. The pins will be cut to match the tails if one is cutting tails first. If cutting pins first, the tails will be marked to match the pins.
    "A pessimist sees the difficulty in every opportunity; an optimist sees the opportunity in every difficulty."
    - Sir Winston Churchill (1874-1965)

  6. #21
    Join Date
    Nov 2009
    Location
    Ellsworth, Maine
    Posts
    1,809
    Don't touch your tails. If paring is needed please just pare the pins. I personally don't think paring is good practice but I used to do it before I was confident enough to saw to the line. Blue masking tape really helps with seeing the line. But again, I only touched the pins not the tails.

    As Derek noted, you should be much more careful with the baseline paring and avoid bumping into the show surfaces. You also need to avoid taking large cuts once you are on your baseline scribe, your chisel will most certainly be pushed back past your baseline causing even more issues.

  7. #22
    Are you sure you need to pare the walls? The errors are usually at the corners or base line. A 1/8” chisel should be able to get across the base.

    If not grind the lands off a beater.

  8. #23
    Join Date
    Jan 2019
    Location
    Fairbanks AK
    Posts
    1,566
    I am pretty sure my DT saw was dull. I am about to get out to my shop to find out.

    The irony is I have a new binocular magnifier and a new to me sawset in their shipping boxes, and the drawers I am building are to hold my saw sharpening supplies. I was wanting to get the drawers done and then move the items from the packing boxes into their drawers. Instead I got the magnifier out and started looking around. My shop has not been this messy since I had multiple children at home.

    I ended up getting up early this morning and sharpened my DT saw. The test cuts before I left for the office this morning were promising, about to find out.

    EDIT: Yup. DT expert I am not, but having the saw sharp sure does help. Appreciate all the inputs along the way. Man those teeth are little.
    Last edited by Scott Winners; 03-04-2022 at 10:37 PM.

  9. #24
    Yeah, I'm in no hurry to start sharpening my set of Veritas carcass and dovetails saws. I bought the set of files as well and built a saw vise. I think I'm ready but I'll practice on something else first. Those teeth are small, yikes.

  10. #25
    Join Date
    Sep 2007
    Location
    Longview WA
    Posts
    27,457
    Blog Entries
    1
    Quote Originally Posted by Richard Hutchings View Post
    Yeah, I'm in no hurry to start sharpening my set of Veritas carcass and dovetails saws. I bought the set of files as well and built a saw vise. I think I'm ready but I'll practice on something else first. Those teeth are small, yikes.
    This is helpful when filing small teeth > https://www.leevalley.com/en-us/shop...r?item=99W9732

    Looks to be an item that will not be available when current stock is gone.

    jtk
    "A pessimist sees the difficulty in every opportunity; an optimist sees the opportunity in every difficulty."
    - Sir Winston Churchill (1874-1965)

  11. #26
    Join Date
    Feb 2004
    Location
    Perth, Australia
    Posts
    9,494
    Quote Originally Posted by Scott Winners View Post
    I am pretty sure my DT saw was dull. I am about to get out to my shop to find out.

    The irony is I have a new binocular magnifier and a new to me sawset in their shipping boxes, and the drawers I am building are to hold my saw sharpening supplies. I was wanting to get the drawers done and then move the items from the packing boxes into their drawers. Instead I got the magnifier out and started looking around. My shop has not been this messy since I had multiple children at home.

    I ended up getting up early this morning and sharpened my DT saw. The test cuts before I left for the office this morning were promising, about to find out.

    EDIT: Yup. DT expert I am not, but having the saw sharp sure does help. Appreciate all the inputs along the way. Man those teeth are little.
    Scott, I have just posted a tutorial on sharpening. Hope it is easy to follow.

    Regards from Perth

    Derek

  12. #27
    Quote Originally Posted by Derek Cohen View Post
    Scott, I have just posted a tutorial on sharpening. Hope it is easy to follow.

    Regards from Perth

    Derek
    I just went looking for that tutorial and couldn't find it.

  13. #28
    Join Date
    Feb 2004
    Location
    Perth, Australia
    Posts
    9,494
    Richard, you are not looking very hard.

    Hint: below this thread ...

    Regards from Perth

    Derek

  14. #29
    What??Derek.jpg

  15. #30
    I was looking on your website. Then I was looking at the bottom of this thread. I then found it on the Australian Woodworking forum and now I found it on another thread here. I found it :-)

Posting Permissions

  • You may not post new threads
  • You may not post replies
  • You may not post attachments
  • You may not edit your posts
  •