
I worked on restoring this plane more or less in parallel with the No. 5 that I discussed in my previous post.
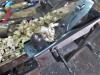
This is a Bailey No. 4, Type 11 with rosewood tote and knob and lots of surface rust and some corrosion, but its a complete plane that looks to have all original parts. It took some effort to get these surfaces looking good again, but Im happy with the results and the restored plane now works beautifully.
Before.jpgAfter.jpg
But one part on this plane did need repairing. The knob had a crack in one side that extended from the top to about half-way down and also extended inward to the center hole. For the repair, I wanted to draw some CA glue deep into that crack before doing any refinishing. To do that I used my shop vac with a small hose to suck the glue into the crack. I didnt take a picture of it at the time, but the following photo shows how I set it up (this is a different knob which isnt cracked):
ShopVacAndKnob.jpg
After applying a liberal amount of CA glue along the crack on the outer surface of the knob, I put the shop vac hose at the base and covered the top of the hole with my finger (I had on a nitrile glove and the fingertip was coated with some paste wax to keep the glue from sticking to it). Then I turned on the shop vac for about 2 minutes. After turning off the shop vac I could see the CA glue that had seeped out from the crack to the inner surface of the center hole so the glue sucking procedure worked (yay!). I had to apply several more layers of glue (shop vac no longer needed) to completely fill the crack and I scraped away the hardened CA glue inside the hole with a 7/16 drill bit that I just twisted around with my hand. Sanding the knob removed the old finish and also removed the extraneous hardened glue around the crack. While the crack was still visible, it was now filled and reinforced with clear glue. For finishing, I used shellac and then Minwax tung oil (as described in my previous posting). The follow photo shows that the repaired crack, which is positioned at the front of the finished knob, is no longer visible.
FinishedKnob.jpg
The remainder of the restoration proceeded in a similar manner as I described in my previous posting for the Bailey No. 5. The only corrosion that is still noticeable is right at the top of the iron where there is some pitting right over part of the V shaped Stanley logo.
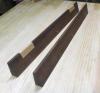
Here are the photos of the finished plane with some additional photos in a follow-up posting.
View1.jpgView2.jpgView3.jpgSides.jpg


 Reply With Quote