Page 1 of 2 12 LastLast
Results 1 to 15 of 22

Thread: Beaded face frame plan - any gotchas?

  1. #1
    Join Date
    Nov 2014
    Location
    Allentown, PA
    Posts
    188

    Beaded face frame plan - any gotchas?

    After looking at past discussions and the internet, I've come up with the following plan for building beaded face frames. The work load includes a kitchen, bath, and frame & panel construction on deep stone walls around windows.

    Equipment
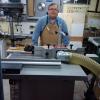
    Felder KF700SP with 1.25" and router spindles
    Kreg 1/4" x 1.5" notching bit
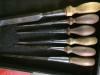
    Freeborn PC-17-041 bead cutter

    Procedure
    Follow this procedure for notches (KF700 shaper, router spindle, Kreg)
    Slide the shaper fence over to chamfer rails (KF700 shaper, router spindle, Kreg)
    Cut the beads (KF700 shaper, shaper spindle, Freeborn)
    Glue and pocket screw

    I'd appreciate any suggestions.

  2. #2
    Join Date
    Dec 2006
    Location
    Toronto Ontario
    Posts
    11,284
    Hi Mike, since you have a sliding table shaper with a router collet I would simply use the crosscut fence on the sliding table to make the notches.

    Slide the fence over as close to the bit as you can, and attach a sacrificial piece of wood to the fence that extends past the far side of the router bit, to act as a zero clearance fence.

    Your crosscut fence already has an accurate flip stop..

    Regards, Rod.

  3. #3
    Hah. I was just about to ask this question using basically the same tools, although I haven’t yet purchased the Kreg bit.

    So on order of operation, would it not be better to cut the bead first?

    Greg

  4. #4
    Join Date
    May 2013
    Location
    Northern Virginia
    Posts
    1,372
    Blog Entries
    3
    That bead size (1/4") is different than what kreg uses. It's not a problem but you need to account for the difference. The 1.5" notching bit will cut a 1.625" notch when set to the .3125" depth for a 1/4" bead with a .0625" quirk (kreg includes the quirk in the 1/4" measurement)

    The only other thing is keep the stock as close to that measurement as possible to within a few thousandths.

    Finally use stop blocks to make consistent notches, and if you want a 2" rail (or whatever) use a spacer block in conjunction with a stop block to make the 2nd pass for the wider cut.

    My method
    https://youtu.be/KGlid5nTgzM
    Last edited by Jared Sankovich; 02-03-2022 at 11:11 PM.

  5. #5
    Join Date
    May 2013
    Location
    Northern Virginia
    Posts
    1,372
    Blog Entries
    3
    Quote Originally Posted by Greg Quenneville View Post
    Hah. I was just about to ask this question using basically the same tools, although I haven’t yet purchased the Kreg bit.

    So on order of operation, would it not be better to cut the bead first?

    Greg
    Bead first will just blow out the bead with the notching bit.

  6. #6
    Quote Originally Posted by Jared Sankovich View Post
    Bead first will just blow out the bead with the notching bit.
    Thanks Jared. Really nice custom set-up you have in the video

    Greg

  7. #7
    Join Date
    Mar 2003
    Location
    SE PA - Central Bucks County
    Posts
    65,943
    Aside from the machining...take your time and be meticulous, sneaking up on the perfect fit. Too long is kewel since you can take more off. Too short...you remake the part. Of course, the alternative to milling the stock is to use an applied bead.
    --

    The most expensive tool is the one you buy "cheaply" and often...

  8. #8
    Join Date
    May 2013
    Location
    Northern Virginia
    Posts
    1,372
    Blog Entries
    3
    Quote Originally Posted by Jim Becker View Post
    Aside from the machining...take your time and be meticulous, sneaking up on the perfect fit. Too long is kewel since you can take more off. Too short...you remake the part. Of course, the alternative to milling the stock is to use an applied bead.
    It should be a perfect fit off the machine if you have it all set right. Notch depth and the width of the mating part are critical with surprisingly little tolerance. A few thousandths wider on the rail is OK, a few thousandths narrower with show gaps on both bead miters. A dial indicator and calipers are your friend. I run all my FF stock to width on the shaper with an outboard fence.

    IMG_20200203_195427_314.jpg
    IMG_20191215_224811_423.jpg

  9. #9
    Join Date
    Mar 2003
    Location
    SE PA - Central Bucks County
    Posts
    65,943
    Good advice, Jared.
    --

    The most expensive tool is the one you buy "cheaply" and often...

  10. #10
    Join Date
    Nov 2014
    Location
    Allentown, PA
    Posts
    188
    Is it worth the extra money to get the Freeborn cutter vs. a router bit? I’ll be running hundreds (not thousands) of feet; but I’m ready to pay for a better result. My assumption is that the cutter won’t burn the wood as easily.

  11. #11
    Join Date
    May 2013
    Location
    Northern Virginia
    Posts
    1,372
    Blog Entries
    3
    Quote Originally Posted by Mike Stelts View Post
    Is it worth the extra money to get the Freeborn cutter vs. a router bit? I’ll be running hundreds (not thousands) of feet; but I’m ready to pay for a better result. My assumption is that the cutter won’t burn the wood as easily.
    If you value your time at all then yes get the shaper cutter. The bead should come out so smooth/clean you should not need more then a scuff sanding. Squirly grain will need a bit of sanding, but won't chunk out like a router bit.

  12. #12
    Join Date
    Nov 2014
    Location
    Allentown, PA
    Posts
    188
    Thanks for the great advice everyone. You tempted me to ask one more question. I'd like to reproduce this 5/16" radius profile on door trim; but, I'm stumped on the best way to do it (without a hand plane). Any ideas?IMG_6526.jpgIMG_6527.jpg

  13. #13
    Join Date
    Nov 2009
    Location
    Peoria, IL
    Posts
    4,564
    I always apply the bead like loose pieces of trim, mitered in the corners. Feels easier to get a perfect joint to me. On a long run, you can at least set up stops for the stiles to speed cutting.
    Last edited by Richard Coers; 02-04-2022 at 12:09 PM.

  14. #14
    Join Date
    May 2013
    Location
    Northern Virginia
    Posts
    1,372
    Blog Entries
    3
    Quote Originally Posted by Mike Stelts View Post
    Thanks for the great advice everyone. You tempted me to ask one more question. I'd like to reproduce this 5/16" radius profile on door trim; but, I'm stumped on the best way to do it (without a hand plane). Any ideas?IMG_6526.jpgIMG_6527.jpg
    Hard to tell from the pictures, but it's a full bead on 2 sides correct?

    Just use a 14mm half round 40mm knife. Run both the face and edge to replicate that detail.
    20171218_164832.jpg
    20171218_164911.jpg

  15. #15
    you can run your bead first it just depends which method you use to cut. If you use a proper machine then its a spinning head doing it, if you use a simpler way people use the Hoffman chomper thing. Neither of those will get blow out on the profile. I used to first have to do this ont he table saw and in that case you cut one side into the profile and one side out of the profile.

    One thing about beading first is it shows you perfectly how deep to go when you clear the haunch. I only do them mortise and tennon and you do need to pay attention to tolerances. Ive cleaned out the haunches different ways.

    I went from a sears moulding head to run the bead which was flintstones to having a corrugated cutter made. It cut so clean I figure you do have to sand for finish adhesion.

Posting Permissions

  • You may not post new threads
  • You may not post replies
  • You may not post attachments
  • You may not edit your posts
  •