Page 1 of 2 12 LastLast
Results 1 to 15 of 22

Thread: New storage box for chisels

  1. #1
    Join Date
    Feb 2004
    Location
    Perth, Australia
    Posts
    9,491

    New storage box for chisels

    A decade ago (!), while road testing the new Veritas chisels (then only O1 was available), I built a box partly to house them and partly to demonstrate them in use ...


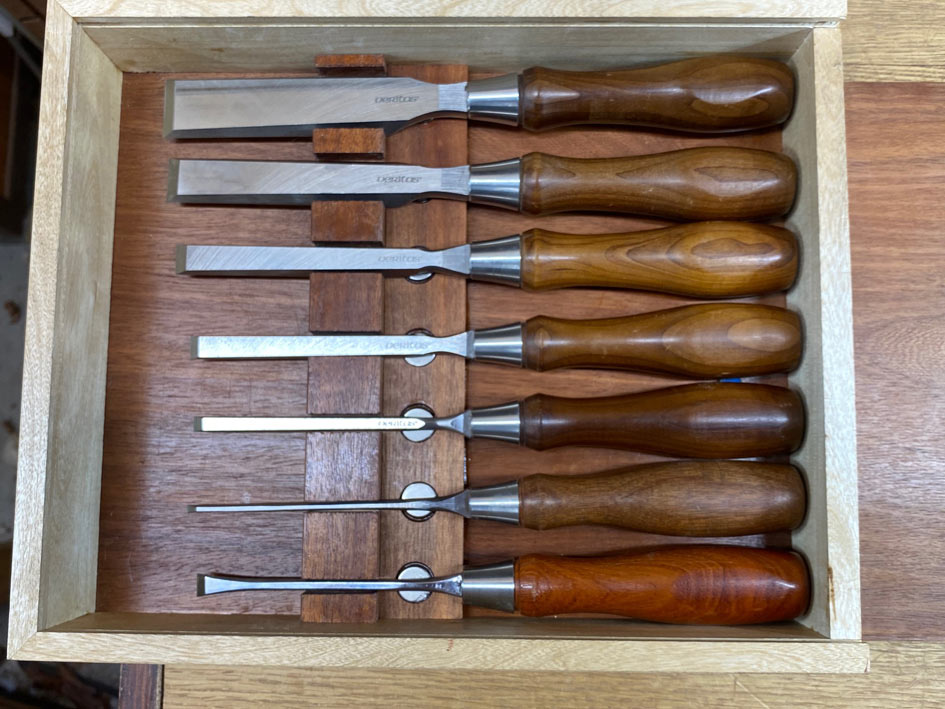
    This coming weekend I shall be part of a dovetailing workshop, and decided that it was time to build a new box for these chisels. These are the chisels I use in demonstrations, such as wood shows.

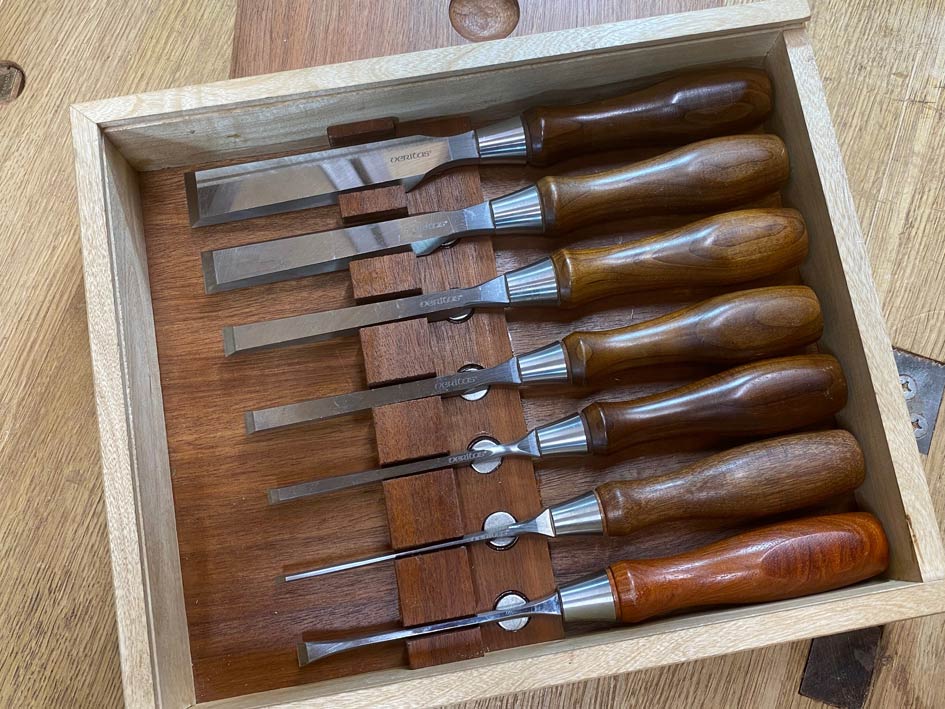
    For one thing, the number has grown from 5 to 7 chisels (I had made a 1/8" from a spare pre-production 1/4" - this was before this size was available from Veritas - as well as a 3/8" fishtail chisel. At some stage Veritas will be producing their own version. I do not have any details).

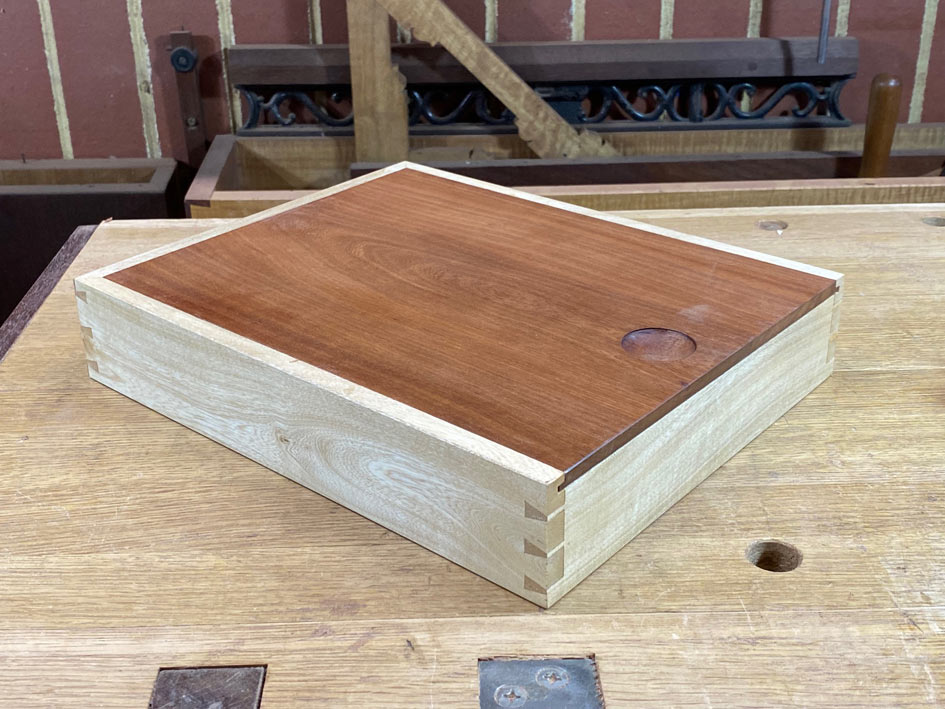
    A second factor was that I thought the existing box was a little OTT, and wanted something more subtle, and less in-your-face. The fact is that the joinery in the new box is far more demanding than the first box, but only those experienced might recognise this.

    It has been a month or more since I have had any regular time in the workshop. My practice has been crazy busy, but now I have a few weeks leave. In particular, I had some time free yesterday and today. This has been therapeutic and fun. I hope others get something from the details here ....

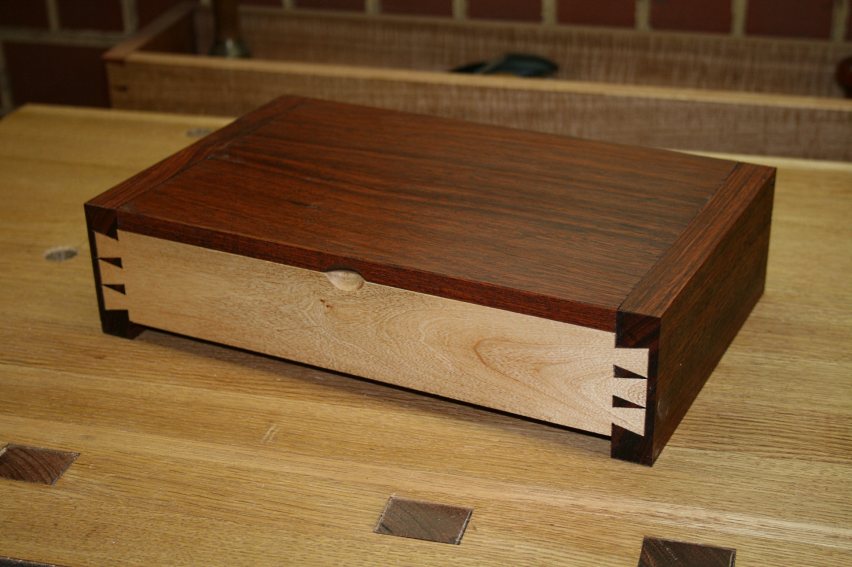
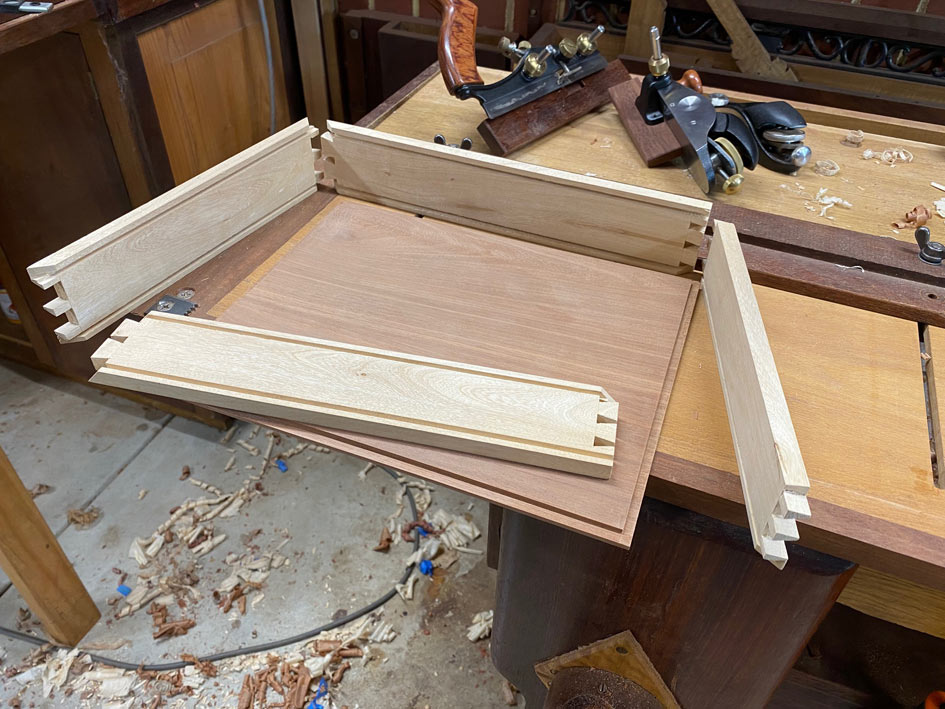
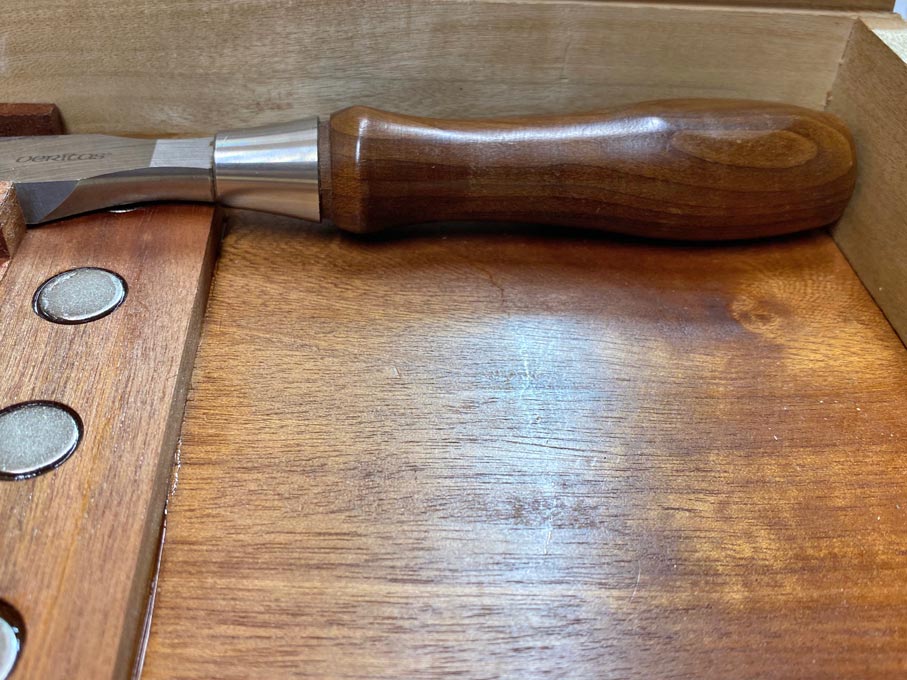
    The light wood is Jacaranda (in both boxes), which is the last harvested from a tree on our property several years ago. It is softish, not so nice to saw and dovetail, but planes beautifully. The darker wood is Makore. Another wonderful wood to work with.

    The construction of the box is mainly mitred through dovetails - all lower corners and the end upper corners. This makes it easier to plough through grooves for the base and top. The mitred corners are also, in my view, far more aesthetic, lending a balanced presentation from the top.


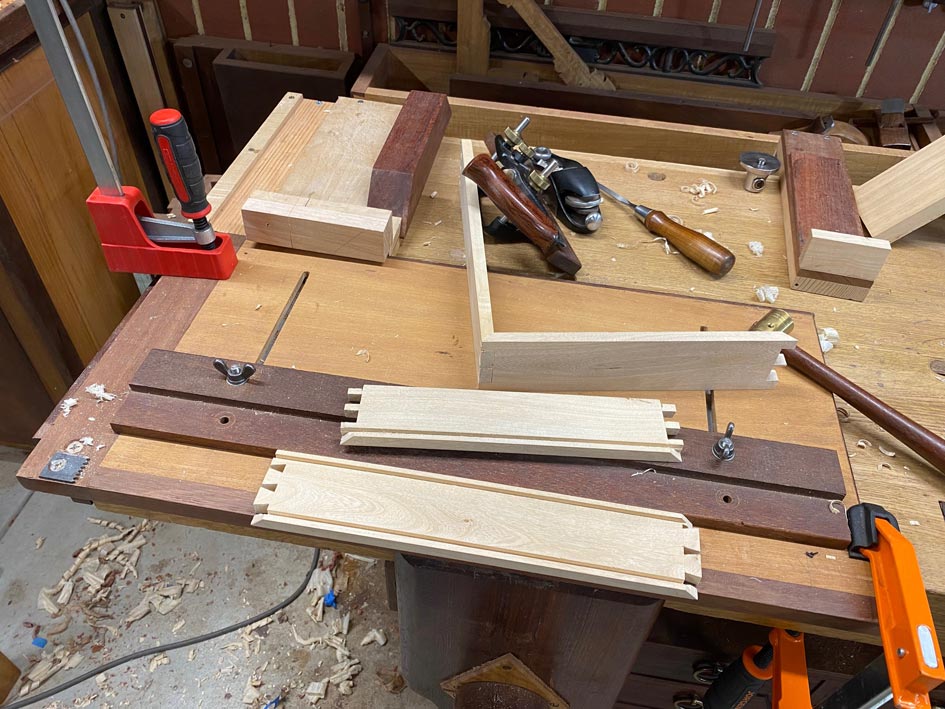
    The sides are held in a sticking board when ploughing grooves with the Small Plow.


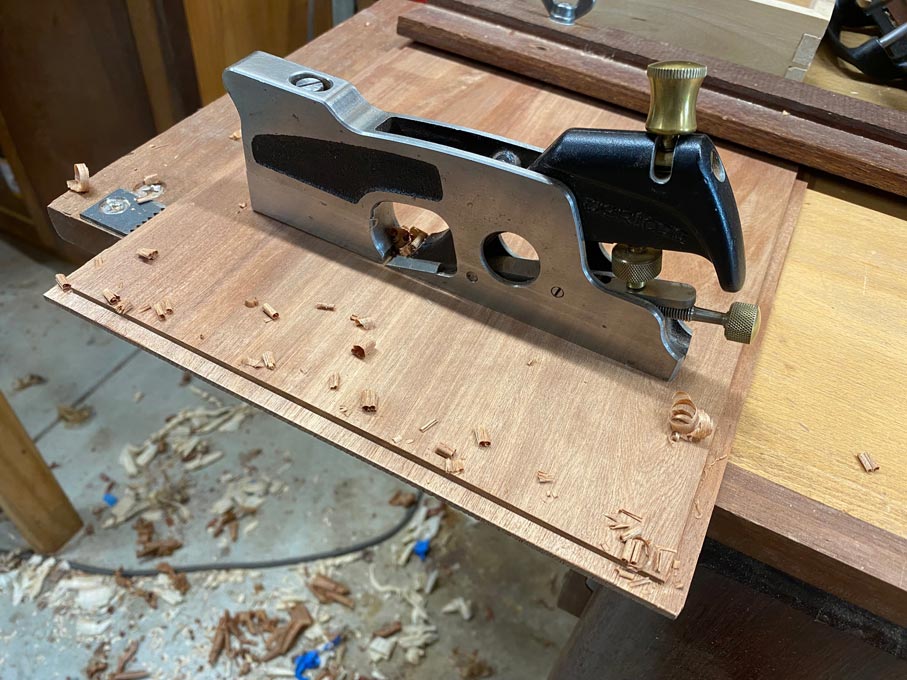
    The rebates were planed with a skew block plane and then fine tuned with a rebate plane. This is the main use I find for rebate planes ...


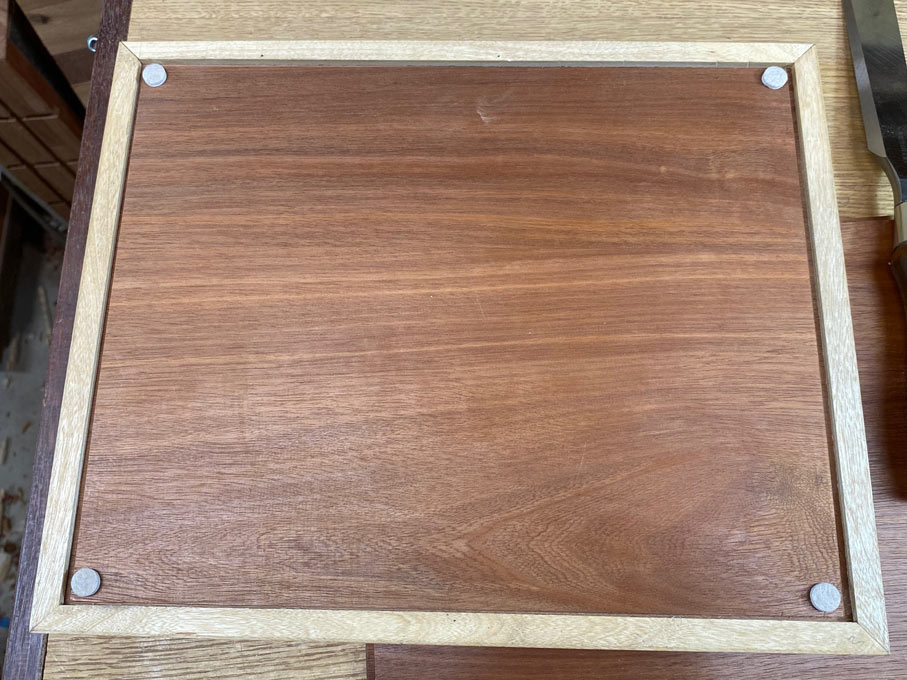
    This is the underside ...


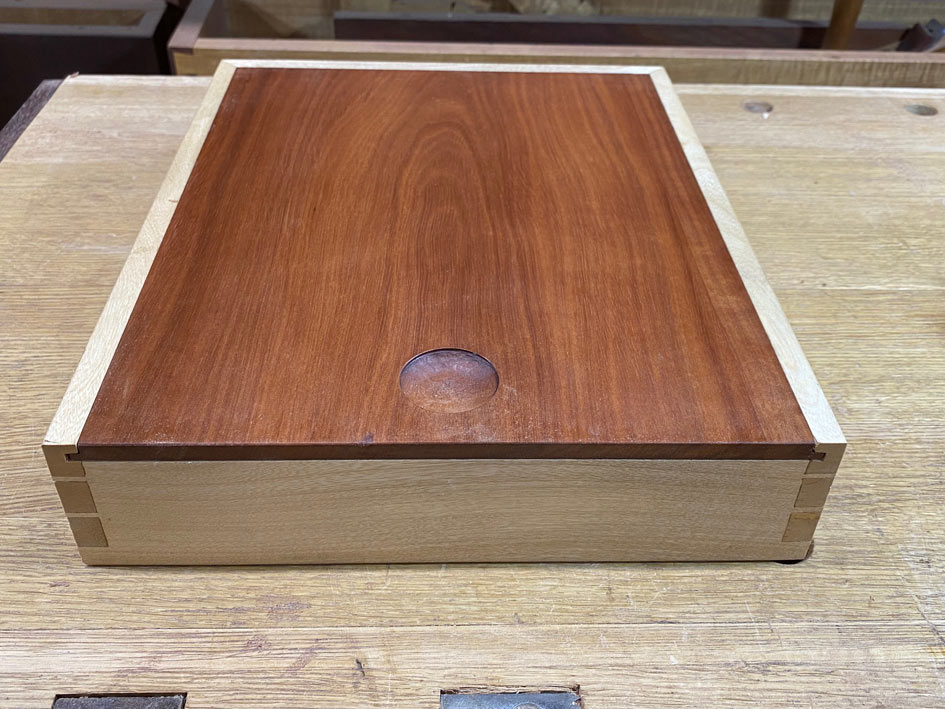
    And from the upper side ...


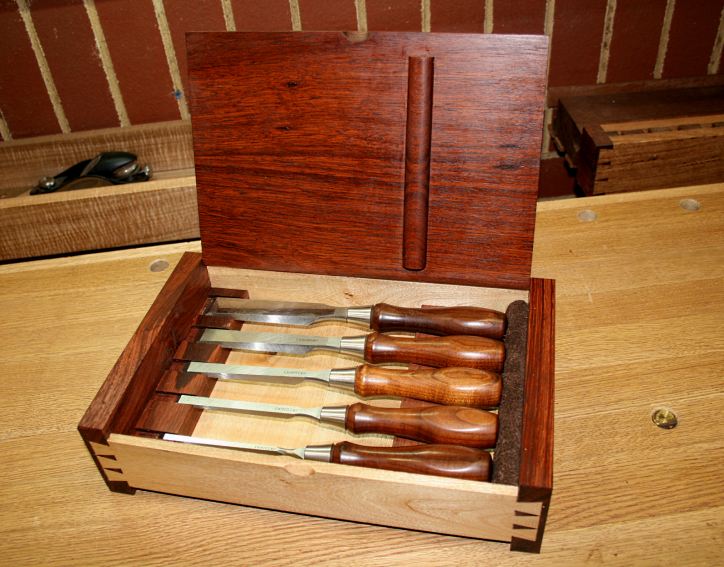
    The finger depression was carved with chisels ...


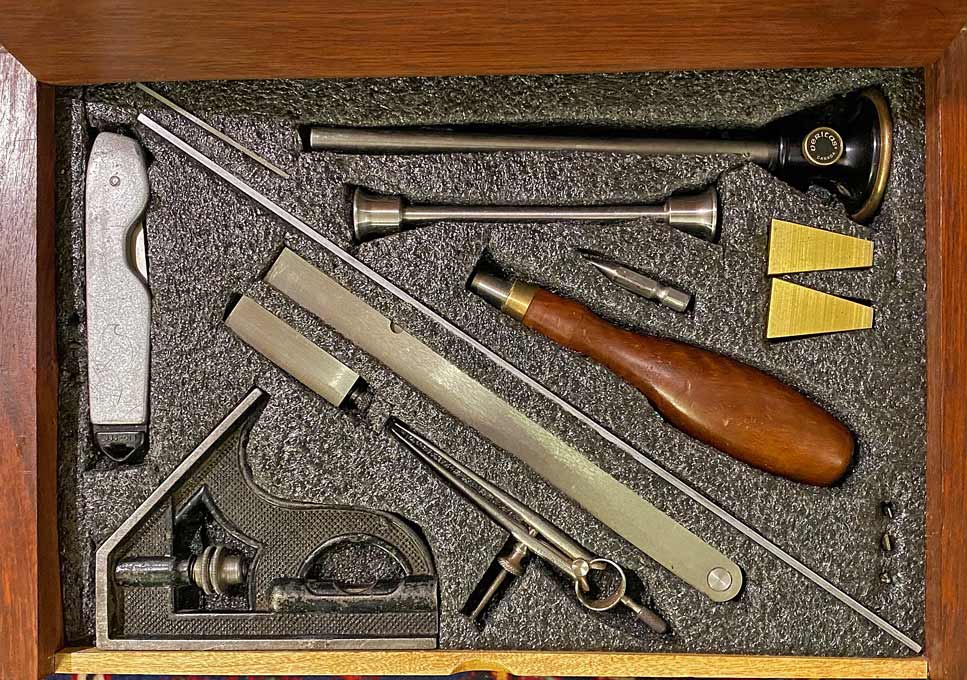
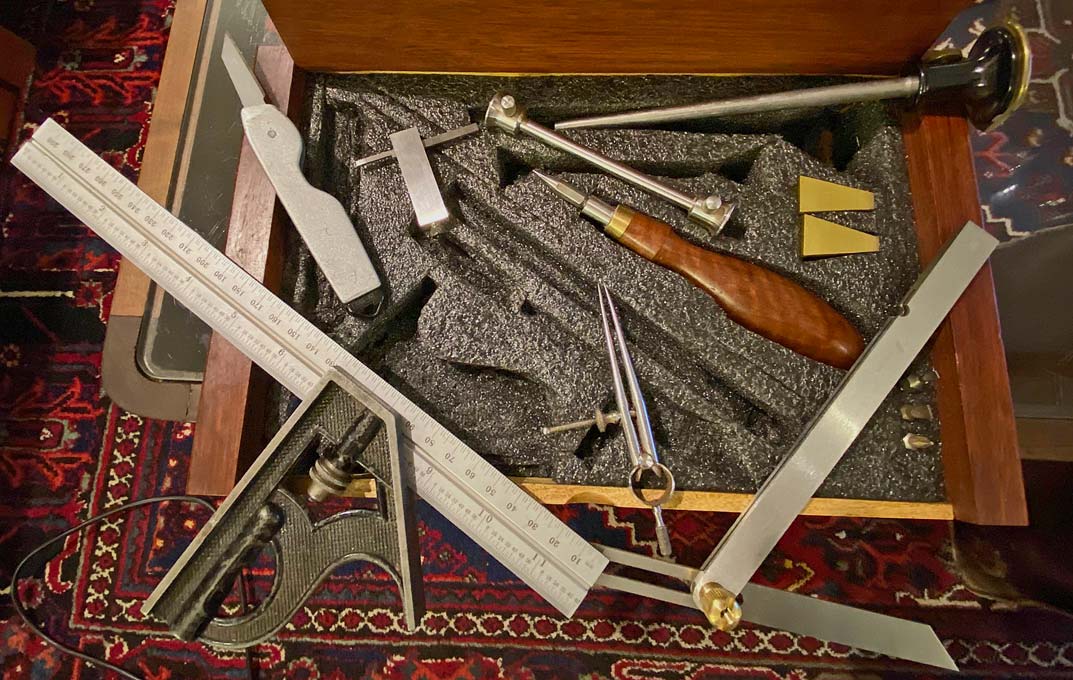
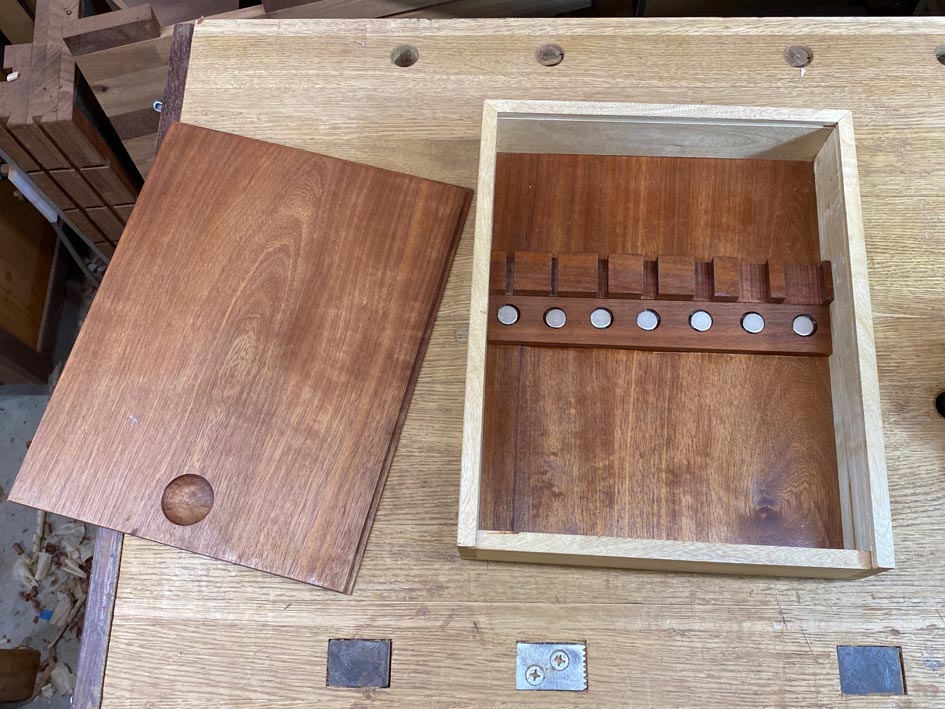
    Inside the box, the chisels are held very firmly with a combination of rare earth magnets and individualised spaces for each chisel ..


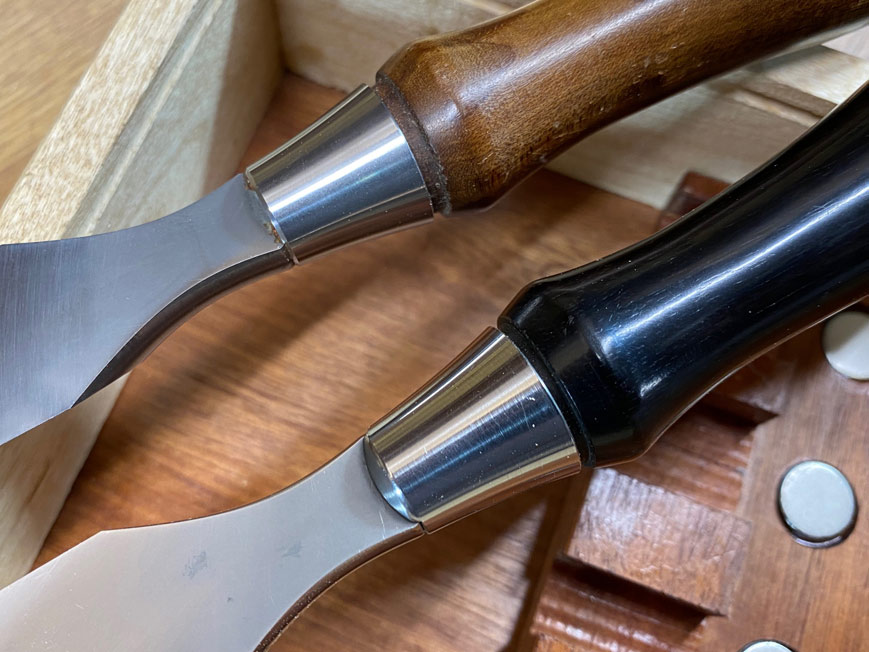
    The O1 Veritas chisels differ from the PM-V11 chisels in that their ferrules are square at the front, while the PM-V11 are curved (I do have a set of both, with the PM used in the workshop) ...


    This square section enables the design to butt them fore- and aft. They cannot move about. Plus the magnets hold them firmly as well.


    Regards from Perth

    Derek

  2. #2
    Join Date
    Sep 2007
    Location
    Longview WA
    Posts
    27,427
    Blog Entries
    1
    As always Derek, nice work.

    jtk
    "A pessimist sees the difficulty in every opportunity; an optimist sees the opportunity in every difficulty."
    - Sir Winston Churchill (1874-1965)

  3. #3
    Join Date
    Jan 2019
    Location
    Fairbanks AK
    Posts
    1,566
    Derek, can you talk a little bit about what glues work for you to hold down rare earth magnets, do you use maybe a washer underneath the magnets, that sort of thing please?

  4. #4
    Join Date
    Feb 2004
    Location
    Perth, Australia
    Posts
    9,491
    Hi Scott

    I simply drilled a mortice/hole for each magnet, and then epoxied them in.

    Regards from Perth

    Derek

  5. #5
    Join Date
    Nov 2006
    Location
    Vancouver, BC
    Posts
    858
    Beautiful work Derek. I think you've inspired me to do something similar.

    If I could offer one small suggestion when you make your next box 10 yrs from now: you can also recess the magnets from the other side so they're not visible. The holding force goes down but probably sufficient if you keep the wood between the chisel and magnet thin.

  6. #6
    Join Date
    Jan 2010
    Location
    Lafayette, Indiana
    Posts
    1,378
    Thanks for the detailed photographs. Nice looking box, and inspiring work. Well done!!!

  7. #7
    Very nice work

  8. #8
    Join Date
    Sep 2007
    Location
    Longview WA
    Posts
    27,427
    Blog Entries
    1
    Quote Originally Posted by Greg Funk View Post
    Beautiful work Derek. I think you've inspired me to do something similar.

    If I could offer one small suggestion when you make your next box 10 yrs from now: you can also recess the magnets from the other side so they're not visible. The holding force goes down but probably sufficient if you keep the wood between the chisel and magnet thin.
    One could also use a thin piece of veneer to cover the magnets.

    jtk
    "A pessimist sees the difficulty in every opportunity; an optimist sees the opportunity in every difficulty."
    - Sir Winston Churchill (1874-1965)

  9. #9
    Join Date
    Jun 2015
    Location
    Northern California
    Posts
    665
    Quote Originally Posted by Scott Winners View Post
    can you talk a little bit about what glues work for you to hold down rare earth magnets?
    Scott,
    I use Loctite Super Glue Professional Liquid. Available at the usual Big Boxes. A little dab’ll do you. Works great.

  10. #10
    Join Date
    Sep 2008
    Location
    N. Idaho
    Posts
    1,621
    Beautiful work Derek. Glad to hear you're back in the shop building.

    Best,
    Chris
    "You can observe a lot just by watching."
    --Yogi Berra

  11. #11
    Join Date
    Nov 2007
    Location
    Goleta / Santa Barbara
    Posts
    967
    Derek,

    As always, exquisite. I am a BIG fan of the original, OTT or not, it speaks to me.

    Always appreciate you sharing with us. Best, Patrick

  12. #12
    Join Date
    Jan 2019
    Location
    Fairbanks AK
    Posts
    1,566
    I guess I will chip in. I have some rare earth magnets and some chisels. Don't bother using fish glue to hold the magnets down. I had 33% glue failure within 24 hours and 50% failure rate (6/12) within 48 hours. Of course 2 of the 12 rascals held in with fish glue are still hanging on two weeks later. I haven't tried PVA.

    I have decided I don't like the magnets sticking proud of the wood substrate. The clacking sound drives me bananas and it supposed to be bad for the chrome coating on the magnets. Looks like Derek's are well recessed.

    I am not enamored, honestly, of having magnetized chisels trying to make whoopie when I am not looking and have two or more of them loose on my benchtop. They can do all sorts of things that require remonstrating verses from Leviticus 18 be spoken over my tools when I am trying to get some work done.

    For my second attempt I used JBWeld 5 minute (2 part) epoxy for the gluing down of the magnets, with zinc plated washers ( quarter inch nominal, star type "shakeproof" lockwashers, OD 0.500 inches, homestore, and responsive to the magnets) under the magnets. But I didn't redrill my dang holes deep enough, so half of the magnets are still proud. After the fish glue failure I drilled my available holes to 0.200 inches, half of them finished recessed and half proud. The good news is I am about 7 days in with no glue failure on the JBWeld epoxy, and a homestore zinc plated lock washer (underneath) does dramatically increase the holding power of the magnets for cheap.

    I was using a weak magnetic strip to hold my chisels on a tray. They wobbled about a little bit, so I had to open and close that drawer with some restraint to keep the chisels from swinging about like clock pendulums, but the chisels didn't couple (or orgy) like rabbits when loose on the benchtop.

    On the one hand chisel handles have a fairly uniform width, so popping in a certain number of rare earth magnets ( I think mine are spaced 1.5 or 1.25 inches) or using a strip of weaker magnetic tape doesn't change the number of chisels that can fit in a fixed width drawer.

    If I decide to stick with the rare earth magnets I shall drill from below (as Greg Funk also pointed out already), and then epoxy in a magnet, a bit more epoxy, a lock washer, and then flip the board over when I glue it down to the drawer bottom. There will just be a wee on center hole showing from above where the tip of the Forstner bit poked through while I was drilling. A rare earth magnet (mine are from Lee Valley) with a lock washer under it _should_ reach through 1/8 to 1/16 of wood no problem, my half inch LN mortise chisel can spin like a clock hand over a recessed 1/2 inch magnet, with washer below. I guess I would check brown or purple heartwood of poplar before going all out, but with white sapwood of poplar, white maple, etcetera I would not expect significant loss of magnet power.

    Were I to do site work, like Derek teaching classes, having a chisel box that is both Frenched and magnetized makes perfect sense. He can open the lid, see the slots are full, know none of his tools grew legs and go home, without worrying about the chisels rattling about in his vehicle on the drive. My father in law was an airliner mechanic, same idea, no tools left behind in the turbofan. Since I only do shop work, I prefer the flexibility of not Frenching, just magnet with no size specific cutouts; so whatever chisels I am using a lot can be easier to reach at the front right and the ones (among my favorite 12) not getting used a lot right now can drift to the rear left. The second dozen are in a different toolbox a few steps away, and since nothing is Frenched they can migrate on my whim.

    Site work, on site teaching, is simply not on my bucket list (mostly because I am not very good at joinery and often grumpy); but if it comes up I will once again type the letters I-N into my browser for a refresher.

    Beautiful box Derek, as usual.

    20220111_214236[1].jpg

  13. #13
    Join Date
    Feb 2004
    Location
    Perth, Australia
    Posts
    9,491
    Quote Originally Posted by Patrick McCarthy View Post
    Derek,

    As always, exquisite. I am a BIG fan of the original, OTT or not, it speaks to me.

    Always appreciate you sharing with us. Best, Patrick
    Patrick, today I purchased some imitation Kaizen foam (cheap and not as good), to try out this idea ....


    Stanley knife for scoring, Starrett 12"/300mm combo square, Starrett mini double square, Starrett small dividers, Shinwa sliding bevel, Veritas cutting gauges (mini and full size), dovetail gauges (5:1 and 7:1), and a driver holder with three driver bits and an awl.


    Regards from Perth

    Derek

  14. #14
    Join Date
    Mar 2019
    Location
    Central New Jersey
    Posts
    57
    Hi Derek, The box looks great. I am curious about the finger depression, looks like you might have defined the edge with a forstner bit and then carved the depression, was it done with bench chisels or a gouge? I really like it and would like to try it myself.
    jim

  15. #15
    Join Date
    Feb 2004
    Location
    Perth, Australia
    Posts
    9,491
    Jim

    That is basically how I did it. Drilled a smidgeon with a forstner, just to set the perimeter, Then a little out of the centre (shy of depth). Finally excavated with gouges: out channel to shape, and in channel to finish.

    The hollow was created in the same way as Alan Peters demos here … just smaller


    Regards from Perth

    Derek

Posting Permissions

  • You may not post new threads
  • You may not post replies
  • You may not post attachments
  • You may not edit your posts
  •