Page 3 of 4 FirstFirst 1234 LastLast
Results 31 to 45 of 51

Thread: Sharpening: hand or wheel

  1. #31
    Join Date
    Jun 2010
    Location
    twomiles from the "peak of Ohio
    Posts
    12,181
    After all that sharpening...maybe time to put it to work?
    THE Cedar Box, refine the cut.JPG
    Bandsaw to rough out an edge, chisel to refine that edge...
    THE Cedar Box, reshaped lid.JPG
    Back of the chisel IS indeed flat...
    THE Cedar Box, flat back.JPG
    And just a single, flat bevel..
    THE Cedar Box, flat bevel.JPG
    Aldi's 24mm chisel....YMMV...
    A Planer? I'm the Planer, and this is what I use

  2. #32
    Join Date
    Feb 2004
    Location
    Perth, Australia
    Posts
    9,494
    I think the point of struggle that I'm grappling with is that I would like to use the Tormek only to do 90% of my sharpening
    Hi Kevin, and welcome to SMC.

    There is immediately a problem when you start out believing that the Tormek is a sharpening system. It is far better used as a grinder for the primary bevel, and then you do the actual sharpening and polishing on stones. Leave the Tormek on 220 grit, and forget about the regrader.

    A decade ago I wrote this piece for my website …


    Is the Tormek a Grinder or a Sharpener, and are 30K grits for Wankers?
    I love my Tormek, but I have had a number of "debates" with the US representative of Tormek, who insists on calling it a sharpener" while I insist on it being seen to be a grinder. This is not simply a different choice of words to mean the same thing.

    He argues that the Tormek is a sharpening system since the honing wheel will convert the 1000 gritted grind to a 8000 grit edge. I argue that this may be so, but I would not use it (others might, not me) on wood if I want a good finish. There is more to sharpening and preparing an edge - be it chisel or plane blade - than simply "sharp".

    "Sharp" is for me synonymous with "smooth" - a smooth edge is a sharp edge. As you go up the grit ratings, so you create an ever increasing smooth edge, that is, the edge serrations become smaller and smaller. This transfers to your wood, and the finish is smoother as well.

    There is a second factor. Taking an edge off a 1000 grit wheel and honing it on a 8000 wheel strop does not necessarily produce a
    flat edge. The edge may be 8000, it may feel sharp (cut arm hair) etc, but it can be curved/serrated/grooved, etc.

    Instead one should take the edge off a Tormek (or any grinder) and smooth/straighten it out on a flat waterstone (or sandpaper, etc). I go to a 1000 Shapton for this. But if you are doing this, then there is NO NEED to go higher than 220 on the Tormek (that is, you do not need to first re-surface the wheel to 1000 grit before moving on) ... a big time saver!

    ... and so on to 8000, 12000, etc ... whatever you want.

    But wait ... there is more!!!

    Is a 12000 or 15000 or 30000 grit stone only for wankers?


    No. Edges often fail, not because the steel is not strong enough, but because it
    is strong enough! This means that edges are more likely to chip than to bend. Chipping is more likely to occur where there are serrations, and the larger the serrations, the greater the propensity for chipping.

    Soooooo .... the smaller the serrations, the less likely the chipping ... hence a higher grit sharpening will hold an edge longer than a lower grit sharpened blade.

    One more thing to consider. I was reading Ron Hock’s new book, The Perfect Edge, the Ultimate Guide to Sharpening for Woodworkers, on sharpening in which he presents evidence that Side Sharpening leaves an edge with fewer serrations than front-and-back honing.

    Regards from Perth


    Derek
    January 2010


    There is a second article that may help as well, which was written a year earlier but is still very relevant:
    http://www.inthewoodshop.com/Woodwor...gStrategy.html

    Derek

  3. #33
    Join Date
    Dec 2021
    Location
    Portland, Oregeon
    Posts
    11
    Such great information here. It helps a lot. I also learned about https://scienceofsharp.com/ It's all starting to make sense. I'm glad to put my new "grinder" in its place now. Though I can see it technically qualifying as a sharpening system, since it is intended to create an edge. It's just more crude than than they'd like to admit perhaps, out of the box. Alright, hope I didn't ruffle any feathers with that

  4. #34
    Join Date
    Apr 2007
    Location
    Columbus, Ohio, USA
    Posts
    3,441
    When starting, I tried many things, but, the tool that produced the fastest most consistent results for me was the Tormek. So, a little discussion.

    I started on sandpaper using a guide. It was slow and it worked.

    The hardest thing for me is flattening the back. I still use sandpaper. I have not found anything that lets me do it any other way without damaging the back. You will notice that Steve made some comment about using a belt sander. Well, Steve is an anomaly in my mind. I handed him a chisel and he stropped it on his jeans or his hand or something and made it sharper. My point is that he has a bunch of skill and coordination that I do not have. You are supposed to be able to flatten on the side of a Tormek wheel. All I did was damage my chisel backs (practice with cheap chisels). I also tried on a Worksharp 3000 that people here love and have great results. I always ended up with a slight skew, but things were sharp. Admittedly, when I have a problem with a tool and I cannot make it go, I go see Steve and he fixes me up.

    When things are crazy out of control, I use a slow speed dry grinding wheel just because it is faster than my tormek.

    The Tormek is wet, it uses water. You will NOT burn your tools using a Tormek.

    I flatten using sand paper and I can go rough as I need to, but, those really deep scratches take a long time to get out.

    Next question. Do you want a flat bevel or a hollow grind? If you sharpen on a wheel, you get a hollow grind. I want a hollow grind because that helps me free hand sharpen for touch-ups. You will not take it back to a grinder (probably). While working, I will pop over to whatever stone I have around (Arkansas stone, Shapton water stone, Norton Ascent Ceramic) touch it up free hand because I have that hollow grind, I am am back to work very fast.

    A pro would tell you that you should be able to free hand without the hollow grind. Many people do. I had problems. Over time I improve, but that is why I like the hollow grind. It is also probably why I used cheap chisels for so long; it was so fast to touch them up they were still usable.

    if you do not want a hollow grind, well, you need to learn to free hand or use a guide on an abrasive. A micro-bevel is more common if you do this. But then you need to grind down that micro-bevel eventually. (always a pro and a con)

    Another choice is something like the worksharp with a spinning disk.

    I like the things that come with a Tormek. All the guides and such.

    Some blades are very short. Short blades are often difficult with a Tormek because they do not fit nicely in a jig. There are ways around it of course, but remember that every method has a pro and a con.

    Some people just purchase the Tormek jigs and use them on slow speed grinders. Others buy diamond wheels for their Tormek (Derek does this I think).

    Wish you lived closer, you could try out my Tormek to see what you think.

  5. #35
    Join Date
    Jun 2010
    Location
    twomiles from the "peak of Ohio
    Posts
    12,181
    Find a nasty, old chisel and haul it up here....and a camera...and we'll see just how long it takes...and...have photo evidence!...
    A Planer? I'm the Planer, and this is what I use

  6. #36
    Join Date
    Mar 2016
    Location
    Tokyo, Japan
    Posts
    885
    Take this with a grain of salt as I've never owned a Tormek or powered grinder (though I have used grinders on occasion in other people's shops), but...

    I have to reiterate what Derek Cohen says: I would not use any powered grinder as a sole sharpening system.

    I would *not* want to try to achieve a final edge just on the tormek. You simply don't have the precision and control that you do with a flat stone. And you're also likely over heating the very tip of the cutting edge if you run it dry.

    Grinders such as this are for rough stock removal on the bevel side only. Establish the basic geometry with a grinder, and move on to stones for much better results.

    I realize that sharpening can be a chore in the beginning, and the inclination is to just throw money at the problem and try every jig and method under the sun, but... Ultimately, the time spent learning to just free hand on stones is well worth it. Once you get it down, sharpening ceases to be a chore and will hardly disrupt your work unless you really damage your edge, at which point that grinder is very helpful.

    My sharpening routine, most often, consists of a single oilstone (a vintage Washita) and a strop. I rarely need anything coarser. I plop the stone on my bench, add a few drops of oil, work the whole bevel, remove any burr that is formed, and strop it carefully. A few more drops of oil and a wipe down with a paper towel, and the stone is put back away and I'm ready to go again. The time I save messing around with jigs and what not more than makes up for any efficiency I lack.

    I rarely need to go to anything coarser unless I've *really* messed up my edge, or I'm working on a new tool that needs work. Tools both new and old often require a huge amount of work to get the backs flat, and this is just something you have to suck up and keep at it. I recommend a fairly coarse sandpaper, as some here have recommended already -- though, it can be difficult to find the right type of sandpaper which doesn't load up or wear out too quickly.
    Last edited by Luke Dupont; 12-31-2021 at 8:59 PM.

  7. #37
    Join Date
    Sep 2007
    Location
    Longview WA
    Posts
    27,453
    Blog Entries
    1
    I recommend a fairly coarse sandpaper, as some here have recommended already -- though, it can be difficult to find the right type of sandpaper which doesn't load up or wear out too quickly.
    Remember, the coarser the abrasive, the more time will be spent removing scratches on the next level of abrasive.

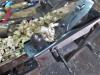
    On my granite bench there is a steel screw for holding a magnet. The magnet is wrapped in paper. This is used regularly to remove iron particles from the abrasive. With something like a plane, it is used every three or four full length passes.

    jtk
    "A pessimist sees the difficulty in every opportunity; an optimist sees the opportunity in every difficulty."
    - Sir Winston Churchill (1874-1965)

  8. #38
    Join Date
    Dec 2021
    Location
    Portland, Oregeon
    Posts
    11
    Success! I agree with what you all are saying and I appreciate the advice very much. I think I've found what will work for me: For chisels and plane irons: Hollow grind primary bevel on Tormek, general purpose stone and add secondary bevel with Lie-Nielsen honing guide on 1200 grit diamond stone followed by 4000 grit and 8000 grit Norton (which I already have so might as well use it if it works. Flatten cheap chisels on the side of the Tormek general purpose stone followed by stones mentioned previously. Flatten backs of quality chisels and plane irons by hand only.

    Now, here's what's cool. I realized that grading the Tormek stone from coarse to fine and fine to coarse with the standard issue grading stone does not work well. I don't know if others have had this experience, but mine was not good. It graded it well to fine, but then not so well going back to coarse. The stone became uneven and still nowhere near as coarse as a freshly graded stone. Sooo, I searched the Tormek forums and here's what I found: https://www.tormek.com/forum/index.php?topic=2656.15
    Basically, diamond stones do a much better job at grading the stone. I am a little worried about ruining my diamond stones, but thought I'd give it a quick try with my 600 grit. It worked great! Then my 1200 grit. No noticeable damage. I didn't do it for long though, maybe only 5 seconds. It worked well too and refined the stone noticeably. I'm mostly planning on sharpening knives with this method, and doing my chisels by hand (I think) I may do my cheap chisels with this method and quality chisels by hand, we'll see. I have not graded the stone back to coarse yet. I'm going to buy a $18 2" x 6" 300 grit stone and use it so as to not damage my 3x8 coarse stone if damage does occur. I don't know why but for some reason, I'm more hesitant to use my coarse stone to grade the Tormek stone than my fine stones... seems aggressive.

    To be clear, I'm not recommending that anyone grade their Tormek stone with their diamond stones, just that some have done it and had good results. You could damage your diamond stones! Try it at your own risk! I'll probably pick up some smaller diamond stones specifically for this purpose.

    Hope this doesn't seem like blasphemy! It does a bit to me, but in reality, these diamonds are manufactured industrial diamonds.

    I'm interested to hear others thoughts on this.

    Jacob

  9. #39
    Join Date
    Jan 2019
    Location
    Fairbanks AK
    Posts
    1,566
    Quote Originally Posted by Jacob Chavez View Post
    What are the pros and cons of both methods? Of course, time is the big con of hand sharpening, but if you prefer hand sharpening, have you found some ways to minimize the time that it takes? I don't have lots of time to devote to sharpening, so I would like to make an informed choice. I have not purchased the wheel yet. It is a significant investment.

    Jake
    TL DR. One of my resolutions for 2021 was to stay out of sharpening threads. It will be the same for 2022, but I haven't made the resolution yet.

    I use a six inch grinder (should have bought an 8") for hollow grinding at 25 degrees, and hand sharpen usually at 30 degrees. Once you have a grinder, get a 40 grit Norton wheel from Lee Valley or similar. Saves a lot of time.

    For chisel backs, and plane iron back, you only have to do it once. I wore out a 300 grit diamond stone building a set of Baileys from rust buckets. It was worth it, once, but never again. If you just have to build up your shop from vintage not square iron, I was there once upon a time too, no judgement zone, but get something cheap and coarse to use before the 300 grit diamond. I am pretty sure you can get 60 and 80 grit Norton stones online to get your vintage irons ready to meet a 300 grit diamond plate.

    I haven't needed a tormek yet. On my lathe I just learned to use a skew for both planing and that other major cut it can do and skipped the sharpening turning tools rabbit hole. I do spindles only. If you want to make bowls, you will need money and time and tooling.

    Right now this minute my 1/2 inch chisel has been sharpened at 30 degrees so many times I have no (25 degree) hollow left, but I am keeping it sharp enough frequently enough and I don't have time to rehollow it at 25 degrees right now. Maybe next week, right now I have work to do.

    What I do suggest for new artisans is get a few chisels in a few different configurations to work out what feels good in your hand. If your favorite shape ends up being O1 or A2 or PMV11 doesn't matter, they all have their plusses and minuses. The point is to find out what works good for you and then work with whatever steel it comes in.

    FWIW I did read enough to agree with who ever said cheap chisels are for scraping glue off. I have a set of cheap chisels exactly for glue lines. Go find a vintage chisel that says "Sheffield" on it for 5 bucks and put some time into that one, it will be worth your trouble. Box store chisels with the plastic handles at $15 for a set of five are for practicing your technique on before you buy your first good chisel now, and scraping glue lines for the rest of your life.

    You are ready to go buy your first good chisel. Live long and prosper.

    PS: I resolve for 2022 to stay out of sharpening threads on SMC dot com.

  10. #40
    Join Date
    Jan 2019
    Location
    Fairbanks AK
    Posts
    1,566
    One other thing that Derek was getting at and hopefully someone said straight out. It doesn't matter what grit you sharpen to. What matters is the surface of the wood after you are done. I am "happy enough" with the surfaces I get sharpening to 4000 grit diamond, no stropping, and occasionally sanding with 220 grit or pulling out a card scraper. But I finish, mostly, with oil and waxes.

    You certainly may sharpen to 30k grit on water stones if it is important to you, and it may be important to you. What matters is not the grit you sharpen to, but the surface your tools leave behind. If you are dead set on clear film finishes like shellac or polyurethane or varnish 4k may not be sharp enough. You may need to use isopropyl or acetone to lift dust out of wood pores before you apply finish. If you are going to paint a thing, you may very well find sharpening to 600 grit is more than adequate. Learn to adjust your chipbreakers so they are as close as possible to the edges on your plane irons.

    One of the users here has a sig line "sharp solves all manner of problems" and I agree, but sharp in not enough to cover fundamentals. If your fundamentals are good, sharp does indeed solve all manner of problems.

    Good luck and best wishes.

  11. #41
    Join Date
    Apr 2007
    Location
    Columbus, Ohio, USA
    Posts
    3,441
    Quote Originally Posted by Jacob Chavez View Post
    For chisels and plane irons: Hollow grind primary bevel on Tormek, general purpose stone and add secondary bevel with Lie-Nielsen honing guide on 1200 grit diamond stone followed by 4000 grit and 8000 grit Norton (which I already have so might as well use it if it works. Flatten cheap chisels on the side of the Tormek general purpose stone followed by stones mentioned previously. Flatten backs of quality chisels and plane irons by hand only.
    Secondary bevel? I am able to free hand off the Tormek because of the hollow grind. This means that I am not using a secondary bevel, but, I will have a small shiny spot near the edge and then again at the other side of the concave bevel. Find some grits that work for you. I go directly to a shapton 5K and then my 15K. I think that Derek said that he goes directly to the 1K and then moves up. Take a peek with an eye loop (magnifier).

    The point of the hollow grind for me is that I do not need to use a jig and use a "secondary bevel". Admittedly, we might be saying the same thing for secondary bevel since I am not sharpening the entire bevel.

    Because I can free hand off this, I can do very fast touch-ups and get back to work.

  12. #42
    The absolute fastest way I have of flattening backs is a 2' Granite surface plate and sticky back aluminum oxide sandpaper. I yank the paper and replace as soon as the cut starts to slow down. On a hardware store chisel, I would estimate a solid hour each, give or take. Most of the high end chisels that advertise flat backs are generally very good and don't need any work... The cheapies... Ugh. Get out the dremel to buzz the humps.

    Now... The question I have is... Do you actually need the back flattened for the work you are doing? I'm commonly using chisels for paring, which means I want it to register properly and not dive/climb in a cut... I like a flat back, so that's how I prep them. I think if you're chopping waste, not so much...

    I've bought a lot of used/vintage chisels, and exactly zero have come in with a properly flat back unless I bought them from a seller who flattens them as a service. I think that says a lot... Every single 100+ year old chisel shows up with back some flavor of out of whack... That leads me to believe it was not a ubiquitous practice.

  13. #43
    Join Date
    Aug 2019
    Location
    Pittsburgh, PA
    Posts
    853
    Quote Originally Posted by John C Cox View Post
    I've bought a lot of used/vintage chisels, and exactly zero have come in with a properly flat back unless I bought them from a seller who flattens them as a service. I think that says a lot... Every single 100+ year old chisel shows up with back some flavor of out of whack... That leads me to believe it was not a ubiquitous practice.
    Perhaps the lack of attention to that detail should tell you that woodworkers of old didn't give a hoot how properly flat a chisel back was.

  14. #44
    Join Date
    Sep 2007
    Location
    Longview WA
    Posts
    27,453
    Blog Entries
    1
    Every single 100+ year old chisel shows up with back some flavor of out of whack... That leads me to believe it was not a ubiquitous practice.
    Quote Originally Posted by Rafael Herrera View Post
    Perhaps the lack of attention to that detail should tell you that woodworkers of old didn't give a hoot how properly flat a chisel back was.
    Many of my old chisels/planes appeared to have gone through hands beyond just one owner. Often blades were run over a coarse grinder and the sellers called that "razor sharp."

    On the other hand, some of my old tools came with only a need for a quick honing.

    This tells me the ratio of knowledgable users 100+ years ago to amateurs with tools was likely low. Anyone can buy an edge tool. Not everyone who owns one knows how to properly care for it.

    jtk
    "A pessimist sees the difficulty in every opportunity; an optimist sees the opportunity in every difficulty."
    - Sir Winston Churchill (1874-1965)

  15. #45
    Join Date
    Jul 2019
    Location
    Northeast WI
    Posts
    571
    Quote Originally Posted by John C Cox View Post
    Now... The question I have is... Do you actually need the back flattened for the work you are doing? I'm commonly using chisels for paring, which means I want it to register properly and not dive/climb in a cut... I like a flat back, so that's how I prep them. I think if you're chopping waste, not so much...

    I've bought a lot of used/vintage chisels, and exactly zero have come in with a properly flat back unless I bought them from a seller who flattens them as a service. I think that says a lot... Every single 100+ year old chisel shows up with back some flavor of out of whack... That leads me to believe it was not a ubiquitous practice.
    Flattening the back is not for the purpose of registration. That thousandth of an inch won't be noticable while paring.

    The back needs to be flat to be honed properly. If there is a hollow at the cutting edge only the edges of the edge will get sharp. You need a flat surface to get an even edge.

    It is also plausible that the old timers did something similar to the ruler trick, and maybe put a shaving or something under the chisel back so they are only polishing the cutting edge instead of taking the time to polish the back.
    Last edited by Jason Buresh; 01-06-2022 at 7:13 PM.

Tags for this Thread

Posting Permissions

  • You may not post new threads
  • You may not post replies
  • You may not post attachments
  • You may not edit your posts
  •