Page 1 of 2 12 LastLast
Results 1 to 15 of 23

Thread: New-old saw till

Hybrid View

Previous Post Previous Post   Next Post Next Post
  1. #1
    Join Date
    Feb 2004
    Location
    Perth, Australia
    Posts
    9,495

    New-old saw till

    As part of the gradual rationalising of my tools - the last episode being the building of an underbench cabinet - it was the turn of my saw till and backsaws. Actually, Lynndy is more astute - she just calls it as it is ... I promised to build a new outdoor table, and I am avoiding it ...

    If you get down to it, joinery is what it is all about for me. Chiselling and sawing. The saw till is pretty much dedicated to joinery backsaws: rip dovetail, small and large crosscut, small and large tenon saws, and a mitrebox saw. I have a few dovetail saws. Some I made and some have sentimental attachments: a birthday present dovetail saw from Mike Wenzloff, another from Rob Lee and Lee Valley, my first new dovetail saw from Lie Nielsen, the forerunner from Independence Tools, another a gift made by my mate, Ian Wilkie. I use them all as they have different configurations and suit different woods. And then there are Japanese saws. A Nakaya dovetail dozuki is sublime. The whole Nakaya range is sublime.

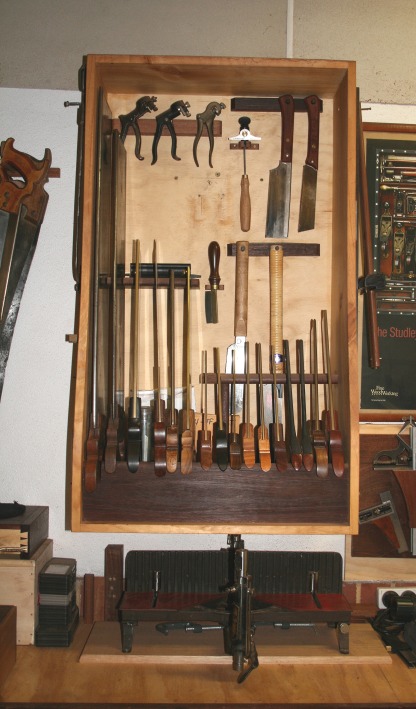
    This is my old saw till, taken probably about 10 years ago ...


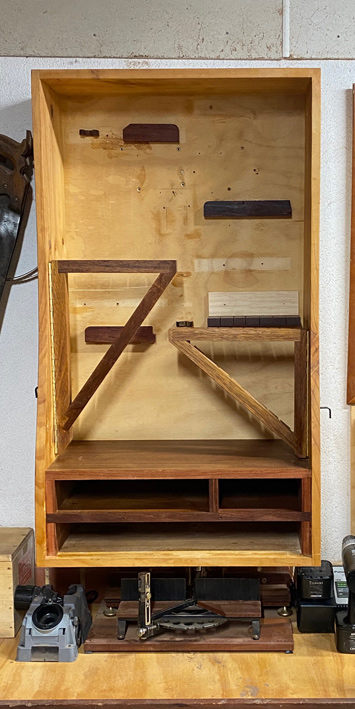
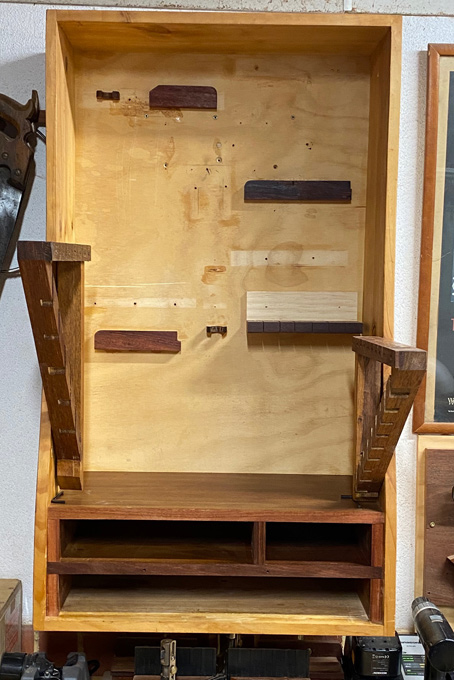
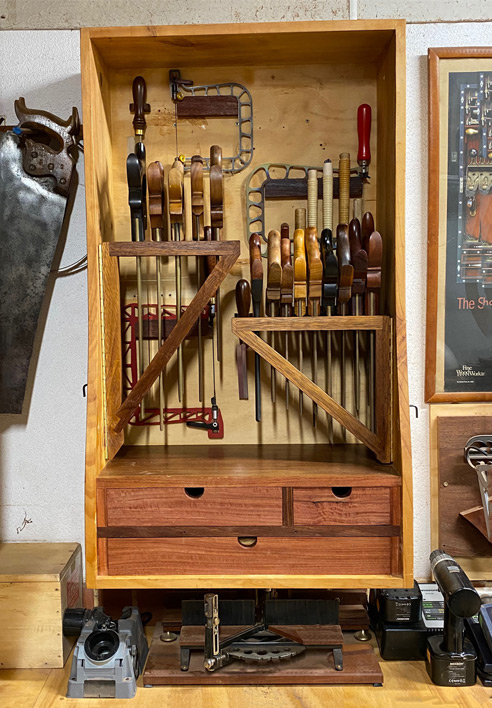
    Here is the new saw till, stripped and rebuilt ...


    The triangular rests at the front pivot away ...


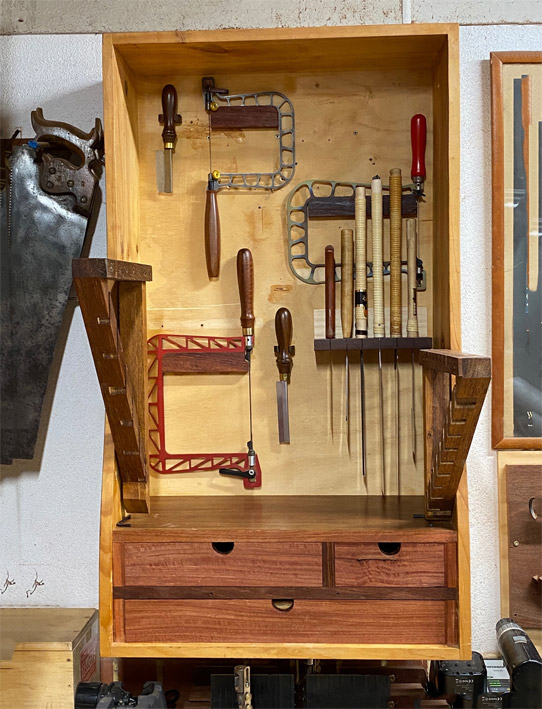
    The rear of the till is home to Knew Concepts saws: 5" and 8" fretsaws and 5" coping saw. (The 8" fretsaw was the one that Lee Marshall sent to me, and we worked on together to eventually come up with the fretsaw line for woodworkers). Plus the Japanese saws: flush cutting, dozuki, ryoba, kataba and azebiki.


    Here is the completed till ...


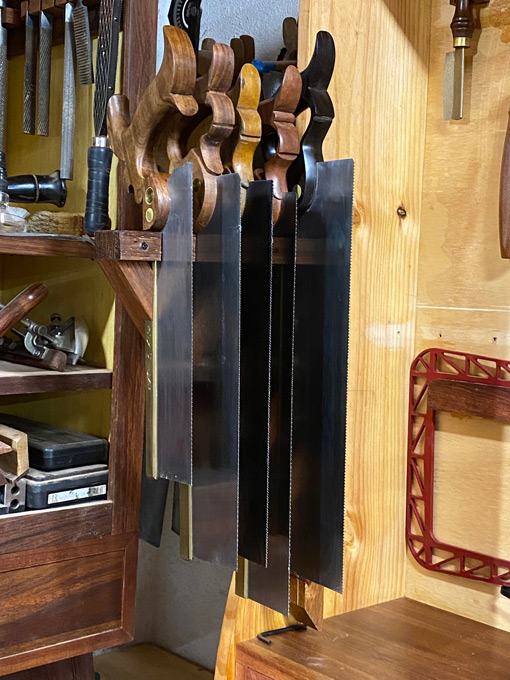
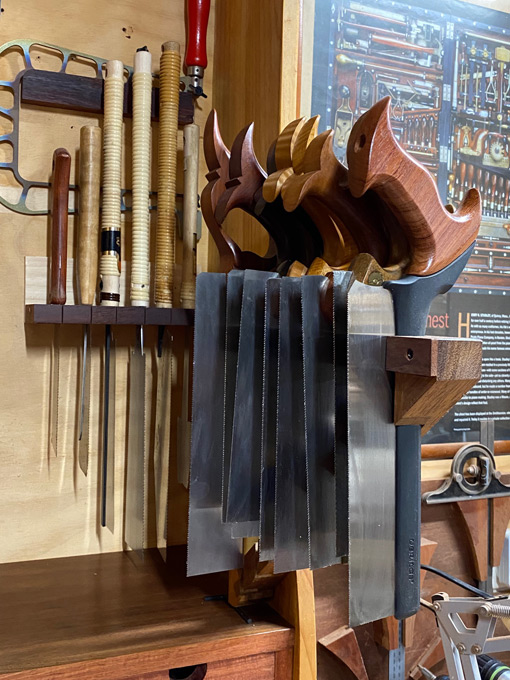
    The Western saws sit in mortices ...


    These were made this way ...


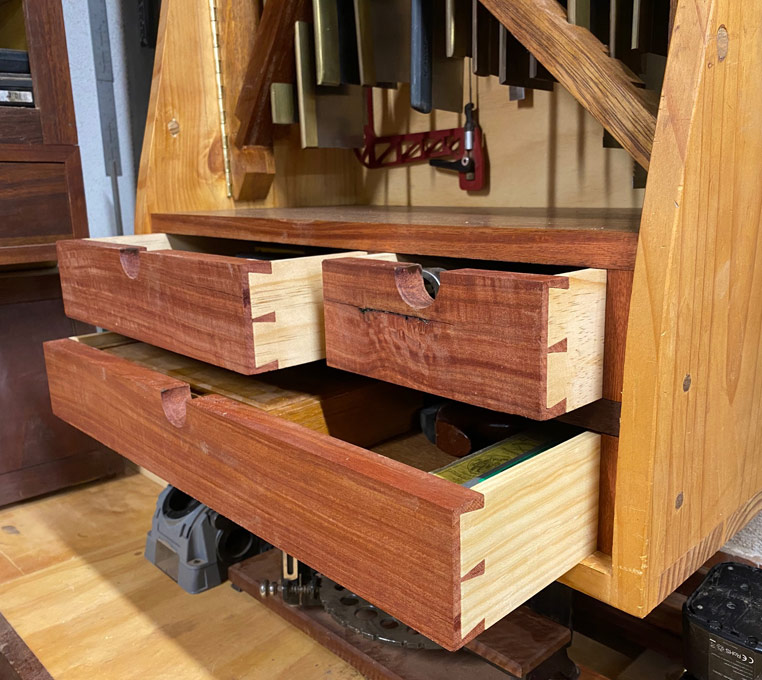
    Lastly, there are drawers for all the saw stuff: files for sharpening, Stanley 42X and Eclipse 77 saw sets, and so on. Of course, the dovetailing was a fun part of this build.


    Hopefully some ideas for you.

    Regards from Perth

    Derek

  2. #2
    Join Date
    Dec 2019
    Location
    Nova Scotia, Canada
    Posts
    280
    Hi Derek,
    That is very nicely done. The timing is also excellent as I have been contemplating making a saw till once I get a few other chores completed.
    We moved this summer to a place with a much bigger workshop but I don’t have it close to sorted out yet. I’m hoping to have it wired up soon and a saw till is on my list after that. However, as I’m sure you’ll appreciate, I’m not the only person in the house that keeps a list…
    Beautiful work. Thanks for sharing.
    David

  3. #3
    Join Date
    Oct 2004
    Location
    SoCal
    Posts
    866
    A very save of the old till. If I ever get wall space, I will keep these ideas in mind. Thank you for sharing.

  4. #4
    Join Date
    Jan 2019
    Location
    Fairbanks AK
    Posts
    1,566
    I like it. I looks like you have a veritable crap ton of saws in there, but you can get to all of them easily. Nice job, elegant as usual.

  5. #5
    Join Date
    Feb 2011
    Location
    Carlsbad, CA
    Posts
    2,230
    Blog Entries
    2
    Derek, I really like how you use the hinged racks to create two layers of saw storage in a single space – nice to be able to access both the commonly used joinery saws and the other saws on the back of the cabinet, while using only a single "footprint" of space on the wall. Typically well designed and executed. I always enjoy your threads. Thanks for sharing.

    Best, Mike

  6. #6
    Join Date
    Jan 2010
    Location
    Lafayette, Indiana
    Posts
    1,378
    I also like the hinged saw racks. I see saws all of the time in tills with the blades touching wooden components of the till. Any concerns with corrosion or similar reactions that the saw blade might have to prolonged contact with the wood?

  7. #7
    Join Date
    Feb 2004
    Location
    Perth, Australia
    Posts
    9,495
    Thanks everyone.

    Joe, the way the saw backs are held in the slots ensures that the teeth do not come into contact with anything that may damage them. There is also no chance of the plate being twisted, and all weight id taken off the backs and plate. This orientation is possible the safest way to store backsaws.

    Regards from Perth

    Derek

  8. #8
    Join Date
    Sep 2008
    Location
    N. Idaho
    Posts
    1,621
    Derek,

    Clever solution, the racks remind me of the saloon doors from old westerns

    Best,
    Chris
    "You can observe a lot just by watching."
    --Yogi Berra

  9. #9
    Beautiful work. Lots of great ideas for us there Derek.

    Way better than an outdoor table.

  10. #10
    Great ideas in that saw storage. Thank you for elevating the forum!

    Cheers,

    Lee

  11. #11
    Derek - do you have a similar till for your western, non-back saws?

    Eric R.

  12. #12
    Join Date
    Nov 2020
    Location
    East Cost
    Posts
    205
    Derek, is there a magnet or something in the triangular swinging pieces? Or is it friction fit? I was contemplating something like this, but all the prototypes had saws occasionally falling out when swung. Couldn't find a good and simple solution to this.

  13. #13
    Join Date
    Mar 2013
    Location
    North Alabama
    Posts
    548
    Quote Originally Posted by Jack Dover View Post
    Derek, is there a magnet or something in the triangular swinging pieces? Or is it friction fit? I was contemplating something like this, but all the prototypes had saws occasionally falling out when swung. Couldn't find a good and simple solution to this.
    Where Derek says this...
    Quote Originally Posted by Derek Cohen View Post
    Over the front a solid section is glued, and this is slotted for the blade. When the back is slid down into the slot, they are effectively locked into position.

    ...he means this.
    Keepers.jpg

    I wondered the same thing as you at first and didn't notice Derek's solution until he explained it.
    Chuck Taylor

  14. #14
    Join Date
    Feb 2004
    Location
    Perth, Australia
    Posts
    9,495
    I’ll try and take a photo of this and post it.

    Regards from Perth

    Derek

  15. #15
    Join Date
    Feb 2004
    Location
    Perth, Australia
    Posts
    9,495
    Here can be better seen the section that runs across the front of the grooves for the saw back. This was glued and screwed as a single board to the front, and then a kerf added for the saw blade ....


    As now seen, the saw back is trapped in the groove. The lower groove is left open.


    I will add that the same system was used for the Japanese saws inside the cabinet. Some required openings for the saw backs/spines, while a few did not. I simply drilled and chiselled these out.

    Regards from Perth

    Derek
    Last edited by Derek Cohen; 02-02-2022 at 10:57 PM.

Posting Permissions

  • You may not post new threads
  • You may not post replies
  • You may not post attachments
  • You may not edit your posts
  •