Results 1 to 14 of 14

Thread: Advice: Unnecessarily complicated endcap for Roubo bench - will it work?

  1. #1
    Join Date
    Feb 2021
    Location
    Israel
    Posts
    317

    Advice: Unnecessarily complicated endcap for Roubo bench - will it work?

    Hi all

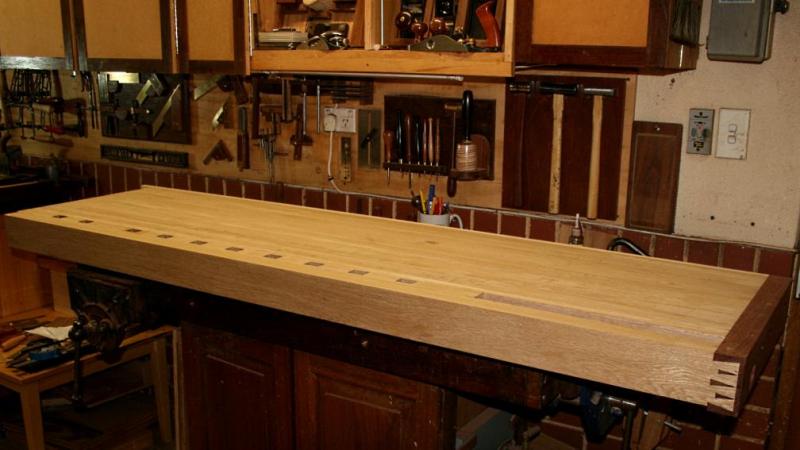
    It has been a while since I have posted. I am finally getting ready to build my workbench (split top Roubo).

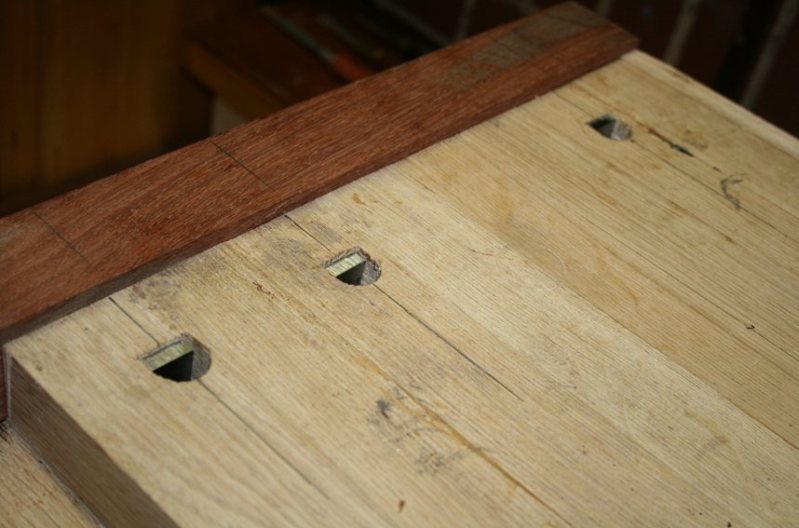
    I have been thinking about endcap options for my bench. I'm currently recovering from a back injury and have way too much time on my hands. considered this theoretical for now. In Benchcrafted plans (and other resources) the only variations I see involve glue and lag bolts. I was wondering if I could make it work with sliding dovetails? I also want to preserve the houndstooth at the endcap.

    What I cam up with was a series of dovetails and 90° tenons that fit into the endcap and then slide to the left to allow it to fit. the Dovetails would "fit" into regular mortices and then slide into there wedged mortices to provide the holding power. at the end the flywheel is bolted on - so there would be some mechanical hold to prevent the joint from back sliding.

    Like I said, this is unnecessarily complicated - but other than that, would it work? Interested in seeing what the community thinks

    Cheers!
    Assaf

    Screenshot 2021-10-20 104844.jpg

  2. #2
    Join Date
    Dec 2016
    Location
    South West Ontario
    Posts
    1,503
    You are trying to fit 3 dovetails that you can’t see at once, waste of time! They won’t be as strong as a sliding tapered wedge as they have less than half the contact area. Think one long tapered dovetail, easier, stronger and better as it lets you get on with the rest of bench!
    ​You can do a lot with very little! You can do a little more with a lot!

  3. #3
    Join Date
    Feb 2021
    Location
    Israel
    Posts
    317
    I agree - except there are problems fitting the houndstooth tail in if I do this.
    sliding dovetails have to be slid in from the begining and this joint by definition cannot - its what led me to try and figure out a work around

  4. #4
    Join Date
    Feb 2004
    Location
    Perth, Australia
    Posts
    9,492
    Hi Assaf

    Needless complication. Even a sliding dovetail is not wanted. A simple dado and tenon is preferred for preventing twist while permitting wood movement. That is what I chose to do nearly 10 years ago ...


    Build: http://www.inthewoodshop.com/ShopMad...ngaBench3.html

    It is still bolted on ...


    And the end has houndstooth dovetails on the face side ...


    Details: http://www.inthewoodshop.com/ShopMad...ngaBench4.html


    The lag holes and bolts on the underside ...


    Details: http://www.inthewoodshop.com/ShopMad...ngaBench5.html


    Regards from Perth

    Derek

  5. #5
    There are about 18 benches illustrated in Andre Roubo's books. There are minor variations, but not one has an "endcap".
    roubo ebeniste.png

  6. #6
    You add the end cap first, then you glue on the final benchtop board with the dovetail tails on it. I don’t know what Benchcrafted says, but that’s how I did the end cap on my split-top.

    I think the stair step thing is overly complicated (and potentially really hard to pull off?!?!). The easy solution, and what I’ve seen most people do when putting a cap on just one of the tops, is to just lag screw or bolt that side (make elongated holes for expansion and contraction). If you want to do it with only joinery, then I would do a breadboard style pegged mortise and tenon, again accounting for expansion and contraction (holes more elongated the closer you get to the center of the bench). That’s how I did mine. It’s arguably more stable than using screws/bolts – but I had to span both tops because it was the inner chop of a twin-screw end vise so that was really important.

    Here’s a shot of the end cap joinery on my bench. It looks overly complicated because I had to work around my twin-screw vise hardware. It’s really just a bread board end with dovetails on the edges. I think you would only need one single mortise. Notice that the end cap is longer than the width of the tops because there aren’t any sides yet.
    st1.jpg

    After the end cap is put on and pegged, then I glue on the final boards on the outsides of the tops. These are glued (if you do no glue the dovetails, they will compress over time and get loose due to the forces the vise is placing on the end cap – essentially trying to rip it off your bench). In MY case, I had a tenon just outside the vise hardware so I also glued that, but the rest is unglued for expansion/contraction. In YOUR case you would only glue the dovetails on the side pieces of your bench and the entire rest would be unglued.
    st2.jpg

    Although I pegged my end cap, another option would have been to use lags screws or bolts instead.
    st3.jpg

  7. #7
    Join Date
    Sep 2007
    Location
    Longview WA
    Posts
    27,441
    Blog Entries
    1
    Quote Originally Posted by Warren Mickley View Post
    There are about 18 benches illustrated in Andre Roubo's books. There are minor variations, but not one has an "endcap".
    roubo ebeniste.png
    Do any of them have an end vise?

    jtk
    "A pessimist sees the difficulty in every opportunity; an optimist sees the opportunity in every difficulty."
    - Sir Winston Churchill (1874-1965)

  8. #8
    Yes. In the section on veneering and marquetry, there are seven benches illustrated and one has an end vise. So Roubo was familiar with it but they probably were not common.

    Roubo calls the bench "Etablie a l'Allemande". Today this would be translated "German bench", but there was no Germany in Roubo's time, and I think Allemande would refer to the Rhine Valley.

  9. #9
    Join Date
    Jun 2005
    Location
    Shorewood, WI
    Posts
    897
    Some of the benches illustrated by Roubo do have an end vise.

    My bench has a 3" thick split top with a steel vise mounted on the end for use with dogs. It has no end cap.

    I'm not saying there's anything wrong with an end cap, but you don't need one

  10. #10
    Correct me if I'm wrong, but the Benchcrafted end vise the OP is using does in fact require an end cap. I don't think there's any way to mount it effectively without one.

  11. #11
    I just cut the end of the bench off with a circular saw. Used a long flush trim router bit and a straight edge to square it up and a slotting bit to do the top and the end cap and made a spline to fit the width of the grove. I have a slotting set so I did about a 3/4 wide groove. Positioned the grove so it covered the groove.
    Tom

  12. #12
    Join Date
    Feb 2021
    Location
    Israel
    Posts
    317
    thanks, the flush bit is a good idea, I'm using one but I didn't think about using it for the end grain...

  13. #13
    Join Date
    Apr 2017
    Location
    Michigan
    Posts
    2,770
    Hi Assaf
    Take all the time you want to making it and complicated joinery is fun. From the US you are getting 'get it done' advice. We can be impatient.

    Here's my split top bench.

    Bench.jpg Machinist's vise 2.jpg

    The open end is handy for clamping things and hanging things thru. The clamp on machinist's vice is an example. The other end has an end vice

    One of the nice things about a split top is you can just about ignore expansion. The gap changes slightly with the seasons.

  14. #14
    Join Date
    Feb 2021
    Location
    Israel
    Posts
    317
    Thanks - nice bench!

    I will probably end up doing the end cap the way everyone else suggested.

    I think people missed the point of my question - If I were to not use glue or screws at all would that design work?

    I might make the joint for the fun of it some time down the line.


    Assaf

Tags for this Thread

Posting Permissions

  • You may not post new threads
  • You may not post replies
  • You may not post attachments
  • You may not edit your posts
  •