Page 4 of 4 FirstFirst 1234
Results 46 to 57 of 57

Thread: A Project for August, start up

  1. #46
    Join Date
    Jun 2010
    Location
    twomiles from the "peak of Ohio
    Posts
    12,171
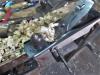
    Was busy running errands today...and Rust Hunting....Millers Falls No. 9, type 3 = $12.75.....
    latches for the lid, and a pair of handles to carry this tool chest with....Rosewood plugs have been trimmed flush...Need to fit the lid to the top of the case a tad bit better, then add the hinges...Should be about ready for a coat of stain...when sanded to 220 grit...I rather doubt THAT will happen while the chest is sitting ON the Brand New Clothes Dryer' top....let alone stain the chest...

    Still a bit "loopy" from yesterday...will see how Saturday goes...
    A Planer? I'm the Planer, and this is what I use

  2. #47
    Join Date
    Jun 2010
    Location
    twomiles from the "peak of Ohio
    Posts
    12,171
    Moved to the top of my bench. Planed the bevels to better match up with the lid. Then the surface mounted Piano Hinge was installed....and the rosewood plugs trimmed of flush with a chisel...Then the 1st coat of stain was brushed on...
    The PIP, Rosewood plugged.JPG
    Rosewood being Rosewood, turned black..added two handle to the sides of the case, so I can at least carry this thing..
    The PIP, side handle.JPG
    One on each side. A pair of latches and a knob, were added to the front of the lid..
    The PIP, latches and knob.JPG
    So...now I am waiting on the 1st coat of stain to dry, before coat #2 gets applied...until then, it can just sit on the bench..
    The PIP, front view, first coat of stain.JPG

    Chest just to store my "Extra" toys...er..TOOLS....
    A Planer? I'm the Planer, and this is what I use

  3. #48
    Join Date
    Jun 2010
    Location
    twomiles from the "peak of Ohio
    Posts
    12,171
    Cleaned off the exposed dried glue spots. Sanded back to bare wood. Second coat of stain where needed...
    The PIP, Lid works.JPG
    Lid works! Need to stain this inside? Hinge?
    The PIP, hinge installed.JPG
    Shadow line. Debate is about stain or black paint the back?

    The PIP, shellac coat.JPG
    Wiped the second coat of stain down, then brushed on a coat of Amber Shellac....even the top of the lid looks shiny..
    The PIP, shiny lid.JPG

    We'll see how this looks tomorrow...before anything else gets done...

    Stay tuned
    A Planer? I'm the Planer, and this is what I use

  4. #49
    Join Date
    Jun 2010
    Location
    twomiles from the "peak of Ohio
    Posts
    12,171
    Taking the day off from the shop...kind of stoved up, right now...Head from a bolt sticking out of the backyard swing's frame...while I was trying to move it out of the way to mow in that spot...nice 5/16" hole...

    Yard got mowed last evening....was trying the clear one of the wheels...had a long stemmed weed stuck in it....tried to pull it free with one foot on the weed, the other on the SHUT OFF mower, pushing the mower back a bit...foot got tangled with the starter cord...and down I went....got a small hole in my right wrist to show for it....mower got pushed inside the shed, and the doors slammed shut...

    So, this morning, woke up feeling like a truck had run over me....guess I don't Bounce like I used too....

    Have drawer liner material to cut and apply to 5 drawers and the top compartment...may cut and fit a length of black chain, to hold the lid...

    Stay tuned
    A Planer? I'm the Planer, and this is what I use

  5. #50
    Join Date
    Jul 2014
    Location
    Edmond, Oklahoma
    Posts
    1,750
    Steven,

    I usually tell folks that I bounce just as well as I ever did. The problem is getting up after I stop bouncing.

    Stew

  6. #51
    Join Date
    Jun 2010
    Location
    twomiles from the "peak of Ohio
    Posts
    12,171
    OK, LaundryDetail last night...somehow managed to waddle down the steps...Laundry started....Shellac came out and a brush..
    Tool Chest Drawers, inside of lid shellaced.JPG
    All of this was given a coat of Amber Shellac..Then got off the roll of Drawer Liner, and the scissors I brought along in the hamper....among other items. Took a bit a bit, as a drawer is quite the same size as this needed to be...
    Tool Chest Drawers, liner installed 1.JPG
    Then lined the top 2 drawers...
    Tool Chest Drawers, top 2 linered.JPG
    With what I had left. Still have 3 drawers to do, once I buy another roll.. Other items? Bought a Hasp, and some plates...already had a flat bar stock ( same as on the Stanley #358 mitre box)
    Tool Chest Drawers, hasp for lock.JPG
    Installed this part at the top, and..
    Tool Chest Drawers, bottom catch.JPG
    This catch at the bottom f the case...
    Tool Chest Drawers, locking bar added.JPG
    Intent to get 3 padlocks, all keyed the same...to lock this up...

    3/8" tapered plug cutter, to cut/burn two Rosewood plugs...as there are 2 counter-bored holes in the bottom edge of the case...a bit of glue, a hammer to drive in...a chisel to trim flush..and a swipe with some shellac...Have to wait and see how those 2 turned out...Dryer was done..and so was I....
    Stay tuned...after a coat or two of clear gloss poly..I'll haul this upstairs....have a spot to sit it at...and load it up...
    Tool Chest Drawers, fillers 1.JPG
    And...
    Tool Chest Drawers, Fillers 2.JPG
    Will empty the boxes into the Tool Chest...and throw the boxes out. Power toys will go to a shelf in the shop....There is an old Walnut Coffee Table under that mess....will become the base of the chest.

    Not even sure what all is in there...will do an inventory....some items may get tossed out.

    Stay tuned..we about done...
    A Planer? I'm the Planer, and this is what I use

  7. #52
    Join Date
    Jun 2010
    Location
    twomiles from the "peak of Ohio
    Posts
    12,171
    1st coat of Clear Gloss Poly is on the chest...letting that sit overnight..

    3 Padlocks are in place...all take the same key.

    Stay tuned..
    A Planer? I'm the Planer, and this is what I use

  8. #53
    Join Date
    Jun 2010
    Location
    twomiles from the "peak of Ohio
    Posts
    12,171
    A bit of fine grit sndpaper, to rub out any nibs....
    Tool Chest Finale, rubbed out lid.JPG
    Followed up with a buffer..
    Tool Chest Finale, getting buffed out.JPG
    Test to see how many planes could be stored in the top..
    Tool Chest Finale, test for fit only.JPG
    2 Smoothers, a Jumbo Jack, and a #62 jack...a Stanley #9-1/2 Block plane, and a Stanley #80...not too bad...about doubled the weight of the chest....
    Tool Chest Finale, padlock.JPG
    Padlocks have been bought, had to buy the 4-pack...but, they are all keyed the same...
    Tool Chest Finale, Rosewood plug.JPG
    Down at the bottom, a couple Rosewood 3/8" tapered plugs were installed...

    Must have been an old Rolling Stones' song playing in the background?
    Tool Chest Finale, back painted BLACK.JPG
    As the back of the case got it's "naked" plywood painted black...

    IF the right knee will allow it, this will be a "Moving Day"....as I think I am done here IN the shop....to reduce weight, drawers are coming up by themselves...have to clear off the landing pad, too....

    Thanks for looking in...did I bore anyone?
    A Planer? I'm the Planer, and this is what I use

  9. #54
    Join Date
    Jul 2014
    Location
    Edmond, Oklahoma
    Posts
    1,750
    Steven,

    Not boring for me, instead very enjoyable read. As always, I think I learned some things as well. The build started about the day we moved, so I had a lot of catch up to do on the read once the computer stuff was back on line. Unfortunately we are still unpacking and trying to figure out where to store stuff, since we have less storage room, at least for now. (Have thrown a lot of stuff away, so you aren't alone in throwing things away.)

    Thanks for the build, and regards.

    Stew

  10. #55
    Join Date
    Jun 2010
    Location
    twomiles from the "peak of Ohio
    Posts
    12,171
    Took a while...but..it did get moved upstairs..
    Project Post, Tool Chest, upstairs.JPG
    Will come back later...after the sun sets...south facing windows making picture taking a bit...rough, right now...way too much glare
    A Planer? I'm the Planer, and this is what I use

  11. #56
    Join Date
    Jan 2010
    Location
    Lafayette, Indiana
    Posts
    1,378
    I am enjoying this latest build. Not sure about the handles. They may be too fancy for the dungeon workshop, but maybe with those handles you can get by sitting the new tool cabinet on top of the new dryer? Looking forward to your next installment.

  12. #57
    Join Date
    Jun 2010
    Location
    twomiles from the "peak of Ohio
    Posts
    12,171
    Mission Accomplished! Tool Chest is now upstairs in it's new home....sitting on an old Walnut Coffee Table....so I have a place to stash/hide all them Yard Sale Gems I bring home..
    Project Post, Tool Chest, upstairs.JPG
    Project Post, Tool Chest. all locked up.JPG
    All locked up, too..
    Project Post, Tool Chest, black chain.JPG
    Black chain to hold the lid..
    Project Post, Tool Chest, Padlock.JPG
    Same key will open all 3 padlocks...

    I think I'll call this done...goal was to get this done before Labor Day Weekend...
    A Planer? I'm the Planer, and this is what I use

Posting Permissions

  • You may not post new threads
  • You may not post replies
  • You may not post attachments
  • You may not edit your posts
  •