Page 1 of 4 1234 LastLast
Results 1 to 15 of 57

Thread: A Project for August, start up

  1. #1
    Join Date
    Jun 2010
    Location
    twomiles from the "peak of Ohio
    Posts
    12,169

    A Project for August, start up

    Have that stack of 1 x 6 Ash...decided to build a tool chest.....Hauled 4 planks to the shop...cut the worst of the planks out...
    August Project, scraps, cut-offs,junk.JPG
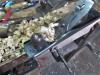
    Not much I can do with these...maybe burn them? Wound up with 6 boards...1 x 6 x 24"


    Needed one good straight edge..
    August Project, need a good, straight edge.JPG
    Rune the "best" edge along the rip fence, set to just skim off the worst of the wavy edges....marked THAT edge with an "X"...
    August Project, straight edges marked.JPG
    Then reset the fence about 2 blade thicknesses closer to the blade...
    August Project, 2nd straight edge ripped.JPG
    And that is supposed to give me parallel edges that are basically straight...in theory...decided 3 board panel would be a bit too wide....rip the worst off 2 planks, and now they are just filler strips..
    August Project, add a filler strip 1.JPG
    Then set up to use a jointer..
    August Project, first edge jointed.JPG
    We will be making gap free glue joints, today..( I hope...)
    August Project, no gaps.JPG
    Checking for gaps....there is no glue, nor clamps used...yet...hauled panel #1 over to the tablesaw..
    August Project, panel #1 glued up.JPG
    Glue rubbed on the joints, 3 pipe clamps, and cauls on the ends....let this sit right there....

    Rinse and repeat...got panel #2 ready to glue up...decided THAT can wait a day.....

    These will be the sides on the tool chest.....unsure about drawer sizes, or how many....and...what sort of lid I will use...have 2 cardboard boxes sitting on an old Coffee Table....that need to be put away.....will sort through both, and see what can head for the shop....

    Stay tuned....at least this is a start...
    A Planer? I'm the Planer, and this is what I use

  2. #2
    Join Date
    Jun 2010
    Location
    twomiles from the "peak of Ohio
    Posts
    12,169
    Came back later, and worked on Panel #2...checking glue joints until no gaps are seen...
    August Project, Panel #2 , no gaps.JPG
    Then some Dummy decided to glue this panel up...right then and there...
    August Project, Panel #2 glued up.JPG
    Cauls to flatten the ends, AND the middle...letting the two panels sit a day or two...will need to square the ends, once they do exit the Forest of Clamps....and do a flattening and smoothing. Will be much easier to do sliding dovetails, that way...besides, I'll need to clean off the tablesaw...have a LOT of ripping to do...

    Today was a Yard Sale/shopping day ( groceries/a clothes dryer) and find a TV for the GrandBRAT....

    Tools found?
    Yard Sale finds, nice sign.JPG
    A white plastic tub....with THIS sign attached....
    Yard Sale finds, august 30.JPG
    Tossed out the cheapo plastic screwdrivers, these were left. there are 3 files in there..that claw hammer?
    Yard Sale finds, save or toss.JPG
    When the face is a mushroom...handle has more cracks than a city sidewalk....it was soon tossed into the trash...Fowled Up Beyond Any Rehab....
    A Planer? I'm the Planer, and this is what I use

  3. #3
    Join Date
    Jun 2010
    Location
    twomiles from the "peak of Ohio
    Posts
    12,169
    Both panels are now out of the clamps....late night work session...to square the ends up...
    August Project, needs a trim.JPG
    Needs a bit of a trim...
    August Project, 6inch trim saw.JPG
    We do have a "Trim Saw"

    August Project, SKIL SAW.JPG
    Uses a 6" blade....need a guide fence..
    August Project, squared an end.JPG
    Distance between the edge of the saw blade and the edge of the saw's shoe....sets the fence away from the saw line.
    August Project, a little off the end.JPG

    As long as I maintain even an even pressure to keep the saw against the fence....and an even speed across the board...seems to do quite well...

    have one more to do, later today (nap came first...)
    August Project, one more cut.JPG
    Trying to get it so both panels are the same length...
    August Project, need to match up.JPG
    As they do need to match each other...then I can start to flatten the panels, and lay out some joinery.....more parts to mill...
    A Planer? I'm the Planer, and this is what I use

  4. #4
    Join Date
    Jun 2010
    Location
    twomiles from the "peak of Ohio
    Posts
    12,169
    Set up to clean up and flatten a couple panels..
    August Project, flatten a panel.JPG
    Millers Falls No. 15 to roughly flatten things out....finally..
    August Project, almost flat.JPG
    Smoothed things down with the Millers Falls No.9...worked on both faces of both side panels this way....with the help of a beltsander on the worst spots...until it blew a belt..

    Cross cut a couple 1 x 6s...need webframe parts...then ripped most to 1-1/2" width....some needed an edge straightened..
    August Project, wave removal.JPG
    Since 7/8" was a might too thick...resaw to 9/16" thick..
    August Project, thinner frames.JPG
    Front and the sides....back may be pine, as a plywood panel will also be back there....
    August Project, spaced for 5 drawers, maybe.JPG
    Setting spaces for 5 drawers....bottom webframe will be 3/4" thick...and will get a plywood panel....I think..
    Same for the compartment at the top, under the lid....3" width on the "Front" and Back rails....1/4" plywood floor.
    Stay tuned....I will try to get the case done....THEN start on the drawer builds...Might get this done by Labor Day? We'll see...
    A Planer? I'm the Planer, and this is what I use

  5. #5
    Join Date
    Jun 2010
    Location
    twomiles from the "peak of Ohio
    Posts
    12,169
    Got woke up this morning at 0530...on a Sunday? Sheesh....why? Seems that phrase "Sleep on it" has a danger......in that my Single Brain Cell Sketch Up is always "on"....and IF it should come up with a solution to a problem...it WILL wake me up, no matter what time it is....so..this morning's wake up call. I now know how a few joints will get done..I just have to wait until I can turn the shop to "on"and make a bunch of noise......

    Need to lay out where the drawer runners will go...and do it so both sides of the case will match. Need to build the bottom webframe and install it so end grain will not show.....Need to align rebates for the floor of the top compartment AND the top of the plywood back...so they miss. yet cover up any slots that might show....

    At 7/8" thick, top and bottom parts are way too thick...I can get by with, say, 3/4" bare....and since they also seem to be a bit rough sawn....be easy to smooth out to get that thin. There is to be a rebate down the back edges of the side panels, to house the plywood back. Debate is now IF I will need a divider back there or not.....might as well, as the back will need something to attach to....at least once in the middle.

    Have a large stack of 1/4" thick "cut-offs" that came about from ripping the dividers down to there 9/16" thickness....may add a groove around the bottom webframe...and slide a few of them in place...rather than BUY more plywood. Saves burning them...anyway...

    Shop will open after Lunch....Brunch? Stay tuned...might be a busy day?
    A Planer? I'm the Planer, and this is what I use

  6. #6
    Join Date
    Jun 2010
    Location
    twomiles from the "peak of Ohio
    Posts
    12,169
    Ok, have 12 pictures to post, from today's Follies.....and can only post 8 at a time? Well, here goes ( without the 3 hours of cussing...)

    First, set up to thin a few boards to 3/4" thickness....did NOT go well.....will need to hand plane the 2 boards I did get done, to get rid of the burn marks......

    Hoping the next task goes a little better.....maybe...lay out for the sliding dovetail sockets....
    August Project, laying out sockets.JPG
    And hope the other side panel will match when I'm done.....Clamped the panel to the bench..and the guide fence....
    August Project, ready to route.JPG
    First socket wasn't too bad....
    August Project, 1st socket done.JPG
    Moved things around so I can do #2...
    August Project, broke the bit.JPG
    Going to be one of THOSE days, eh.....1/2 hour round trip to Lowes to buy a new bit. Try again..
    August Project, new bit.JPG
    At least the new bit matched the old one....#3 went ok....just had to turn the panel around...
    August Project, next one set up.JPG
    #3 and #4....repeat for the other side panel....except..#3 was out of line on the second panel....tried to get that corrected...almost....time to see how that went...
    August Project, checking alignment.JPG

    Bottom web frame..
    August Project, bottom webframe.JPG
    Rails and stiles....need notched....and a 1/4" groove milled....to house a few slats...

    Stay tuned, for Part 2...
    A Planer? I'm the Planer, and this is what I use

  7. #7
    Join Date
    Jun 2010
    Location
    twomiles from the "peak of Ohio
    Posts
    12,169
    Those 1/4" thick slats, that were ripped from the divider stock....to make them thinner? Well, kept the best of the bunch..
    August Project, panel for the bottom.JPG

    This was before the grooves were milled. Also did some rebate/dado work....
    August Project, checking the fit.JPG
    This is to house the bottom webframe...test fitting...
    August Project, waste removal tools.JPG
    First, make a bunch of cuts, then remove the waste....then the shoulder plane to clean things up..
    August Project, rebate tools.JPG
    Same with the rebate to house the plywood back....back to the webframe...
    August Project, webframe glue up, bottom.JPG
    We have a glue up going on....there are screws at the notches, one each...cauls to pull and keep the corners flat. Let this thing sit right there a day or so....

    I do have a router table...and need to dig it out....drawer guides and dividers need milled to fit into the sockets....have a spare part of the same thickness....to help with the set ups....

    Looking like Tuesday...I can try to assemble the case? Monday, I'm sitting around, waiting on a new clothes dryer to be delivered, and the old one hauled away....minus it's power cord, I have to install that onto the new Dryer.....as they don't come with cords, anymore....and hook up the vent. Fun!

    Stay tuned.....sure to be more cussing involved....( think reception center, day 1, boot camp)
    A Planer? I'm the Planer, and this is what I use

  8. #8
    Join Date
    Jun 2010
    Location
    twomiles from the "peak of Ohio
    Posts
    12,169
    Well, got the bottom webframe out of the clamps, and cleaned up....then a dry fit of sorts..
    August Project, case's bottom panel.JPG
    This will be the bottom of the tool chest, after all. attach with counter sunk screws from the outside in...cover those with a strip of molding....

    Got the old dryer all ready to be hauled away. Re-arranged the shop a bit....mainly to dig out...
    August Project, Router Table cleaned up.JPG
    This thingy. Spiders were a bit miffed... Holds a B&D 1/4" all metal router...that looks like a clone of my DeWalt #610 1/2" all metal router...other than the paint job...same depth adjuster, too...
    August Project, B&D Router.JPG
    Used the same 2 wrenches to change out cutters...
    August Project, a 2 wrench chuck.JPG

    Set up the rip fence to do a bit of dovetail work....
    August Project, cutting tails.JPG
    Need 8 of these...drawer runners...then needed 4 dividers...afraid they stood up on me..
    August Project...push stick.JPG
    Then a dry fit..
    August Project, dry fits, runners.JPG
    May get to a glue-up later this week?
    August Project, fence set up.JPG
    Was one of those days...even if it was a Monday....
    A Planer? I'm the Planer, and this is what I use

  9. #9
    Join Date
    Jun 2010
    Location
    twomiles from the "peak of Ohio
    Posts
    12,169
    2 hours of shoptime, today...I'm whopped.......needed 4 sockets milled today...
    August Project, more sockets.JPG
    And..each took a different set-up....until...
    August Project, sockets done.JPG
    These are to hold the front and back of the top compartment....which also were milled to fit those sockets....then needed a rebate for the floor of the compartment...
    August Project, Ward's #78.JPG
    Set up the Ward's Master Quality No. 78.....and went about 1/4" deep...
    August Project, almost deep enough.JPG
    Then needed a dado across the sides of the case, to also house that bottom panel...
    August Project, Stanley 45 Dado plane.JPG
    Stanley No. 45, Type 4....with what turned out to be dull spurs...
    August Project, dry fit, dado.JPG
    Will work on the other dado after the spurs aren't as dull. Might as well dry fit the entire case...just to see how things are lining up...
    August Project, case dry fit.JPG
    Will be waiting on a sheet of 1/4" plywood.....and then may start on drawer building 101?

    Stay tuned.

    No, Lowes could not deliver the new Clothes Dryer, yesterday...claimed my street was too small for their HUGE delivery truck....re-scheduled for tomorrow, and they will send it out in a van....means I am stuck waiting around all day, waiting on them to show up....as I am the one doing the hook-ups...
    A Planer? I'm the Planer, and this is what I use

  10. #10
    Join Date
    Jun 2010
    Location
    twomiles from the "peak of Ohio
    Posts
    12,169
    Need to rest up a bit...new dryer is installed! Doing a bit of Lunch....may head to Lowes for a bit of 1/4" plywood (luann?) to cut for the back panel on the tool chest...and the floor of the compartment.

    Need to tear that dry fit down...have a few items to do.(like put away the router table, get out the tablesaw, again?)...before any assembly can be done....

    Stay tuned..
    A Planer? I'm the Planer, and this is what I use

  11. #11
    Join Date
    Jun 2010
    Location
    twomiles from the "peak of Ohio
    Posts
    12,169
    Ok...here is the Clothes Dryer I have been yakking about...already been in use for a few loads..
    The New Dryer.JPG
    Had to use a scrap of 1/4" plywood under one foot, so it would sit level, and NOT walk across the floor....


    Lowes trip.....
    August Project, 9 dollar panel.JPG
    1/4" x 24" x 48" panel...cost me $9.02....counting my 10% Mil. Discount, and the local Sales Tax. Will be the back of the tool chest's case...and see how many drawer bottoms I can get from what is left..

    case has been dismantled....Had a rebate that need the back corner cleaned out...
    August Project, rebate cleaned up.JPG
    Seems when you forget to raise the spur on the #78...it will creep out a bit.. spur has been rotated up..and I used both of these planes to remove that little ledge in the corner..

    Clamped the 2 case sides together, inside to inside face...
    August Project, needs a little off the top.JPG
    Both were an 1/8" too wide ( out front) and one was a hair wider on one end. I figured since I paid almost a $5 bill for this thing..
    August Project, power Jack Plane.JPG
    Now would be a decent chance to see how well it works..
    August Project, jointed edges.JPG
    Other than being a bit LOUD...not too bad...fence seems to help balance the thing. It can now go back on a shelf.


    One dado was not deep enough...corrected that. went from 1/4" deep to 3/8" deep....after all the noise lately...this sounded kind of good...
    August Project, wants to lean a bit.JPG
    Should have used the cam rest, as this wanted to lean a bit...checked the depth..
    August Project, depth checker.JPG
    Then set up to mill the dado in the other case's side...
    Stay tuned...part 2 coming right up..
    A Planer? I'm the Planer, and this is what I use

  12. #12
    Join Date
    Jun 2010
    Location
    twomiles from the "peak of Ohio
    Posts
    12,169
    Dado #2..
    August Project, 2nd dado started.JPG
    Ash does NOT like getting dadoed, does it? Even with a knife wall.
    August Project, dado about done.JPG
    Checking how well the dado is going...dry fit?
    August Project, bottom panel sized.JPG
    BTW, I also cut a panel for the bottom of this compartment...
    August Project, dry fit, dado 1.JPG
    Then checked Dado #1 for fit, as well...
    August Project, view from inside.JPG
    Later, when you happen to open the lid, this is what you will see.....yes, I will be removing those burn marks.

    Errands to run, needed to stash all the parts...and NOT on the new dryer..
    August Project, waiting around, now.JPG
    Figure they can all wait around here, for now.....

    Stay tuned...
    A Planer? I'm the Planer, and this is what I use

  13. #13
    Join Date
    Jun 2010
    Location
    twomiles from the "peak of Ohio
    Posts
    12,169
    out of that 2' x 4' panel..I need to cut a 20" x 22-1/2" panel to make the back of the case....Have the entire case dry fitted, right now....needed that done to get the size of the back's panel...


    need to figure out HOW to make the 2 cuts....and come out square....and still leave enough to make a few drawer bottoms..

    Bunch of Yard Sales tomorrow, the Boss has a list of them all made out....one is even a village wide sale...oooh-aaahhh!.

    Not enough cash to do the World's Longest Yard Sale, though....It start this morning ( Thursday) and runs through this coming Sunday.....cash for gas, cash for food, and cash for anything I wanted to buy...bad when Pay Day is the THIRD Wednesday of the month... Oh well...
    A Planer? I'm the Planer, and this is what I use

  14. #14
    Join Date
    Jun 2010
    Location
    twomiles from the "peak of Ohio
    Posts
    12,169
    Late night Laundry Detail. ( 1 load) so...went to check on the washer..19 minutes left...hmm..

    Tear the Stanley 45 Type 4 down...remove the LONG rods...clean the various parts...oil some threads..install the short rods. Sliding stock and fence back on.. cutters put away. Put the plane back in it's case, and place the case back where it belongs ( on top of the Type 20 Stanley No. 45, Roxton Pond)

    Measure for the case's back, again...hmmmm

    Put the router table away, swept the crud out of that spot, first. Had to set it aside a bit, to bring the tablesaw back out...then slide the router table back into it's "home"..move the tablesaw around so I could use it..


    Framer square to do the layout. With the plywood panel laying ON the tablesaw. A "crosscut" was marked out first...20" down from the "top" of the panel ( could be the other way around?) Without moving the square...I then made about 5 trips with the knife. Made things easier to see, and less splinters to clean up. Set up the saw to make the cut.....slowly, by hand...

    Set the 28" long "cut-off" aside...need a rip fence to cut a 1-1/4" off an edge...so that I'll have a 20" x 22-1/2" panel...

    Set the cut panel over with the dry fitted case, looks like it will fit..

    Washer "Binged" meaning it was done. Transfer the clothes to the New Dryer....call it a night...after I hit "Start" button..didn't even bring the camera along....oh well..

    Stay tuned...
    A Planer? I'm the Planer, and this is what I use

  15. #15
    Join Date
    Jun 2010
    Location
    twomiles from the "peak of Ohio
    Posts
    12,169
    laundry Detail this afternoon...means I get some shoptime, while waiting on things to get done (Washed & Dried) Film at 2300 hrs...picking dried glue off of my fingers at the moment...

    Stay tuned...
    A Planer? I'm the Planer, and this is what I use

Posting Permissions

  • You may not post new threads
  • You may not post replies
  • You may not post attachments
  • You may not edit your posts
  •