


Steven,
Have been busy, so have not kept up with the build, so read it just now. Very nice project, and I liked the look of the rounded over edges and also the shellac finish.
At any rate I enjoyed the build and the final result looks great. I was wondering what the end use of the box would be as I read along, and the spoke shaves go well in the box.
Thanks for posting the project. It was a fun read.
Stew

 Reply With Quote
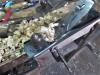


")
