Convex can also be a pain in the tukus. Especially if one is trained to start with registering the toe then shifting the emphasis to the plane's heel.
jtk


 Contributor
Convex can also be a pain in the tukus. Especially if one is trained to start with registering the toe then shifting the emphasis to the plane's heel.
jtk
"A pessimist sees the difficulty in every opportunity; an optimist sees the opportunity in every difficulty."
- Sir Winston Churchill (1874-1965)
 Contributor
Hmmm...a Stanley No. 4....from about that same era...
Birthday Rust Hunt, Stanley #4.JPG
Took about one hour...
Stanley No. 4 rehab, the sole.JPG
100 grit beltsander to "flatten" the sole.....it had passed the 2-finger test, was in need of a good cleaning..
Stanley No. 4 rehab, side 2.JPG
Sides did not NEED too much work, as this will NOT be a shooting plane, anyway.
Stanley No. 4 rehab, rear deck.JPG
Cleaned the crud and grime off. Sharpen the iron @25 degrees, flatten the back...hone to 2500 grit.....make sure the chipbreaker sits gap free...and 1/64" back from the edge....no back bevel required..
Stanley No.4 rehab, test track.JPG
Set up an Ash Test Track.....no tear-outs, no chatter observed....ready to join it's English Cousin..
Stanley No. 4 rehab, side views.JPG
Did NOT take all that long to do....
Member
The problem you described reminds me of a front to back concave sole, which is the simplest to fix. Twisted or convex are difficult with specialized tools.
With a concave sole, the blade has to protude a lot before touching the wood (except at the start and end of the cut, resulting in a convex surface). Then once it cuts, it goes deep.
It's difficult to judge from only this photo but it looks like a wavy sole with something like 1mm+ difference. This is bad. I would not keep it.
I understand from your previous posts that getting your hands on wood and tools is difficult. You will be safer buying new from LN/LV/QS. Old stanley are often bad but we don't mind to much if they are not rare nor expensive.
Actually, the only place they are not rare or expensive are North America and the UK. They are not that rare but expensive in many other places.
[OP]
Contributor
yeah, I am not ready to throw out the baby with the bathwater yet... I found a machinist who will try and flatten the sole of the plane and square up the sides (they mushroom out a bit towards the front of the plane). the machinist is a friend of my SO's father - so I won't be burning more money trying to fix it.
Overall though, this is why all my other planes are new and premium - the Stanley 4-1/2 cost me just upwards of $90 US. Id rather buy a tool I know that works than order one on ebay and pay north of $200 with tax and shipping just to find out it is too far gone. only reason I bought this one was I could inspect it first (not that that did me much good).
If the machinist can flatten the sole Ill let you all know
Member
I would start by honing the plane's sole on my saw table using 120 sand paper and then check it for flatness and square.
[OP]
Contributor
If I had access to a flat surface, I would do that.
Can't find float glass around here
granite surface plate not in the budget
I wish I had a table saw...
I am taking the sole to a friend who knows a machinist
Ill hope for the best
Contributor
You must be able to find float glass. I think that all glass now is float glass unless you are buying special textured glass. I just got a 3mm pane of glass to replace a garage window. It was float glass. I asked at the glass shop and was told that float glass is regular glass. You do want something more sturdy than 3mm though! A marble or granite floor tile should work too, but check the flatness first. All the ones that I have checked were flat enough: dead flat according to my Lee Valley precession straight edge.
[OP]
Contributor
you would think that, right?
I went to a store dealing with glass with a 12" Starrett combination square as a straight edge - nothing was remotely flat - didn't even need a feeler gauges to check.
I told the vendor and he said he would look into it.
in the mean time I do the best with what I have
 Member
Your plane does indeed sound concave, but if you're only planing a wee bit, it could be (as in most cases it is from what I've seen)
that your bench could indeed be a workmate and you're deflecting the material.
Did you watch any of Mr Charlesworth's stuff on youtube?
From the lapping methodology that most demonstrate, I wouldn't think flatness/tolerance matters much if one has no choice either way
on which material they wish to keep and which they wish to remove.
I think you might be able to find a few glass shelves from a fridge, that you could wrangle together, (if they pass your test)
For all who think a flat surface makes lapping fool proof,
Note that abrasion favours the ends!
The lap will tell you that, if your sole is coloured in, still don't believe this...
Try and not to remove the perimeter when lapping any flat thing with a huge abrasive surface, but try do the opposite instead,
Basically saying its impossible to concentrate on areas without a smaller abrasive than the item in question would be, unless you're targeting the very edge.
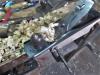
A big lap is for checking, not needed for working.SAM_3677.jpg
SAM_3676.jpg
Even if you need to remove from the ends of the plane with a larger lap than the item is,
you're going to approach flat at some point, and want to target areas, as if too much has been removed from the edges
you loose your nice reference points and start to create a belly which just gets more and more pronounced.
And since there's only one contact point if that happens, then you might also start to create a belly the other way along the width also
as one contact point will rock.
On a wide plane like the 4 1/2, if you're intending to use the cap iron, i.e unnoticable camber, then a belly along the width is bad news.
Last edited by Tom Trees; 05-23-2021 at 12:49 PM.
 Contributor
Originally Posted by Jim Koepke

Thank you Jim for this tip! When lapping plane bottoms, I use my shop vac to suck up the fine cast iron dust and the internal filter gets clogged frequently. The paper over the magnet trick will allow me to pick up the swarf and transfer it over to the waste bin and save my shop vac. (Also, thanks for adding "swarf" to my vocabulary).
Contributor
Glad to be of help.
jtk
"A pessimist sees the difficulty in every opportunity; an optimist sees the opportunity in every difficulty."
- Sir Winston Churchill (1874-1965)
[OP]
Contributor
Its warped - the area before the mouth is concaved and the area immediately after is convex
Member
Blue or colour in with marker the whole plane, a single stroke or two on a lap, the shiny spots will be the high ones.
Target those areas with a short bit of abrasive, a rectangle of some size shorter than the plane,
depending on if how much the middle will take to flatten, (say there's a trench in it)
a narrower strip than the plane is, is more likely to guarantee the plane will stay flat across the width.
You can do a figure 8 and overlap along the edges to feather it off.
Leave touching the rest like the heel and toe until you colour in the sole and check again.
You may need to rinse and repeat with a slightly longer strip this time, a bit of overlapping again but including the entire length to get an idea of flatness heel to toe,
and when that's done, and you check with the ink again, there should be ink removed from the edges only with two rubs on a full sized lap (something larger than the plane is will do)
Another few swipes if you like afterwards, if you wish to make it ever so slightly convex again.
Some folk say a Lie Nielsen plane has too much friction and is hungry for wax, but regardless if you wish to get it that flat or not,
best to know how to achieve the results you're after, as many articles and videos can be convincing.
More of an issue with say a no.5, but worth mentioning, none the less.
Good notes about keeping abrasive clean, I like to use some self stick adhesive, or to use spray on stuff on cheaper rolls, as they are good for holding another
abrasive on top, if you use above method, this is a better way to avoid wasting time and your abrasive floating on the grit.
ps, Another trick for checking your surface plate is by getting a pair of squares, or a square and a block,
and pushing one against the other with a light source behind.
Good luck
Tom
Last edited by Tom Trees; 05-24-2021 at 3:12 PM.
 Posting Permissions

 Reply With Quote