Page 1 of 2 12 LastLast
Results 1 to 15 of 17

Thread: First backsaw handle

  1. #1
    Join Date
    Apr 2019
    Location
    Madison, Wisconsin
    Posts
    283

    First backsaw handle

    I am in the process of changing the handle on my son's gent's saw. The turned/in-line handle just hasn't been working well for him.

    He picked out a piece of quartersawn red oak,and I downloaded a pattern from Blackburn Tools (thanks, Isaac!).

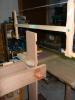
    The handle isn't quite done yet: I only have the pilot holes drilled for the bolts and I haven't yet let in the spine. I am presently using the gent's saw in question as a drying rack for the handle.

    As this is the first backsaw handle I have ever made, I would appreciate some constructive criticism; what can I improve (either on this handle or the next) and is there anything I messed up?

    Thanks in advance.

    Michael Bulatowicz
    20210402_162517~2.jpg20210402_164318.jpg20210402_162441.jpg20210402_164432.jpg20210402_164532.jpg

  2. #2
    Join Date
    Jul 2014
    Location
    Edmond, Oklahoma
    Posts
    1,750
    Michael,

    Nice looking handle, nicely shaped, and the grain is beautiful.

    The only suggestion I would make is to soften the edges a little overall, and especially where the hand grips the handle. I would lightly sand off the sharp edges, and round them over just a little, so that it would be more comfortable in the hand. The handle might look a little "softened" too, if you "soften" the square edges all the way around. The sharp edges give it a tiny bit of a "harsh" look due to the crisp edges to my eye.

    That said, the "look" of the handle is a matter of personal taste, and probably an equal number of the folks on this site probably like the "crispness," if you will, better than if the edges are "softened" a little.

    All told, however, you have done a very nice job on the handle, it looks great.

    I have a gents saw that I hope to give the same treatment that you are giving the one for your son, but that will be a while down the road from now. If my effort turns out 2/3 as good as your job is i will be very satisfied.

    Stew
    Last edited by Stew Denton; 04-02-2021 at 8:25 PM.

  3. #3
    Join Date
    Dec 2010
    Location
    South Coastal Massachusetts
    Posts
    6,824
    It's masterfully done.

    The only suggestion I would make is to leave the upper horn "heavy" - that's the part broken off most of my flea market finds.

  4. #4
    Join Date
    Dec 2016
    Location
    South West Ontario
    Posts
    1,503
    Michael I just finished doing the same thing for an old wooden plane. Your grain direction is good for maximum strength. The 'crisp' edges have a machine made look to them. I shaped mine with a spoke shave and a knife over 5 days. Each day a fresh look and feel beckoned improvements. When changes could no longer be felt I stopped. Rub pencil on all the bits you feel and cut them away, repeat daily.
    You can have a totally custom fit with smooth flowing wood, a lovely step beyond the factory look. That is what the best old wooden hand planes did.
    Your handle is fine but I encourage you to go all the way!
    ​You can do a lot with very little! You can do a little more with a lot!

  5. #5
    Join Date
    May 2015
    Location
    Ingleside, IL
    Posts
    1,417
    Very nice Michael. I'm one that likes the crispness of the lines. Is the pattern you got something they would let you share? Or maybe the link? I have an old disston that needs a new handle and I've been putting it off for long enough. Thanks for any info.
    Stand for something, or you'll fall for anything.

  6. #6
    Join Date
    Apr 2019
    Location
    Madison, Wisconsin
    Posts
    283
    Hi Stew,

    Thanks for the suggestions and the kind words; I’ll run your thoughts about the softened edges past the “customer” and see what he prefers. Comfort is definitely a major priority, so I’ll have him check it out thoroughly.

    Michael

  7. #7
    Join Date
    Apr 2019
    Location
    Madison, Wisconsin
    Posts
    283
    Quote Originally Posted by Jim Matthews View Post
    It's masterfully done.

    The only suggestion I would make is to leave the upper horn "heavy" - that's the part broken off most of my flea market finds.
    Thanks, Jim, for the kind words and the suggestion. I’ll be making a few more handles soon, and I’ll keep that in mind.

    Michael

  8. #8
    Join Date
    Feb 2004
    Location
    Perth, Australia
    Posts
    9,492
    Michael, that is excellent, especially considering it is the first you have done. First aside, it is excellent.

    The only area I would do differently is the side flats, which I think could be narrower. The rounded areas could come around further in. This would make the handle more comfortable, but also make it look less blocky. Still, this is a personal preference, as would be rounding the sides, another option.

    If course, you are only half-way there! What of the screw holes and mortices - what type of nuts are you to use, and how do you plan sawing for the plate, or have you done this already (which I would have done first - get it wrong and you toss away all the hard work)?

    Regards from Perth

    Derek

  9. #9
    Join Date
    Apr 2019
    Location
    Madison, Wisconsin
    Posts
    283
    Quote Originally Posted by Bill Carey View Post
    Very nice Michael. I'm one that likes the crispness of the lines. Is the pattern you got something they would let you share? Or maybe the link? I have an old disston that needs a new handle and I've been putting it off for long enough. Thanks for any info.
    Hi Bill,

    Thank you for the kind words.

    The patterns have been generously made freely available for personal use.

    The Blackburn website specifically requests that one avoid linking to the saw handle templates; you should be able to run a search for “Blackburn saw handle templates” in your favorite search engine and find them that way, or you can drill down through the Blackburn website back saw kit page to find them.

    Michael

  10. #10
    Well done. Even though I don’t like red oak. You are ready to move on to the expensive woods for your next project.

  11. #11
    Join Date
    Apr 2019
    Location
    Madison, Wisconsin
    Posts
    283
    Quote Originally Posted by William Fretwell View Post
    Michael I just finished doing the same thing for an old wooden plane. Your grain direction is good for maximum strength. The 'crisp' edges have a machine made look to them. I shaped mine with a spoke shave and a knife over 5 days. Each day a fresh look and feel beckoned improvements. When changes could no longer be felt I stopped. Rub pencil on all the bits you feel and cut them away, repeat daily.
    You can have a totally custom fit with smooth flowing wood, a lovely step beyond the factory look. That is what the best old wooden hand planes did.
    Your handle is fine but I encourage you to go all the way!
    Hi William,

    I do like the idea of a fine tuned custom fit; I’ll work with my son to get it properly tuned up for him. Thank you.

    Michael

  12. #12
    Join Date
    Apr 2019
    Location
    Madison, Wisconsin
    Posts
    283
    Quote Originally Posted by Derek Cohen View Post
    Michael, that is excellent, especially considering it is the first you have done. First aside, it is excellent.

    The only area I would do differently is the side flats, which I think could be narrower. The rounded areas could come around further in. This would make the handle more comfortable, but also make it look less blocky. Still, this is a personal preference, as would be rounding the sides, another option.

    If course, you are only half-way there! What of the screw holes and mortices - what type of nuts are you to use, and how do you plan sawing for the plate, or have you done this already (which I would have done first - get it wrong and you toss away all the hard work)?

    Regards from Perth

    Derek
    Hi Derek,

    Thank you for the kind words and the suggestions.

    I did indeed cut the slot for the saw plate first thing after cutting out the blank: that’s how I am using my son’s saw as a holder. The photos were taken with the blade (upside down) in the slot.

    My son chose some nickel plated, domed screws and nuts to match the folded steel saw back. They haven’t yet arrived and I want to make sure they fit properly, hence stopping for now at the pilot holes. He still wanted to be able to use his saw while waiting for the new handle, so I haven’t yet removed the original handle, let alone cut the back and plate: I’ll cut the mortise for the back once everything else is ready.

    I’ll be consulting with him on the aesthetics and comfort for this handle; I will pass along your suggestions and I will keep them in mind for the next handle I make.

    Michael

  13. #13
    Join Date
    Sep 2007
    Location
    Longview WA
    Posts
    27,441
    Blog Entries
    1
    A very nice looking handle.

    jtk
    "A pessimist sees the difficulty in every opportunity; an optimist sees the opportunity in every difficulty."
    - Sir Winston Churchill (1874-1965)

  14. #14
    Join Date
    Jan 2019
    Location
    Fairbanks AK
    Posts
    1,566
    I like it. Not a huge fan of red oak, but golly.

    I wonder if you could leave the top profile crisp, soften the grip to fit the customer and then take another look to see how much crispness to take off the profile to "go with" the profile of the hand grip?

    One of my older saws has a wear mark on the side of the handle where the right handed owner kept his finger pointed down the blade while working. I could not bring myself to smooth it out.

  15. #15
    Join Date
    Apr 2019
    Location
    Madison, Wisconsin
    Posts
    283
    Thanks again, everyone, for the feedback and suggestions.

    After a conversation with my son in which he was able to examine the feel of the handle, I will indeed be further rounding/softening of the edges. I’ll iterate this until he judges it ideal. He likes the present “crisp” look, but agreed with those of you who indicated that the corners are insufficiently rounded for ideal comfort.

    I’ll post images of the updated version when it’s complete, along with a “before/after” set of photos of the saw.

    The next handles will be made from cherry.

    Michael

Posting Permissions

  • You may not post new threads
  • You may not post replies
  • You may not post attachments
  • You may not edit your posts
  •