Results 1 to 11 of 11

Thread: leg vise install pointers?

  1. #1
    Join Date
    Jan 2019
    Location
    Fairbanks AK
    Posts
    1,566

    leg vise install pointers?

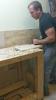
    I have all my hardware now. I have one child at home on spring break from college, so I have a bout a week to finalize my plans before I start hacking on my bench.

    My thinking is the vise screw needs to go in perpendicular to the face of the leg and as square as possible.

    If I screw it up, would it be better for the screw to tilt up a bit or down a bit?

    How tight do I want the mortise for the parallel guide? I am thinking if I have 1/8" all around now at the end of the dry season it should probably move pretty smoothly without dragging at the height of the wet season.

    What question should I ask at this step that I dont even know to ask?

  2. #2
    Join Date
    Feb 2018
    Location
    N CA
    Posts
    1,283
    Scott, I too have all the part, but have not begun the install of my BM Leg Vise. I would suggest that you check out Tom B’s post on his cross cross. it’s pretty slick.

  3. #3
    Needs to be straight. and I would drill the holes the same size as the screw threads. That will keep every thing in alignment, latter you can open up the holes one drill size for clearance. I assume you have BenchCrafted's Criss- Cross. The criss cross will give you about 1 /4 to 3/8th wider at the bottom than at the top. If you are installing the retro criss cross than the width isn't important at all If it is a new build without the blocks than it needs to be like 1/8 to 1/4 wider. A couple of washers will stop the criss cross from moving sideways. so you can be even wither just ad washers.
    Tom

  4. #4
    Join Date
    Jan 2019
    Location
    Fairbanks AK
    Posts
    1,566
    Advice on any leg vise install is welcome in this thread. I searched on "leg vise install" and paged back into 2016 without finding anything super helpful. If someone remembers a thread from 2015, please do post a link.

    I get the BenchCrafted vise with criss cross is well reviewed, well liked and very popular. It seems sensible that many future search button users here will have that product in hand when they find this thread, so if you know that product, bring it.

    I chose a different path. When I was in Junior High shop classes there was routinley one or two benches with old wooden screw vises on them, but all the cool kids wanted the new shiny benches with the metal vise screws. I tried both kinds, liked wooden vise screws better and it was one of the first times in my life the value of keeping my mouth shut was a real, palpable, rewarding thing. I like Tommy bars that drop out of the way with authority.

    I like not getting grease from metal vise fittings on my work. I am confident someone has figured out how to protect wood work from grease on metal vises by now with the new stuff, but it used to be a thing.

    My personal harware is a Lake Erie 2X, with the Anchora Yacht Services chain tensioner. I have a piece of QSWO that was dimensioned for width and thickness about a month ago for the parallel guide, and a gorgeous piece of Doug Fir for the chop.

    As pictured the AYS chain system is taped back into the shipping box. My shop foreman is a cat who lives to bat round shiny things across the floor. All the pieces were in there last time I taped it shut.

    The hole saw is the 3 1/8" size specifically suggested by Lake Erie, new in packaging.

    20210309_172141[1].jpg

    I thought of one specific question. Can I use the salad bowl wax from Lee Valley on the nut and screw threads, or do I really need to go find some floor wax?

  5. #5
    Join Date
    Jan 2010
    Location
    Lafayette, Indiana
    Posts
    1,378
    Schwarz only allows for 16th clearance for the parallel guide. I don’t think mine is that tight, but I use a pin instead of the chain. I am doubtful that there would be any noticeable difference between 1/16 and an 8th. I would spring for a can of min wax paste wax or a similar paste wax for your screw. You will find lots of use for this on other projects and a little goes along way. When rubbed out on drawer runners, drawers slide like silk on silk.

  6. #6
    Join Date
    Sep 2007
    Location
    Longview WA
    Posts
    27,426
    Blog Entries
    1
    Hi Scott, the search feature on SMC can be enhanced by the user.

    When searching with the SMC search box with terms like > leg vise design < the selected search engine enters > leg vise design site:www.sawmillcreek.org < in the search engine.

    The user enhancement is to remover the > www. < to create the search of > leg vise design site:sawmillcreek.org <. This will give better results.

    To further enhance the search term substitute different words for > design < such as > installation < or any other pertinent linguistics.

    jtk
    "A pessimist sees the difficulty in every opportunity; an optimist sees the opportunity in every difficulty."
    - Sir Winston Churchill (1874-1965)

  7. #7
    Join Date
    Mar 2012
    Location
    Mid coast Maine
    Posts
    479
    Hi Scott. Here is a link to Derek Cohen’s install of the chain kit with a wooden screw.

    http://www.inthewoodshop.com/ToolRev...nAdjuster.html

    yes you want to be as square to the leg as possible, the nut is drilled and tapped square so when that is bolted to the leg it will be square. The slot for the parallel beam just needs clearance that won’t bind with seasonal changes. You don’t need to fool with a pin so set the beam as low as possible.

    Jim
    Ancora Yacht Service

  8. #8
    Hey Scott, I hope you'll share info on your build as you go along. I am doing the exact same combo with the Lake Erie 2x leg and wagon vises and Jim's awesome chain kit. My thought on the nut for the leg vise is that it could, in theory, be adjusted to be flush fairly easily. Once that is set, then the brass garter will "lock in" the vise screw. Once you get those both set to be perpendicular, the vise screw won't move. Of course, this is all in my mind, and I haven't actually executed any of this, so take it with a grain of salt.

    -John

  9. #9
    Join Date
    Oct 2004
    Location
    SoCal
    Posts
    866
    Scott,

    I have an early Lake Erie 1X screw. At the time, I think they advocated BLO followed by Johnson's Paste Wax or similar. Perhaps their advise has changed in the interim. Give some thought to the tenon between the leg and top. That vise exerts mucho pressure and if it all bears on the top then the only thing keeping the top in place is the tenon. One thought that occurs to me is: if you can get the leg and chop onto a drill press, then you should be able to drill them both at one shot

  10. #10
    Join Date
    Jan 2019
    Location
    Fairbanks AK
    Posts
    1,566
    Quote Originally Posted by John Domsic View Post
    Hey Scott, I hope you'll share info on your build as you go along. I am doing the exact same combo with the Lake Erie 2x leg and wagon vises and Jim's awesome chain kit. My thought on the nut for the leg vise is that it could, in theory, be adjusted to be flush fairly easily. Once that is set, then the brass garter will "lock in" the vise screw. Once you get those both set to be perpendicular, the vise screw won't move. Of course, this is all in my mind, and I haven't actually executed any of this, so take it with a grain of salt.

    -John
    Hey John, welcome.

    My build thread is this one: https://sawmillcreek.org/showthread....-vise-retrofit - I think I addressed nut mortise depth in this one.

    And I did my legwork before choosing a chop in this one: https://sawmillcreek.org/showthread....se-experiences - it is on page three of this latter thread where Michael Bulatowicz did a finite element analysis and came up with a false color image....

  11. #11
    Join Date
    Jan 2019
    Location
    Fairbanks AK
    Posts
    1,566
    Quote Originally Posted by Curt Putnam View Post
    Scott,

    I have an early Lake Erie 1X screw. At the time, I think they advocated BLO followed by Johnson's Paste Wax or similar. Perhaps their advise has changed in the interim. Give some thought to the tenon between the leg and top. That vise exerts mucho pressure and if it all bears on the top then the only thing keeping the top in place is the tenon. One thought that occurs to me is: if you can get the leg and chop onto a drill press, then you should be able to drill them both at one shot
    Both good points. The tenon at the end of my leg is 1.5x 5.5 by full top thickness, about 3.5 inches.

    The ability to clamp the leg and chop together and heave them onto a drill press is a major attraction to doing the vise install as part of the bench build for sure. Retrofits suck.

Posting Permissions

  • You may not post new threads
  • You may not post replies
  • You may not post attachments
  • You may not edit your posts
  •