Page 2 of 2 FirstFirst 12
Results 16 to 25 of 25

Thread: A Project for the Month of March

  1. #16
    Join Date
    Jun 2010
    Location
    twomiles from the "peak of Ohio
    Posts
    12,170
    So...do I NEED a chuting board for those cross cuts?
    The March Project, square check.JPG
    Not really...this is right off the saw. Then mark for width, set the rip fence...
    The March Project, Drawer Front to width.JPG
    Was still a hair too wide....Millers Falls No. 14 to joint the edges a bit...test for fit, again..
    The March Project, checked for fit.JPG
    Nice slip fit...run the 2 sides through the same way...marked for length, ripped for width...joint for fit...
    The March Project, sides too wide.JPG
    Check for fit..
    The March Project, sides checked for fit.JPG
    Seemed all these parts needed to be planed flat, too...we have ways..
    The March Project, flatten the parts.JPG
    Getting all the main drawer parts sized up...
    The March Project, rest of drawer parts.JPG
    Back needed to be a tad shorter and narrower. It will sit in a dado at the back of the sides, and the bottom of the drawer runs under it...
    The March Project, front and back.JPG
    And, just like the rest, needed planed flat....

    part 3 coming up...Laundry has been moved from the washer, over to the dryer....when that is done, so is shop time...back is getting sore, right between the shoulder blades..
    Stay tuned..

  2. #17
    Join Date
    Jun 2010
    Location
    twomiles from the "peak of Ohio
    Posts
    12,170
    Part 3..... getting a start on Drawer Building 101? Pins need laid out....usual suspects...
    The March Project, pins laid out.JPG
    I found out, that bevel gauge is a Stanley No. 25, SW model. Pins are laid out on the sides of the drawer..then
    The March Project, Pins sawn.JPG
    They were sawn...then chopped, cleaned up.....use to lay out the tails...trying to stay on the WASTE side of the lines....a bit rough on the small items...dry fit?
    The March Project, tails done, dry fit.JPG
    A bit rough around the edges...maybe the other corner will be better? Dryer shutting down...time to call it quits for today..
    The March Project, quitting time.JPG
    letting this sit right here, until the next shop time/Laundry Detail comes along...

    Will need to plough grooves to house a plywood bottom in the drawer...and the dados to house the back....may get out the new Stanley #45, T-3 to cut the dados?

    We'll see....stay tuned..

  3. #18
    Join Date
    Jun 2010
    Location
    twomiles from the "peak of Ohio
    Posts
    12,170
    laundry Detail today...means 3 hours of shoptime, too

    So, clamps from the last glue up came off...
    The March Project, out of the clamps, again.JPG
    So, now it is easier to size the drawer parts....Needed to get the other front corner dovetailed, too....enough to do a dry fit...
    The March Project, another dry fit.JPG
    Might get the hang of these things, someday....Issues began AFTER the dados for the drawer back were done, and I had started to groove the front..
    The March Project, front grooved.JPG
    And one side..
    The March Project, side grooved.JPG
    On this one, the dado is on the correct face..the inside one....on the other side piece, dado was on the OUTSIDE face... 
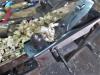
Means I had to stop, remake a new side from scratch...and hope the dovetails fit
    Then a dry fit to get the drawer bottom the right size...
    The March Project, bottom fitted.JPG
    THEN I could get the back to the correct length, and height ....which involved a jointer plane...
    The March Project, back needed jointed.JPG
    Jointed each edge, so the top of the back will be low enough...(Washer was done, transfer over to Dryer) At which point, glue and clamps came out, along with a wet paint brush to moosh the glue into all the spots..
    The March Project, Drawer glued up.JPG
    There goes the neighborhood, again. Laid out a few curves on the lid...and used the bandsaw, with a BRAND NEW BLADE..
    The March Project, lid rough shaped.JPG
    This Ash must be some tough stuff. Blade isn't even 1/4" wide....and still can make the turns?

    Waiting on the drawer..
    Stay tuned...letting the drawer sit overnight...Dryer is done, and so am I...

  4. #19
    Join Date
    Jun 2010
    Location
    twomiles from the "peak of Ohio
    Posts
    12,170
    Drawer is out of the clamps, and cleaned up..test fitted...
    The march Project, drawer fits.JPG
    Handles installed...
    The March Project, handles installed.JPG
    Hinges installed...
    The March Project, hinges installed.JPG
    Back of the drawer needed shortened a bit...too long of a bottom...
    The March Project, bottom too long.JPG
    Top edges of the drawer needed to be leveled...
    The March Project, leveled the corners.JPG
    EVERYTHING sanded from 100 grit down to 220 grit...then..
    The March PIP, around the corner.JPG
    A coat of stain was brushed on, then wiped down....need to let this air out a while..
    The March PIP, airing it out.JPG
    Then see how things have dried out...before the varnish goes on...

  5. #20
    Join Date
    Jun 2010
    Location
    twomiles from the "peak of Ohio
    Posts
    12,170
    Went to the shop today....repaired a couple spots where glue blocked the stain...then hand sanded the whole box to 320 grit...added a wash coat of stain....allowing to dry another day.

    Find out tomorrow when they will be installing the "Watchman" in my heart...those go up through the leg and into the heart....means I will be "grounded" from even driving the car...let alone going to the shop...have to wait until that plug heals up...so...this might be the last Project for a little while.....until I get the "OK" to work in the shop, again...

  6. #21
    Join Date
    Jun 2010
    Location
    twomiles from the "peak of Ohio
    Posts
    12,170
    1st coat of clear gloss poly has been brushed on....allowing it to dry.

    Waiting on the Medicade to give the "OK" before they install the Watchman.....says about 2-3 weeks away.....

  7. #22
    Join Date
    Jun 2010
    Location
    twomiles from the "peak of Ohio
    Posts
    12,170
    here we go....
    March Project Post, closed up.JPG
    March Project Post, corner view.JPG
    March Project Post, hinge side view.JPG
    March Project Post, end view.JPG
    March Project Post, top view.JPG
    haven't a clue as to what will get stashed in it...yet. Was just a way to use up the Ash leftovers from another project, instead of burning them. practice to keep what little skills I have going along..

  8. #23
    I think you should re-name the Dungeon to the Toy Room. Nice tools, nice work. I hope the new Pacemaker has a special “shop mode” so that it can keep up with you.

  9. #24
    Join Date
    Mar 2021
    Location
    Munich, Germany
    Posts
    13
    Great to see how the first two weeks went! How is it going now? Any updates?

  10. #25
    Join Date
    Sep 2007
    Location
    Longview WA
    Posts
    27,441
    Blog Entries
    1
    Quote Originally Posted by steven c newman View Post
    [edited]
    Find out tomorrow when they will be installing the "Watchman" in my heart...those go up through the leg and into the heart....means I will be "grounded" from even driving the car...let alone going to the shop...have to wait until that plug heals up...so...this might be the last Project for a little while.....until I get the "OK" to work in the shop, again...
    Good luck with your medical procedure Steven. My bypass surgery kept me out of the shop for four months.

    jtk
    "A pessimist sees the difficulty in every opportunity; an optimist sees the opportunity in every difficulty."
    - Sir Winston Churchill (1874-1965)

Posting Permissions

  • You may not post new threads
  • You may not post replies
  • You may not post attachments
  • You may not edit your posts
  •