Page 1 of 2 12 LastLast
Results 1 to 15 of 30

Thread: A Cabinet for the Bathroom's blank wall

  1. #1
    Join Date
    Jun 2010
    Location
    twomiles from the "peak of Ohio
    Posts
    12,171

    A Cabinet for the Bathroom's blank wall

    Behind the "Throne" is this blank wall...
    Bathroom Cabinet, not so blank canvass.JPG
    (Red lines are from the computer) that needs.....something. Have to leave access to the light switch. There is another wall..
    Bathroom Cabinet, corner defects.JPG
    That I will need to leave a space in front of....mainly to allow a door to open up against the wall, and NOT bang your head...leave just enough room for a door handle, too....
    Single Brain Cell Sketch Up came up with a starting plan...
    Bathroom Cabinet, rough sketch up.JPG
    along with a treatment for the bottom ends of the cabinet sides...
    Bathroom Cabinet, bottom end detail.JPG
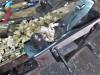
    Just in case a towel rod needs added....Lumber Supply?
    Bathroom Cabinet, 9 Ash boards.JPG
    9 planks of 1 x 6 Ash....might be enough?.....we'll see.

    Bathroom Cabinet, fancy grain.JPG
    Want to show off the grain....too.

    Stay tuned...

  2. #2
    Join Date
    Apr 2007
    Location
    Columbus, Ohio, USA
    Posts
    3,441
    So you are planning on a closed cabinet (it has doors) it seems. One was in a bathroom when I moved in and it is simply "shelves". I have considered making something nicer and was on the bench about doors or no doors. The truth of the matter is that if I finally get around to it I will ask the wife and she will dictate the answer.

    The problem is that what is there works. It is not very attractive, but it does work.

    Looking forward to this one.

  3. #3
    Join Date
    Feb 2003
    Location
    McKean, PA
    Posts
    15,637
    Blog Entries
    1
    You mean a cabinet like this one that filled a similar space in my daughters first house?
    Projects_0048.jpg
    Lee Schierer
    USNA '71
    Go Navy!

    My advice, comments and suggestions are free, but it costs money to run the site. If you found something of value here please give a little something back by becoming a contributor! Please Contribute

  4. #4
    Join Date
    Apr 2007
    Location
    Columbus, Ohio, USA
    Posts
    3,441
    Wow, very nice

  5. #5
    Join Date
    Jun 2010
    Location
    twomiles from the "peak of Ohio
    Posts
    12,171
    Sides....
    Bathroom Cabinet, curvy bottom.JPG
    5-3/8" x 30" long...bottom 4" has a double curve...
    Bathroom Cabinet, Dado lay out.JPG
    There are 2 shelves at the bottom, first one starts at that 4" mark ( 4-3/16") second one at the 10" mark (measurements are to the bottom of each shelf) Shelves sit in 7/8" wide dados, 1/2" deep.

    Tablesaw makes a bunch of cuts..
    Bathroom Cabinet, dados sawn.JPG
    A chisel comes along and knocks the waste loose...
    Bathroom Cabinet, break out.JPG
    Then things get cleaned up with a router...
    Bathroom Cabinet, second set of dados.JPG
    A cordless one, at that. Then a test fit..
    Bathroom Cabinet, test fit.JPG
    Decided on a "mid" shelf....using a 1/2" thick Pine board as the shelf...means I needed yet another dado..
    Bathroom Cabinet, mid shelf dado.JPG
    Except this needed to be 1/2" x 1/2"...bottom of the shelf sits at 21-1/4" up from the bottom of the sides..again, waste away the waste, knock the waste loose, then clean out with the Stanley 71-1/2...
    Also needed to get 3 shelves cut to size...
    Bathroom Cabinet, 3 shelves.JPG
    23-1/4" long, by 5-3/8" wide....

    Stay tuned....I also got the top of the cabinet made, today...

  6. #6
    Join Date
    Jun 2010
    Location
    twomiles from the "peak of Ohio
    Posts
    12,171
    Cabinet needs a top...if nothing else than to keep the dust bunnies out....so.

    Top is about 1/4" wider than the sides...to allow a 1/4" plywood panel as a back. Staight-line ripped one edge, as the board was tapered a bit..
    Bathroom Cabinet, top of cabinet, dados.JPG
    Ends were squared up, at 26" length. a dado was cut 1" in from each end.....I was going to cut a round corner there in the res circles....changed to the better looking edge..
    Bathroom Cabinet, dull blade.JPG
    Hmmm....could be about time to change the bandsaw blade?
    Bathroom Cabinet, rounded front corner.JPG
    Will clean this up with the beltsander.....
    Bathroom Cabinet, flattened top.JPG
    Top of the top needed flattened a bit....bowed up down the center...was. Stacked all the parts...
    Bathroom Cabinet, flat pack.JPG
    Into a "Flat-Pak"....3 shelves, 2 sides, and the top. Will try a glue-up later....then see about a couple doors? Have to do a pair of panel glue-ups for that....and make the frames...

    Stay tuned

  7. #7
    Join Date
    Jun 2010
    Location
    twomiles from the "peak of Ohio
    Posts
    12,171
    There will be cussing involved....what started out as just a dry fit...
    Bathroom Cabinet, dry fit for glue.JPG
    Soon devolved into a glue adventure....Trying to glue and clamp everything at once....didn't work too great..
    Bathroom Cabinet, glue up, stage 1.JPG
    This being about the best way to add clamps....
    Bathroom Cabinet, Sabre clamp....JPG
    Even ones shaped like a Sabre....then came adding the top...
    Bathroom Cabinet, Top glued on.JPG
    getting long clamps to fit around other clamps, and pull the case square....at the same time...then, needed more clamps..
    Bathroom Cabinet, pulling shelves straight.JPG
    To pull the shelves straight....1/2" one was trying to bow....letting this mess sit overnight...maybe even 2.....I suppose I had better clean up under the tablesaw?
    Bathroom Cabinet, saw's been busy.JPG
    Most will be headed to the FirePit....been rather busy, lately...the saw, that is...

    Stay tuned..

  8. #8
    Join Date
    Jun 2010
    Location
    twomiles from the "peak of Ohio
    Posts
    12,171
    Was a bit busy with other items, yesterday.....maybe this afternoon-ish.....I can try to remove that army of clamps....and get the case cleaned up?

    There IS a longer plank available...
    Bathroom Cabinet, 9 Ash boards.JPG
    That I think I can cut into 4 sections....and glue up into 2 panels....to make the raised panels for the 2 doors.

    At least that is/was the "plan" for today....we'll see..

  9. #9
    Join Date
    Jun 2010
    Location
    twomiles from the "peak of Ohio
    Posts
    12,171
    Wasn't quite long enough for 4 blanks...drat..

    The before the clamps came off shot...
    Bathroom Cabinet, remove the clamps.JPG
    SLOWLY....until...
    Bathroom Cabinet, clamps removed.JPG
    All clamps were removed....Still needed a couple, though..
    Bathroom Cabinet, plane hold down.JPG
    To hold the case in place, as the pine shelf was a bit too wide (was flushed with the front of the case..)
    Bathroom Cabinet, needs planed down.JPG
    Needed something to remove the "excess" pine..
    Bathroom Cabinet, plane working.JPG
    See-through shavings, takes a LOT of passes....and, the shavings want to stick to about anything...especially my left hand.

    Could finally set the case aside..
    Bathroom Cabinet, set aside.JPG
    What is throwing this picture off...is the legs for that bench behind the case, are splayed, to keep the bench stable.....case IS square...
    Bathroom Cabinet, rip fence set up.JPG
    Which means I can clear off the tablesaw, and set up to do a few rip cuts, need frame parts for 2 doors...
    Bathroom Cabinet, door frame parts.JPG
    Stay tuned...door parts are next on the list..

  10. #10
    Join Date
    Jun 2010
    Location
    twomiles from the "peak of Ohio
    Posts
    12,171
    Was a busy day...off and on...
    Busy Busy Busy Day.JPG
    These needed jointed...
    Bathroom Cabinet, left pair.JPGBathroom Cabinet, right pair, needs work.JPG
    Tapers were ripped straight...waves planed flat...until..
    Bathroom Cabinet, door panels glued up.JPG
    Until 2 panels could be glued up, and set aside...

    Decided those 7/8" thick stiles and rails could be thinned a bit, to 3/4" thick....and even removed a few bad spots along the sides..
    Bathroom Cabinet. door parts resized.JPG
    Will sort through these tomorrow, pick out the best 4 stiles...and see about enough rail stock....and set up a Stanley #45 to do a bunch of grooves...and MAYBE some beads?

    Stay tuned..

  11. #11
    Join Date
    Jun 2010
    Location
    twomiles from the "peak of Ohio
    Posts
    12,171
    Sorted through...even found 2 decent long stick s to make the 4 rails out of.
    .Bathroom Cabinet, rail blanks,uncut.JPG
    also sorted through the rest for 4 stile blanks..
    Bathroom Cabinet, jointer work, rails.JPG
    Most needed a little jointer work...Also worked on a jig...
    Bathroom Cabinet, jig parts.JPG
    that will come in very handy...still needed a couple notches cut...
    Bathroom Cabinet, notched jig.JPG
    Stiles needed to be all the same length...best way to do that,,,
    Bathroom Cabinet, gang trimmed stiles.JPG
    just gang them up...one pass on each end. Set up the plough plane...have work for it..
    Bathroom Cabinet, plane set to plough.JPG
    The cutter is a #12...took a few tries to get thing set just right..
    Bathroom Cabinet, Groovy.JPG
    Kept that old candle handy...kept things from binding...
    Bathroom Cabinet, depth checker.JPG
    And, check for depth of cut...had a few high spots that tried to slip by..
    Next up..them rails...

  12. #12
    Join Date
    Jun 2010
    Location
    twomiles from the "peak of Ohio
    Posts
    12,171
    rails were cut to about the right length over on the mitersaw..
    Bathroom Cabinet, rail trimmer.JPG
    A cordless Stanley #358...then adjust that jig a bit...
    Bathroom Cabinet, jig reset for rails.JPG
    As the rails are a bit shorter that the stiles....
    Bathroom Cabinet, all grooves done...JPG
    Did not take all that long to do...or..make a mess on the shop floor..
    Bathroom Cabinet, Chippy day.JPG
    Between the Jointer and the plough planes....was a Chippy sort of day. next item involved this cutter..
    Bathroom Cabinet, cutter #22 need sharpened.JPG
    A #22 bead cutter. Had to stop for a bit, as this did need to be sharpened up....bevel and the back...then the plane reset..
    Bathroom Cabinet, beader set up.JPG
    Moving skate adjusted out a tad...fence adjust in a bit...depth stop was set up AFTER a test run..
    Bathroom Cabinet, test bead, Pine.JPG
    More to keep the cutter from going too deep...then set up the jig..
    Bathroom Cabinet, 1st bead in Ash.JPG
    Was a bit rough at the start....not a biggie, as a mitered half lap will go there....turn the rail around...
    And do another bead....stiles and rails all get 2 beads....one around the outside edge, and one around the inside towards the raised panels...

    Back was getting sore, right between the shoulder blades.....2-1/2 Hours in the shop.....time to clean up, and close up....plenty of time to do all them beads, later..

    Stay tuned...

  13. #13
    Join Date
    Jun 2010
    Location
    twomiles from the "peak of Ohio
    Posts
    12,171
    Beads on all the rails are done..
    Bathroom Cabinet, rails beaded.JPG
    Re-adjust the jig. and bead the 4 stiles....until
    Bathroom Cabinet, last bead done.JPG
    last of the stiles had their beads done....had one stile that needed to be straightened out...
    Bathroom Cabinet, flattening a hill.JPG
    Was a bit bowed up in the middle...got that flattened back down....
    Change of tools..
    Bathroom Cabinet, miter layout tools.JPG
    lay out a few miters...and do a few cuts..
    Bathroom Cabinet, cut a miter.JPG
    But, only half way down....then another saw took over...
    Bathroom Cabinet, rip cut.JPG
    To make a rip cut...
    Bathroom Cabinet, needs tuned,pared.JPG
    At least on the 4 rails....even set up 2 mitersaws...
    Bathroom Cabinet, 2 saws, no waiting.JPG
    One for each end...then that rip saw....
    Stay tuned...more to come, was a busy day...

  14. #14
    Join Date
    Jun 2010
    Location
    twomiles from the "peak of Ohio
    Posts
    12,171
    Ok, all the rails have their joinery done? Need to half lap the stiles to match...
    Bathroom Cabinet, half laps done.JPG
    Stiles started out like this....but, they need to match up with..
    Bathroom Cabinet, half laps.JPG
    the rails...means a 45 degree cut,,,

    Bathroom Cabinet, frame parts done.JPG
    Like these ( done on the tablesaw, this time) Then a test fit...
    Bathroom Cabinet, test fit corner.JPG
    And clean things up until a good match is made....enough that a full frame could be dry fitted..
    Bathroom Cabinet, frame dry fit.JPG
    Both frames are ready for their raised panels...but..
    Bathroom Cabinet, Next up, panels.JPG
    I need to work on the panels just a bit....trim to size, raise the front , need to rebate the back of the panel....

    Sounds like another full day in the shop...Stay tuned...

  15. #15
    Join Date
    Jun 2010
    Location
    twomiles from the "peak of Ohio
    Posts
    12,171
    Guess I should meander down towards the shop, after a bit.....make a bit of saw dust...

    Stay tuned...there may be some cussing involved....doubt there will be any glue spilled, though...

    Have to haul the 30 gal. Trash Can to the shop...and clean up under the tablesaw....getting hard to move the saw where I need it to be....may bring in the snow shovel, as well...at least I can find it, later...

    Stay tuned..

Posting Permissions

  • You may not post new threads
  • You may not post replies
  • You may not post attachments
  • You may not edit your posts
  •