Page 1 of 2 12 LastLast
Results 1 to 15 of 16

Thread: My first ever "project"

  1. #1

    My first ever "project"

    Edit: No idea why they are upside down!

    Critiques welcome!!!

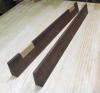
    So I've been looking to get into woodworking for the last couple years but I was always scared. I finally built up enough equipment that I knew I needed to start on something and I decided that I wanted to build some speaker stands. I ended up drawing these out last week on a notepad and after probably about 40 hours this is the finished product. I'm not sure what I'm going to do for finishing after I put the second coat of stain on. If you guys have any suggestions please by all means send them my way! I made some mistakes and my joints are a bit on the rough side but for a first project I think they came out all right.

    IMG_2977.jpgIMG_2980.jpgIMG_2978.jpgIMG_2979.jpg
    Attached Images Attached Images
    Last edited by Ryan W Taylor; 02-09-2021 at 6:05 PM.

  2. #2
    Join Date
    Aug 2007
    Location
    Dickinson, Texas
    Posts
    7,655
    Blog Entries
    1
    I would go to Lowes or Home Depot and by a small can of varnish and a small can of shellac. I would play with them on scrap wood until I know what I want.

  3. #3
    Looking good, you seem to be off to a great start in a great hobby!

  4. #4
    Join Date
    Feb 2019
    Location
    Cincinnati, Ohio
    Posts
    968
    Really nicely done. A couple of minor suggestions to up your game.

    First, I'm noticing a few lines going across your pieces. There's one on a leg, and another on a top. Guessing it might be snipe. If you buy the tables, and set them up correctly for your 735 that should go away. If you to be cheap, you can make a longer table out of melamine and run that through the planer bed. Cost you 3/4" of capacity, but again, no snipe. The other options are to sand it down, or run the pieces long and cut them off.

    Second, I think you might be better off with a slight amount of tapering on your legs, but that's purely a taste thing. If you like it, that's all that matters.

  5. #5
    Thanks for the info! The snipe did come from the 735 and ironically the tables were on there when I purchased it...it was the floor model. I will have to take a straight edge out there tomorrow and align them with the deck of the unit.

    As for the taper...I thought about that. I have to make a taper jig for that though, and right now I am working off of a Hitachi jobsite saw so that could be interesting? I will need to find some good plans for a tapering jig first though.

    Quote Originally Posted by Andrew More View Post
    Really nicely done. A couple of minor suggestions to up your game.

    First, I'm noticing a few lines going across your pieces. There's one on a leg, and another on a top. Guessing it might be snipe. If you buy the tables, and set them up correctly for your 735 that should go away. If you to be cheap, you can make a longer table out of melamine and run that through the planer bed. Cost you 3/4" of capacity, but again, no snipe. The other options are to sand it down, or run the pieces long and cut them off.

    Second, I think you might be better off with a slight amount of tapering on your legs, but that's purely a taste thing. If you like it, that's all that matters.

  6. #6
    Join Date
    Feb 2019
    Location
    Cincinnati, Ohio
    Posts
    968
    Quote Originally Posted by Ryan W Taylor View Post
    Thanks for the info! The snipe did come from the 735 and ironically the tables were on there when I purchased it...it was the floor model. I will have to take a straight edge out there tomorrow and align them with the deck of the unit.
    Okay, didn't see them in the picture. Also you might want to raise them just slightly from the main bed, like a couple thou.

    Quote Originally Posted by Ryan W Taylor View Post
    As for the taper...I thought about that. I have to make a taper jig for that though, and right now I am working off of a Hitachi jobsite saw so that could be interesting? I will need to find some good plans for a tapering jig first though.
    Should be doable in about 15 minutes. Either you get a piece of plywood, with two hold downs, or you get two boards with a hinge at one end, and something to hold it open at the other. Finally you can do tapered legs on a jointer, though it's a bit of a party trick, rather than a serious approach.

  7. #7
    Join Date
    Dec 2010
    Location
    South Coastal Massachusetts
    Posts
    6,824
    Nicely done.

    A sheet of drawer liner will keep the speakers from moving around.

    I would use a wipe on polyurethane and allow it to cure outside for a few days.

    Pics when they're in action, please!

    Kudos

  8. #8
    Nice job Ryan!
    "All that is necessary for the triumph of evil is that good men do nothing."

    “If you want to know what a man's like, take a good look at how he treats his inferiors, not his equals.”

  9. #9
    Join Date
    Feb 2003
    Location
    McKean, PA
    Posts
    15,635
    Blog Entries
    1
    Nice work. As far as finishing goes, my suggestion would be for future projects. As you probably have already discovered, applying finish inside a tight space like the interior portions of your stands is a royal pain. Next time, assemble all your parts to confirm proper fit and function, then disassemble and apply painters tape over joint areas then apply your finish (stain and finish) to the interior portions before assembly. Finishing the out side can be done after final assembly.
    Lee Schierer
    USNA '71
    Go Navy!

    My advice, comments and suggestions are free, but it costs money to run the site. If you found something of value here please give a little something back by becoming a contributor! Please Contribute

  10. #10
    Join Date
    Sep 2012
    Location
    Greater Manor Metroplex, TX
    Posts
    264
    Quote Originally Posted by Lee Schierer View Post
    Nice work. As far as finishing goes, my suggestion would be for future projects. As you probably have already discovered, applying finish inside a tight space like the interior portions of your stands is a royal pain. Next time, assemble all your parts to confirm proper fit and function, then disassemble and apply painters tape over joint areas then apply your finish (stain and finish) to the interior portions before assembly. Finishing the out side can be done after final assembly.

    What he said--took me several projects to figure this out...

    Also, on the finish, I would look at a wiping varnish--like General Finishes Arm R Seal. They are very forgiving to apply (stick to Satin) and are very durable.

  11. #11
    I have already ordered some hardware and will be making this probably tomorrow! Thank you!
    Quote Originally Posted by Andrew More View Post
    Okay, didn't see them in the picture. Also you might want to raise them just slightly from the main bed, like a couple thou.


    Should be doable in about 15 minutes. Either you get a piece of plywood, with two hold downs, or you get two boards with a hinge at one end, and something to hold it open at the other. Finally you can do tapered legs on a jointer, though it's a bit of a party trick, rather than a serious approach.
    Thank you and will do!
    Quote Originally Posted by Jim Matthews View Post
    Nicely done.

    A sheet of drawer liner will keep the speakers from moving around.

    I would use a wipe on polyurethane and allow it to cure outside for a few days.

    Pics when they're in action, please!

    Kudos
    Thank you!
    Quote Originally Posted by Frederick Skelly View Post
    Nice job Ryan!
    Great suggestions and I was thinking about how it was such a pain as I was applying it. Lessons learned for the 2nd project...which the wife has already mentioned should be a coffee table.
    Quote Originally Posted by Lee Schierer View Post
    Nice work. As far as finishing goes, my suggestion would be for future projects. As you probably have already discovered, applying finish inside a tight space like the interior portions of your stands is a royal pain. Next time, assemble all your parts to confirm proper fit and function, then disassemble and apply painters tape over joint areas then apply your finish (stain and finish) to the interior portions before assembly. Finishing the out side can be done after final assembly.
    I need to look at that and see how it works. I am going to be honest.....staining/finishing is by far my weak point. I really know jack and crap about it. I need to go to finishing school if you will for finishes.
    Quote Originally Posted by Todd Mason-Darnell View Post
    What he said--took me several projects to figure this out...

    Also, on the finish, I would look at a wiping varnish--like General Finishes Arm R Seal. They are very forgiving to apply (stick to Satin) and are very durable.

  12. #12
    Join Date
    Mar 2005
    Location
    Cashiers NC
    Posts
    603
    Those look really good. I built my first cabinet in the garage with very few tools and finished it in a spare bedroom. Every time I go to our bathroom I look at it. The warped solid wood door, poor sanding and the lumber from Lowe’s. My wife loves it. If you care about the craft you will get better, but plan on having those stands around for awhile. I always figure the worst piece I ever build will be the one that survives for generations!
    Charlie Jones

  13. #13
    Join Date
    Mar 2015
    Location
    SE Michigan
    Posts
    3,225
    Nicely done, Ryan. There’s no bigger complement than when the misses asks for more! You did good.

  14. #14
    Join Date
    Feb 2009
    Location
    Cedar Park, TX - Boulder Creek, CA
    Posts
    837
    Those look like the most impractical saw horses* I've ever seen. And all that time wasted on finishing them.

    ;-)

    * My first project.

    Nice work.

  15. #15
    Nice job. They look like Greene and Greene Craftsman style. It is a good look and very much in style.

Posting Permissions

  • You may not post new threads
  • You may not post replies
  • You may not post attachments
  • You may not edit your posts
  •