Results 1 to 12 of 12

Thread: Rebuilding a Kiyohisa oire nomi

  1. #1
    Join Date
    Feb 2004
    Location
    Perth, Australia
    Posts
    9,492

    Rebuilding a Kiyohisa oire nomi

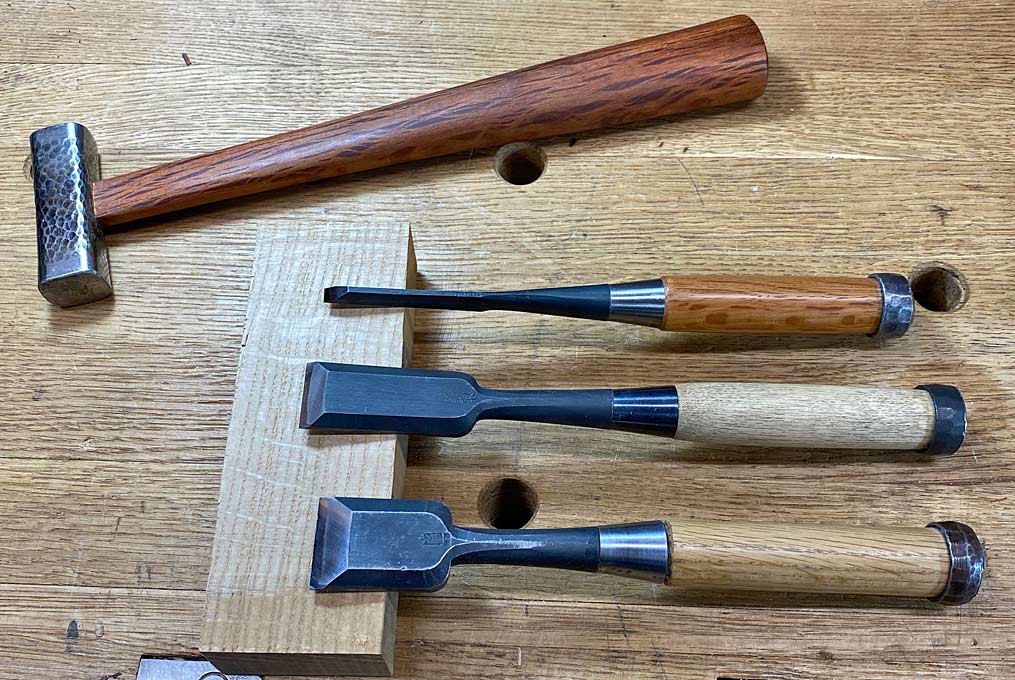
    I sort of collect ... and use ... Kiyohisa chisels. I purchased a set of slicks about 12 years ago, which were a 3 year wait. I was lucky - soon after this there was a 6 year waiting list. Unfortunately, they are now no longer being made as Watanabe Kiyoei has been very ill for some time.

    So Yamashita writes about Watanabe: https://www.japan-tool.com/nomi/Kiyo...isa_Oiire.html

    There are better nomi than Kiyohisa, that is, blades which hold a longer edge, but using these always makes me smile.

    I wanted some of the oire nomi - bench chisels - however they have become collector's tools and incredibly expensive. There are some silly prices on eBay. Not sure if they are actually sold at the asking money. I've been lucky, and managed to pick up a few - and new! - for very reasonable amounts.

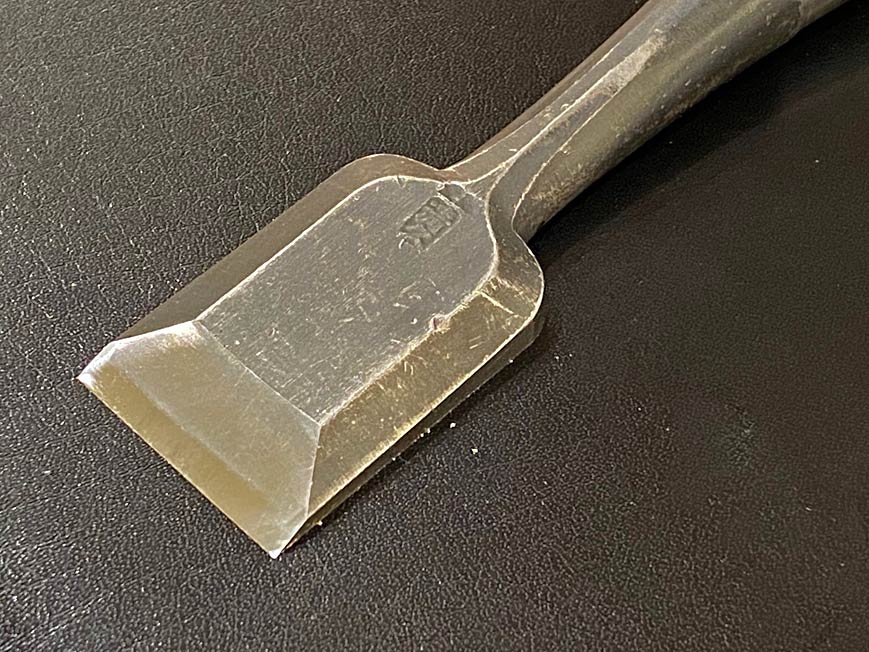
    A few weeks ago I purchased a 30mm oire nomi on eBay. It was going quite cheaply, mainly because it was 30 years old and used. It arrived yesterday, and I was disappointed. It had not been looked after. Yes, the blade was worn, but there is a lot of meat left, and it said to me that it was used well. It was smaller than expected, but not the issue on its own. It was the handle, now about 3/4" to 1" shorter than the original .. and this made it too small for my hand.

    The advert in the auction did not represent the state of the chisel accurately. I could have sent it back, but the cost of doing so was prohibitive (what has happened to US shipping costs!!!). The Seller was really a good guy. We talked about it. In the end he refunded part of the purchase price (making it even cheaper), and I decided to renovate the chisel. Perhaps restore some of it past glory?

    This is going to be one of those articles with LOTS of photos - all you wanted to know about dismantling and rebuilding an oire nomi

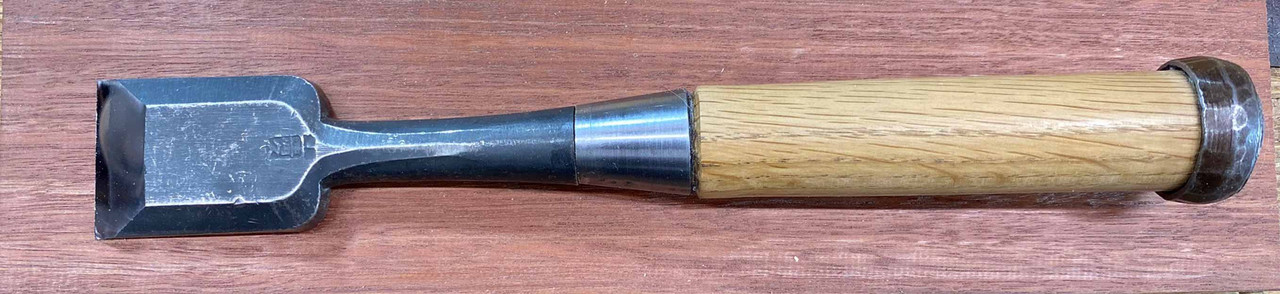
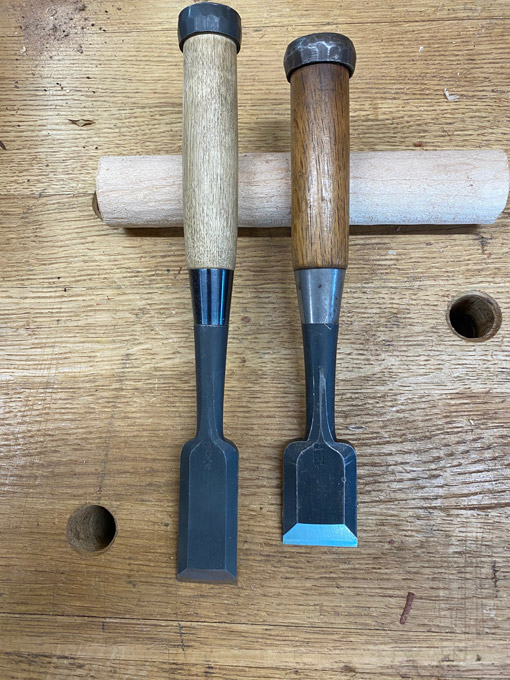
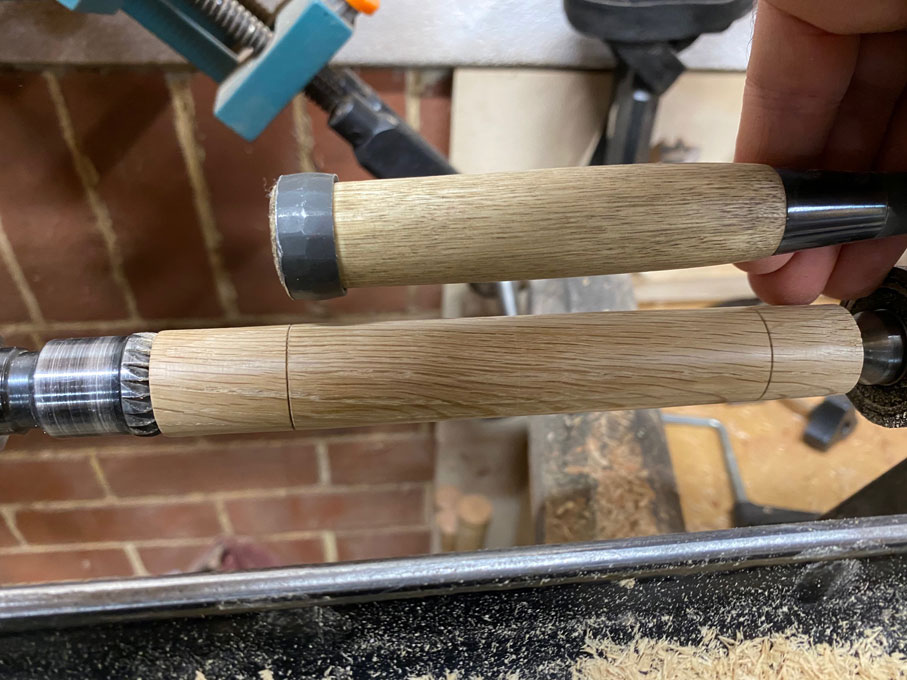
    Here is the chisel when it arrived, alongside a 24mm Kiyohisa oire nomi (on the left), which is new ...


    So ... we need to make a new handle. I have some US White Oak, which is the closest wood to the Japanese White Oak used by Watanabe among the others in my collection. That will have to do ... I can always make another handle if this does not work out.

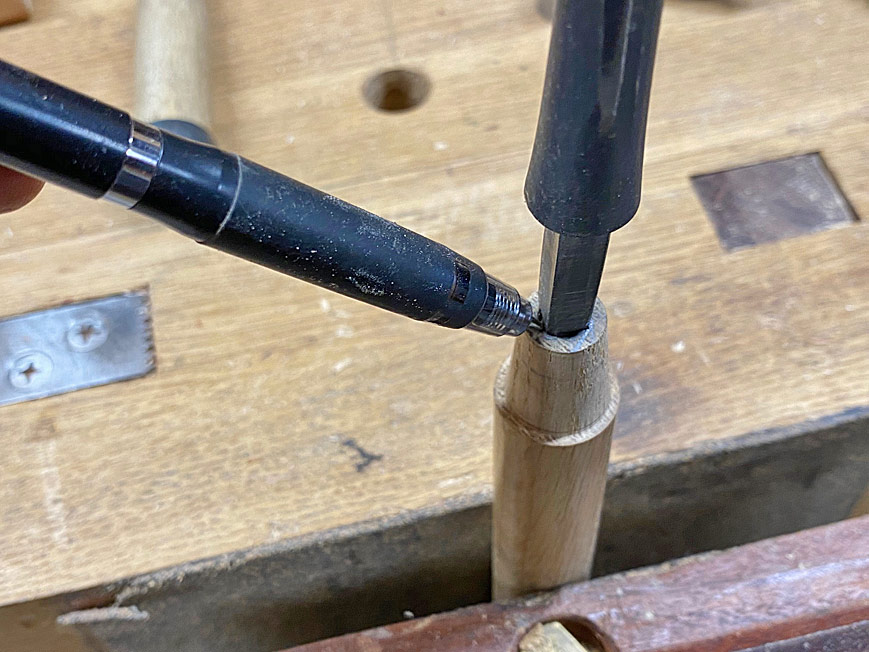
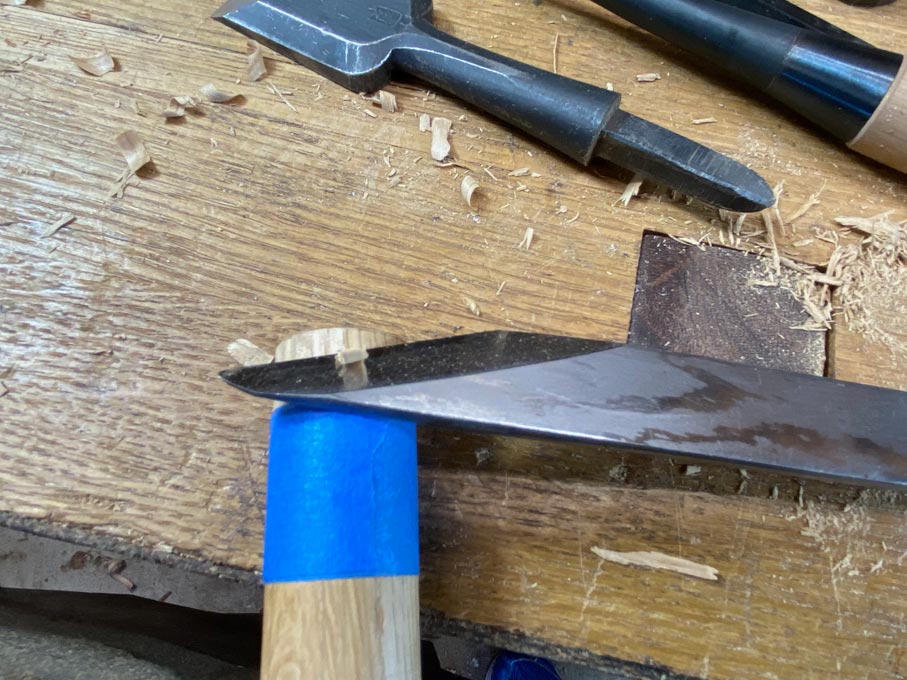
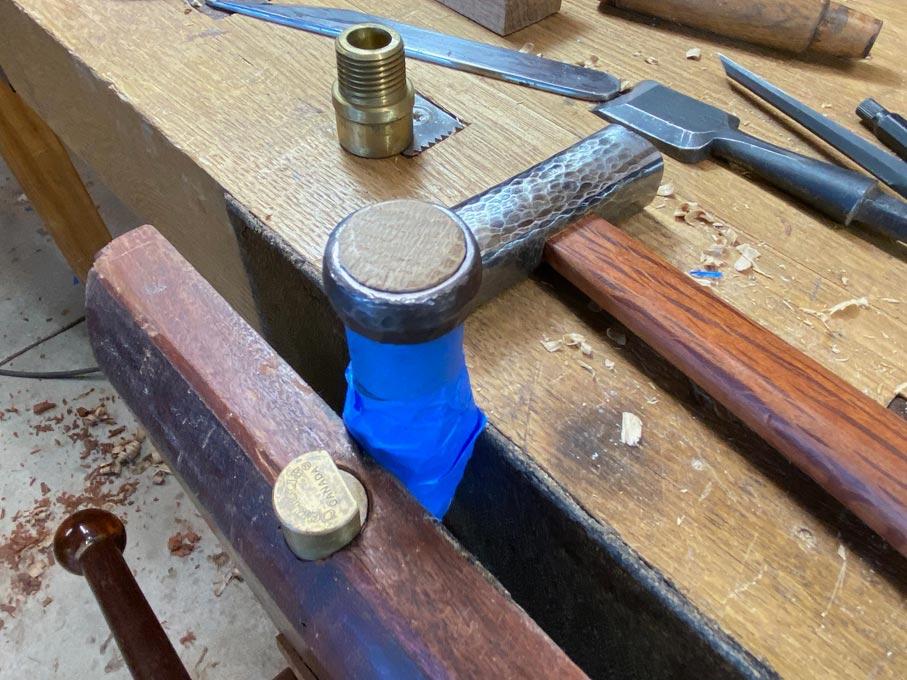
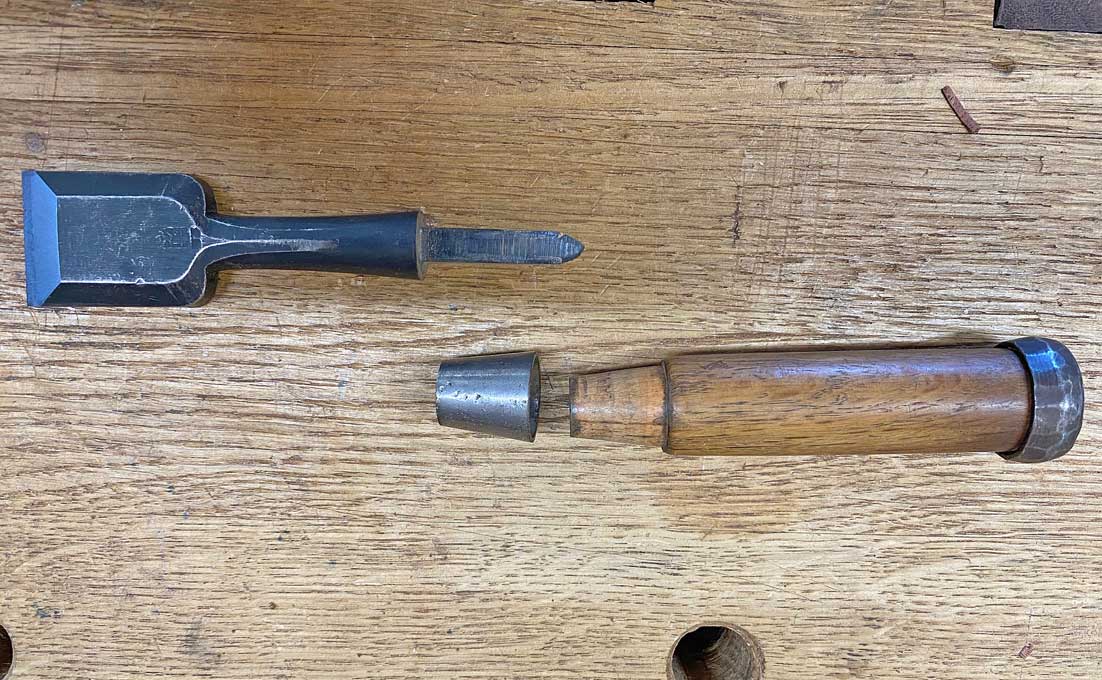
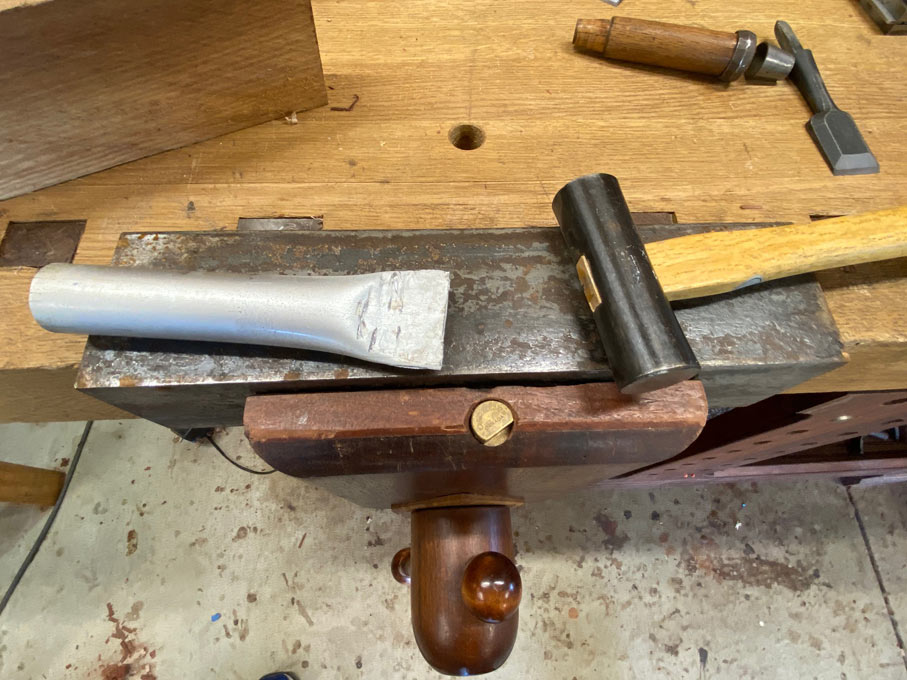
    First step is to remove the handle. These chisels are constructed with a tang and a socket. How do you get them apart? The answer is to rap the handle on a hard surface ...


    Just keep tapping. It will come apart ... eventually.


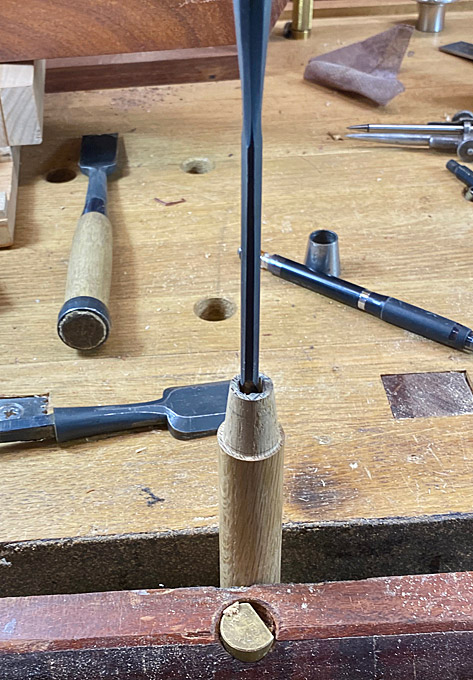
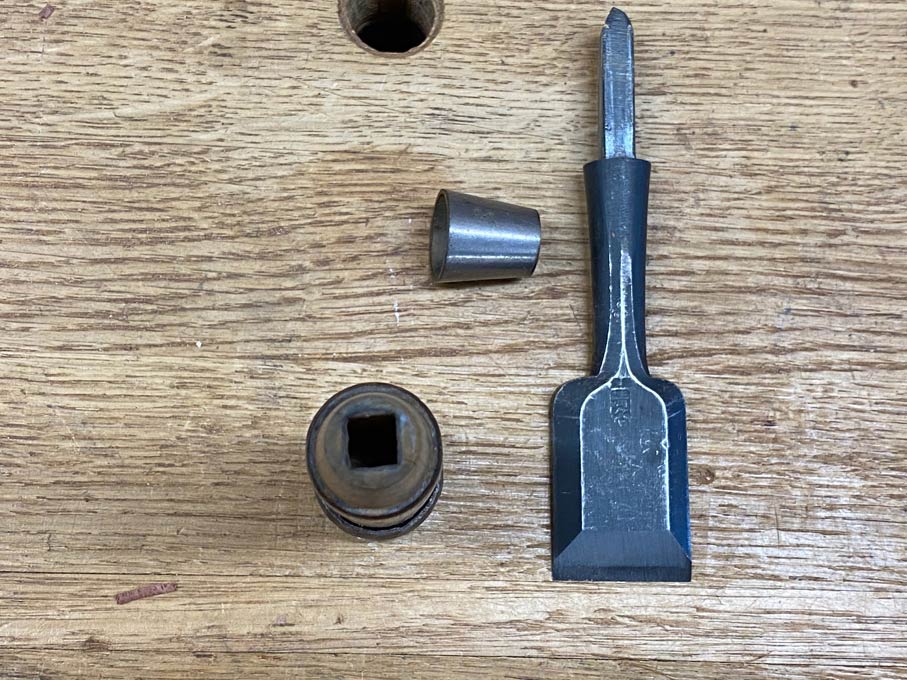
    Take note - the tag is square, as is the mortice ...


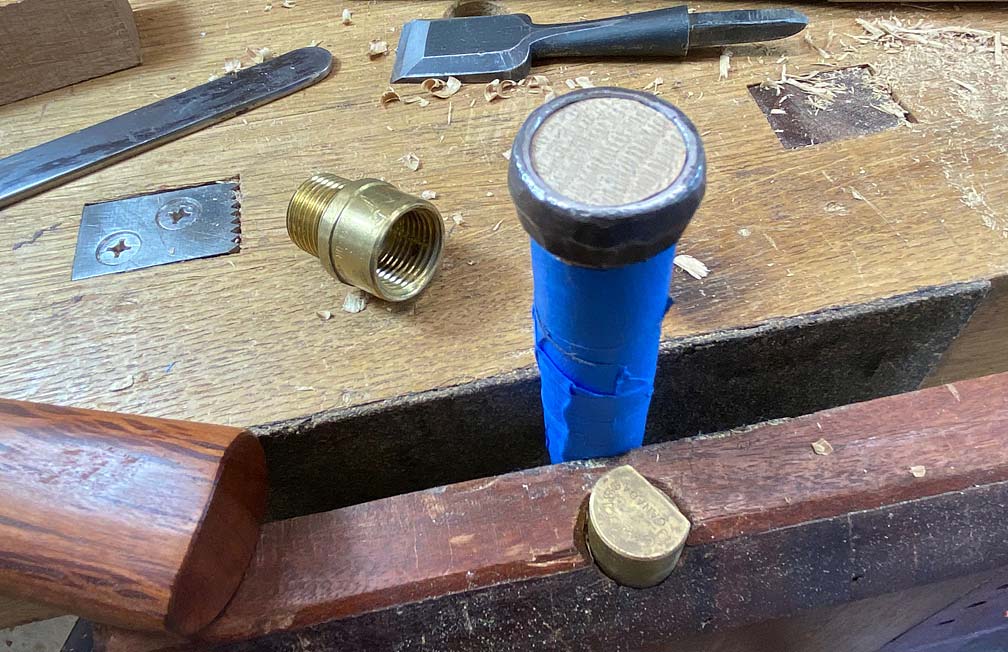
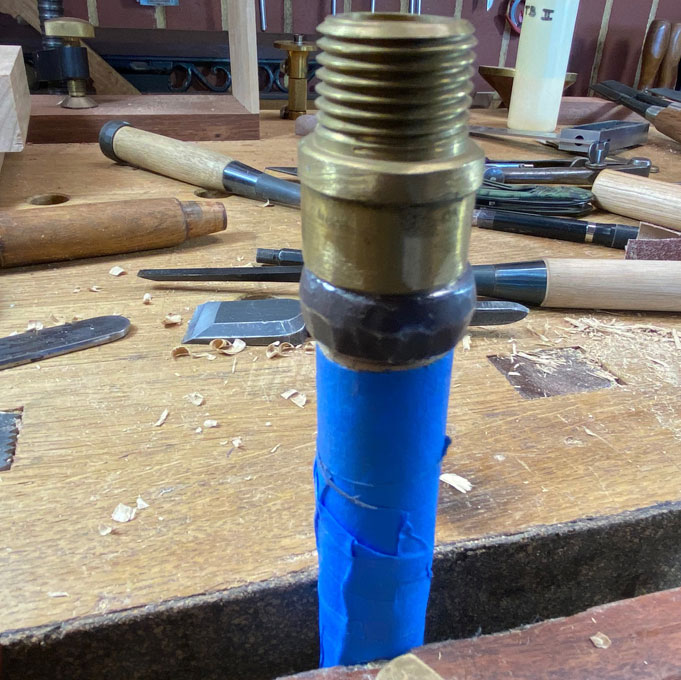
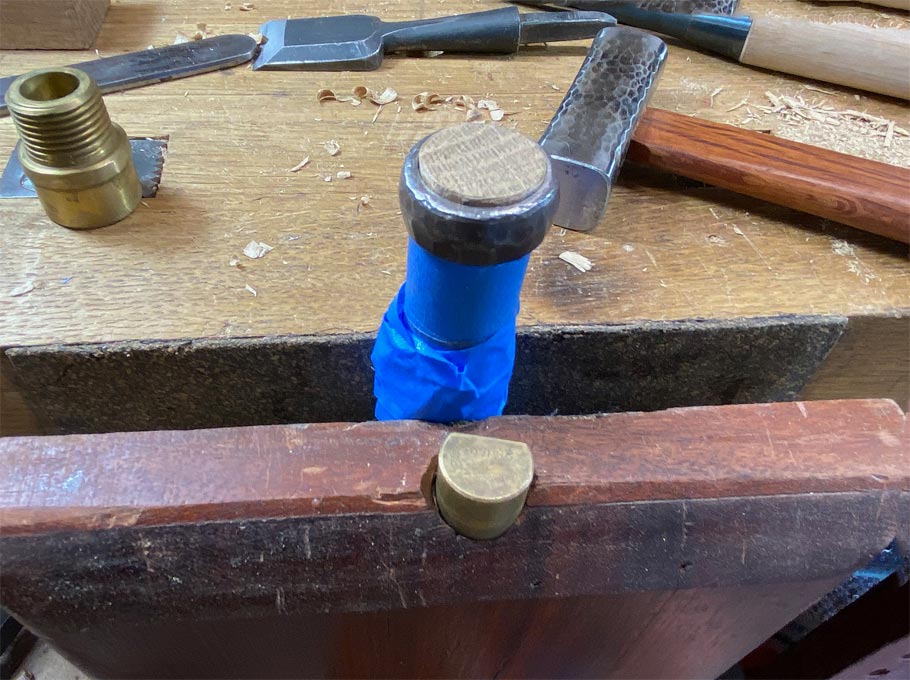
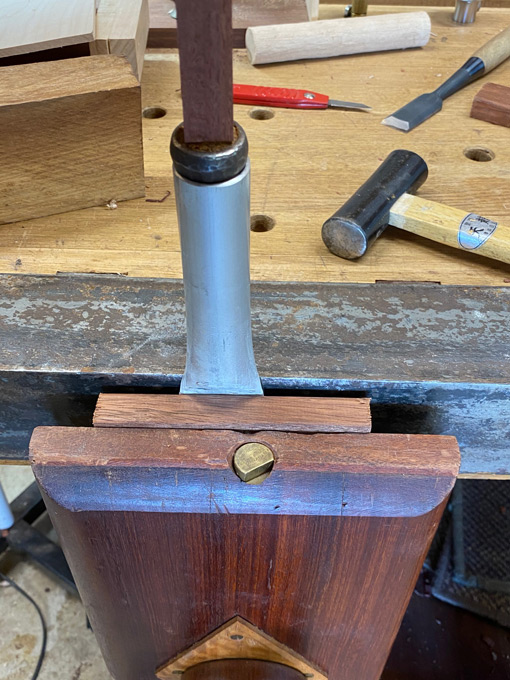
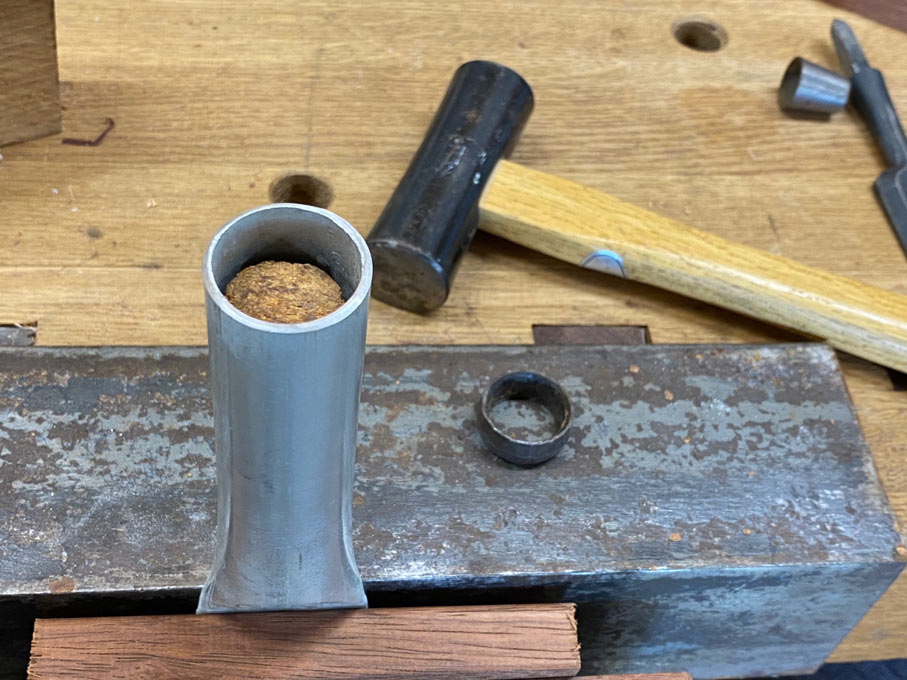
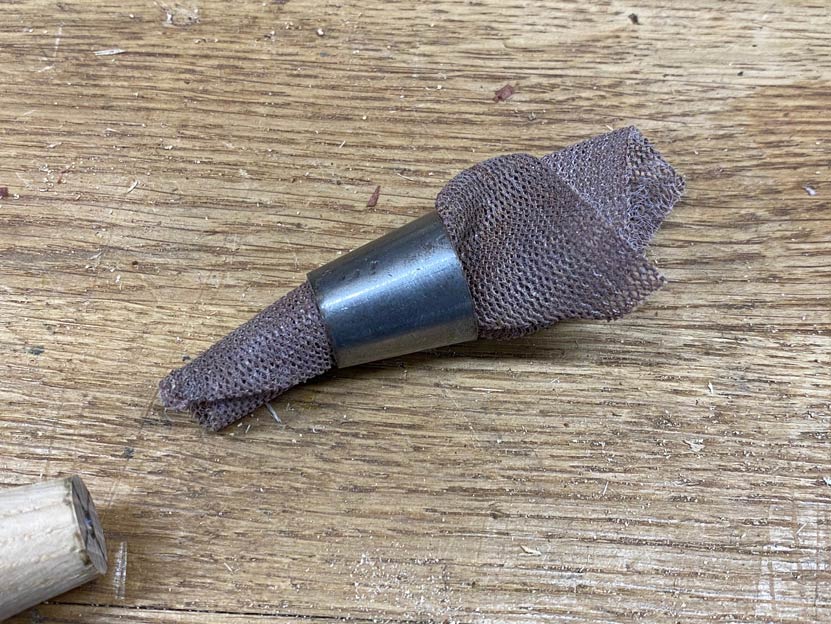
    Next: remove the ferrule. It comes off the opposite way it went on! I had an idea to make a tool to do this from a short section of aluminium tube - hammered the end flat ....


    ... then popped the handle inside, and tapped the end down ...


    ... and off came the ferrule ...


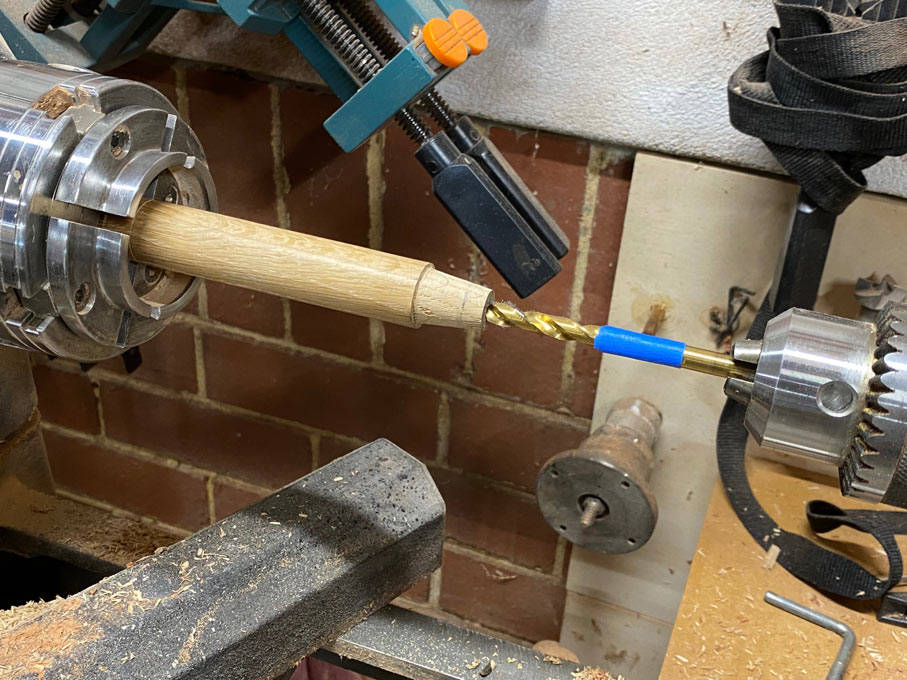
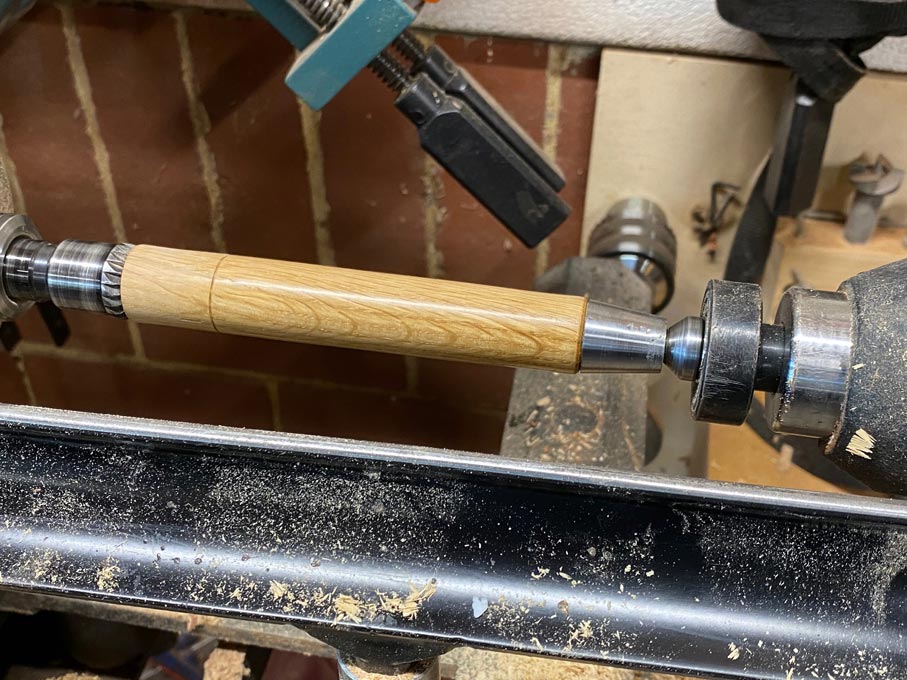
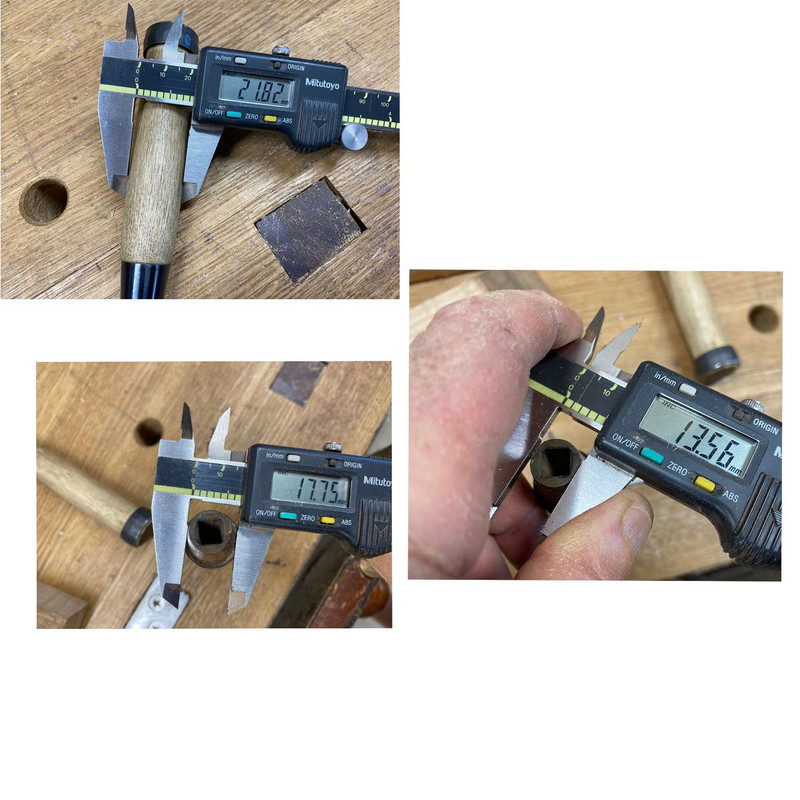
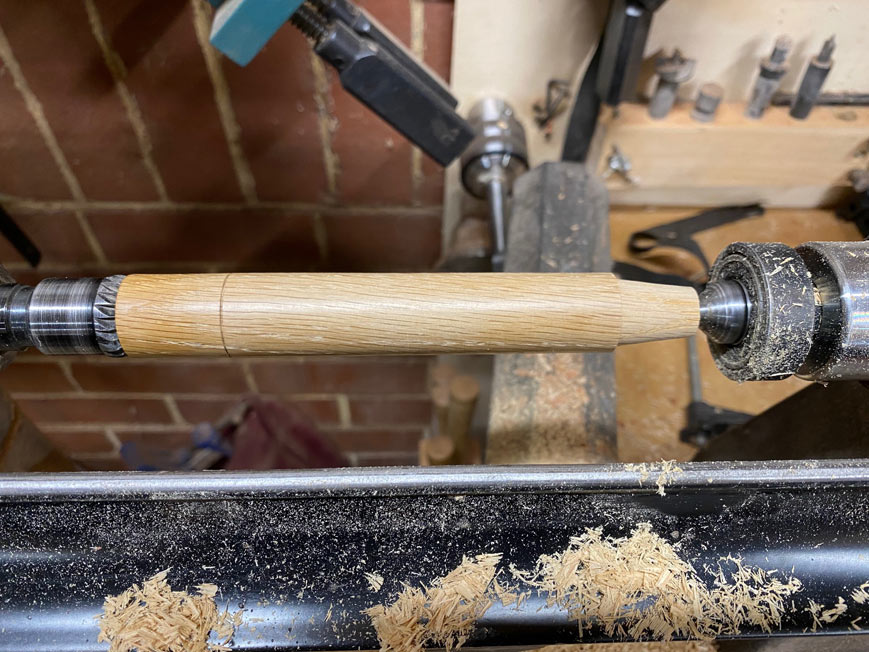
    Now we go over to the lathe. The White Oak has been turned into a cylinder, and the length of the handle marked from the 24mm Kiyohisa. I have orientated the wood until the grain runs as straight as possible ...


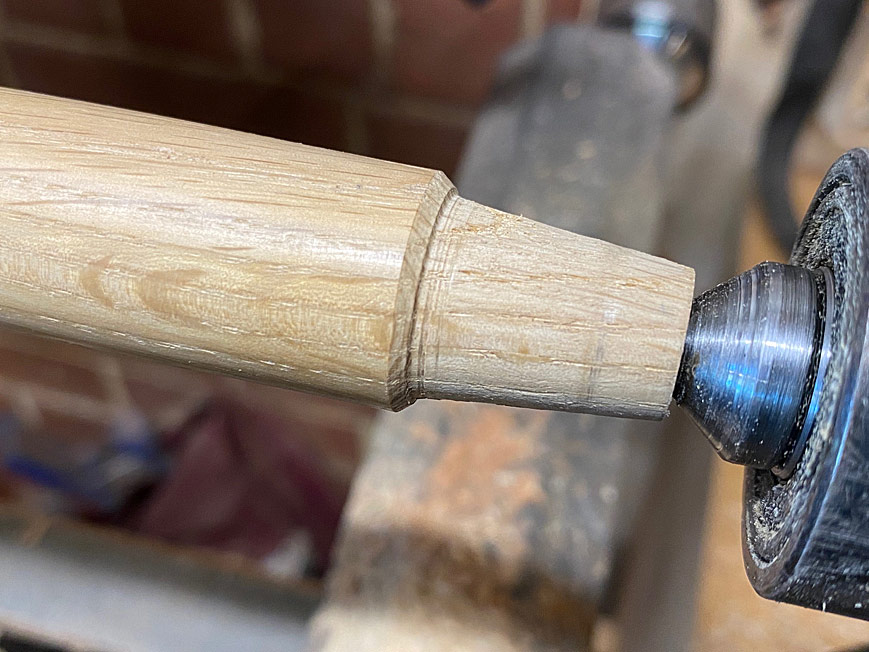
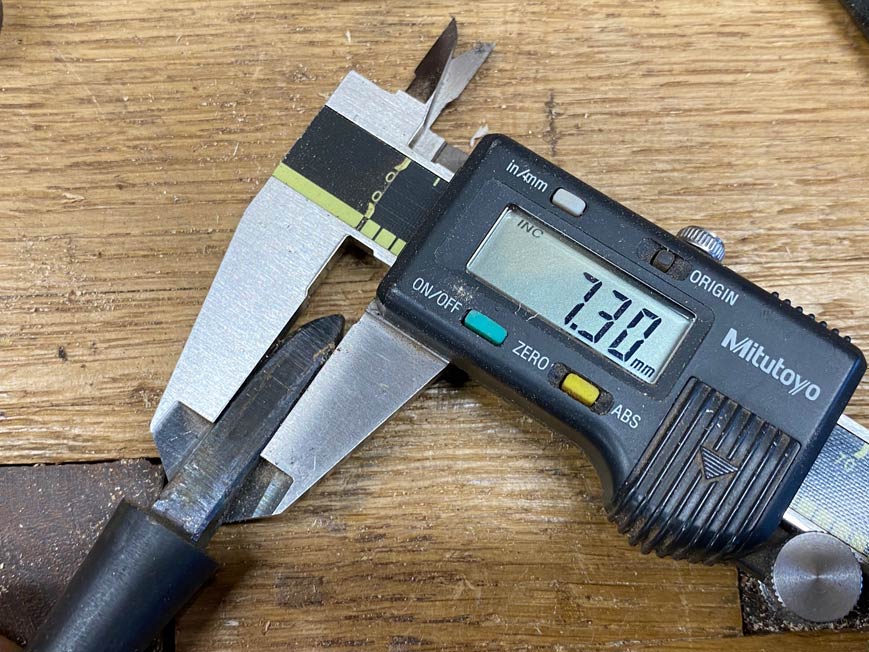
    The other measurements that are needed are the diameter of the handle, and the start and end of the tenon ...


    The tenon is turned from the latter measurements ...


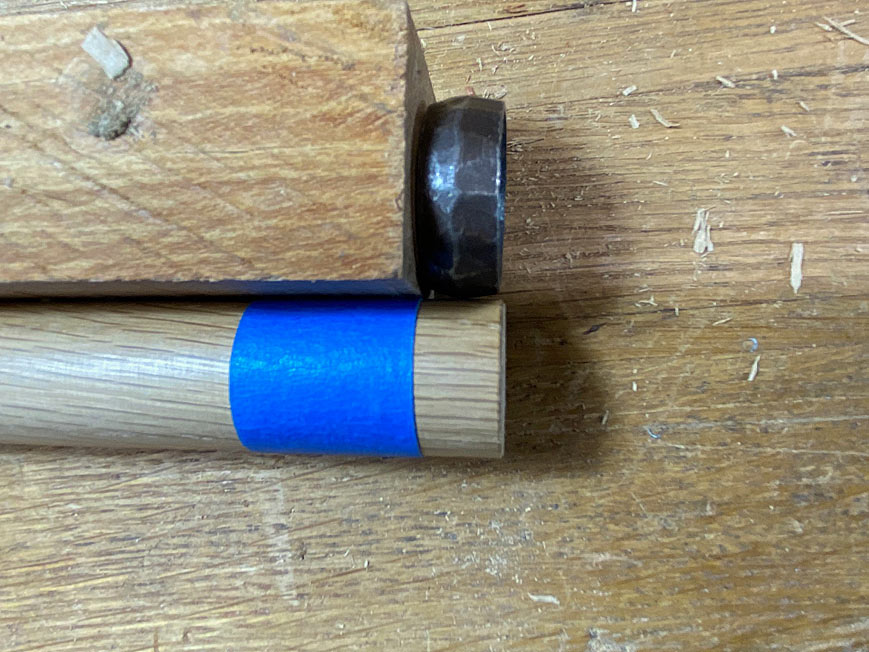
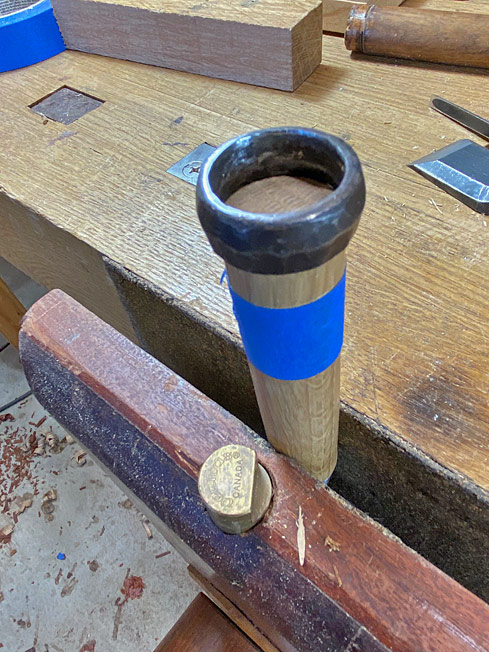
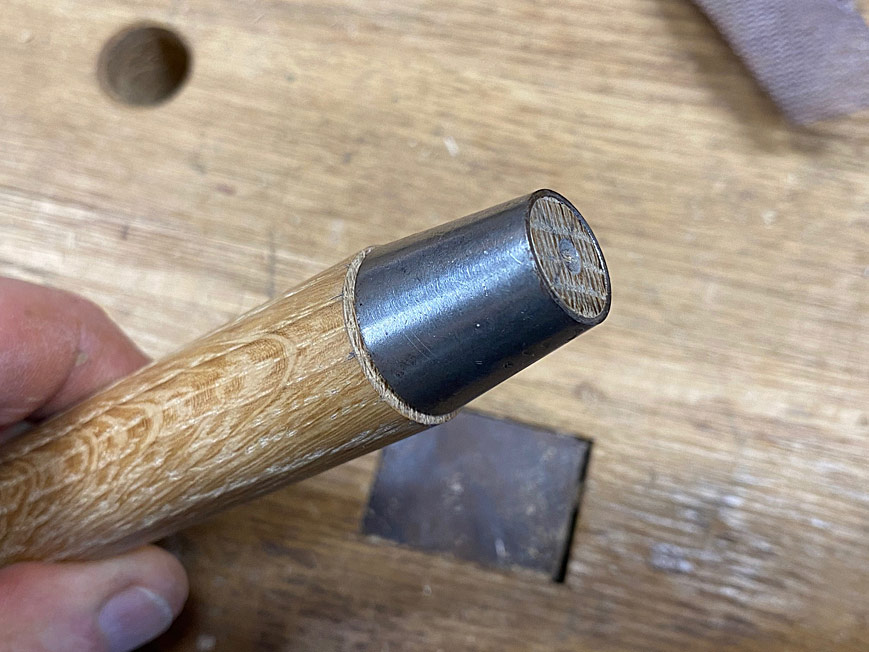
    Next, clean the inside of the ferrule. It is rusty.


    It needs to slip on firmly, and sit flush with the end of the tenon ...


  2. #2
    Join Date
    Feb 2004
    Location
    Perth, Australia
    Posts
    9,492
    Drill out most of the mortice ...


    ... and then mark and chisel out an exact fit for the tang ...


    The fit is as good as I could hope for - a little force drives it home ...


    Back to the lathe to add a small chamfer to the tenon ...


    Before the handle is cut to length, some finish is added. Initially, this was just Renaissance Wax. However, later when sharpening the blade I notice that this failed to stop the wood becoming black (as the tannin in oak is apt to do around iron filings). I returned later to re-finish the handle in Ubeaut Shellawax.


    After 30 years, the ferrule has been hammered and has flat spots. These need to be removed otherwise it will not fit over the end of the handle. I used a knife to scrape the inside of the band ...


    To re-fit the ferrule, the handle is marked off with about 2mm spare ...


    At this stage the ferrule does not fit ...


    ... and the end of the handle needs to be pared ...


    It can be hammered on until it lies flush ...


    I do not own a tool for seating the ferrule. Over the years I have set the ferrules on Japanese chisels using a brass plumbing connector ...


    Drive the ferrule down about 2mm below the end of the handle ...


    Then peen the edges of the handle over the ferrule ...


    The peened ends do not extend over the ferrule - it is the handle you hit, not the ferrule.

  3. #3
    Join Date
    Feb 2004
    Location
    Perth, Australia
    Posts
    9,492
    All put together ...


    The blade is sharpened. Japanese blades are a composite of a hard steel layer, the “hagane”, and a softer iron body called “jigane”. In cheap or poorly made blades, the hagane is thin and uneven. The hagane in the Kiyohisa is thick and even ...


    Three Kiyohisa oire nomi (6mm, 24mm and 30mm): US White Oak, Japanese White Oak, and Japanese Red Oak ...


    I am happy with the new addition.

    Regards from Perth

    Derek

  4. #4
    Join Date
    Oct 2004
    Location
    SoCal
    Posts
    866
    Some really great photography of a very nice save. Now you need a project on which to use it.

  5. #5
    Join Date
    Feb 2004
    Location
    Perth, Australia
    Posts
    9,492
    Thanks Curt!

    Project? What is that?

    Regards from Perth

    Derek

  6. #6
    Join Date
    Sep 2007
    Location
    Longview WA
    Posts
    27,443
    Blog Entries
    1
    Great work and write up as usual Derek.

    It makes me appreciate my socket chisels even more for the ease of rehandling.

    jtk
    "A pessimist sees the difficulty in every opportunity; an optimist sees the opportunity in every difficulty."
    - Sir Winston Churchill (1874-1965)

  7. #7
    Join Date
    Feb 2004
    Location
    Perth, Australia
    Posts
    9,492
    Jim, forged socket chisels (such as on many vintage chisels) are slightly irregular internally. This makes them more work to fit. On the other hand, machined sockets (such as LN) are regular and interchangeable. I suspect that the Japanese use common or mass-made ferrules, which is similar to LN.

    Regards from Perth

    Derek

  8. #8
    Join Date
    Sep 2007
    Location
    Longview WA
    Posts
    27,443
    Blog Entries
    1
    Quote Originally Posted by Derek Cohen View Post
    Jim, forged socket chisels (such as on many vintage chisels) are slightly irregular internally. This makes them more work to fit. On the other hand, machined sockets (such as LN) are regular and interchangeable. I suspect that the Japanese use common or mass-made ferrules, which is similar to LN.

    Regards from Perth

    Derek
    It is just my opinion but it seems the machined sockets (such as LN) may be the cause of their handles slipping off at times. The beautifully smoothed surface doesn't grip the handle as well as a rough surface.

    The handles of mine that have slipped led me to a way of tuning the fit. Older socket chisels are usually 'dirty' inside the socket. Turning the handle in the socket reveals the spots on the handle that are a hair too high. A very light rasp used to remove the oxidation from the wood quickly leads to a very tight fitting interface. None of my sockets have come off a chisel in quite a while now. Though it is still a good idea to treat them as if they could fall off.

    If a socket is deformed, one needs to pay attention to the orientation to affect a good, tight fit.

    jtk
    "A pessimist sees the difficulty in every opportunity; an optimist sees the opportunity in every difficulty."
    - Sir Winston Churchill (1874-1965)

  9. #9
    Enjoyed that Derek. Thanks for posting. Enjoy your "new" tool!
    Fred
    "All that is necessary for the triumph of evil is that good men do nothing."

    “If you want to know what a man's like, take a good look at how he treats his inferiors, not his equals.”

  10. #10
    Join Date
    Feb 2015
    Location
    North Jersey
    Posts
    132
    A labor of love. Thanks for the Zen moment.

  11. #11
    Thats a nice looking chisel! I hope it works every bit as good as it looks or even better for you. Also, a little off topic but what's the wood your hammer handle is made of? Buloke? Its beautiful!
    Last edited by Aiden Pettengill; 01-24-2021 at 7:08 PM.
    "The key to a long life is when you start to die, don't"

  12. #12
    Join Date
    Feb 2004
    Location
    Perth, Australia
    Posts
    9,492
    Thanks Aiden

    The one unusual feature - a small concern - about the blade is that it was ground and honed at 25 degrees. It is more usual for a chisel like this to have a 30 degree bevel. I will leave it as is and see how it goes. To change to 30 degrees would lose more steel. If there is an issue with edge-holding when chopping, I shall use the Unicorn Profile.

    The gennou handle is one I made out of West Australian Sheoak. Buloke has a similar appearance. Both are from the Casuarina family. Both are very hard (Buloke is reputed to be the hardest wood in the world).

    Regards from Perth

    Derek

Posting Permissions

  • You may not post new threads
  • You may not post replies
  • You may not post attachments
  • You may not edit your posts
  •