Page 1 of 2 12 LastLast
Results 1 to 15 of 24

Thread: Minimax wiring advice needed

  1. #1

    Minimax wiring advice needed

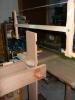
    Took delivery of a SC4E and setting it up. Planned to use the circuit my Delta Unisaw was on as the Minimax is going where it was stationed. It's in a small industrial space that electricians wired and on a 30 amp breaker. The plate on the SC4 has 20 amp but I have more of a question regarding the wiring on the machine. I have the 2 hot wires and a ground. The manual (see pics) states to wire the 3 phases to L1, L2, L3. The manual was originally in Italian and translated so some of the wording is, of course, not the same as English.

    So what would be the "3 phases"? I'm no electricians but can follow directions. There is no diagram on the saw itself, only the box as in the photos and a plate with the numbers on it. 230 60. If anyone that has a similar machine would let me know I would appreciate it.
    Attached Images Attached Images

  2. #2
    I think you have a single phase 220 volt machine. Based on the QC inspection sticker that is pictured plus you can see a clipped white wire in the connection box.

  3. #3
    To the OP, it’s just two hots and a ground (yellow/green). I sold many 1-phase SC4’s. Hope this helps,

    Erik

  4. #4
    Quote Originally Posted by Dale Dumond View Post
    I think you have a single phase 220 volt machine. Based on the QC inspection sticker that is pictured plus you can see a clipped white wire in the connection box.
    Yes, it is single phase.

    Thanks Erik, you've always been helpful and gave good advice pre-purchase- more advice than the SCM folks .

    So...the 2 hots from me should go on the same spots on the box as the saw is wired from the factory. I mean directly beneath on l! and L4?

  5. #5
    Join Date
    Mar 2003
    Location
    SE PA - Central Bucks County
    Posts
    65,885
    Yes, the colors will be different than typical for the, US, but hot-to-hot for each of the two legs and connect the ground to the appropriate terminal for that. I found all of my MiniMax machines to be easy to readily identify the correct terminals.

    And congratulations on that new machine! It's a great one.
    --

    The most expensive tool is the one you buy "cheaply" and often...

  6. #6
    Quote Originally Posted by Jim Becker View Post
    Yes, the colors will be different than typical for the, US, but hot-to-hot for each of the two legs and connect the ground to the appropriate terminal for that. I found all of my MiniMax machines to be easy to readily identify the correct terminals.

    And congratulations on that new machine! It's a great one.
    Thanks Jim. The box is easy to get to and simple, just wanted to make sure the wires went to the same ligs even though it seems obvious now that is the only way they would work. I'm excited to get it setup and start the fun.

  7. #7
    Join Date
    May 2014
    Location
    Santa Fe, NM
    Posts
    260
    I wired mine up yesterday. I put black to L1, White to L4 and ground to ground. I'm running it on a 30 amp breaker.
    SC4E.jpg

  8. #8
    Quote Originally Posted by Mick Simon View Post
    I wired mine up yesterday. I put black to L1, White to L4 and ground to ground. I'm running it on a 30 amp breaker.
    SC4E.jpg
    Thanks Mick. They electricians here just used the same color cable and marked the ends as hot, with green tape on the ground. I did wire them to L1 and L4 and all is good.

    I do now have questions about using the Dado set though. I will start a new thread since I am confused about the throat plate and see it just has to be left off- seems rather crude.

  9. #9
    Join Date
    Dec 2010
    Location
    South Coastal Massachusetts
    Posts
    6,824
    Quote Originally Posted by Mick Simon View Post
    Stealth Inca flex.

    Your shop tools are worth more than my 3 cars, altogether.

  10. #10
    Join Date
    Mar 2003
    Location
    SE PA - Central Bucks County
    Posts
    65,885
    There is a separate throat plate for dado work...it's optional and pricy. Make your own. You may want to also make a zero clearance plate for normal non-beveled cutting, too. It cleans things up when you're not using scoring and also improves below the blade dust collection.
    --

    The most expensive tool is the one you buy "cheaply" and often...

  11. #11
    Quote Originally Posted by Jim Becker View Post
    There is a separate throat plate for dado work...it's optional and pricy. Make your own. You may want to also make a zero clearance plate for normal non-beveled cutting, too. It cleans things up when you're not using scoring and also improves below the blade dust collection.
    I couldn't even find one listed anywhere. You would think that having the 'dado package' listed would mean it came with the throat plate. Least it's an easy one to make. I'll do the zero clearance at the same time.

  12. #12
    Join Date
    Mar 2003
    Location
    SE PA - Central Bucks County
    Posts
    65,885
    Yes, the dado insert is about $300 from Italy. Make your own. The biggest challenge is thicknessing the material. Sam Blasco made inserts years ago from phenolic. My zero clearance was made from purpleheart as I had some nice scraps and it's stiff. I snuck up on the thickness via my drum sander, but there are multiple ways to do that.
    --

    The most expensive tool is the one you buy "cheaply" and often...

  13. #13
    Thanks Jim. I have made them before and the drum sander makes it pretty easy to get them the correct thickness. I can spend a little time to save $300- and the months and months to get SCM to do anything.

  14. #14
    Join Date
    Mar 2003
    Location
    SE PA - Central Bucks County
    Posts
    65,885
    You'll be able to use the OEM insert as a pattern to lay out your additional inserts. These are different than North American style saws, however, and you need to drill and countersink for the wide flange 4mm hex screws precisely. The critical thickness is the part that overlays the ledges where the screws go in. Since the inserts are very long and no supported on the waggon side, adding a little reinforcement on the bottom is a good idea, at least for the ZCI version and in front and behind the opening for a dado version...like the aluminum OEM inserts are configured.
    --

    The most expensive tool is the one you buy "cheaply" and often...

  15. #15
    my SCM saw has a metal insert. Its not straight so in use its crap, likely straighter when new.

    More important someone was not thinking had the top been made with tabs then you can have fine allen screws and dial the insert in for flush, if it is straight. Saw came with Wooden ones a previous owner made. Have to figure a tab thing with not drilling the top if possible. Then have the allen screw adjusters if possible. In my cabinet saws those inserts can at times rattle.

Posting Permissions

  • You may not post new threads
  • You may not post replies
  • You may not post attachments
  • You may not edit your posts
  •