Results 1 to 15 of 15

Thread: Cabinet Secretary Build – Lots of Pics

  1. #1
    Join Date
    Feb 2011
    Location
    Carlsbad, CA
    Posts
    2,230
    Blog Entries
    2

    Cabinet Secretary Build – Lots of Pics

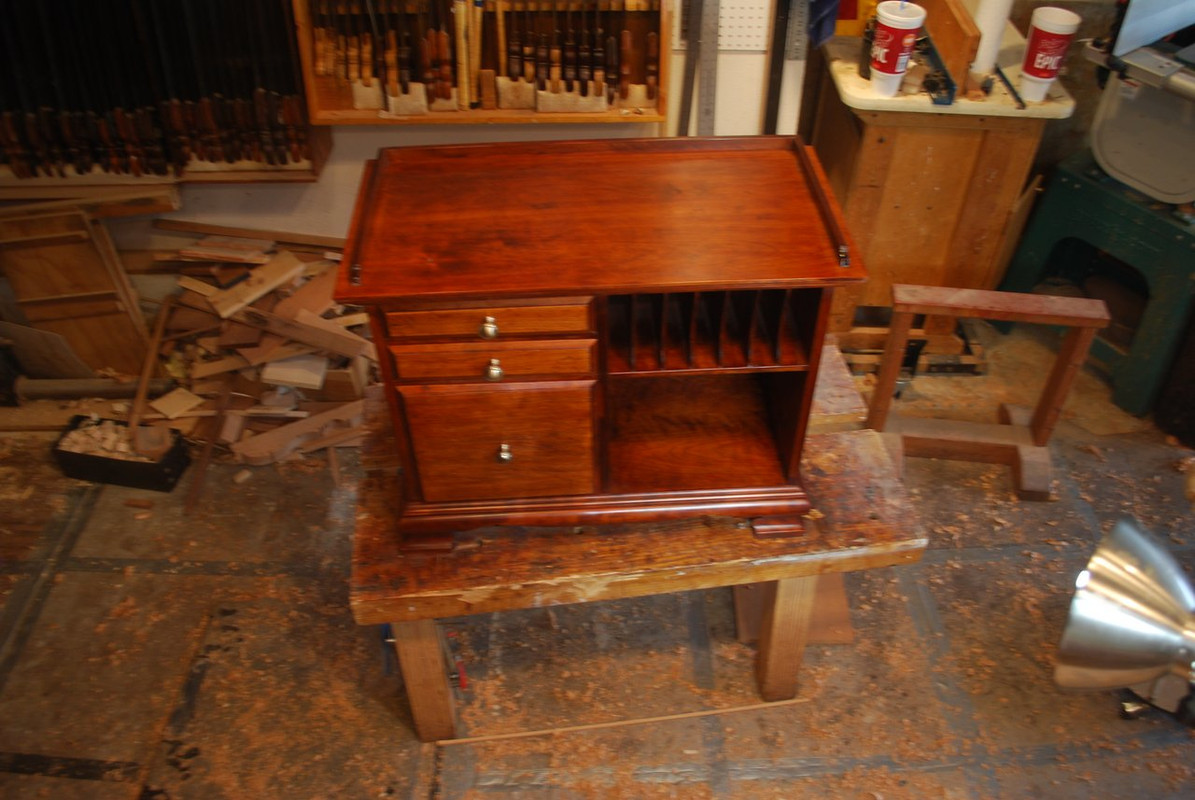
    My 88-year-old Mom is still a practicing tax accountant (I know it’s crazy – can’t get her to stop). She recently had a knee replacement and these days can’t go into the office and spends most of her time in the easy chair in the living room. She wanted a cabinet she could keep next to her chair to organize her work. This cherry cabinet is ~ 30” tall x 30” wide by 18” deep. She wanted a bank of drawers that can accommodate hanging file folders on the left side and a pigeonhole section for correspondence and space for binders on the other side. I couldn’t find a good existing example so came up with this design on my own – which is usually a recipe for disaster!

    I’ll try and keep the words to a minimum and let the pictures speak for themselves.

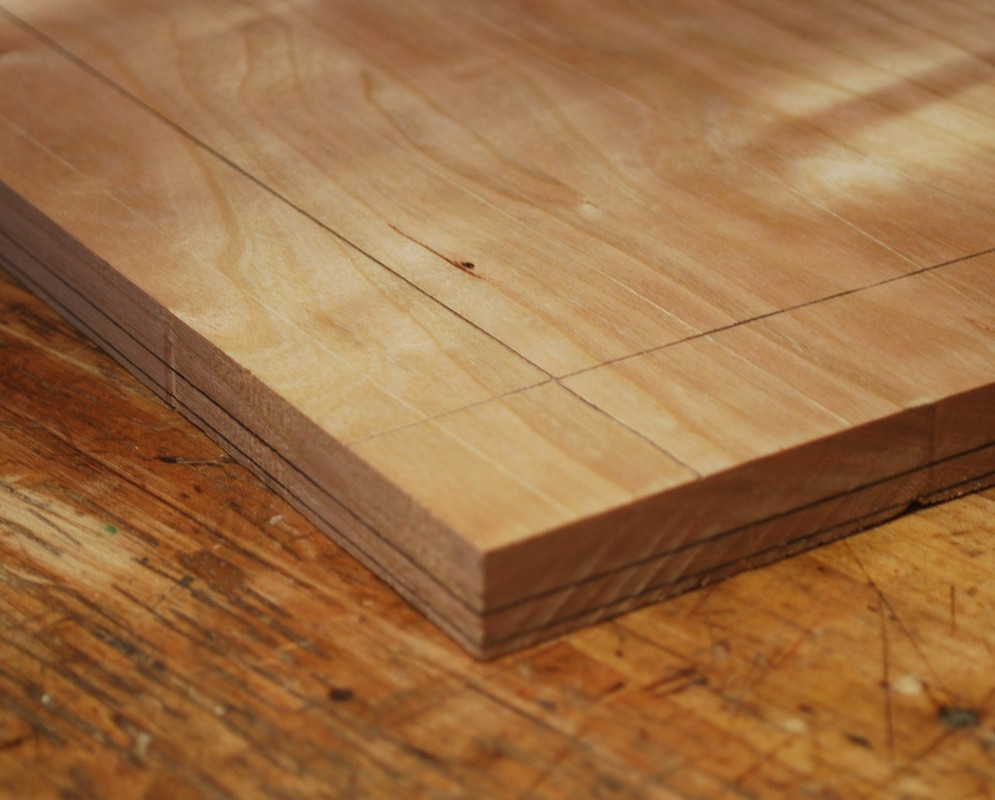
    Carcass sides are frame and panel construction – one of my favorite hand tool jobs. To me handmade frame and panel construction is pretty easy to differentiate from the IKEA version. I like the challenge of trying to execute all the details – wider bottom rail, proportionally sized sides/top, tight miters and consistent reveals to get a nice final result. I like to start with interior frame molding and dado for the panel, which corresponds to the layout for the M & T’s. My typical mistake, which I absolutely made here, is making the molding too deep which creates a weak mortise too near the edge of the frame. IMHO, better to go with shallower molding and more centered mortise – way easier to align the mortise with dado groove.


    For delicate cuts like trimming this miter, I like Japanese pull saws- light and easy guide.


    Mitering moldings – I find it easier to use a guide block/chisel to sneak up on final dimension. If you go too far there’s really no great recovery


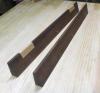
    M & T’s: because I want the shoulders of the tenons to close nicely when the frame is assembled, go to the extra effort of paring a guide ramp for the saw next to the layout line. To compensate for my earlier layout mistake, I chop the mortise with Stiles clamped inside of vice to avoid blow out. Old school pig sticker Mortice chisel are still my favorite for levering out chips.


    Last edited by Mike Allen1010; 12-30-2020 at 4:43 PM.

  2. #2
    Join Date
    Feb 2011
    Location
    Carlsbad, CA
    Posts
    2,230
    Blog Entries
    2
    Panels: dimensioning panels seems easy but getting it exactly right is critical so the frame comes together tightly and leaves enough room for the panel to expand without rattling. My process is: surfacing, jointing reference edge. Small #3, #1 planes are good for surfacing "hollows" in the surface that would otherwise require removing a lot of surrounding material.


    layout final length and width,


    saw to length,


    Plane end grain in front vice where extra width mitigates spelching


    finally saw to final width


    Raising panels: layout, establish the field with fenced rabbit plane, remove the bulk of the waste with Jack plane and finalized bevel with block planes.


    Opps! what's wrong with the F&P on the right? Classic "I'm in a hurry" mistake- yikes I hate when that happens!

    Last edited by Mike Allen1010; 12-30-2020 at 4:51 PM.

  3. #3
    Join Date
    Feb 2011
    Location
    Carlsbad, CA
    Posts
    2,230
    Blog Entries
    2
    Base: because this is overall cabinet design is fairly simple design, I wanted to add some curves to the base. My approach is to:

    1) Figure out what thickness of stock you need that allows S curved face profile and enough width left flat on top to accommodate a smaller “jointing” molding

    2) Create a template – I like poster board I can cut with an X-Acto knife. I did buy the links into equal segments and basically design all the curves with segments of a circle.


    3) Drill holes in the tightest corners and saw out profile with saber saw. I’m too old to scroll saw 8/4 stock.


    4) Smooth curves.


    5) I used a router table and Cove bit to rough out most of the waste and finished with round plane and scrapers.


    Once the molding is complete I miter the corners and create rabbits for reinforcing corner blocks. For me gluing/clamping miters is always dicey. Lately I relied on superglue to get the miters correctly lined up and then adding strength with glued/screwed corner reinforcement’s.


  4. #4
    Join Date
    Feb 2011
    Location
    Carlsbad, CA
    Posts
    2,230
    Blog Entries
    2
    I joined the carcass side frames to bottom and two top pine stretchers with dovetails that will be covered with moldings. This is probably a poor decision – cutting the pins in the long grain in the bottom frame rail made them very weak. A better choice would have been either simple rabbits or much larger tails.


    Because the two Pine top rails will be hidden I could afford to focus a bit more on speed and less on accuracy cutting the dovetails. For me this means sawing dovetails in both boards at the same time and stacking the pieces to chop out the waste.


    Cutting stopped dadoes on the interior of the carcass for vertical and horizontal dividers. Because these dadoes are small 1/8”square it was easier to cut them by hand.


    Assembled the carcass with internal vertical divider and measured width of dividers to the bottom of the dadoes.


    I slide in the horizontal dividers from the back and leave them a little proud at the front of the carcass so I can trim them flush after assembly.


    I shaped multiple curved pigeonhole dividers together for consistency.


  5. #5
    Join Date
    Feb 2011
    Location
    Carlsbad, CA
    Posts
    2,230
    Blog Entries
    2
    With carcass assembled and base attached, added additional small molding to join the base to the carcass. Probably should’ve been a little bit narrower.


    In gluing up stock for drawer fronts I miscalculated and ended up short. Rather than wait around I used superglue to quickly glue up required stock – hope that works out!


    Created a raised field for drawer fronts and dovetail drawer sides and back.


    I used to make the secondary drawer components out of poplar, and for a larger case piece I probably still would. Because these drawers are relatively small, it was way easier and more fun for me to make these out of pine.


    I’ve been having good luck getting my chisels really sharp in record time with the unicorn technique described elsewhere here on SMC. To speed up chopping I deep in the marking gauge baseline with an X-Acto knife on the show side and just chop straight down all the way through.


    For the half blind DTs into the drawer fronts, I used a trim router to remove the bulk of the waste (thank you Derek for the suggestion!) And then pair from both sides to final dimensions. Still takes me longer than I would like.


    Because the back will be exposed I made 3/8 thick cherry frame with half lap joints – pretty fun hand tool job just saw & chisel, routed rabbit in the back for 1/8” inch thick plywood panels.


  6. #6
    Join Date
    Feb 2011
    Location
    Carlsbad, CA
    Posts
    2,230
    Blog Entries
    2
    Personally I love the natural look of cherry with a shellac finish and the way it darkens over time. However my Mom wanted something “darker” to match some existing pieces so I used a water-based dye, which naturally came out blotchy. Pretty disappointing. Polyurethane topcoat with some dark wax which helped get more of an antique look.


    Thanks for looking! All the best, Mike

  7. #7
    Looks good Mike! Love the base molding too!
    "All that is necessary for the triumph of evil is that good men do nothing."

    “If you want to know what a man's like, take a good look at how he treats his inferiors, not his equals.”

  8. #8
    Join Date
    Mar 2015
    Location
    SE Michigan
    Posts
    3,225
    Love doing projects for others...especially family. Since most of us have run out of room for stuff, it’s nice to keep building. Frame and panel is on my bucket list...excellent hand tool job on that. Base is amazing. And anything with pigeon hole dividers is just pure classic. I just have to build something someday with those.

    Nice design and well done, Mike. And complements on the tool sharpening...pine doesn’t do well with dull edges.

    Look forward to the finish. Your Mom’s going to love it. And bless her for still working.

  9. #9
    Join Date
    Oct 2004
    Location
    SoCal
    Posts
    866
    Wpw! Need to spend more time with those pics

  10. #10
    Join Date
    May 2015
    Location
    Ingleside, IL
    Posts
    1,417
    Beautiful hand work Mike. Really well done. Love the base
    Stand for something, or you'll fall for anything.

  11. #11
    Join Date
    Nov 2015
    Location
    Freiburg, Germany
    Posts
    223
    Your build threads are always a delight Mike. Absolutely top of this forum. Thanks for sharing your heavy load of progress pictures!

  12. #12
    Join Date
    Aug 2014
    Location
    Silicon Valley, CA
    Posts
    1,048
    Wow, just wow. Outstanding Mike.

  13. #13
    Join Date
    Mar 2015
    Location
    SE Michigan
    Posts
    3,225
    Looks like I jumped in before the rest of the post. Great looking piece, Mike. I’m with you, not a fan of coloring wood, but sometimes the “client” wants what they want. It turned out really well. Love all the details...even the molded folder holder rails. Nice touches.

  14. #14
    Join Date
    Sep 2003
    Location
    South Carolina
    Posts
    1,429
    Beautiful job, Mike. Love the execution with all the hand work.

  15. #15
    Join Date
    Jan 2010
    Location
    Lafayette, Indiana
    Posts
    1,378
    Very nice job Mike. I’m sure the finish looks better in person. Digital cameras can be very harsh critics.

Posting Permissions

  • You may not post new threads
  • You may not post replies
  • You may not post attachments
  • You may not edit your posts
  •