Results 1 to 13 of 13

Thread: Stringing and cuffs

  1. #1
    Join Date
    Mar 2015
    Location
    SE Michigan
    Posts
    3,225

    Stringing and cuffs

    Making some progress. The stringing has been completed, the ovals glued in, and the ebonized veneer has been glued in place.

    A836588D-D565-40AB-B6F5-1E3B842DF9B0.jpg

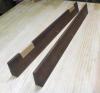
    Next up was making the grooves for the cuff banding. I first referenced off the bottom of the leg with a marking gauge and made a tick mark at each corner.

    453C4217-A351-4EF8-A9DE-E975FB41B832.jpg

    Keeping in mind that not all the sides of the leg are tapered, I used both a bevel and square to knife the bottom line.

    CFBE1A0C-E79F-4279-A6F1-BB65BE3290FF.jpg

    Once the knife line was scribed around the leg, I repositioned the gauge against the knife line, held the banding against the gauge and knifed the upper line.

    14C4D372-1EE5-4735-BF94-DAE64E188C75.jpg

    I set up a router plane to depth and used that mark the baseline. I chiseled a knife wall and using a pull saw, I cut down to the baseline.

    9E084930-A13B-4D1F-8ACA-ACEDCECE28FD.jpg

    Then a chisel to take out most of the waste and the router plane to clean it up.

    819D7874-73E4-4E6C-99C5-9DE1E5EE7689.jpg 16096ABD-28B6-443F-AECA-8139EE22DBF9.jpg

    continued...
    Last edited by Phil Mueller; 12-19-2020 at 12:03 AM.

  2. #2
    Join Date
    Mar 2015
    Location
    SE Michigan
    Posts
    3,225
    ...check for fit

    AE5141CA-76DD-49CD-AF20-854320A97EBB.jpg

    and rinse and repeat for the other three sides.

    E431ED26-71EC-4E1B-ABFA-C95011CA8903.jpg

    Three more legs to go...

    Might actually finish this by New Years.

  3. #3
    Join Date
    Sep 2007
    Location
    Longview WA
    Posts
    27,433
    Blog Entries
    1
    Looks great.

    jtk
    "A pessimist sees the difficulty in every opportunity; an optimist sees the opportunity in every difficulty."
    - Sir Winston Churchill (1874-1965)

  4. #4
    Join Date
    Apr 2017
    Location
    Clarks Summit PA
    Posts
    1,744
    Nice progress Phil...you got some fine legs!

  5. #5
    Join Date
    Sep 2009
    Location
    Putney, Vermont
    Posts
    1,044
    Your gonna have some beautiful table legs there Phil.
    Thanks for posting because I enjoy your approach and ideas on inlays and such.

  6. #6
    Join Date
    Feb 2011
    Location
    Carlsbad, CA
    Posts
    2,230
    Blog Entries
    2
    Very nice Bill, the legs are looking great! I applaud your excellent job of executing these classic federal details. I look forward to the rest of the build.

    Cheers, Mike

  7. #7
    Join Date
    Apr 2007
    Location
    Columbus, Ohio, USA
    Posts
    3,441
    ummm, wow! I have not seen that done before. Looks good!

  8. #8
    Join Date
    Apr 2017
    Location
    Clarks Summit PA
    Posts
    1,744
    Phil, it is almost the New Year...

  9. #9
    Join Date
    Mar 2015
    Location
    SE Michigan
    Posts
    3,225
    Ha! Thanks, Mark. Did I say the table might be done, or just the legs! Well, legs are done.

    1E548E22-D237-42F3-9639-D58F5EA32B6B.jpg


    Then to draw this thing out longer, I decided to add a bead molding around the base. The 1/4” round blank was flattened on one side (simple block plane on a jig job), then steam bent and currently being glued in place. Even though they were bent, there was still a good deal of tension to draw them in tight...so I’m doing them one at a time and giving them ample clamp time.

    182D343F-18E3-4CA3-BB20-0F59CDC6DA5D.jpg

    The bead will go around the leg, so I’v figured a way to make little 3/16” pieces (mitered on both ends) for the leg sides...love this little detail work. Looks like another week or so. Good thing about hobbies...no real deadlines!

  10. #10
    Join Date
    May 2015
    Location
    Ingleside, IL
    Posts
    1,417
    Hey Phil - those look fabulous. Way above my pay grade. Did you post a previous thread about the start of the build for the legs? If you did and you can point me to it, much appreciated.
    Stand for something, or you'll fall for anything.

  11. #11
    Join Date
    Mar 2015
    Location
    SE Michigan
    Posts
    3,225
    Thanks Bill. Actually when you break it down into “parts”, and take advantage of a few electrons, it’s pretty basic stuff, just takes time. Anyway, I did post a few bits and pieces separately, but I’ll have some time tomorrow and put together a leg build thread.

  12. #12
    Join Date
    Apr 2017
    Location
    Clarks Summit PA
    Posts
    1,744
    Phil, the legs are spectacular! The detail is so ornate. A New Year's Eve celebration shaped into wood! Thanks for posting and looking forward to more pics in the near future. Happy New Year!

  13. #13
    Join Date
    May 2015
    Location
    Ingleside, IL
    Posts
    1,417
    Quote Originally Posted by Phil Mueller View Post
    Thanks Bill. Actually when you break it down into “parts”, and take advantage of a few electrons, it’s pretty basic stuff, just takes time. Anyway, I did post a few bits and pieces separately, but I’ll have some time tomorrow and put together a leg build thread.
    Thanks Phil. Look forward to it
    Stand for something, or you'll fall for anything.

Posting Permissions

  • You may not post new threads
  • You may not post replies
  • You may not post attachments
  • You may not edit your posts
  •