
-
Looking good Derek & thank you for all the photos and directions. Must've taken all day to make that post.
-
Thanks Michael
I've been photographing and writing for so long now that I do not notice it. Writing gives me a chance to reflect on what I've done - can it be improved upon ...
I always hope that the posts will both create discussion and also educate. It certainly educates me! 
Regards from Perth
Derek
-
Inspiring. What a joy to follow along. Thank you for sharing.
-
Thanks Peter.
Regards from Perth
Derek
-
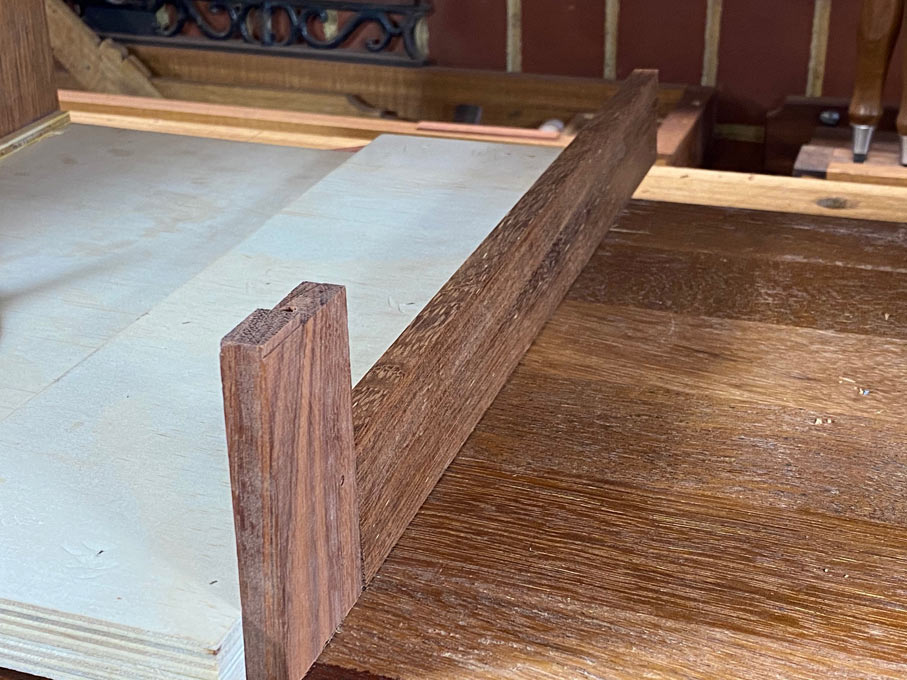
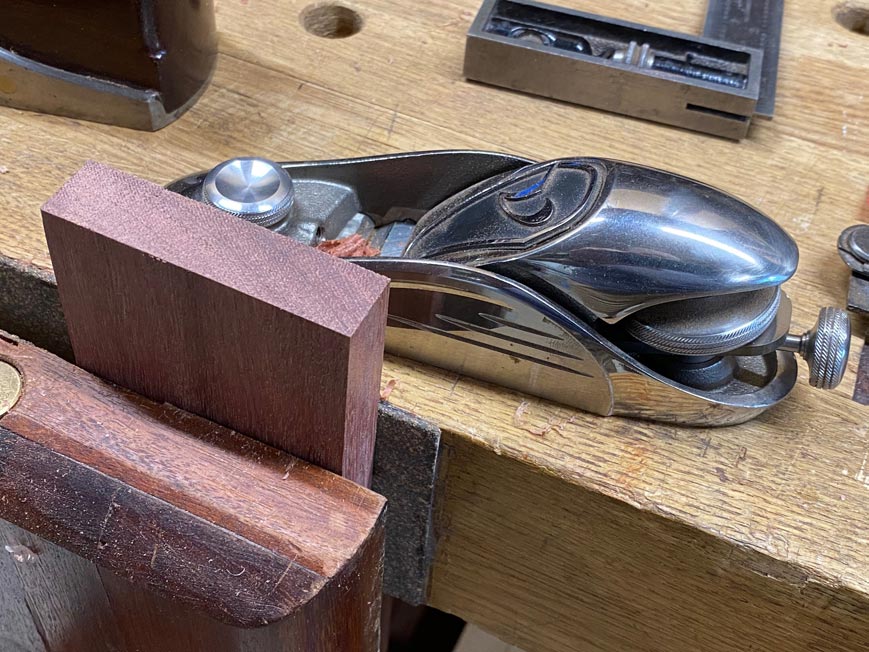
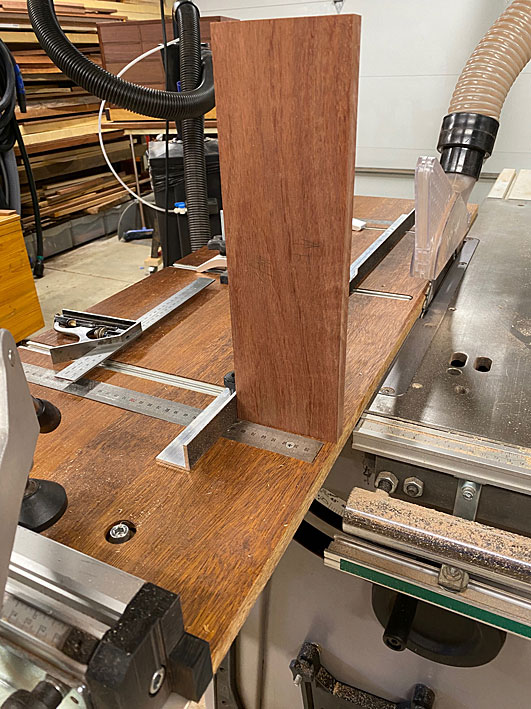
A blind sliding dovetail
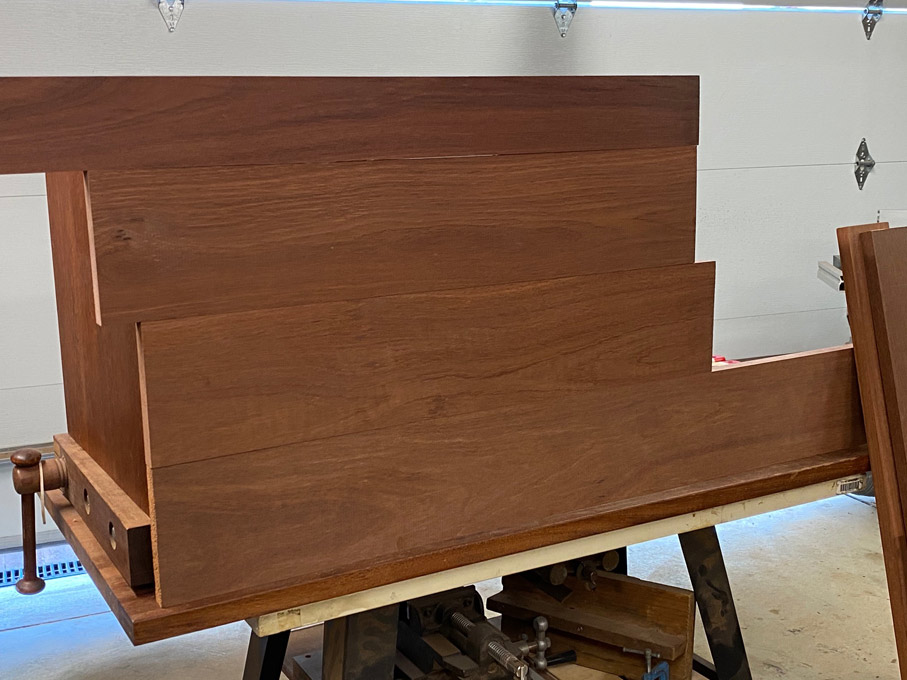
This is the front of the cabinet, with all the vertical dividers to install.
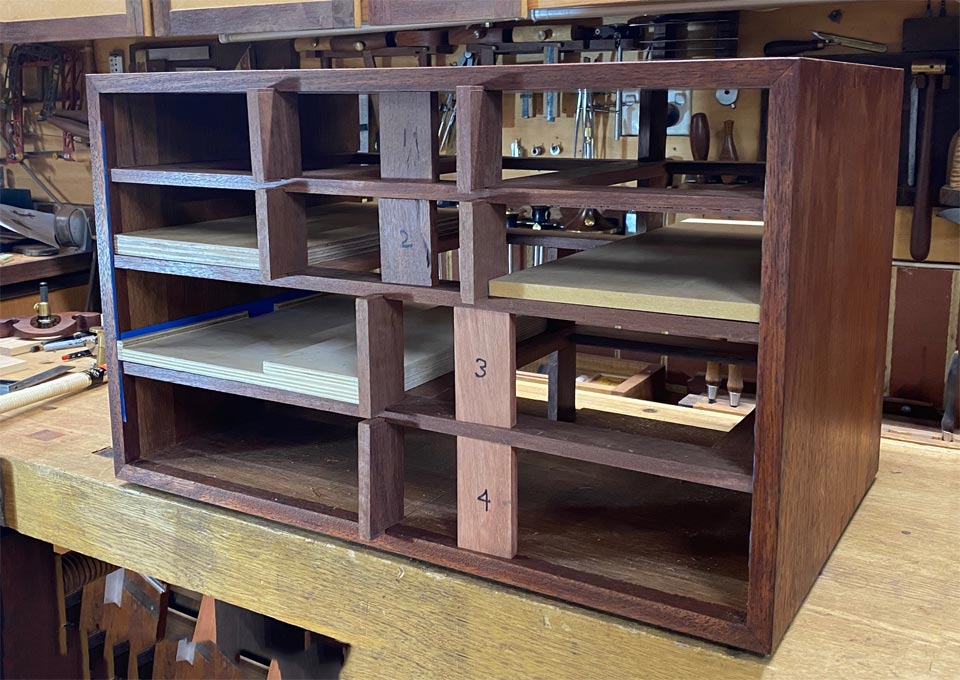
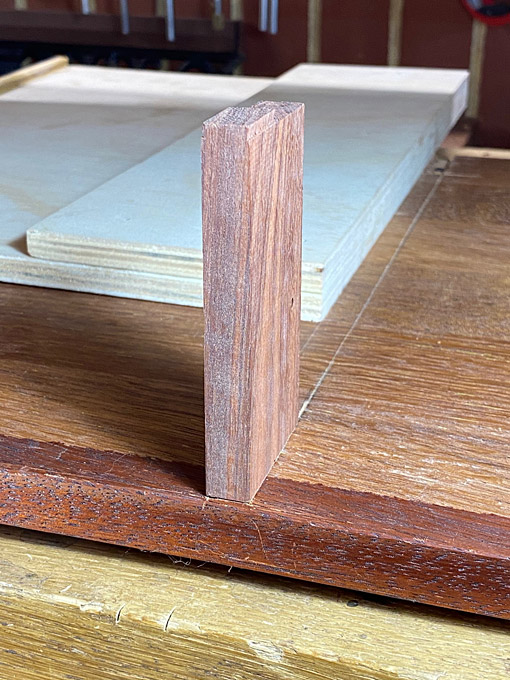
The single lower- and the two dividers need to be fitted into a sliding dovetail ... however, unlike the dividers at the rear, this must be from inside the case. In other words, a blind sliding dovetail.
This post will show the steps taken for the lowermost, central divider.
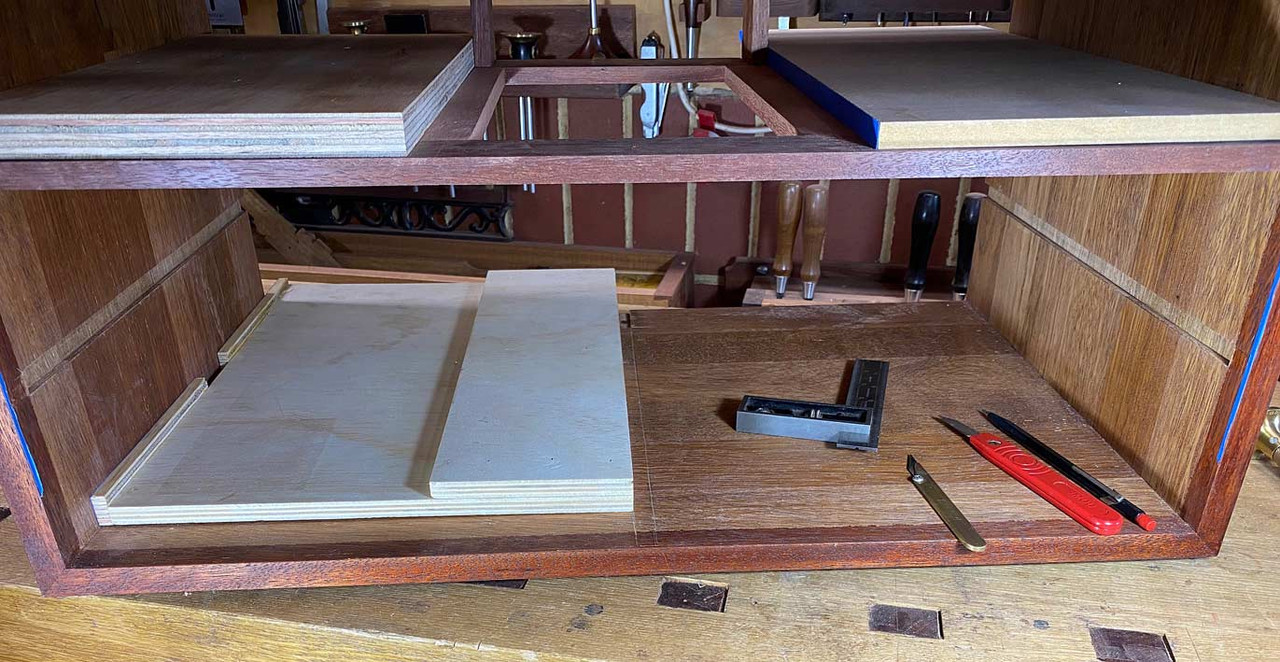
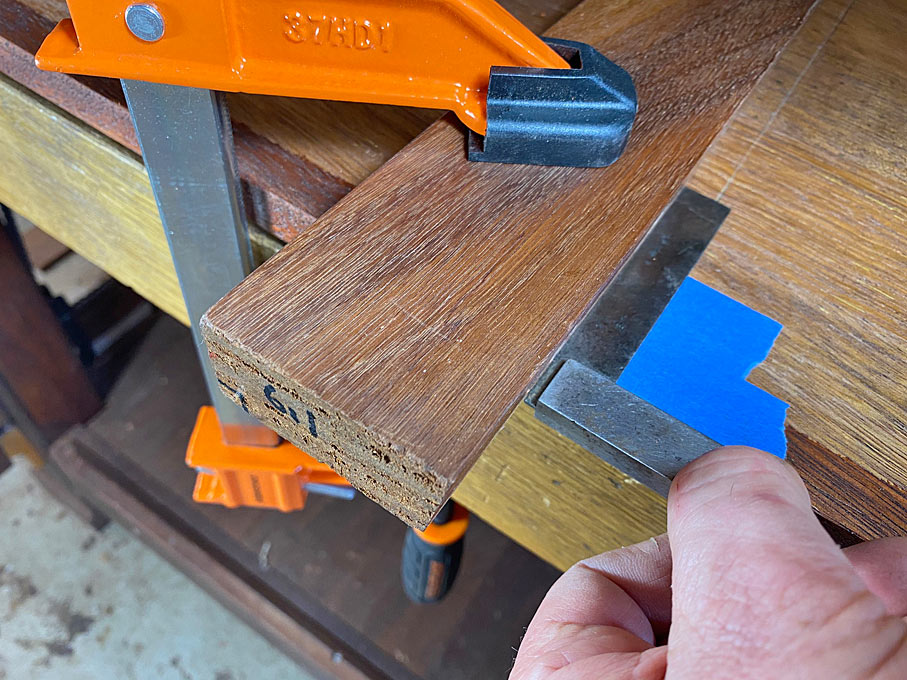
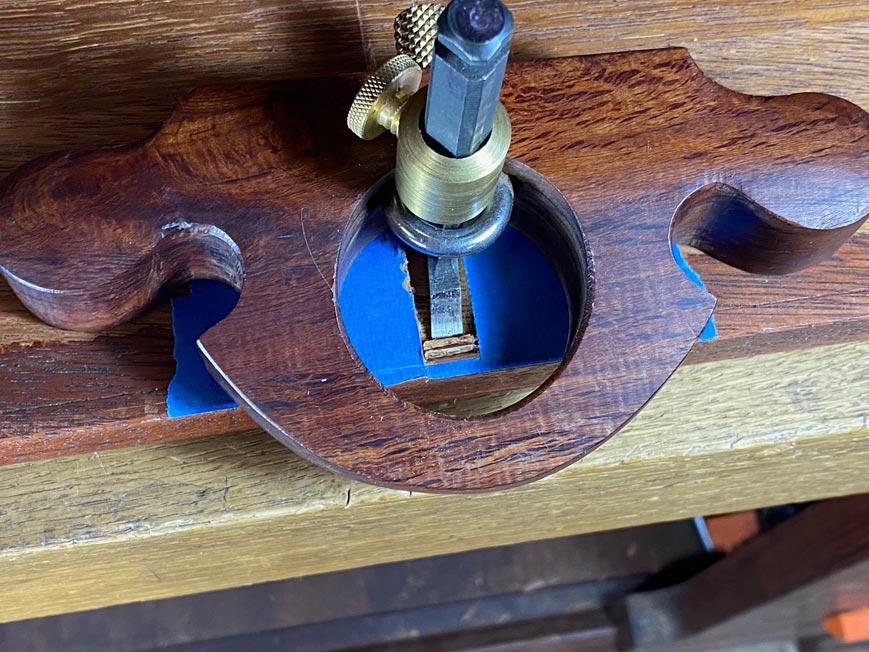
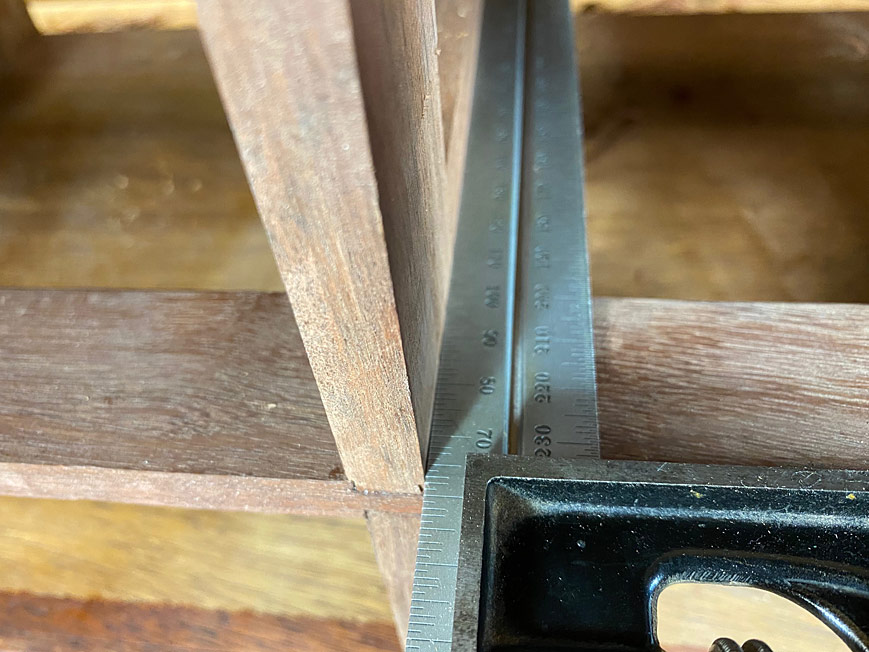
This could not be done without the aid of blue tape. This is used to mark the apex of the tail ...
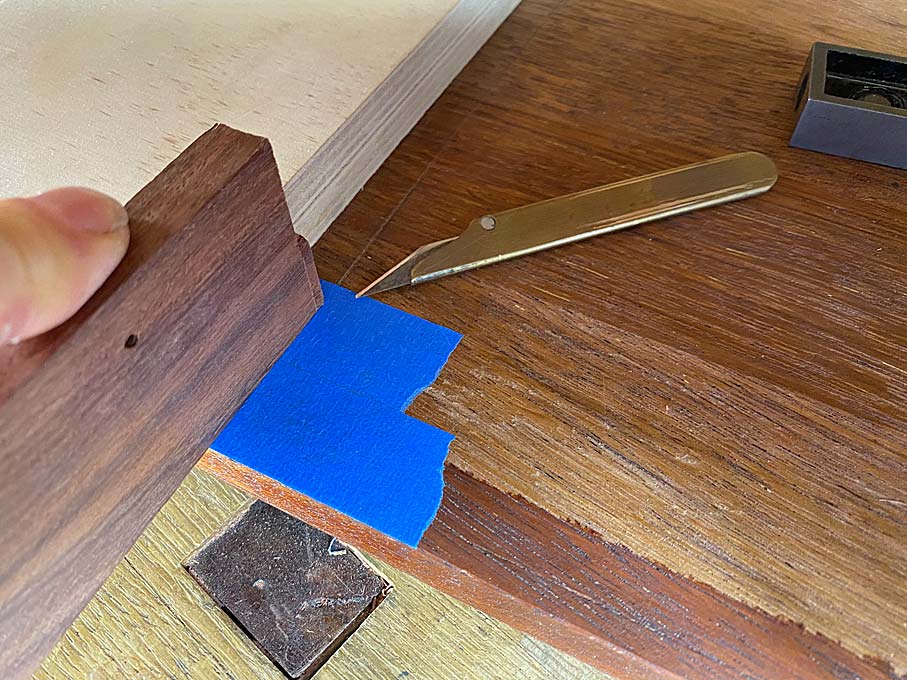
This is how the tail will be positioned. Below is where the pin socket has to be cut ...
A line is scribed at the two apex points, and the dovetailing guide is placed against it ...
Very carefully, using the dozuki, saw about 5mm from the boundary line. Be careful not to get closer than this. Saw marks must not show outside the dividers.

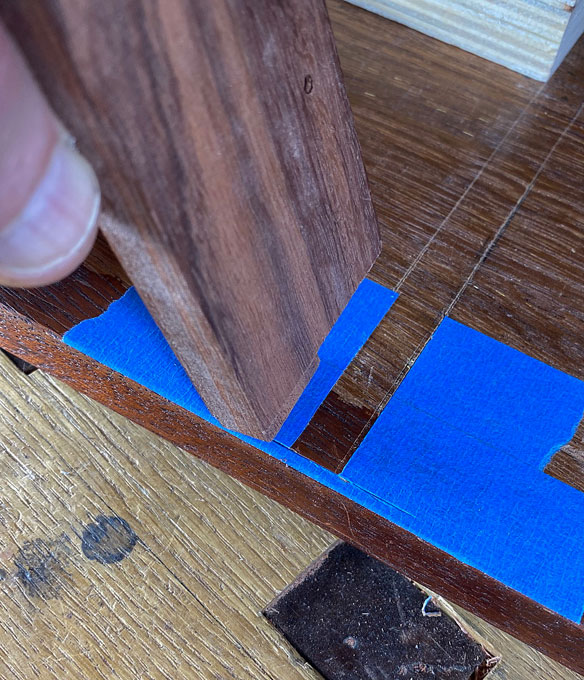
Do the other side ...
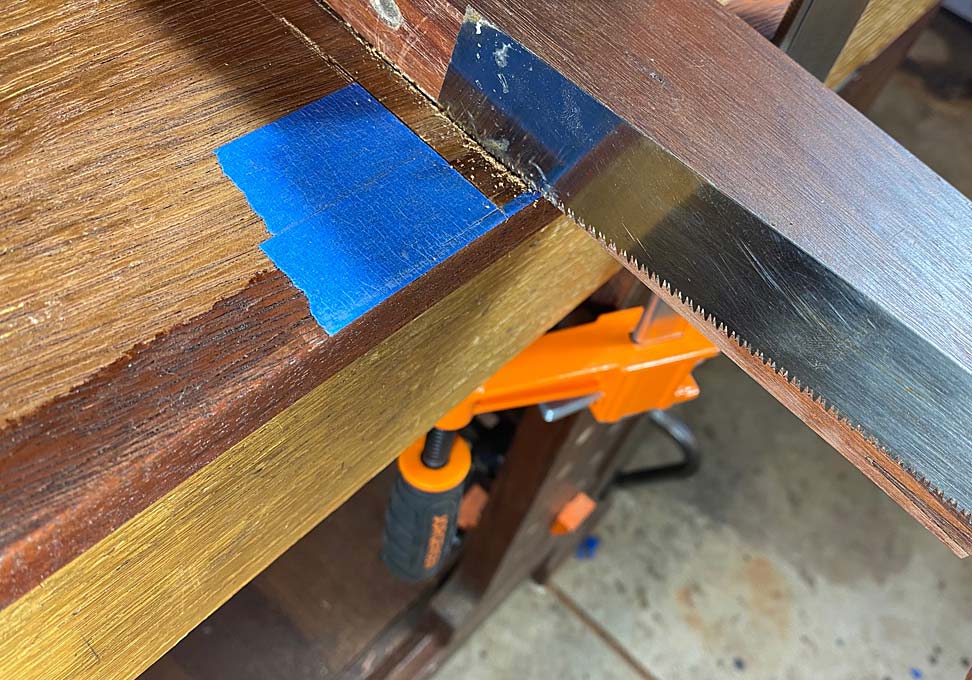
Swing the case around and work from the other side. Use the razor saw to cut up to the boundary line ...
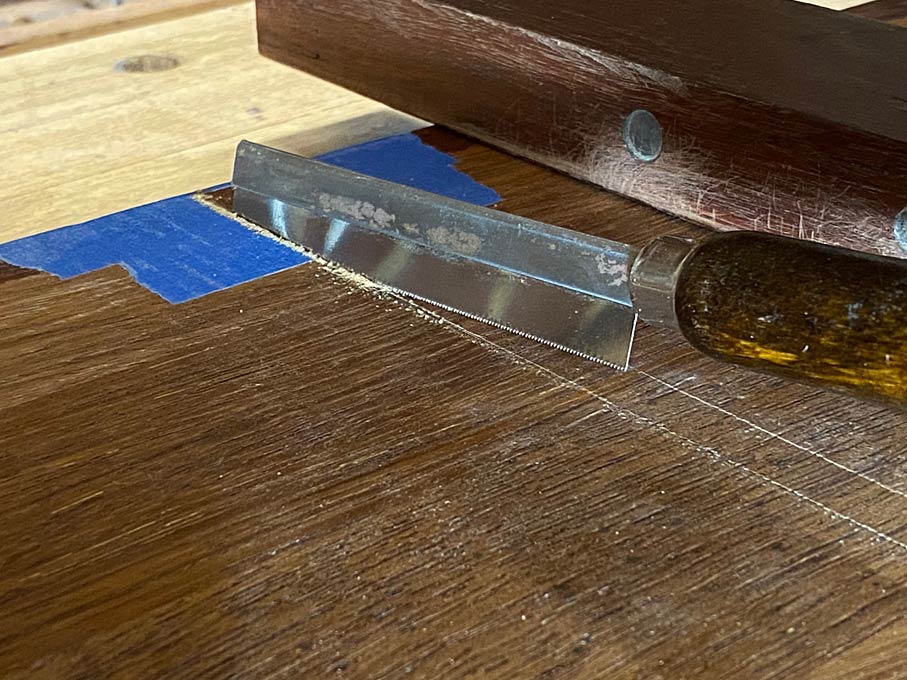
Now chop out (shallowly) the trench/dovetail in the same way one would do a hinge mortice ...
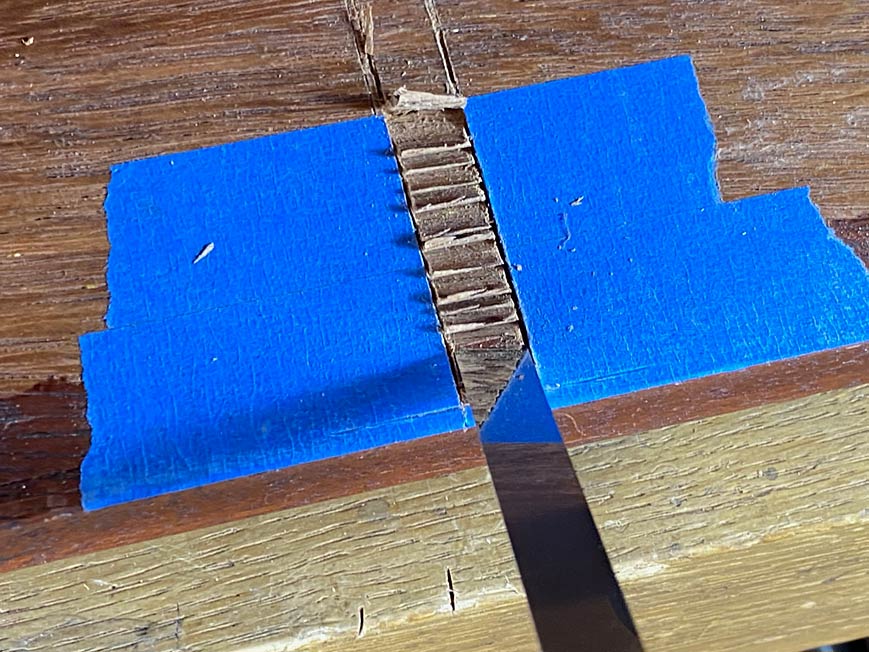
Finish and level the surface to a depth of 3mm (the height of the tails) with a router plane ...
The result ...

What is difficult to see here is that the trench is fractionally wider in the rear half to allow the tail section to enter, and then slide along.
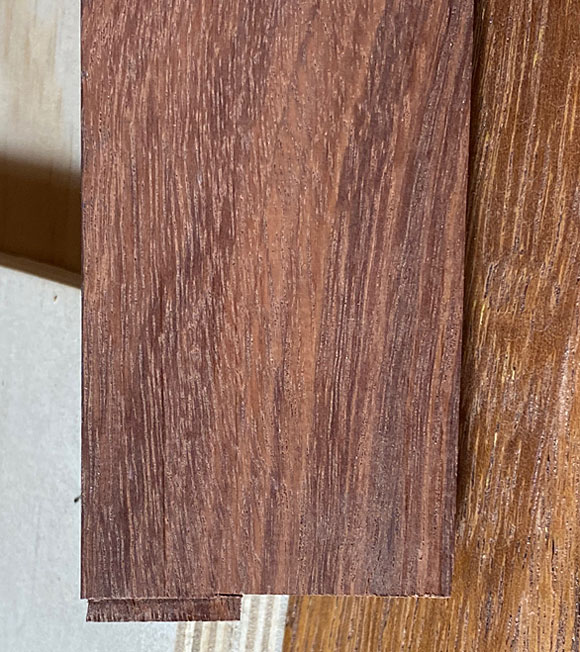
Unlike the internal tail sections, those used in the blind dovetails require a small beauty rebate ...
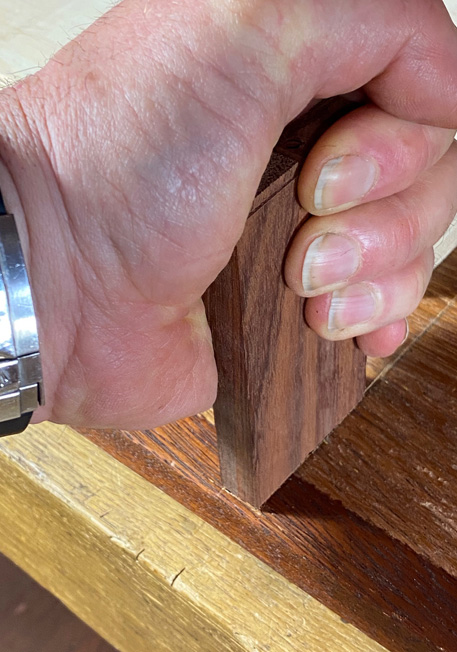
The divider slides along into position ...
Why do we go to all this trouble to use sliding dovetails? Well, this is how strong they are ... one hand attempting to lift the case ... neither are budging.
-
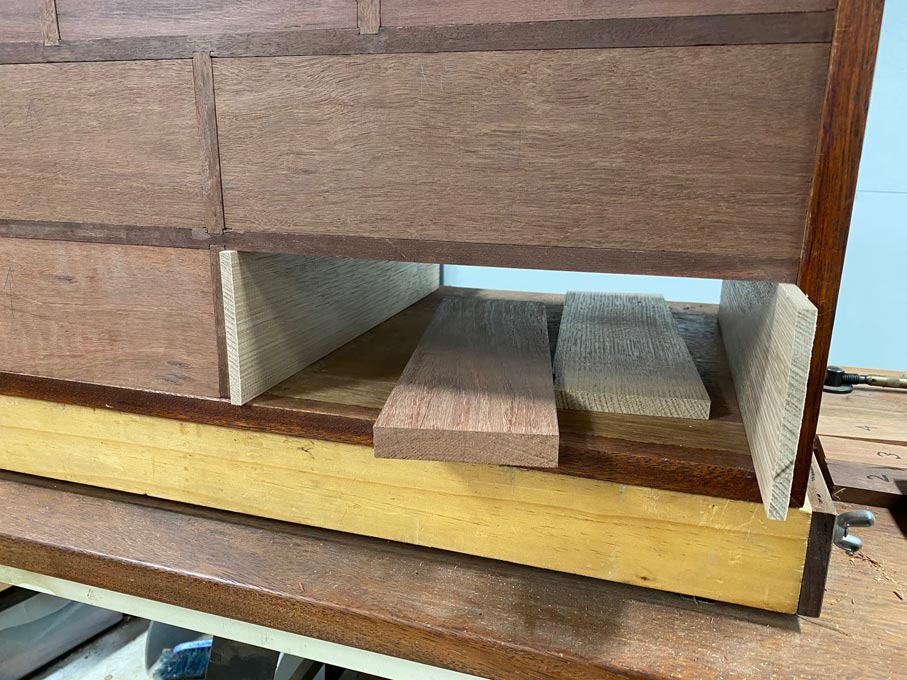
Incidentally, I was asked "how does the drawer run between two dividers?". Well, of course it does not - all will have a rail to guide the drawer ...
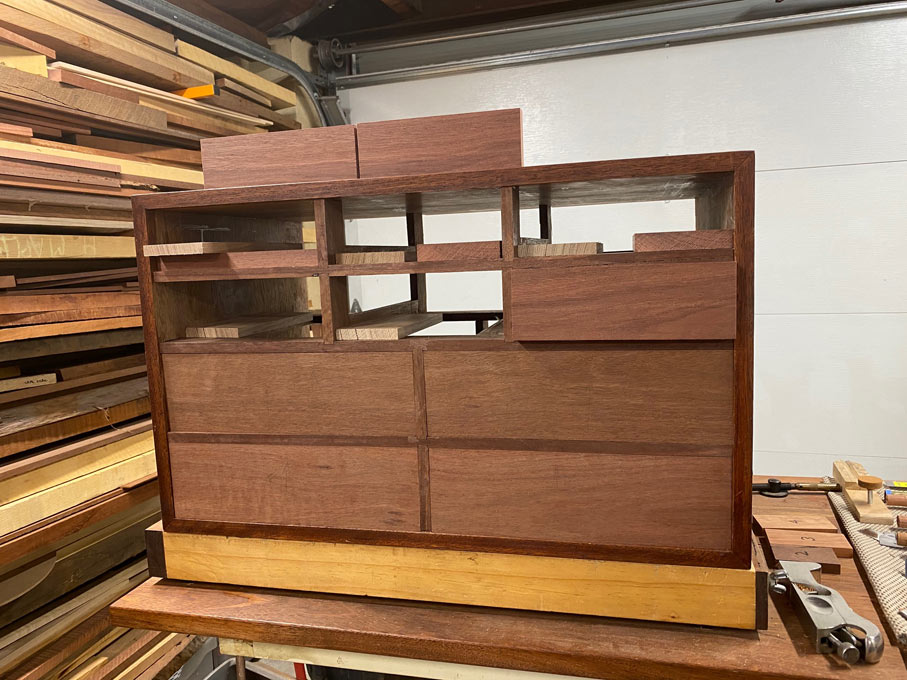
One the lowermost divider is in, the one above it can be marked ...
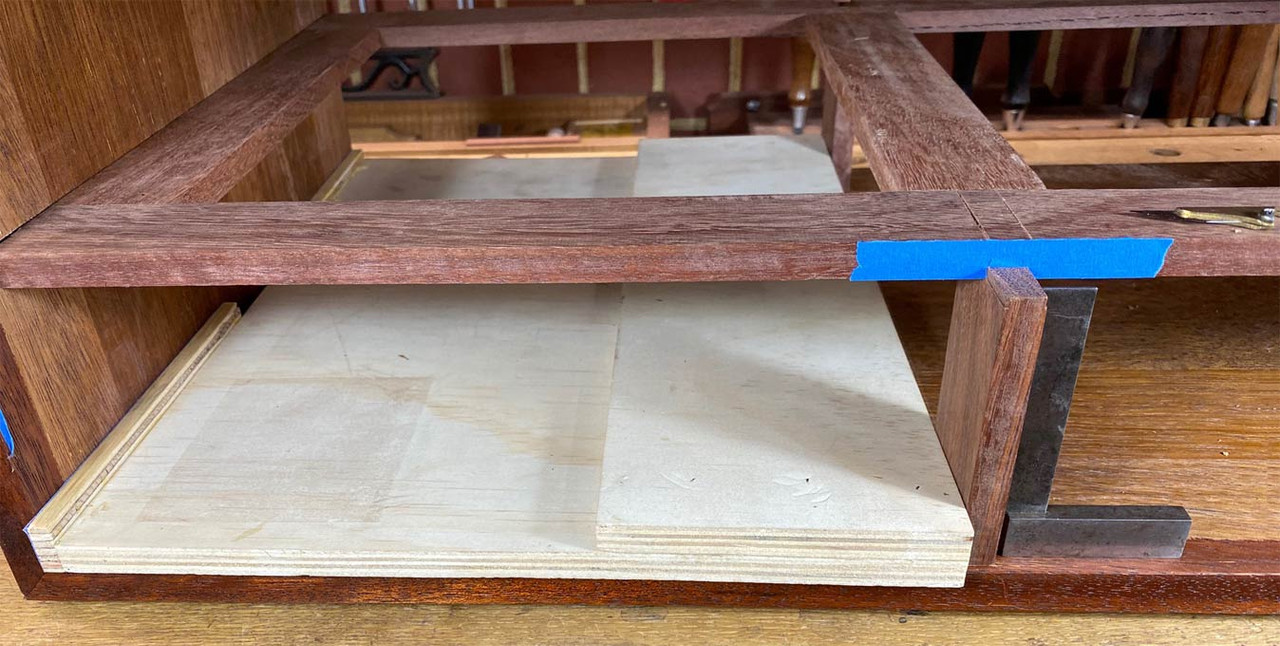
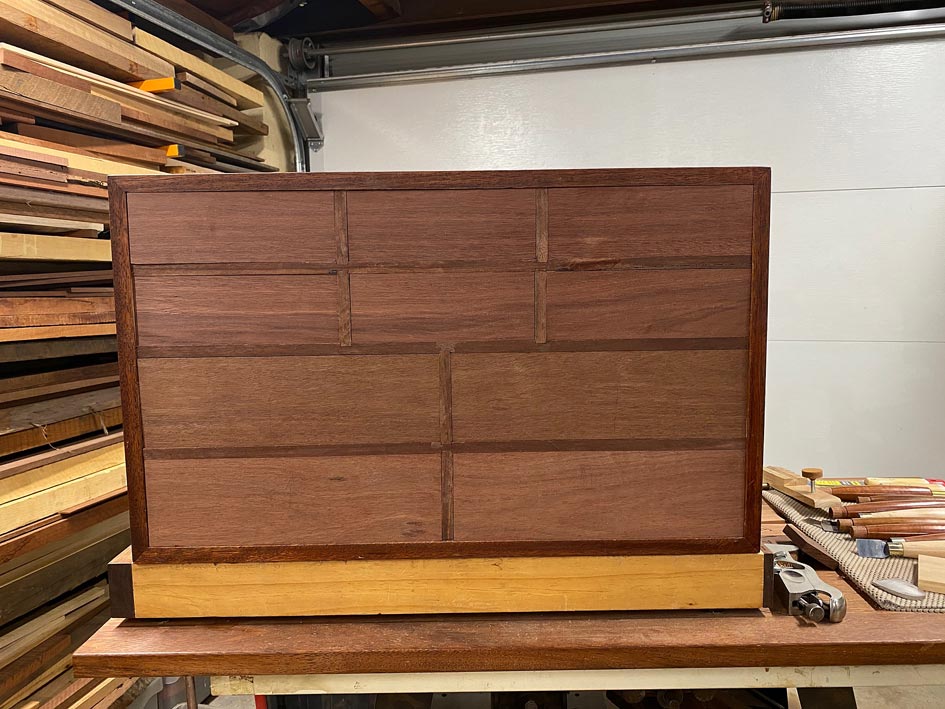
Progress to date ...

Regards from Perth
Derek
-
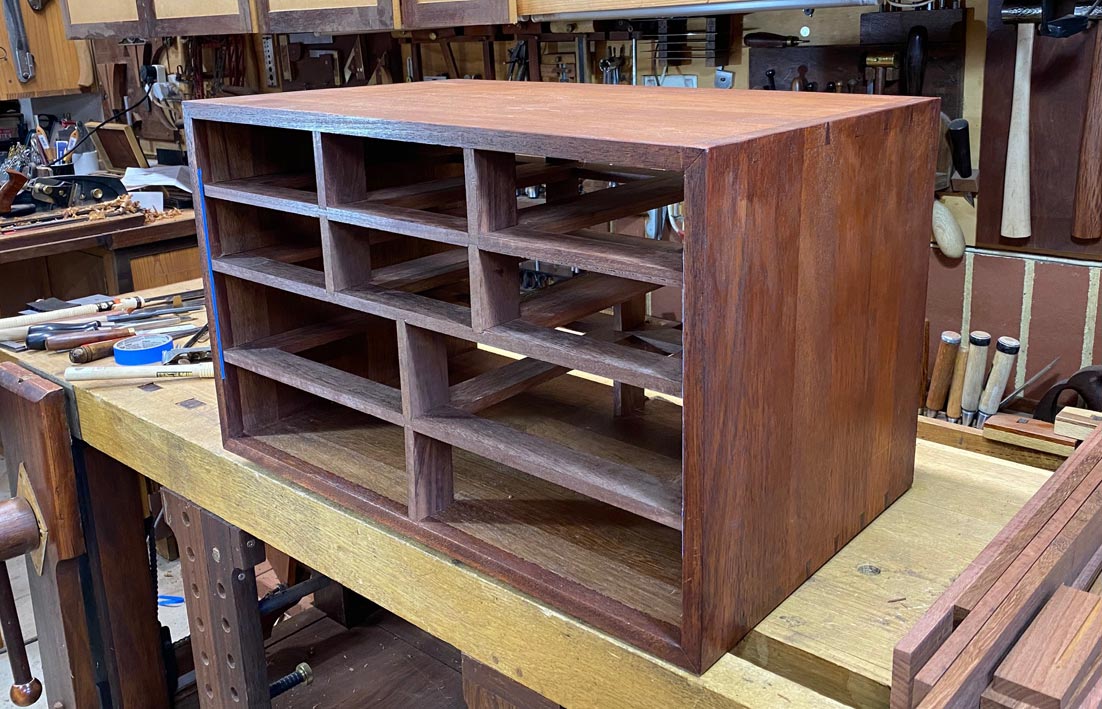
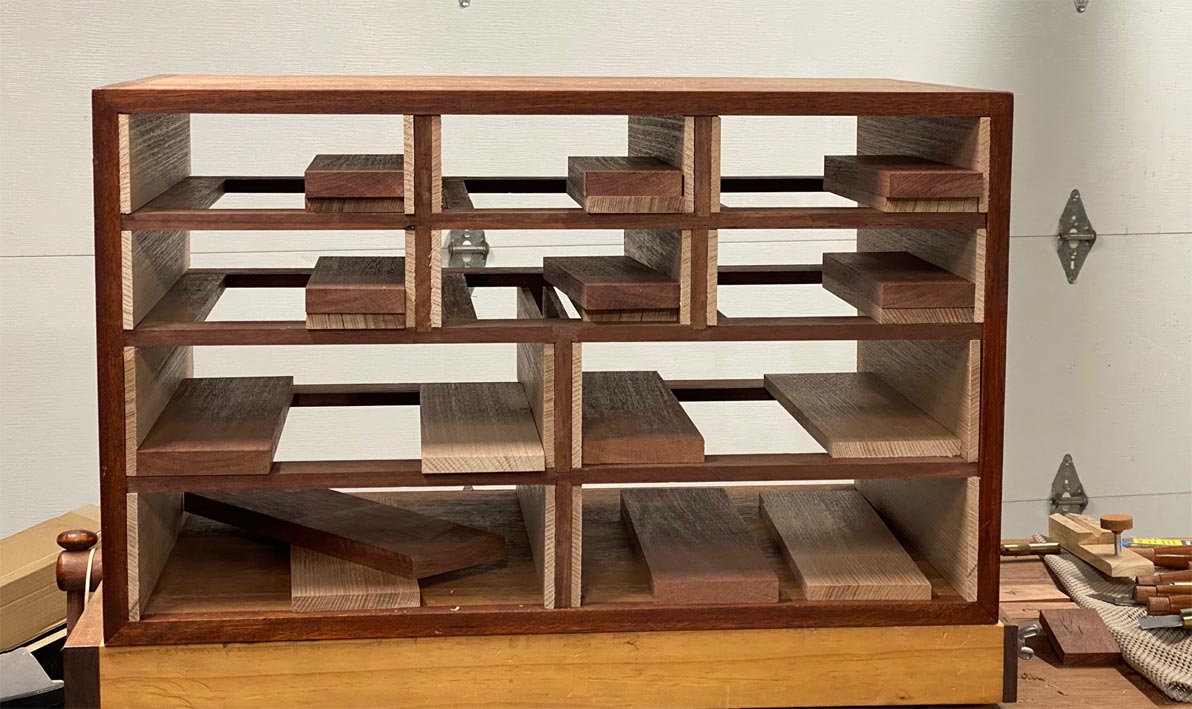
Progress report ...
I am pleased to get to this stage, with everything still square ....
... 24 sliding dovetails done.
Only a dry fit - now to glue it together ..
Regards from Perth
Derek
-
I am enjoying this build, Derek. Thanks for the regular updates. I know you take care to maintain squareness throughout, but what would you do if the cabinet moved out of square at any given stage of the build? I ask because I am genuinely interested in your thought process. Also interested because you have mentioned that it is "still square" during several stages of this build.
-
Tim, adjusting for out-of-square drawer cases is a pain in the watsit. Every time this occurs, you are left with a less-than-perfect running drawer. I set my sights high and aim for square front and rear for a smooth running, as-close-to piston fit drawer.
Regards from Perth
Derek
Last edited by Derek Cohen; 01-05-2021 at 7:56 PM.
-
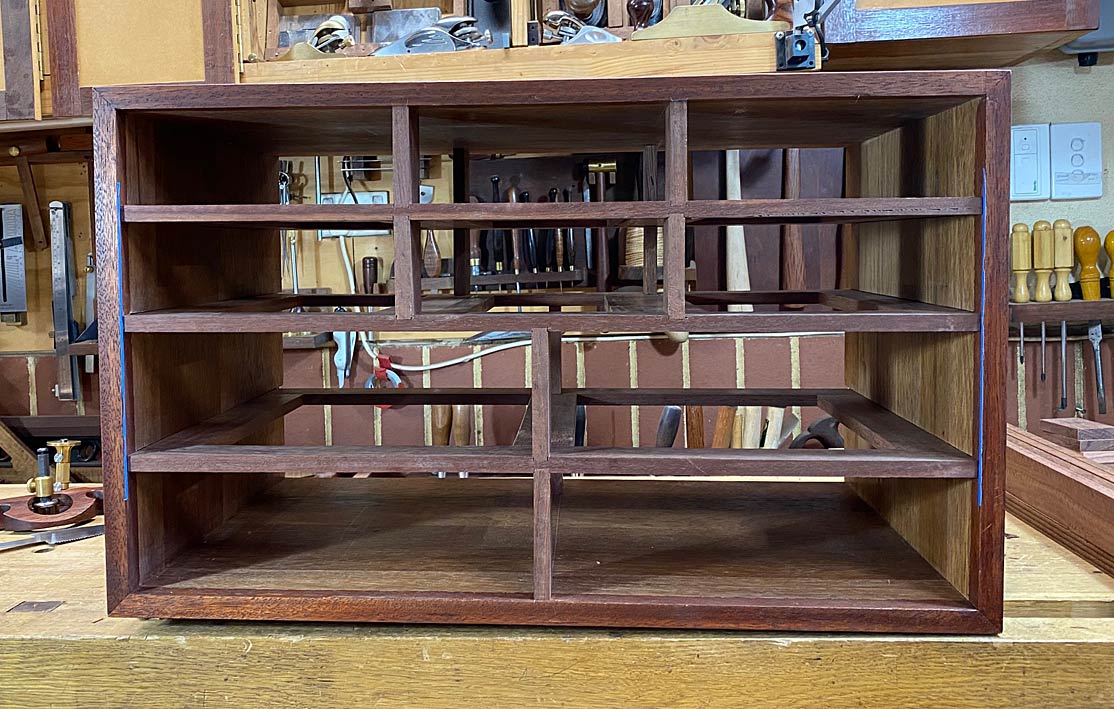
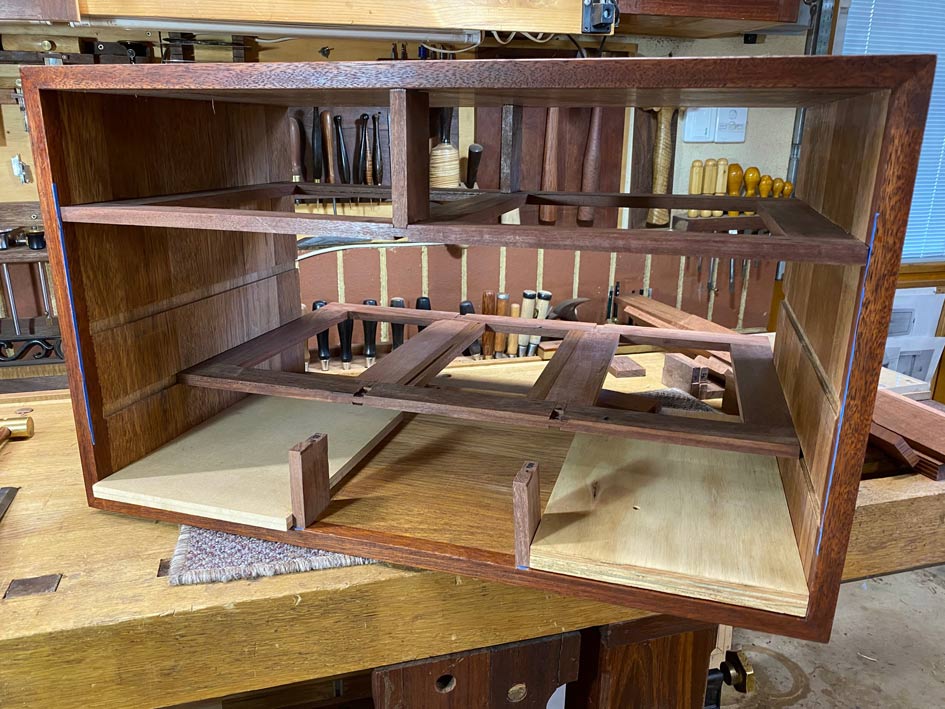
It seems so straight forward: build the case, insert drawer frames and dividers, and build the drawers.
Each step actually requires planning ahead. The devil lies is in the details. These are some of the details we take for granted ...
Step one is to plane the fronts of the rails and dividers, and fill in any chips with tinted epoxy.
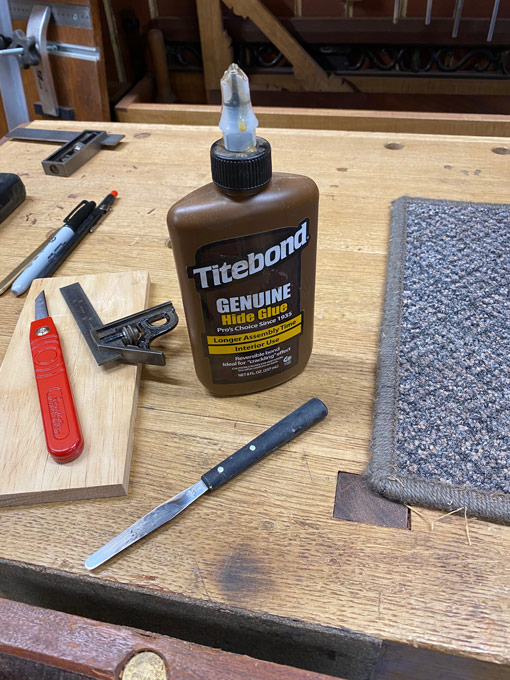
Even gluing up requires a strategy when the case includes blind sliding dovetails: glue these first.
The benefit of liquid hide glue is extended open time and repairability. I hope that I do not have to make any repairs, but I could do with the open time as it is 40° Celsius today (that's 104° Fahrenheit). I like a small spatula for placing glue where it needs to go.
Glue the first set of blind sliding dovetails, and then the other set ...
Finally glue in the other dividers ...
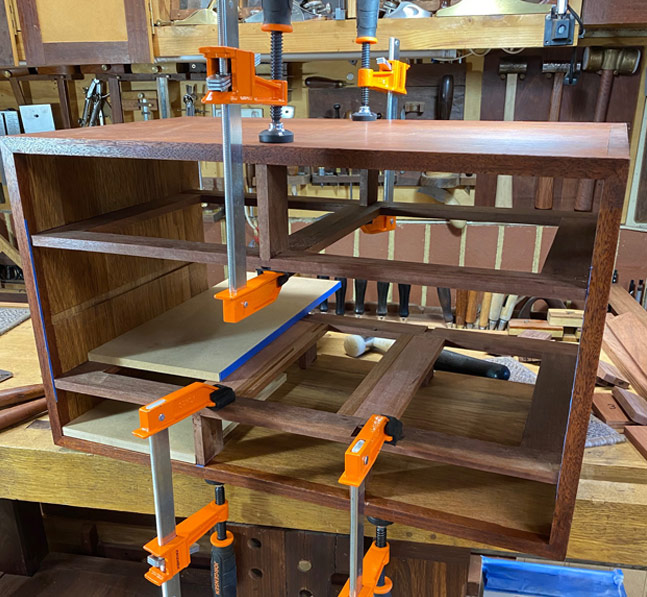
Lastly, add the drawer guides. These are just glued in. The spring clamps centre them.
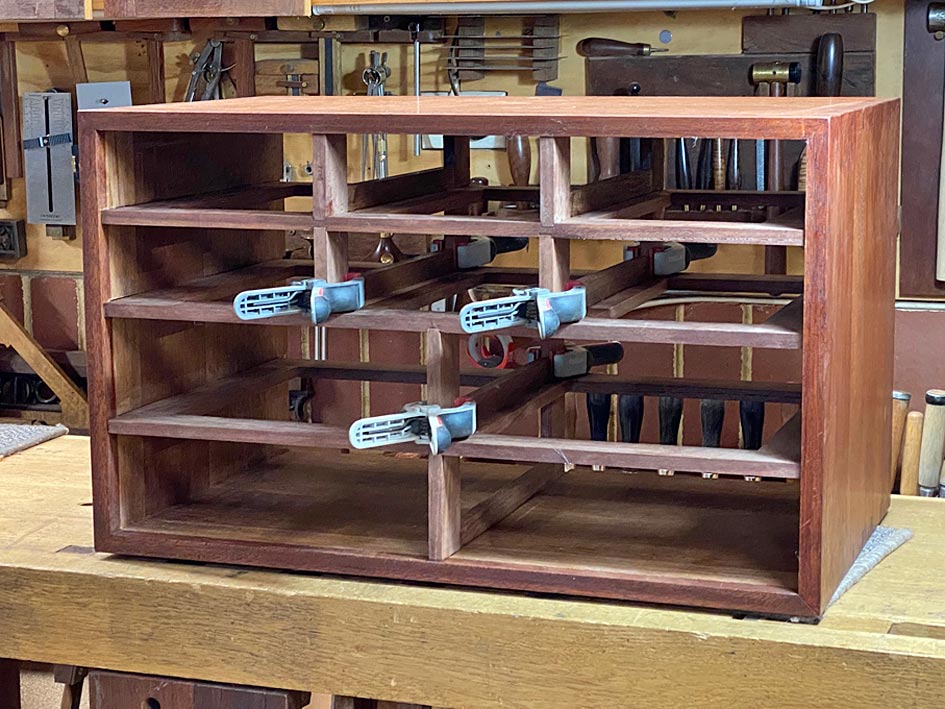
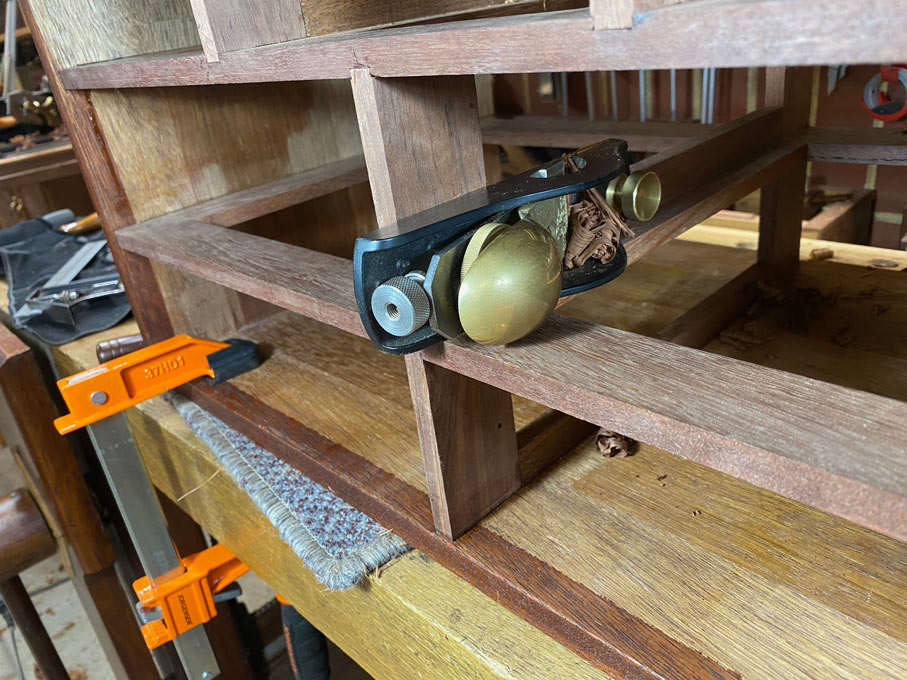
Once all this is dry, we start to prepare the drawer cases. Each one of these needs to be square at the sides and parallel all the way through.
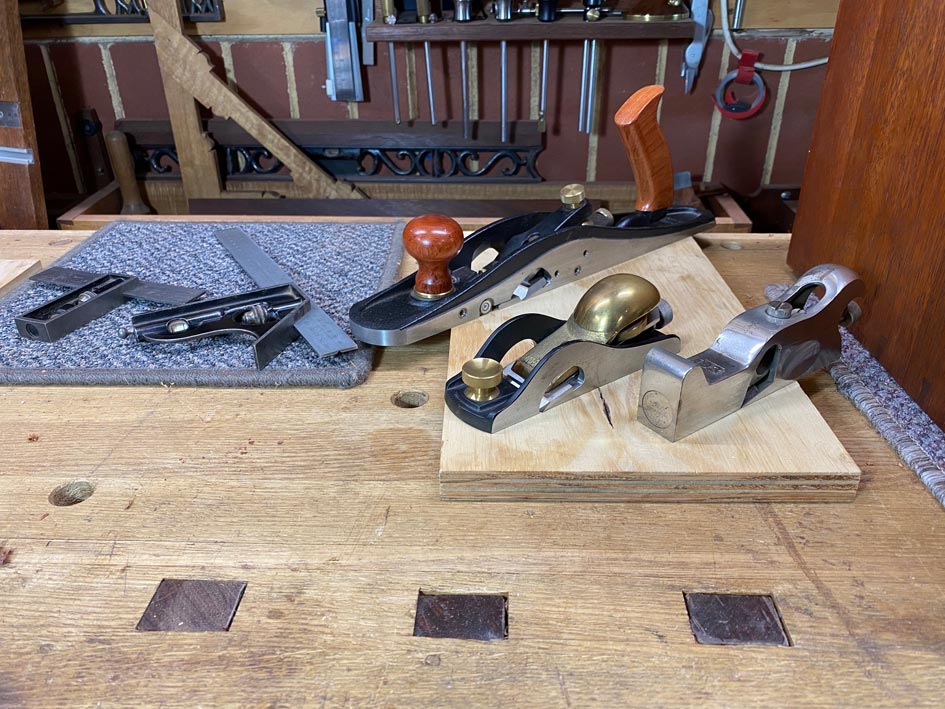
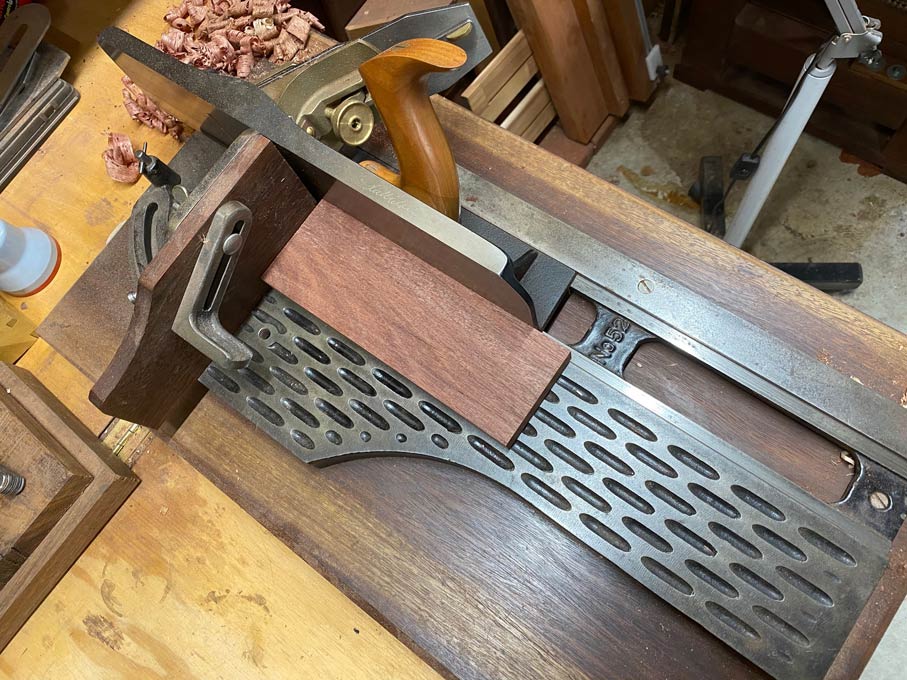
The planes I find helpful are these: a rebate jack, a rebate block plane, and a low shoulder plane ...
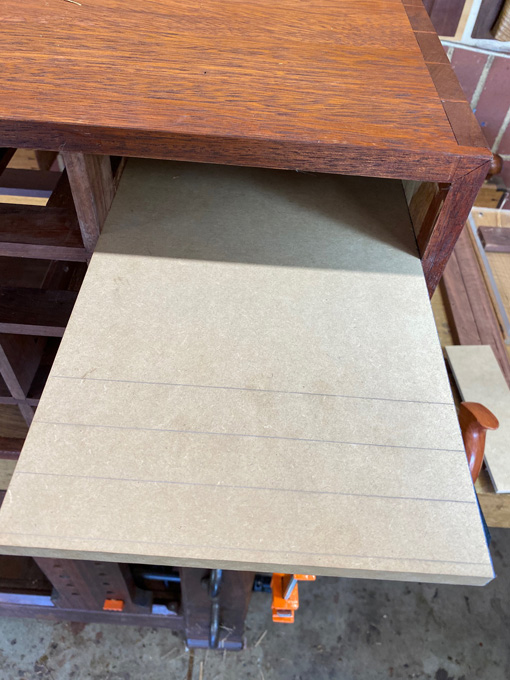
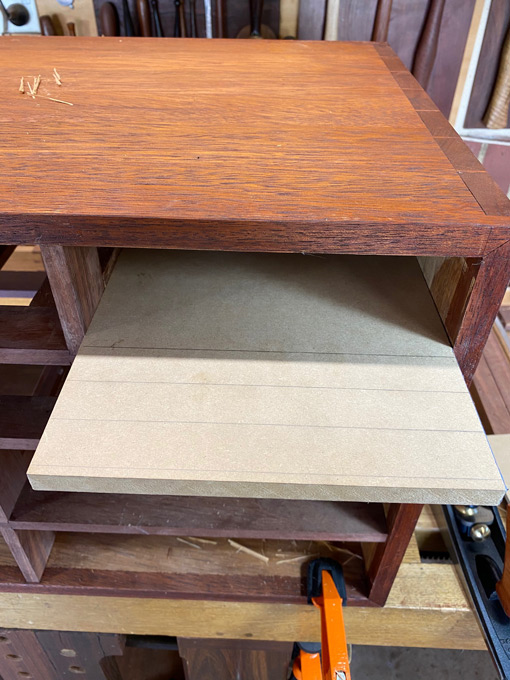
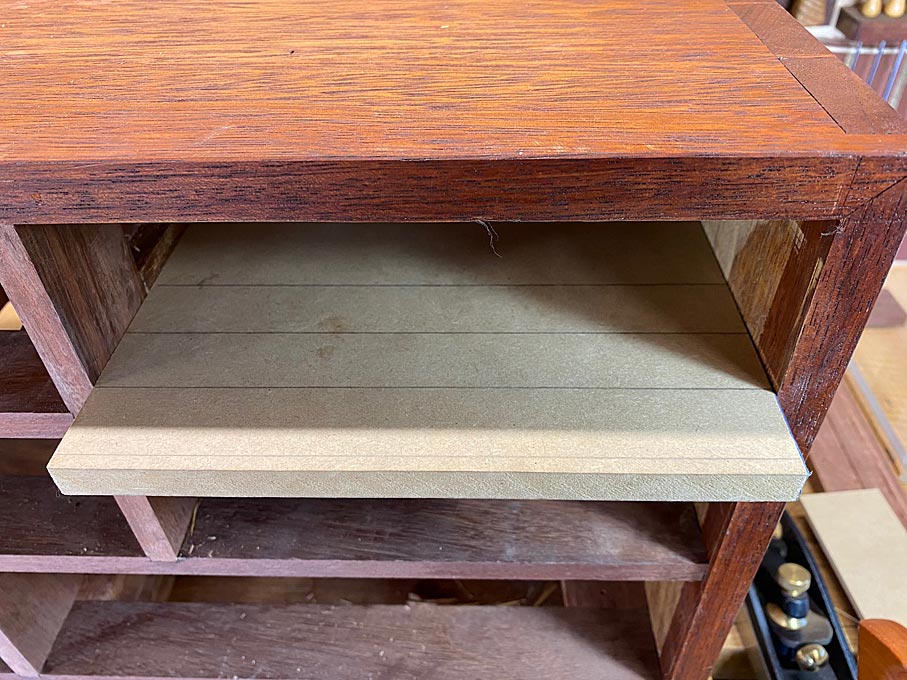
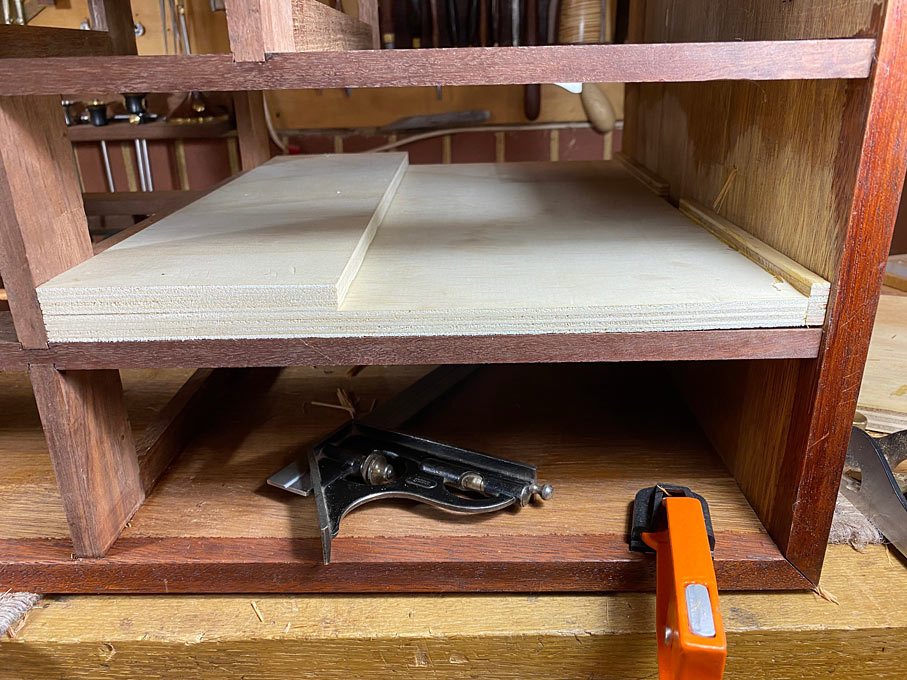
For each drawer case there is a drawer-sized insert, generally of MDF or ply. A couple of cross lines aids in determining whether the drawer will be square to the sides.
The "drawer" here does not enter more than an inch or so ...
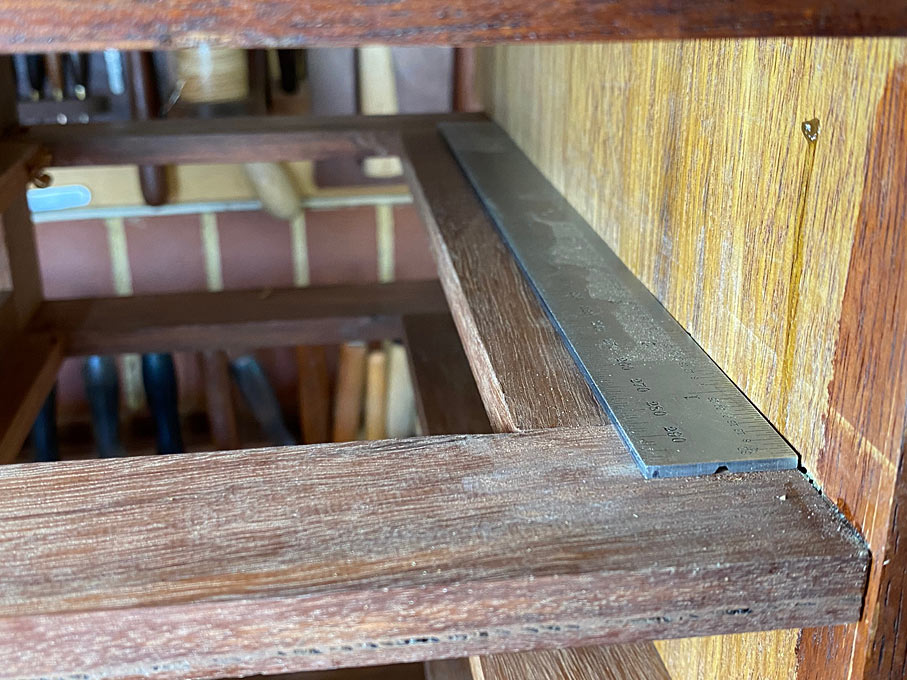
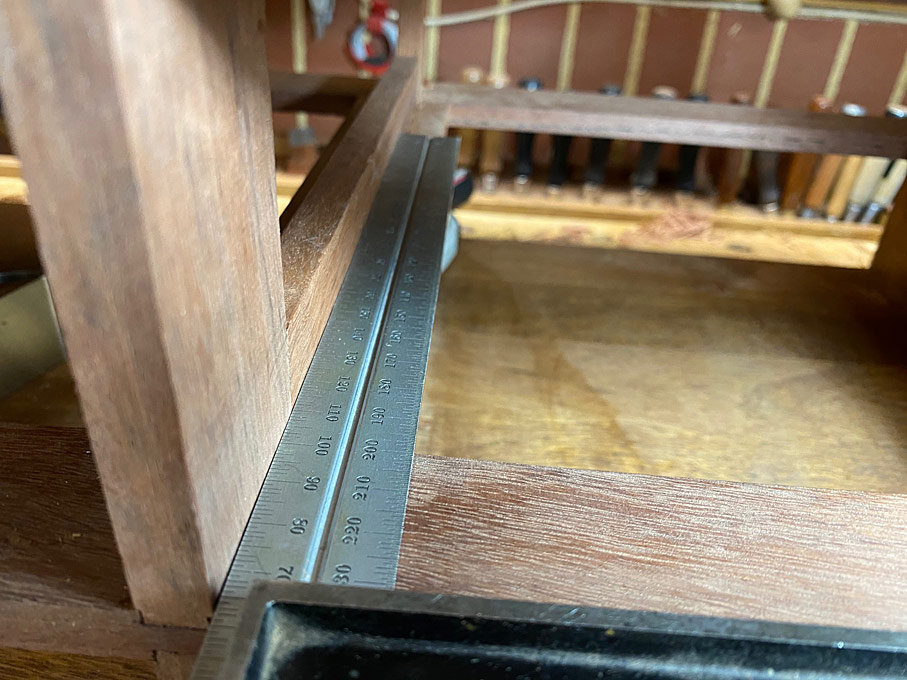
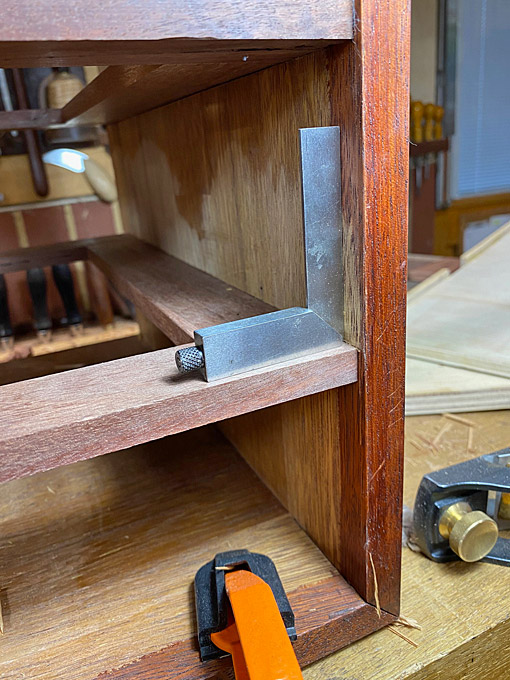
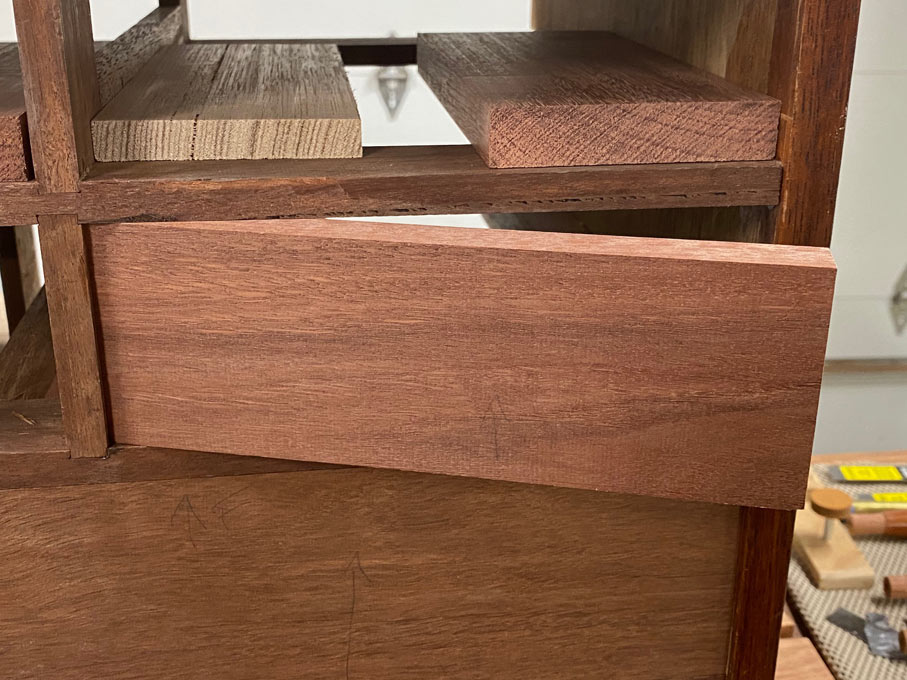
A straight edge along the side reveals that there is a bow ...
The block plane takes this down ..
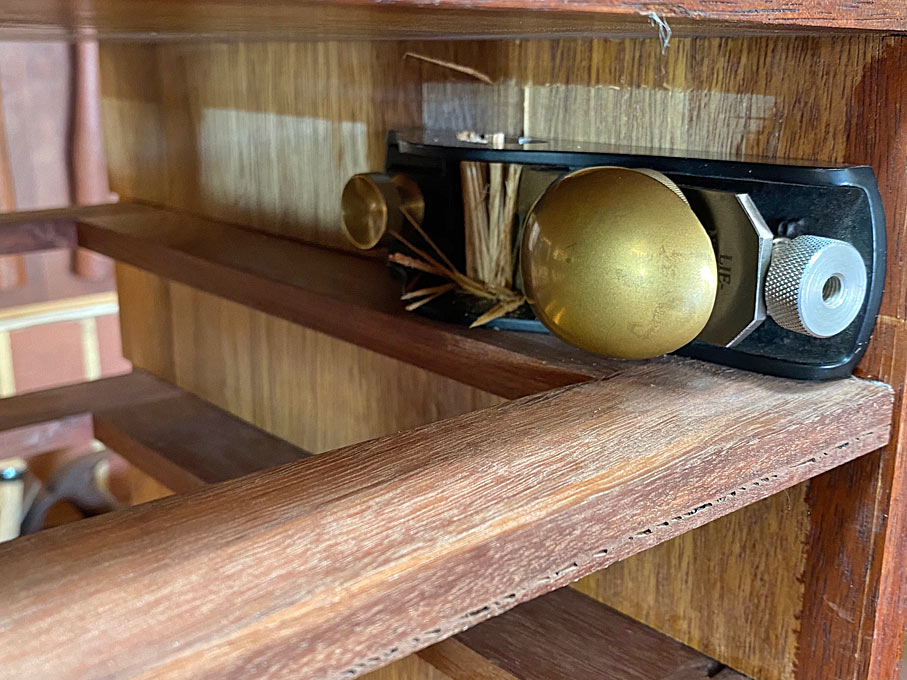
... tested with the insert. Looking better ...
A little more planing ... and the insert moves tightly, but smoothly all the way back-and-forth ...
-
Every drawer case is dealt with this way ...
Square edge ..
Planing ..
Square and insert ...
Square and parallel and square ...
Every drawer case is tuned this way.
Now we are ready to make drawers 
Regards from Perth
Derek
-
This chapter follows on from "Before the Drawers", in which I should have ended up stating, "Now we are one step away from making drawers". And now this chapter is that penultimate step ...
I need to explain some of the (as I feel) pedantic details I have been outlining. Firstly, I write this for those who are starting out and those who are seeking ways to increase their accuracy. The steps may not be new to some, but we all like to be reassured that others also find them necessary.
Secondly, I am going to introduce a fixture I built that increases not only accuracy, but speeds up a section of the work. This is the first time I have had a chance to try it in a furniture build.
So what do we need to do today? Well, we need to cut the drawer parts (minus the drawer bottoms) to build the drawers
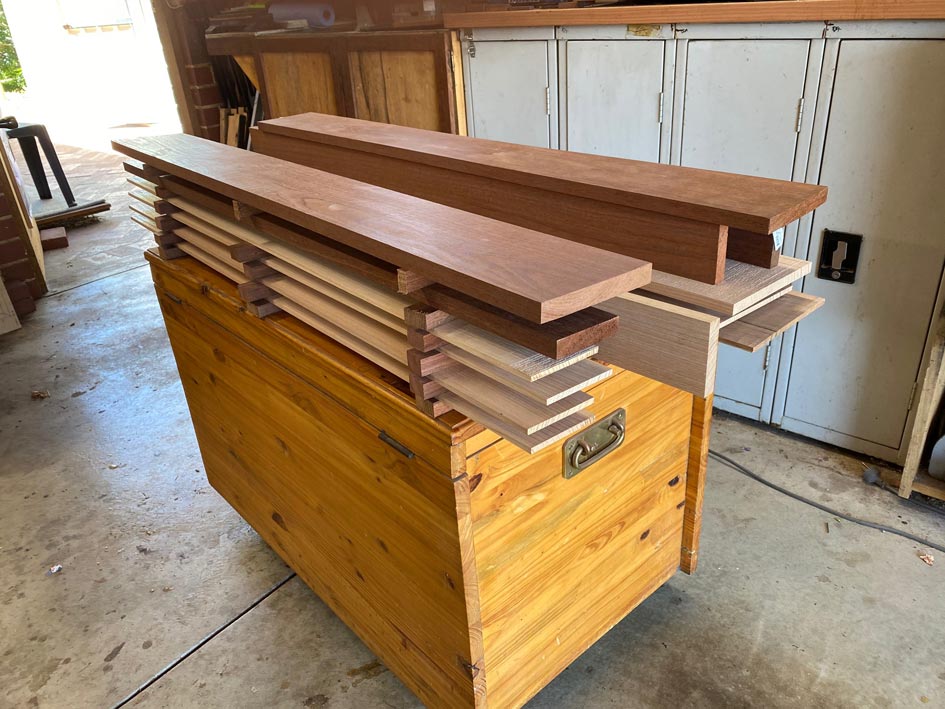
I spent time selecting the wood for the drawer sides and drawer front-and-back. The sides were jointed and thicknessed by machine, and then stickered for a few days ...
The drawer sides are to be 7mm thick, which is more typical of the drawers I build for furniture than a tool cabinet, however the drawers will each house a tray - some sliding and some cantilevered - which effectively doubles the thickness. My aim is to be sturdy but also save space (since the tool cabinet is on the small side, as it must fit under the work bench).
The drawer front is 18mm. The drawer back is 12mm.
For reference, mentioned at the start of the build, the dimensions are:
Dimensions: 660mm x 400mm x 400mm (26" x 15 3/4" x 15 3/4").
Small drawers: 205mm x 70mm (8" x 2 3/4")
Large drawers: 305mm x 95" (12" x 3 3/4")

Time was taken to select the wood for the drawer fronts.
The issue here is that I was not after figure, but constancy of grain and colour (although a little tinting could be done with a latter). Lots of combinations tried ...
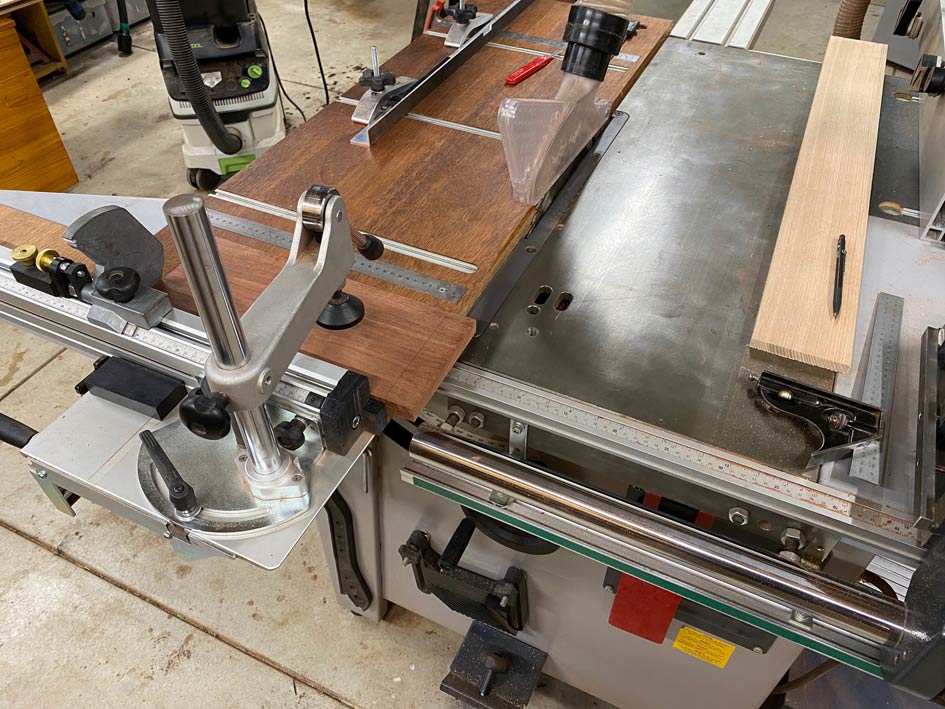
Now to the fixture. Actually, there are two fixtures.
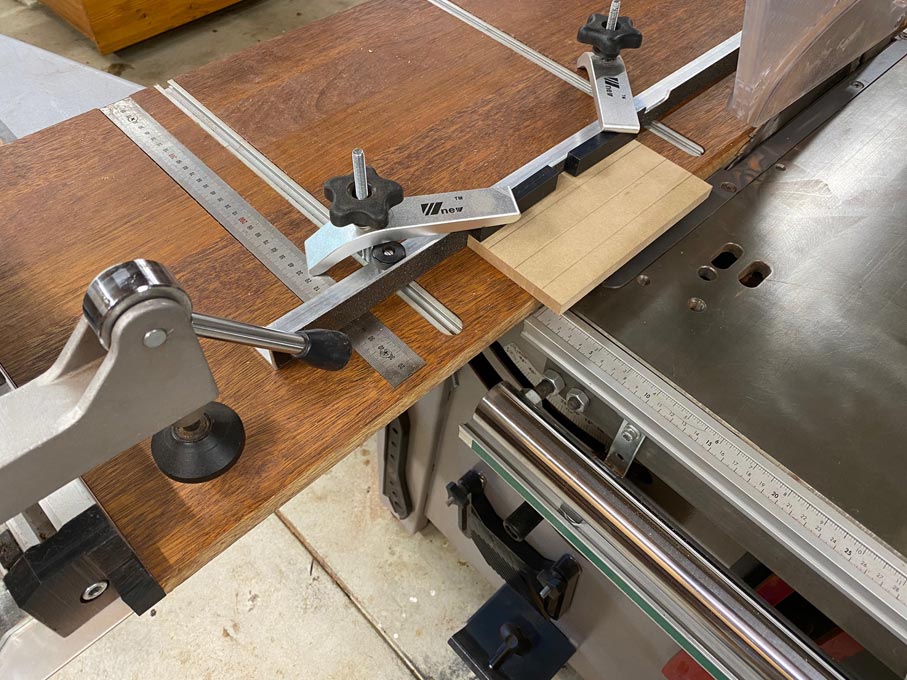
I recently posted a design for a Parallel Guide for a slider table saw (mine is a Hammer K3). This article is here: http://www.inthewoodshop.com/Powered...rK3Slider.html

The other design I posted was for a Micro Adjust for the crosscut fence: http://www.inthewoodshop.com/Powered...croAdjust.html

These new addictions made sizing the drawer fronts and backs much easier, and quicker.
Generally, I would rip a board to rough size for the drawer front (and back, since they must be an exact copy of each other), and then fine tune it with a shooting board and hand planes. Well, these tools continue to be used, but I can get pretty close to final dimensions on the slider alone. The parallel guide replaces a rip fence, and it is both safer to use as well as leaving a cleaner finish than off a table saw rip fence.
Here is the crosscut fence cutting the width of a drawer front ...
With the use of the Micro Adjuster, it is possible to sneak up on the width and "shoot" it with the table saw, to such fine tolerances only previously capable on a shooting board ...
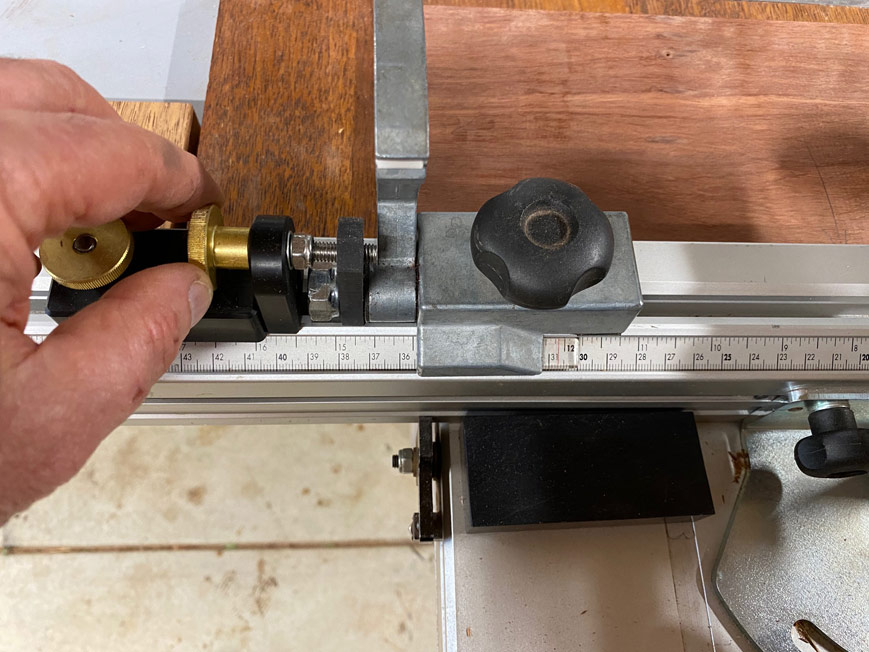
Minute adjustments can be made to the cut, with the aim of a tight fit side-to-side.
Once the drawer front is done, it is a simple matter to cut the drawer back using the same setting ..
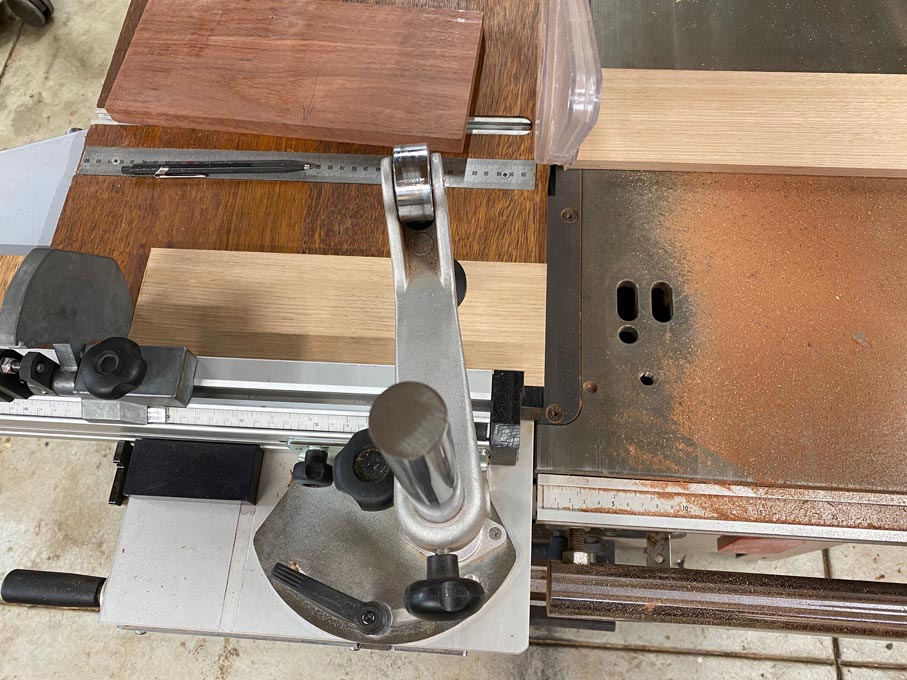
Now is the time to rip the height if the drawers fronts and backs (although the drawer backs will receive further shaping at the time of drawer making). This is a test cut. It needs to be repeated for each line of drawers, and checked for each drawer ..
As mentioned earlier, the aim is a tight fit throughout ...
Once all are done, comes the time to tune each. The main tool use for the upper edge is a shooting board ...
Last edited by Derek Cohen; 01-15-2021 at 1:13 AM.
-
Ensure one side fits smoothly ...
... and the other ...

The ends need some tuning as well. This is to remove a smidgeon here-and-there, to ease a section where the sides may be touching or even jamming. It may require a shaving, or just dust. The tool of choice here is a block plane.
My aim here is a smooth fit - not loose but not tight: at the end, after the dovetailing is done and the sides are glued together, I want the drawer to dry in the drawer case. Therefore, it needs to be able to fit. I expect to do a little tuning still, but the aim now is to prepare for this fit.
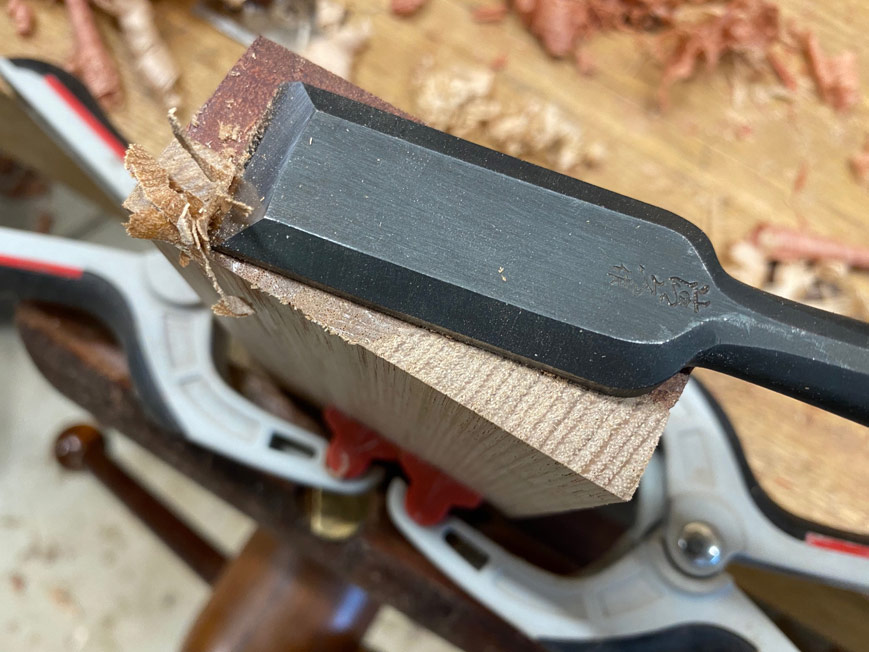
The drawer back needs to be tuned up identically to the drawer front - the smidgeon "here-and-there" included. So, clamp the parts together ...
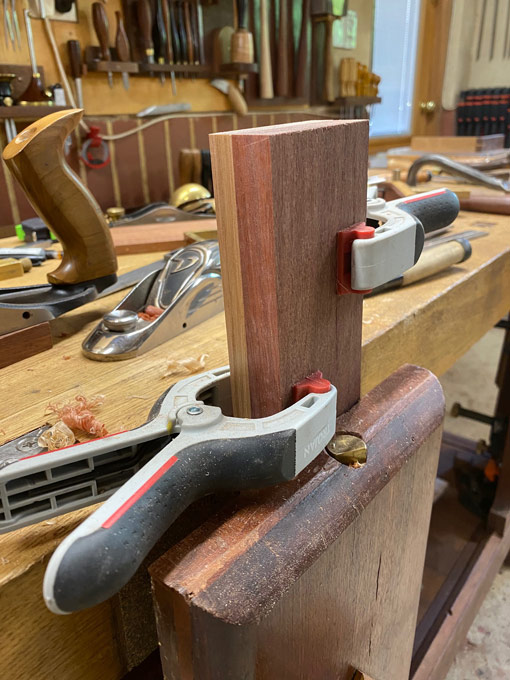
I prefer a sharp, wide chisel to pare away the excess waste from the drawer back ...
This leaves the fronts and backs ready, so ...
The last task is to saw the drawer sides. This is made a quick job by the parallel guide, and using the drawer fronts as a template.
Once side of a drawer front will dimension the height of that drawer side ...
Rip it ...
Test the fit in the drawer case. Any tight spots can be removed with a shooting board or block plane. This is what we are after ...
... and eventually ...
Now we are ready to start dovetailing.
Regards from Perth
Derek
Last edited by Derek Cohen; 01-15-2021 at 1:13 AM.
-
Thanks for detailing how you check and plane the inside of the carcass. I hadn’t seen that before. I’ve always just planed the drawers to fit the carcass, and if there are discrepancies inside the carcass the drawers don’t slide perfectly. A rabbeting block plane looks perfect for that. I think I could also do it with a regular block plane plus a paring chisel to get the corners.
-
Ben, no doubt many do something similar. I recall seeing Rob Cosman doing this to make "piston fit drawers" about 10 years ago. He use a sander - a squared block of wood with sandpaper glued to one surface, along with a LN #10 Carraige Maker's Plane.
Regards from Perth
Derek
 Posting Permissions
- You may not post new threads
- You may not post replies
- You may not post attachments
- You may not edit your posts
-
Forum Rules

 Member


 Reply With Quote