Results 1 to 6 of 6

Thread: Updated Parallel Guide for K3

  1. #1
    Join Date
    Feb 2004
    Location
    Perth, Australia
    Posts
    9,494

    Updated Parallel Guide for K3

    Mike Kreinhop posted a superior parallel guide for his SCM Minimax SC2 Classic using the Incra LS-25 positioner ...


    Fantastic - I would love to have this - but the Incra positioner in Australia costs well over $1000. So not just yet.

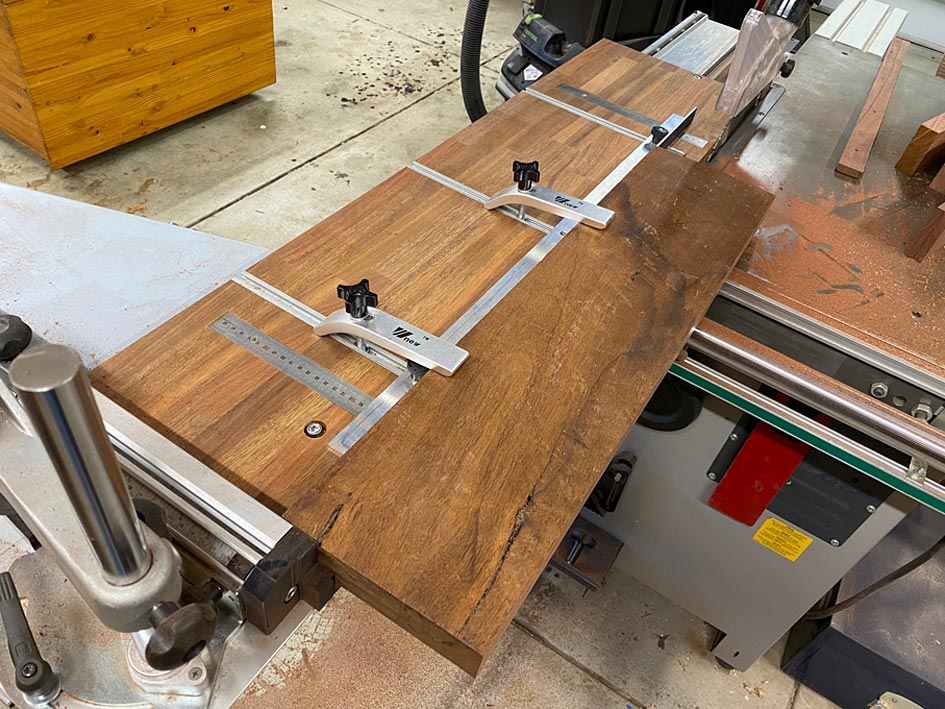
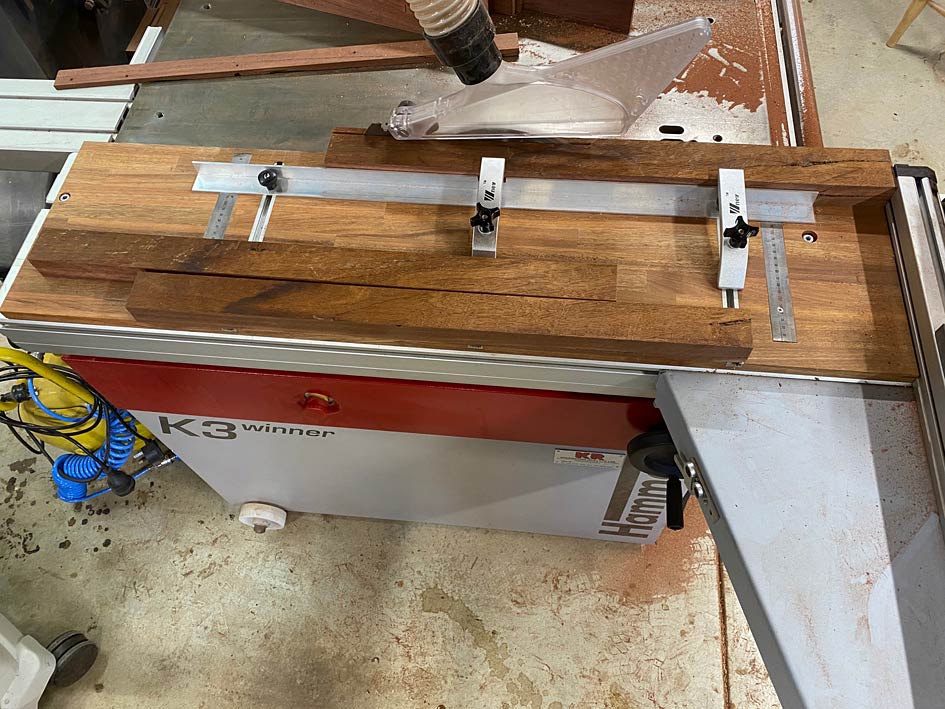
    About a month or so ago I posted a few pictures of my simple version, which was made from laminated Merbau strips (cheaper and better than any ply locally), clamped to the wagon, and featuring an adjustable fence ...


    This fixture is 1200mm long and 300mm wide (the size of the wagon in front of the crosscut fence). My only complaint is that it lies on top and this removes 18mm (3/4") from the depth of cut available (the blade is 305mm/12"). An advantage of Mike's parallel guide is that it lies flat on the wagon. My version works so well, however, that I am able to suppress the desire to build another one .... well, that is what I tell myself for now

    Why not make it wider? Or longer?

    Well, I really do not need anything wider. I only work with solid wood, never sheet goods. This can rip 12" wide boards.

    I do at times rip longer than 1250, but that is not needed for this fixture - if I need to rip long, then one just uses the rip fence, which has JessEm Clearcut Guides. Most of the time I dock rough sawn boards to approximate length before dimensioning them.

    The purpose of this fixture is to rip shorter lengths, especially safely rip very narrow sections, as well as taper legs accurately and repeatedly to the same dimensions.

    In a recent build I used a Fritz & Franz jig to first square one side of a rough sawn Hard Maple board ....


    ... and then rip this for legs ...


    Note: sawing to a specific width can be done in two ways: either use the rip fence as a depth stop, or use a set of stops on the crosscut fences (F&F) or the parallel guide as a stop.


    I could see that there is the potential for the parallel guide fixture to combine all the best features of the F&F, and do it even better!

    What has changed in the updated version?


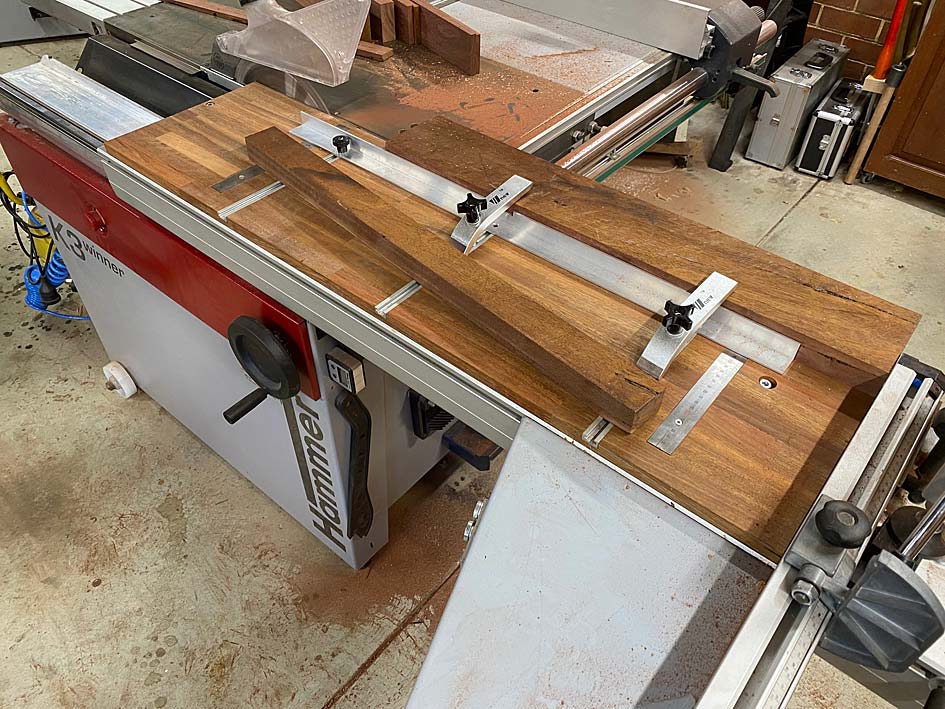
    Firstly, the hold down knobs are gone and the fixture is secured to the T-track with recessed hex bolts. This increases the capacity.

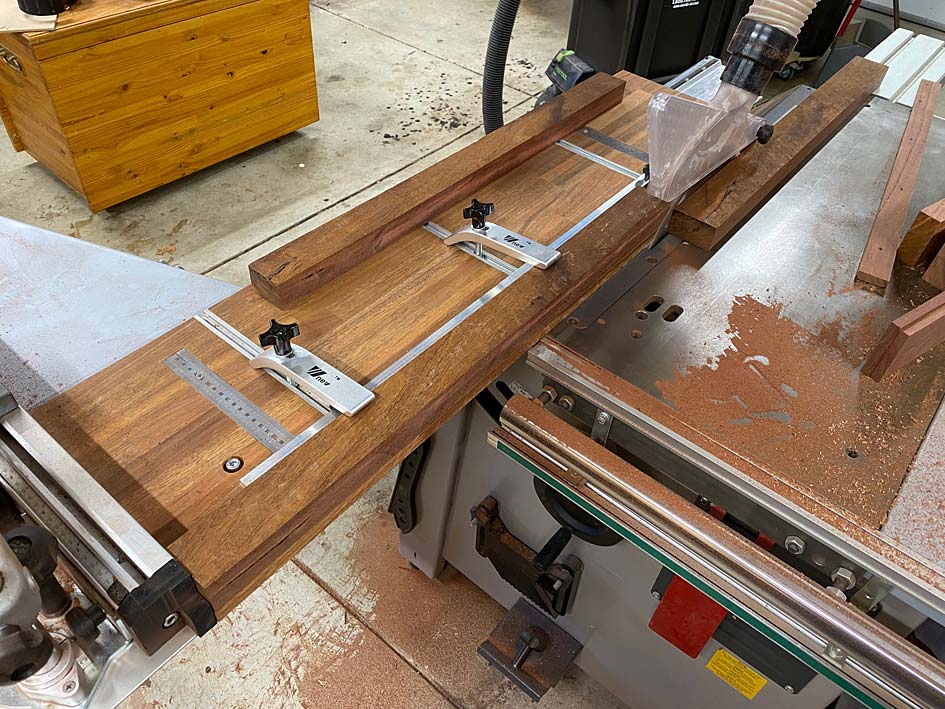
    Secondly, there are now scales at each end to set the fences quickly and accurately ...


    As before, the aluminium angle fence has non-slip on the front. The centre recess allows the clamp to hold shallower boards ...


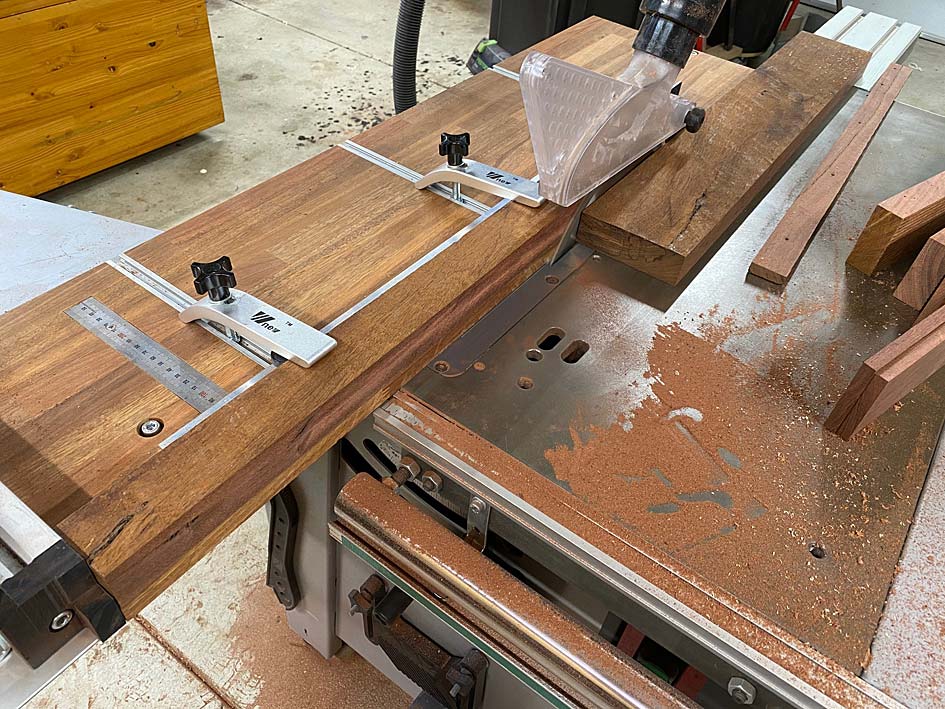
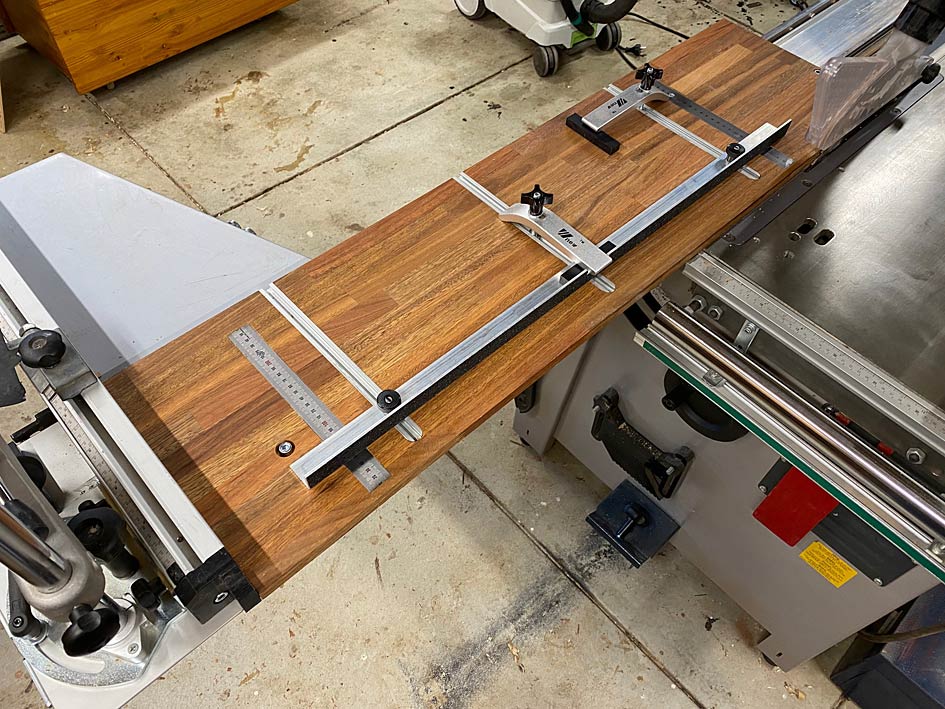
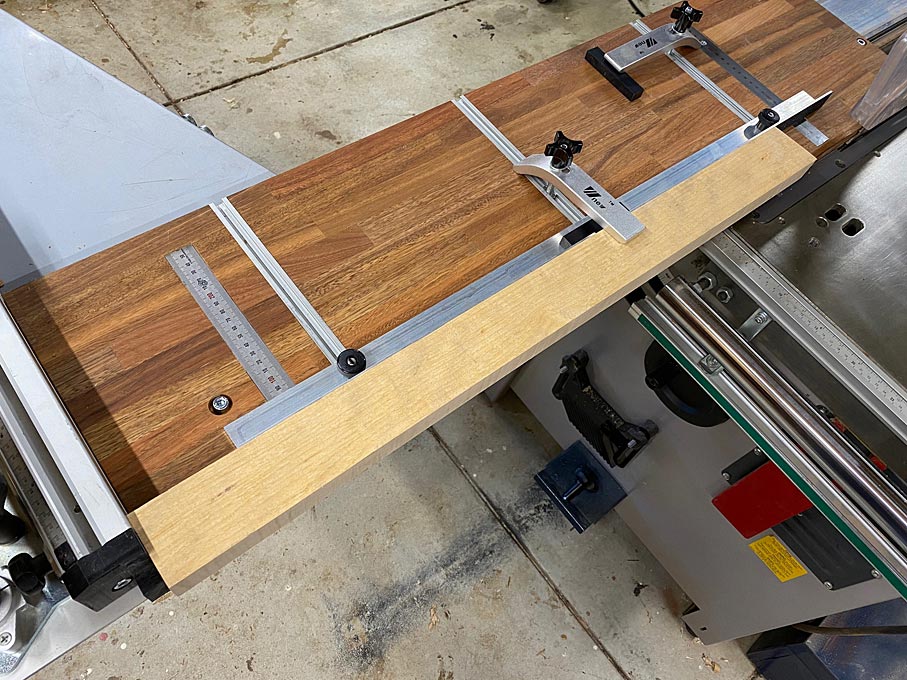
    Below is an example in ripping a leg: first to desired width, and then it is possible to incline the parallel guide to saw a taper ...


    This is an example of safely ripping a 25mm/1" wide board ...


    Note in the last two example, the crosscut fence acts as a zero clearance insert. Taken from an older version ...


    Lastly, for crosscutting, one can either remove the parallel guide, or simply leave it in position as there is 100mm/4" clearance. This is sufficient for most joinery ...


    Regards from Perth

    Derek

  2. #2
    Question: How do you register the fixture for parallel to the blade upon installing it on the sliding table? It appears the fixture is secured to the table by means of the two recessed bolts presumably connected to nuts captured in the T slot of the K3 table extrusion, which is very secure but normally allows slop side to side. Are there fixed registration blocks on the underside that fit the slot precisely? Or do you do register the business edge of the fixture against a known parallel, like the rip fence, then tighten down? ...Very nice design, BTW--the most appealing and practical I have seen. I particularly like how you integrate the clamping function (using the sliding table this way with unclamped workpieces always felt more than a little unsafe to me and trying to clamp from the ends can be a hassle) and how it lends itself to being a taper jig. Also great that it can live on the saw without crippling the crosscut function.

  3. #3
    Join Date
    Feb 2004
    Location
    Perth, Australia
    Posts
    9,494
    Hi David

    It is really simple, and quick.

    The fixture is bolted to the slider table or wagon via the T-slot, as you noted. The holes for the bolt are a smidgeon oversize - enough for wiggle room to align the side of the fixture with a saw tooth (at the front) and the zero clearance on the crosscut fence (at the rear).

    The side of the fixture (facing the blade) is always a zero clearance. Place the rough and skew edge of a wide rough sawn board against this and rip it straight.

    The parallel guide is set from two T-tracks, each with an identical metric scale. (These scales are set into a dado, attached with screws, each of which has a little adjustability to fine tune perfect accuracy).

    The idea that this would be a better fixture for tapering came when I made this simple aid several months ago to taper legs for a table. Clearly, this was quite rudimentary, and a fence would have made set up (for the other legs) so much easier ...


    Currently, I am building a cabinet, and preparing the parts for drawer blades. This also requires "production" sawing, that is, creating the same 50mm wide stretchers from a wide board. These will then be re-sawn to around 14mm (for thicknessing to 12mm .... the stretchers will be 50x12).

    The importance of the clamps comes in at this point: how else does one hold a wide, thick and heavy board just 50mm from the parallel guide? This is demonstrated in a recent post I made, and repeated below ...

    ..... the next step is to prepare the boards for the drawer blades/frames. I have found a chunk of Jarrah, about 50mm thick and 180mm wide and about 950mm long. This needs to be sliced up into 50mm wide boards (which will be further reduced to 12mm thick drawer blades.


    Place the board against the parallel guide ...


    ... and rip one side to 50mm ...


    Now rip the second length ...


    .. and the third. How safe is a slider? This is where one stands - well away from any possible kickback (which does not occur on a slider, anyway. And the hands are no where near the blade ...


    Regards from Perth

    Derek
    Last edited by Derek Cohen; 12-08-2020 at 9:09 AM.

  4. #4
    Quote Originally Posted by Derek Cohen View Post
    Mike Kreinhop posted a superior parallel guide for his SCM Minimax SC2 Classic using the [COLOR=#333333]Incra LS-25 positioner ...
    Thank you, Derek! I need to incorporate some clamps like you have into my slide.

    Quote Originally Posted by David Stone (CT) View Post
    Question: How do you register the fixture for parallel to the blade upon installing it on the sliding table?
    I realized you asked Derek, but I will share what I've learned and been told by the commissioning technician and Sam Blasco. On my slider, the sliding wagon has a slight toe out to the left of the blade, so the only relevant part of the blade is the leading cutting edge, not the rear of the blade. As I pass a piece of wood on the slide through the blade, the downward moving teeth at the front of the blade are cutting, but the upward moving teeth at the rear of the blade aren't touching, or maybe just kissing, the wood as it passes. I thought this would affect the edge of the offcut on the right side of the blade, but I haven't noticed any adverse effects. For this reason, the Incra parallel guide I added to my slider is referenced to the edge of the slider, not the blade. I set the zero reference for the fence on the Incra guide to the leading edge of the blade.

    The standard rip fence on the right side of the blade has a slight toe out to the right of the blade. This is the reason why the owner's manual for my saw states the outfeed end of the rip fence must be as short as possible, and ideally follow a 45-degree angle away from the blade from the center of the blade based on the width of the rip. When I used the standard rip fence for widths of 100mm and less, the end of the fence was in line with the center of the blade. For wider width rips, the end of the fence would follow an imaginary line from the center of the blade that follows a 45-degree angle. Now that I have the Incra positioner on the sliding wagon, I haven't used the standard rip fence.

  5. #5
    Thank you, both.

  6. #6
    Derek, your mods never cease to impress.

    Erik
    Ex-SCM and Felder rep

Posting Permissions

  • You may not post new threads
  • You may not post replies
  • You may not post attachments
  • You may not edit your posts
  •