Results 1 to 11 of 11

Thread: Toothpick boxes Christmas boxes

  1. #1
    Join Date
    Apr 2007
    Location
    Columbus, Ohio, USA
    Posts
    3,441

    Toothpick boxes Christmas boxes

    I will update this thread as I make progress.


    My Sister asked me to make her a box to hold toothpicks. I decided to make a few of them because although these are simple, people find out I am making them and then want one.


    I decided to make two types (1) just add a flat top with a latch and hinges and (2) complete box that I need to cut into two pieces so that the top is not just a flat board.


    I will make this simple so it is fast.


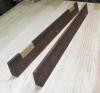
    I started with some Walnut and some Cherry. Not spectacular wood, but OK anyway. All of these are 5/16" thick so that they will be thick enough for the closure to attach more easily to the tops that are just a board. Previously they were closer to 1/4" thick.


    box_001.jpg


    This should be fast


    box_002.jpg


    My first box I carefully marked things with a knife. By box three, I stopped using the knife. I make a pencil mark and then I eyeball the angle. Seems to work just fine and much faster.


    box_003.jpg


    I even used an angle gauge. After box 1, no more angle gauge, just do it by eye.


    box_004.jpg


    So many saws to choose from, grab my Veritas saw from Lee Valley.


    box_005.jpg


    Not perfect but it will do.


    box_006.jpg


    Use my knew concepts saw to clean out the waste. See how the blade is straight and not angled. That caused me some grief because I did not notice it on the first few cuts. Have never made that mistake before. Hopefully I never make it again.


    box_007.jpg

    I do better when it is angled. I also cut too deep in a few places. My first one, I got better with the others.


    box_008.jpg

  2. #2
    Join Date
    Apr 2007
    Location
    Columbus, Ohio, USA
    Posts
    3,441
    I pulled out my Lee Valley detail chisels purchased before I had a 1/8" chisel. I still needed the 1/16" detail chisel for a few of these. I own three 1/8" chisels now, one of them is a detail chisel. I mostly used the one shown.


    box_009.jpg


    This cleaned up OK.


    box_010.jpg


    This is how I marked the pins.


    box_011.jpg


    That will do.


    box_012.jpg


    Still on box 1, that first fit is not great. Box three generally looks much better, but I will use this just the same.


    box_013.jpg


    This is what happens when you cut on the WRONG side of the line!


    box_014.jpg


    Could I fix that? Yeah, I could, but no point to it. Ignoring that I have extra wood, I grabbed another piece for that joint, and then I did a “tails first” joint for that board. My first time cutting tails first. The joint came out just dandy. This is how I marked it. Easy!


    box_015.jpg


    make sure it is square


    box_016.jpg

  3. #3
    Join Date
    Apr 2007
    Location
    Columbus, Ohio, USA
    Posts
    3,441

    Part 3

    My first two boxes I needed to cut apart, so, threw them onto the Table saw and then scored it most of the way through. Then, I cut the rest of the way using my dovetail saw. Problem is that I held the box with my left hand and the last cut on box 2 went free and hit my finger. It would not stop bleeding so I needed two stitches. A superficial cut but it sure hurt and I now need to keep it wrapped up for 10 days and it hurts. This is two days after the fact. Looks much improved.


    box_017.jpg


    They are not as wide if I will not make a totally enclosed box. Previously, I only made these with a “flat” top. I figure I will make a few of each and then see which I prefer. Only two tails on these.


    box_018.jpg


    My 15 year old asked for one of these. It seems that she uses toothpicks when she does her nails with nail polish. Sister and daughter both said that darker is better so I decided to slap on a coat of oil followed by garnet shellac. While I am writing this, I have four “boxes”, two with flat tops and two with the “cut” boxes. I did one of each using Boiled Linseed Oil (BLO) and one of each using Watco Danish Oil finish. My daughter thinks that the BLO makes it a bit darker. Here are two of them.


    box_019.jpg


    Next, I will make a few out of Cherry because I want to see how they age, but, so far I have been asked for darker so I purchased 1.3 board feet of 4/4 Wenge. I have never used Wenge. Any suggestions on how to finish it? Oil and then shellac? Leave it unfinished? My originals I made out of oak and I never finished them. As of now I only have one left, all the others were claimed.


    Wenge is very expensive, so I decided to resaw it. I should have called a friend with a band saw, but I sent it through my table saw to score both sides and then I finished cutting it by hand. Turns out this saw is really sharp. I suppose you have all seen the comic where a man shows a board that he cut into two pieces. He is saying to his wife… Look what I made honey! (or something like that).


    box_020.jpg


    I will provide updates as they happen, but, I am not nearly as prolific as Steve, I have a day job!

  4. #4
    Join Date
    Apr 2007
    Location
    Columbus, Ohio, USA
    Posts
    3,441
    One of my friends said that they wanted a light wood so I picked up some rather expensive maple with a figure that I kind of liked.

    box_01.jpg

    I marked vaguely where I wanted the cuts. This is just to get me ballpark in the right area.

    box_02.jpg box_03.jpg

    The tape trick allows me to pretty much go saw cut to a fit without any paring. Takes a light marking cut, and I can even set the boards back and see if the fit is fine before I cut.

    box_04.jpg

    The boxes on the left I used Watco Danish Oil and the boxes on right right are BLO. From left to right we have Wenge, Walnut, Cherry, Maple, Cherry, Walnut, and Wenge. These have been sitting for probably two weeks

    box_05.jpg

    I use a sled to cut the tops off (if I build an entirely closed box and not all of them are). I made sure that the boards are at 90 degrees to the sled.

    box_06.jpg

    I mixed my own Gernet shellac flakes for all of the oiled boxes and a clear poly for the maple (to keep it as light as possible).

    box_07.jpg

    And here they are after one coat of finish.

    box_08.jpg

    The boxes are sitting on some thin cut-offs that I then shot with a weak electric pin-nailer that barely worked for even this. I have not tried to create more with my more robust pin-nailer that I now own, I would probably need to use thicker strips. These work great when I want to apply finish and not just use my "painters triangles".

    I will apply a few more coats then add hinges. I have more wood prepared to make some more if I think that I need them.

  5. #5
    Join Date
    Mar 2015
    Location
    SE Michigan
    Posts
    3,225
    Well done, Andrew. Working in the “miniature” adds some challenges, but they turned out great. I’ve nicked myself with a saw before...sharp, aren’t they? Hope you heal quickly. Those will make great Christmas gifts.

  6. #6
    Join Date
    Apr 2007
    Location
    Columbus, Ohio, USA
    Posts
    3,441

    Assembly Finally

    Step one is to find the worst example and use that one to test

    I have two styles. This style has a simple top attached with just a hinge. This is a 15mm x 12mm (00D30.05) BP Box Hinge from Lee Valley. For the other tops I used the 00D30.04 20mm x 13mm hinge. My first box I taped the box closed, eyeballed where I wanted the hing and marked the holes.


    box_assemble_001.jpg

    I have this little fiskars hand drill and a very tiny drill bit to pre-drill the holes.

    box_assemble_002.jpg

    I used 1/4" #18 brass escutcheon pins.

    box_assemble_003.jpg

    I used this nice little hammer to drive them in. I got this at a great price when woodcraft near me stopped selling Lie Nielsen gear. I was chatting with the owner and I bought a bit of stuff so he threw the hammer in for cheap just to get it out of the store.

    box_assemble_004.jpg

    I had to use a nail set. You can see my finger that is healing here.

    box_assemble_005.jpg

    And here is what it looks like on the back side.

    box_assemble_006.jpg

    The tape did not work well so I started holding things together with clamps. This is my special maple so it was pricey; but it looks much nicer than my other maple. Quarter-sawn with flecks. Notice that this box was a fully sealed six sided box that I then cut apart. This makes the lid heavier so I used the larger hinge.

    box_assemble_007.jpg

    Here I am installing a filigree clasp. I held the top in place with clamps and supported it underneath.

    box_assemble_008.jpg

    Continued in the next post....

  7. #7
    Join Date
    Apr 2007
    Location
    Columbus, Ohio, USA
    Posts
    3,441
    These are both Cherry using two different size filigree clasps. I decided that I like the look of the smaller clasp.

    Again from Lee Valley 00D60.01 (20mm) 00D60.02 (25mm) and 00D600.03 (32mm). I believe that you are looking at a 25mm and a 32mm in this picture. Both of these were finished first with Watco Danish Oil followed by Shellac.

    box_assemble_010.jpg

    Here are two Maple versions finished with General finishes poly.

    box_assemble_011.jpg

    Here we have the two cherry boxes again.

    box_assemble_012.jpg

    Next I will finish walnut and Wenge, again using the Danish oil and Shellac.

    box_assemble_013.jpg

    So I have a few more boxes to apply hardware that I finished the Danish Oil and then I will move on to the versions using the BLO.

  8. #8
    Join Date
    Mar 2015
    Location
    SE Michigan
    Posts
    3,225
    Looks great, Andrew. Those will make wonderful gifts.

    Just a word of caution; avoid using the Watco on the inside of the boxes. It has a tendency to leave a solvent smell forever. Might make the toothpicks a bit untasty. Use shellac instead, if you do anything on the inside. If you’ve already used Watco inside, let it cure and then go over it with shellac. This won’t fix it altogether, but may help.

  9. #9
    Join Date
    Apr 2007
    Location
    Columbus, Ohio, USA
    Posts
    3,441
    Quote Originally Posted by Phil Mueller View Post
    Looks great, Andrew. Those will make wonderful gifts.

    Just a word of caution; avoid using the Watco on the inside of the boxes. It has a tendency to leave a solvent smell forever. Might make the toothpicks a bit untasty. Use shellac instead, if you do anything on the inside. If you’ve already used Watco inside, let it cure and then go over it with shellac. This won’t fix it altogether, but may help.
    In the pictures, all of the oiled boxes have at least three coats of Shellac. I detected no odor in the Watco boxes but I did in the BLO boxes. I had not considered that the oil would permeate the Shellac. If so I will be making more boxes.

    Thanks for the warning on that. I added three more coats of shellac and as of today, I smell nothing, but, what about in a week....

    I used an oil based finish (Waterlox) on my computer desk, inside and out, but, I also let it cure for months (really, months). No odor that I can detect. I did let the BLO and the Watco Danish Oil sit for a couple of weeks, but I intended to rely on the Shellac to deal with it. Hope that works. I put a lot of time into these boxes.

    On the plus side, my wife was eyeing them and saying something about storing something else in them. Jewelry I think. Ironically, she prefers the maple that I finished strictly with poly.

  10. #10
    Join Date
    Nov 2019
    Location
    Big Bend/Panhandle, FL
    Posts
    122
    Andrew,

    Great job. Thanks for posting the build.

  11. #11
    Join Date
    Sep 2007
    Location
    Longview WA
    Posts
    27,454
    Blog Entries
    1
    Great job Andrew, makes me want to make more boxes.

    jtk
    "A pessimist sees the difficulty in every opportunity; an optimist sees the opportunity in every difficulty."
    - Sir Winston Churchill (1874-1965)

Posting Permissions

  • You may not post new threads
  • You may not post replies
  • You may not post attachments
  • You may not edit your posts
  •